Recently, many of the Moto-Tubers are making their own videos in response to the FortNine body position video.MotoJitzu posted a lengthy recap of well established body position principals and MCRider used the video as an opportunity to wag a finger at those who ride irresponsibility and hang off racer style on the street.
I like that Ryan’s video triggered a discussion about a motorcycle skill, even though his decision to focus on the extreme end of the spectrum unecessarily lit the fuse.
Here is my opinion: I see this as a lot of to-do about a relatively minor riding skill.
Body position is one of the last things I focus on when coaching on the street or track…unless the rider’s bp is significantly hindering their control, which isn’t very often.
Almost all street riders and most riders who are new to the track, pretty much lean in line with the bike (not counterleaning, nor leaning inside) as they have done for years as street riders, which is appropriate 99% of the time. This is fine becasue it usually is not something that causes safety concerns.
I will however focus more on body position when we are working on slow speed maneuvers, becasue this contributes significantly to balance and control.
Instead of spending all this energy on body position, let’s look at more critical issues, like vision, situational awareness, reading the road, precise speed control, cornering accuracy and traction management…skills that can kill us if neglected or misunderstood.
Notice that I don’t mention rider attitude or judgment… becasue I have come to believe that I cannot “teach” this. Preaching doesn’t work, it just alienates the people we most would like to reach. I do what I can to influence someone to ride smarter, but the people that need to hear the message aren’t going to listen. Fatalistic maybe, but also realistic. I’ll focus on what I can change.
Keep in mind that Much of my perspective these days is working with very experienced riders who are pretty set in their ways and attitudes. Newer riders are much more likely to respond to influential voices.
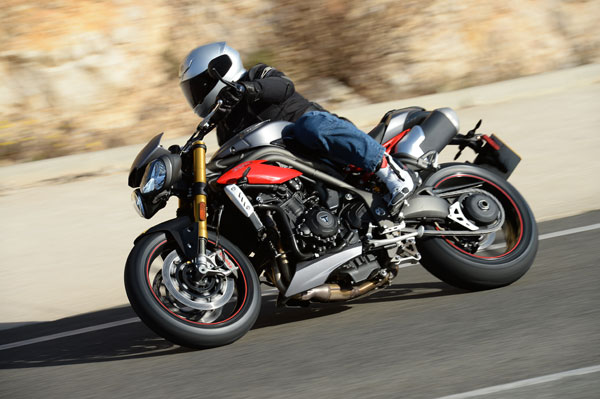
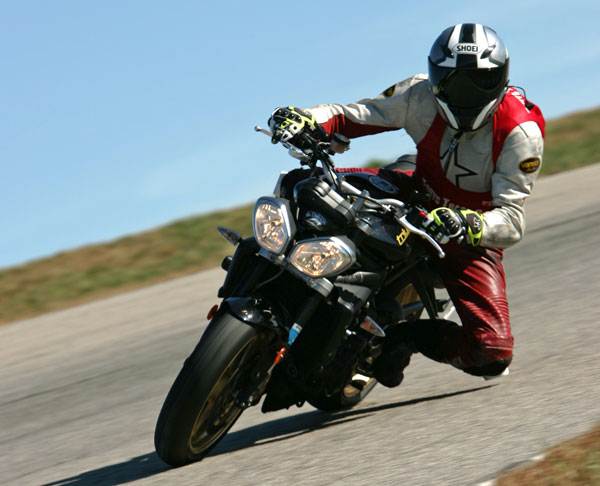
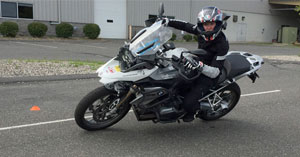
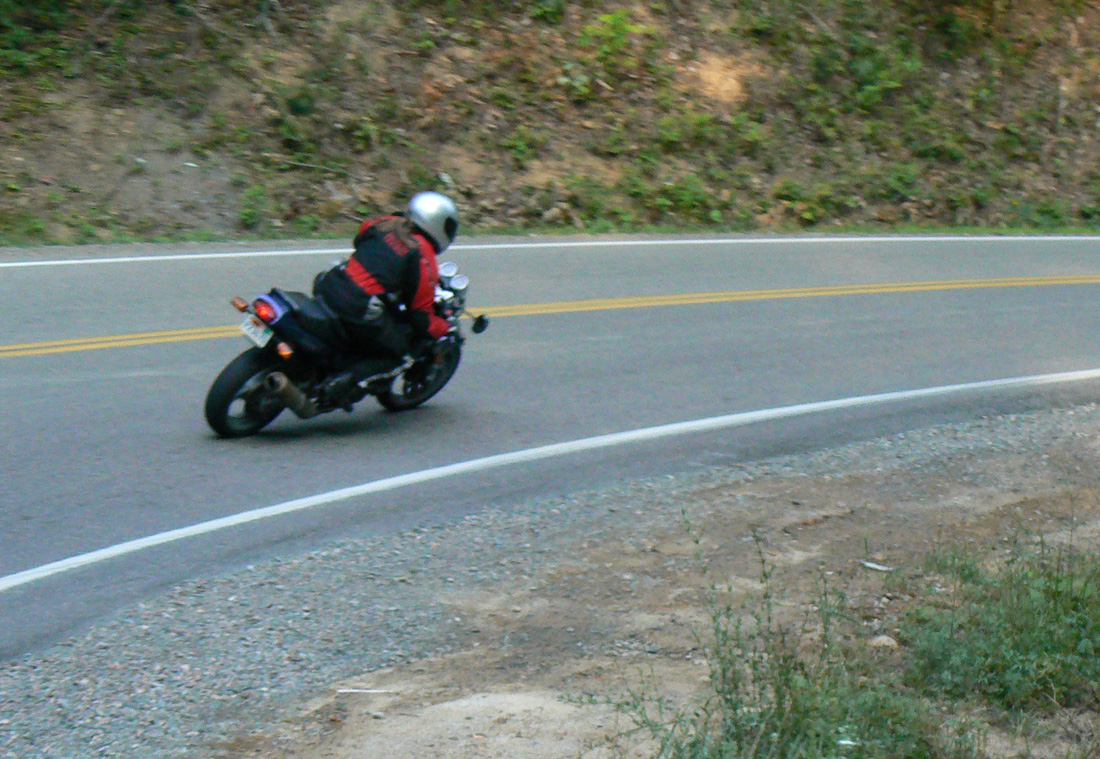
An upright posture when cornering makes sense sometimes, like when needing to see farther around a curve.
The fact is that there is no single right body position. A good rider is proficient at all body positioning and knows when to implement the bp that makes the most sense at the time. The above photo is of me rounding a tight blind curve with a more upright body position to help see around the corner.
In this article, I will outline the cornering crash sequence that often leads to the dreaded single-vehicle motorcycle crash, aka “running wide in a corner”.
We know that proper lane position, effective visual acuity and strong countersteering skills are crucial for successfully negotiating a curve. However, once the crash sequence starts it’s difficult to halt the cascade of mistakes that lead to cornering mishaps. If you get involved in such accidents, it is advised that you contact a motorcycle accident lawyer or personal injury lawyer to ensure your rights are protected. A Wisconsin motorcycle lawyer will help present your case to optimize your chances of getting the maximum compensation.
Getting in over your head sucks!
The top 10 Cornering Crash Factors
Things often start out okay as you approach the turn, but any lack of cornering confidence sets up the typical cornering crash sequence.
Once the crash sequence begins, it is exponentially more difficult to execute the actions needed to negotiate the curve.
1. Too Fast Entry- You approach and enter the turn faster than your personal level of comfort with leaning or the capability of your bike. Don’t blame the corner. You messed up. Often, a more competent rider could have made the turn with no drama.
2. Poor lane position at turn entry- You enter the turn too close to the inside instead of the outside. Nervous riders who are afraid of running wide often approach corners in the middle-to-inside, making the turn sharper.
3. Narrow angle of view- An inside lane position also limits the view into and beyond the turn.
4. Poor turn-in timing- Countersteering too early or too late and with either too strong or too weak handlebar inputs leads to problems at the exit. (Nervous riders turn in too early).
5. Apex too early- Turn in too early and the bike will be pointed toward the oncoming lane or the edge of the road at the exit. This then requires a second turn input to stay on the road.
6. Mind freeze- When it becomes apparent that things aren’t going well, fear and doubt take over, leading to a shift into survival mode. (We can’t function well in this state).
7. Target fixation- Panic causes rider to look down and at the oncoming car or the guardrail. (Humans are programmed to look at what we fear).
8. Muscle paralysis- Panic leads to ineffective or non existent countersteering and the bike feels like it won’t turn. (It’s common to put pressure on both left and right handgrips as you brace for the worst).
9. Ineffective body position- Poor body position isn’t the most significant cornering failure, but relying on your body to turn the bike (without countersteering) is disastrous. Some riders lean in to try and coax the bike to turn more, while others counterweight for fear of leaning beyond their comfort level.
10. Panic braking- With panic comes the unwillingness to lean more. In response, humans tend to grab the brakes when panicked. Adding significant brake force when leaned leads to traction loss.
What to Do
So, there you have it. Of course, there are other factors that may come into play that aren’t listed here, but this is the most common cornering crash sequence. You can also overly this same sequence to most other crashes where one domino falls and others tumble quickly.
Understand that arresting the sequence is quite difficult once it has been activated. So, enter turns a bit slower and continually learn and consciously practice expert cornering techniques on every ride to prevent this from happening to you!
How to Corner Better
There are several ways to become better at cornering to reduce the likelihood of crashing in a corner. Under all circumstances, accounting for other vehicles and their drivers remains a challenge. In all likelihood you will be preoccupied by sustained injuries should you be involved in an accident, so look for a professional well-versed in car accident law ahead of time and call them if and when the time comes.
A lot of riders ask about which brake is appropriate for what situations. The short answer is that it depends on speed, desired maneuver and available traction. Here, I’ll discuss proper brake use as it pertains to various situations. Let’s start by defining the characteristics of each brake.
Front Brake
Your front brake is your “power” brake. The front brake is designed to take the burden of getting the bike and you stopped ASAP. The front brakes include components that provide maximum brake force…two large multi-piston calipers, large vented brake rotors, and brake pads designed to handle and dissipate lots of heat. Even the front brake components on smaller bikes and cruisers with a single front brake are more robust than the rear brake.
Rear Brake
In contrast, the rear brake is the “control” brake. It provides additional braking power at road speed, but it is the tool you want to use to refine your speed and direction. Make sure to work with the experts from Chelsee’s AC & Brake Emporeum to help you decide the best choice for your needs.
Which Brake and Why?
Now that we have an understanding of the basic characteristics of each brake, we can discuss the benefits or disadvantages of each brake in specific scenarios.
Normal braking (street)
When slowing or stopping normally, use both brakes. This shares the braking load between both tires and helps stabilize the chassis.
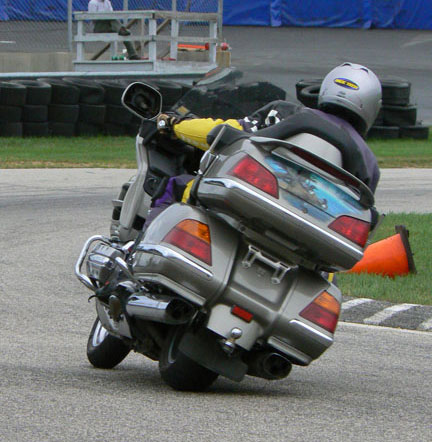
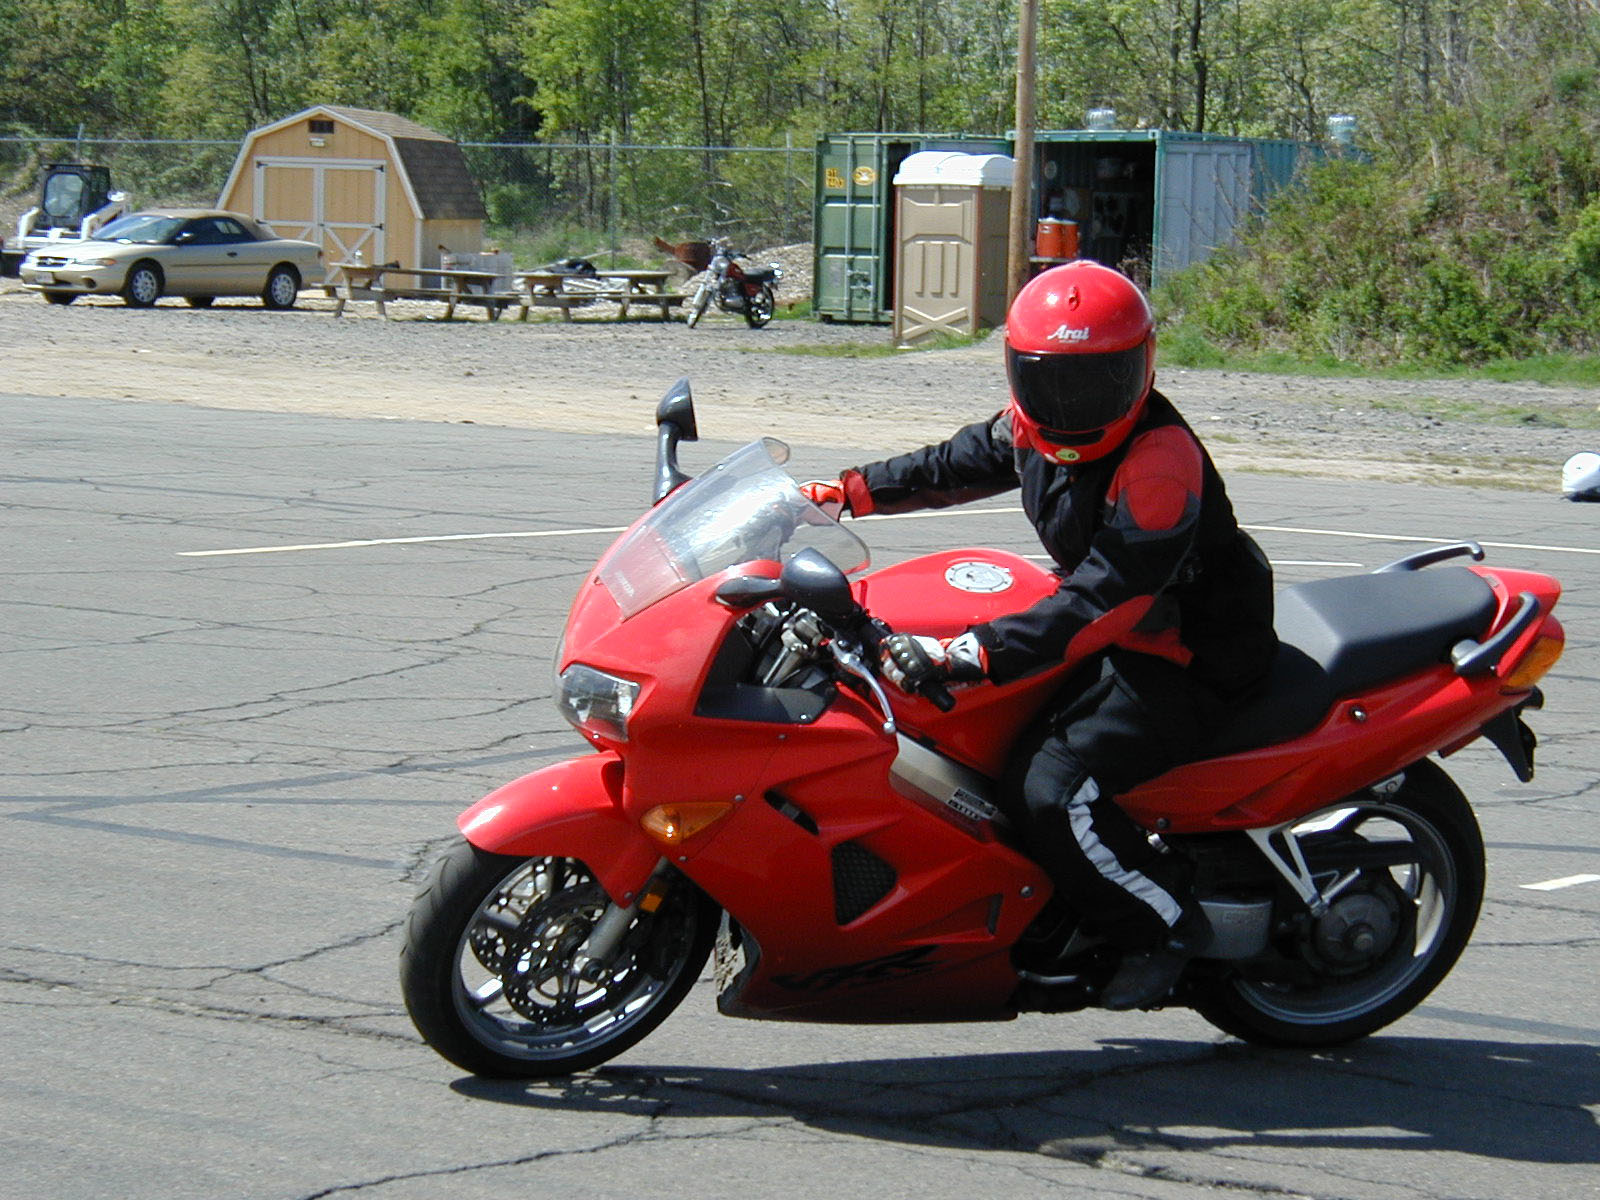
Emergency Braking
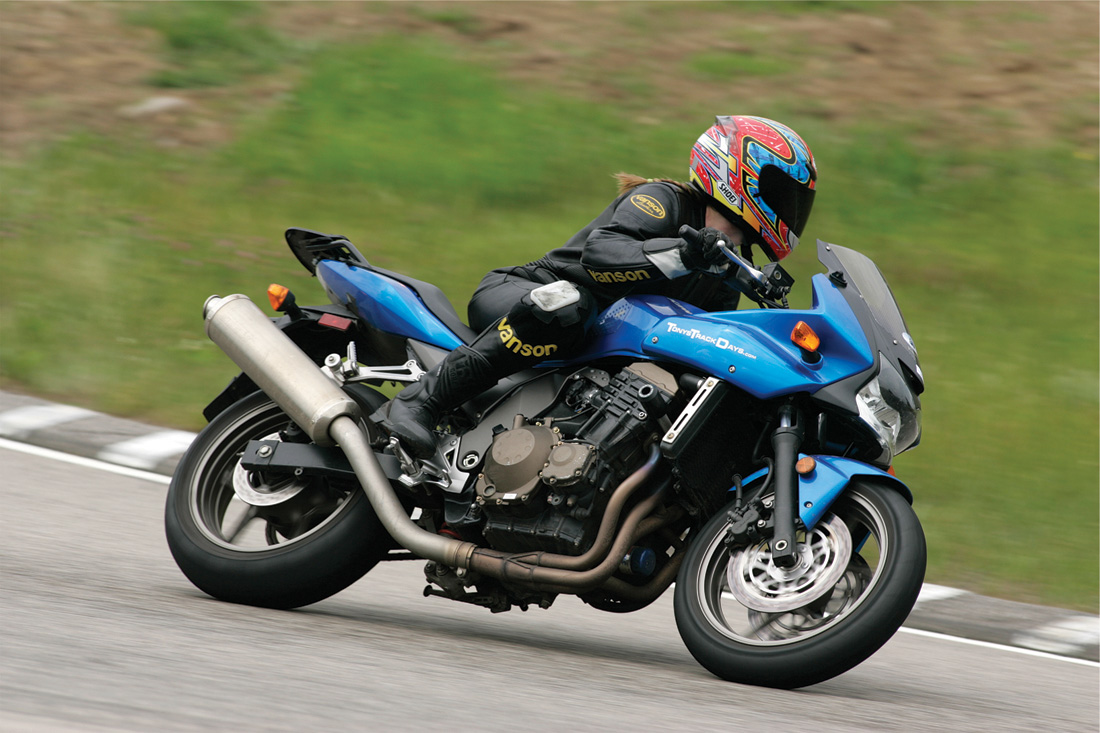
This rider has not practiced her emergency braking.
Use both brakes to get the most braking power for the shortest stop. The caveat here is that emergency braking causes the load to transfer to the front tire, reducing weight on rear of the machine. This means that it’s much more likely to skid the rear tire and is why you’ll engage the ABS on the rear tire first.
Control the Rear
So, how to get the maximum brake force without skidding? Reduce rear brake pressure as you increase front brake pressure. This isn’t easy to get perfect, but is worth practicing. If all you can manage in an emergency is to use one brake, use the FRONT BRAKE! That’s where the majority of your brake power comes from. Do it firmly and progressively for maximum effect.
Consider that short wheelbase sportbikes will pitch onto their nose earlier and easier than a long and low cruiser or a heavyweight tourer. This means that the rear brake is more effective on these machines in an emergency.
Passengers
The rear brake is much more important with a passenger on board.
The rear brake is much more useful and effective when carrying a passenger or heavy luggage, because of the extra weight on the rear wheel. This is true no matter what type of bike you ride.
Normal Stops at Intersections, etc.
For the smoothest, controlled “normal” stops, like at an intersection, taper off the front brake and finish with the rear brake. Reduce brake pressure and speed progressively. Avoiding abrupt stops is especially appreciated by passengers who hate having to brace themselves to avoid the unwelcome “helmet bonk”.
You can execute a smooth stop by using the front brake, but it takes more finesse and effort. Keep the right foot on the rear brake until completely stopped. This avoids rolling past your desired stopping point. This may sound obvious, but I see a lot of riders surprised when the bike keeps rolling.
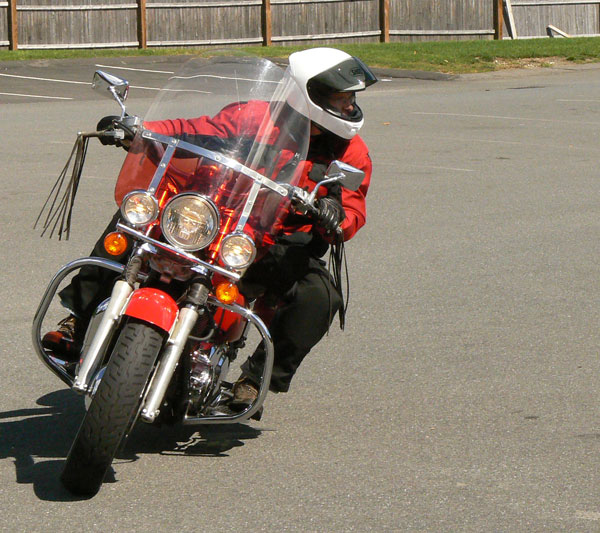
Poor Traction Surfaces
Favor the rear brake on sketchy surfaces.
When riding on gravel, sand, wet leaves or slick construction plates, use the rear brake. This is because the powerful front brake is much more likely to skid when traction is sketchy and a skidding front wheel means a crash is imminent.Whereas a skidding rear tire is less likely to cause a crash unless it fishtails violently.
The MSF says to ride out a rear tire skid to avoid the rear tire hooking up when sideways and causing a highside. But, chances are that you’ll be okay if you release the rear brake before the rear kicks out too far. ABS reduces this risk significantly, but keep in mind that some less sophisticated ABS systems aren’t very effective at slow speeds, so you may end up with a skid that lasts a foot or two.
Slow Speeds
Use the rear brake only in slow speed turns
Favor the rear brake when creeping along in traffic, stopping smoothly from a slow speed and making tight u-turns. Be very gentle with the front brake, or avoid it altogether when speeds are below, say 8-10 mph; the front brake is too powerful for slow speeds and you risk stopping the bike abruptly which will cause imbalance. I like to lightly “dab” the rear brake as I make very tight u-turns. It gives me more speed control and feel.
Trailbraking
Trailbraking is when you carry some brake force past the turn entry to allow more time to refine your entry speed. Light trailbraking (and/or deceleration) also helps the bike lean into the curve. Read all about trailbraking here.
There is a belief that trailbraking is using the rear brake only. But, you can use front only, rear only, both brakes, or even strong engine braking (what I call “trail-deceleration”) to get the desired speed reduction and easy turn-in.
Tight, Slow Corners
I just described a simple use of trailbraking. However, a skilled rider can fine tune their speed and direction control with a finely orchestrated use of the brakes. Start by using both brakes to slow into the curve, but about halfway around (this varies depending on the radius of the curve) smoothly release the front brake but keep a bit of rear brake applied.
This helps “hook” the bike around the last section of the curve and helps refine speed. Ideally, at this point you don’t want to slow anymore, so brake lightly. For uphill tight turns where momentum is important, I often overlap acceleration against that last bit of rear brake force to execute the smoothest transition I can. A bit of late rear brake also helps manage the effects of gravity in downhill curves.
Linked Brakes
Some larger bikes, particularly tourers link the front and rear brakes. While this limits the proportioning the rider has control of, many manufacturers design their brakes to give more or less power to the front or rear depending on the input of the rider. In this case, thee techniques still apply, but the effect is lessened.
Racetrack
On the racetrack and when riding fast and hard, it makes sense to concentrate on using the front brake only. Yes, you’re giving up the advantages of the rear brake, but brake forces are considerably higher where the rear wheel is barely in contact with the surface.
Track days are excellent for skill development.
Professional-level racers develop their rear brake technique to help with direction control, but track day riders and amateur racers are usually better off keeping it simple.
Practice
Like most skills, braking skill is perishable and needs regular practice just to maintain proficiency. You don’t need anything more than a large parking lot or a straight piece of remote roadway. Brake hard from speed to practice emergency stopping and work on trailbraking when in appropriate corners. However, the best place to improve all of your skills is at a track day.
The majority of motorcycle riders do a decent enough job of keeping their bike on two wheels. Most of them are making custom graphics for their motorcycles. This simple fact can give the self-perception of proficiency. Perhaps their skills are decent, but it’s hard to know, becasue we as humans suck at measuring our own abilities.
This is so common that two researchers named Dunning and Kruger created the Dunning–Kruger effect that describes how average people suffer from the illusion that their ability is much higher than it really is.
Science also uses the term “Illusory Superiority“. In a research study, a group of Swedes and Americans were surveyed, asking them to compare their driving skills with others. 69% of the Swedes said they were above average and a whopping 93% of Americans believed they were above average! Yeah, right!
Knowing this, is it possible to measure your level of proficiency with any real accuracy? Inaccurate perception of ability is a problem when judging risk tolerance and acceptance. It also leads to complacency in attention and skill development.
What is a “Good” Rider?
Skillful cornering requires knowledge and practice.
The first place to start is to ask what makes a rider “good”? Is it someone who displays impressive control skills on the racetrack or canyons, someone who can do a lengthy standup wheelie, or is it someone who can maneuver an 800-pound motorcycle within tight confines? Certainly, these riders deserve to be recognized for their abilities. But, when it comes to describing a “good” motorcyclist, we must place the ability to make it home every day at the top of the list.
Measuring Competence
Here’s a quick list that may indicate whether you’re a good rider or if it’s time for some immediate change.
You may be a good rider if:
You rarely experience close calls. Good riders are able to predict threats before they materialize and take appropriate action to “not let it happen to them”.
You have good visual habits. Most new (and many veteran) riders do not look far enough ahead to see and then prepare for what’s next. You must be able to scan a scene and determine the likelihood of a problem developing. Related article
You rarely have pucker moments when cornering. Cornering mistakes account for about half of all fatalities. Anxiety when cornering is the first sign of trouble. Related video.
You are an expert a reading the road. It’s not enough just to look well ahead. This is especially important when riding on twisty roads with blind curves. Good riders consciously look for specific visual clues to create a snapshot of the radius, camber of a corner even before they can see around the bend.
You have had professional training. Like most endeavors that require some semblance of strong coordination, timing, visual acuity and foresight, high level of skill development comes from learning from professional instructors. Sure, your Uncle Joe might be an accomplished rider, but few people know how to teach motorcycling. Training options.
You ride smart. Good riders train for the threat, but ride smart enough to rarely need their superior training. Even the most skilled riders will get into situations they can’t handle if they ride stupid.
You understand the risks. Many riders jump on their bikes without thinking much about the true risk they are taking. Most people ride for fun and would rather not think about the possibility of injury. Good riders understand that if they get seriously hurt, it’s their family and friends that will also pay. Related article.
You accept the risks. Even with an accurate perception of risk you still choose to ride. Cool. We don’t ride to be safe, after all. But, don’t let the thrill of adrenaline get the better of you. Good riders know when and where to wick it up. I highly recommend the racetrack for sporty riders.
You wear protection. This alone does not mean you’re a good rider, but it does indicate that you respect the risks and strive to minimize serious skin abrasions, broken bones or head injuries. Just don’t be fooled into thinking you can ride riskier becasue you’re better protected. Related article.
You have fun while also being safe. If you’re not having fun, you’re doing it wrong. Yes, getting training and wearing protective gear is inconvenient and expensive, but it’s time and money well spent. The satisfaction of riding well and with high confidence increases enjoyment.
Getting Better
Advanced training pays big dividends.
No matter how “good” a rider you think you are, it’s likely that you have at least a few bad habits, risky attitudes and dangerous perceptions that develop over time without you knowing it. A lot of riders think that seat time is the answer to being a better rider. But, it takes knowledge and purposeful practice to become as good as you think you are.
Change starts with awareness. Take some time to evaluate your current habits and assess whether you harbor unhelpful beliefs and unconscious attitudes. A bit of reflection and purposeful training increases satisfaction, reduces risk and increases enjoyment. It’s true.
Start by opening to the idea that you don’t know all you need to know and evaluate your personal strengths and weaknesses. Don’t allow yourself to brush off incidents as an insignificant misstep that is quickly forgotten. Even small mistakes can be a sign that you need a bit more work.
Their names are infamous; Pordoi, Sella, Gavia, Gardena, and of course Stelvio. These are just a few of the mountain passes that snake up and over the mighty Italian Alps and jagged Dolomites. Riding these epic roads is not for the faint of heart or the weak of skill. Riding the steep hairpin switchbacks isn’t fundamentally different than riding any other twisty motorway, except these roads are turned all the way up to 11. But with a little knowledge and pre-trip cornering practice you can tackle the wicked Alpine passes with enthusiasm, rather than dread.
Sharpen your cornering skills – You’ll need to be really good at looking well ahead, judging entry speed, selecting effective cornering lines and leaning the heck out of your rental bike. You also need to understand techniques for managing both uphill and downhill hairpin turns. Article Link
Keep your momentum up hill. photo Caroline White
Maintain uphill momentum – On the way up the mountain gravity works in your favor to help slow for turns. But, slow down too much and the bike will want to fall over. Minimize instability by getting on the gas early, but not so early so you run wide.
Control speed going downhill – When riding downhill gravity works against your attempts to scrub speed. This means you need to brake with greater force. To be safe, brake earlier so you can brake with less intensity.
Trailbrake – Get the bike slowed and help it to turn by braking past the turn-in point and then taper (trail) off the brakes as you lean more. Hold light brake pressure until the bike is pointed around the turn before fully releasing. Article Link
Use the rear brake – Apply the rear brake just before the front to minimize forward pitch and keep the wheels in alignment. Maintain light pressure on the rear binder for a moment after releasing the front brake to help “hook” the bike around turns.
Use Effective Cornering Lines – Enter from the outside or middle of your lane and don’t turn in too soon. Aim for a “delayed apex” that is about 3/4 around the curve so you’re pointed safely down the road and not at the oncoming lane or outside edge of the road. Cornering Lines Article
Drive out of each corner –Gradually accelerate as soon as the bike approaches mid corner to maintain speed and stabilize the chassis. Well-timed acceleration ensures a predictable path of travel.
Look where you want to go! Ken Condon photo
Use smooth brake-to-throttle transitions – Smoothly release the brake while simultaneously rolling on the throttle to avoid abruptness that can squander traction and cause your bike to exit wide.
Practice slow speed turning – You will need excellent slow speed control to prevent mid-corner tip-overs on the countless tight “slower than first gear” switchbacks. Maintain stability using steady clutch and throttle control. The tightest turns may require some rear brake and counterweighting. Article Link
Look where you want to go – The eyes are a powerful tool for helping direct your motorcycle. But, too often when we are anxious we look down and toward what we fear, which increases the likelihood of a mishap. Look at the solution, not the problem! Article Link
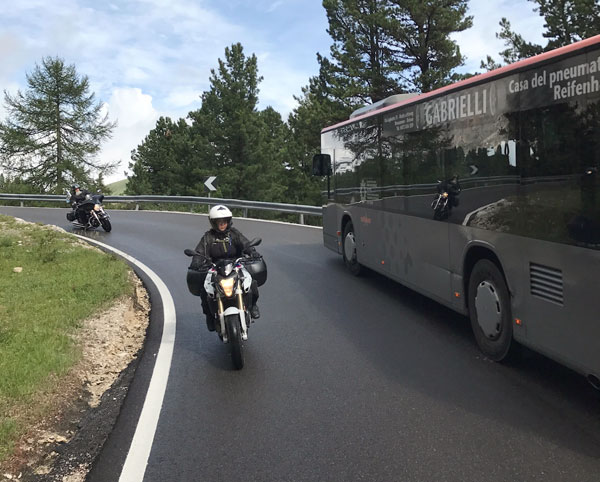
Dealing with tour buses and bicyclists is part of riding the Alps. photo Caroline White
Watch for buses and bicycles – If you ride the Alps someday, you’ll be sharing the ridiculously narrow Alpine passes with tour buses and bicycle riders. Look well ahead and plan accordingly to avoid a collision. Expect to stop and wait until it’s safe to proceed.
Do yourself a favor and bone up on your cornering skills before you hit the Alpine switchbacks. You’ll have a more enjoyable and safer experience.
Some related Videos:
Discussing Hairpin Turns during Street Training
A ride down the Gardena Pass in the Dolomites in northern Italy.
Here is a list of the top 10 things riders need to know (but often don’t):
1. Traction management and direction control are directly affected by load transferring to the tires.
2. Timing of deceleration, braking, countersteering and acceleration directly affects traction, direction control (line) and where the bike is pointed at the turn exit.
3. Intensity of brake and throttle application and handlebar inputs directly affects traction, chassis stability and direction control.
4. Specific Visual targets help to accurately read the road and minimize overspeed corner entry.
5. Dynamic Lane positioning is a critical tool for maximizing angle of view and conspicuity.
6. Trailbraking done correctly, maximizes stability, manages traction and refines corner entry speed and direction control at mid-corner and exit.
7. Even the best riders get into trouble if they don’t respect environmental limitations.
8. Electronic rider aids help manage traction; they do not create more traction.
9. Proper riding gear minimizes the risk of injury, but does not make you “safer”.
10. Reading lists like this can make you smarter about riding, but only application of knowledge can make you a better rider.
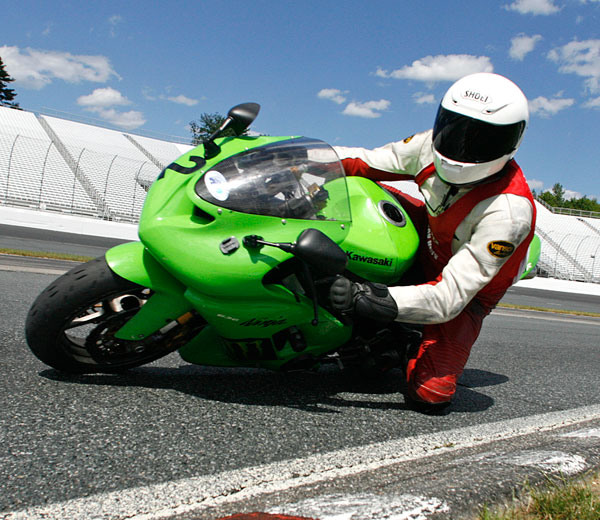
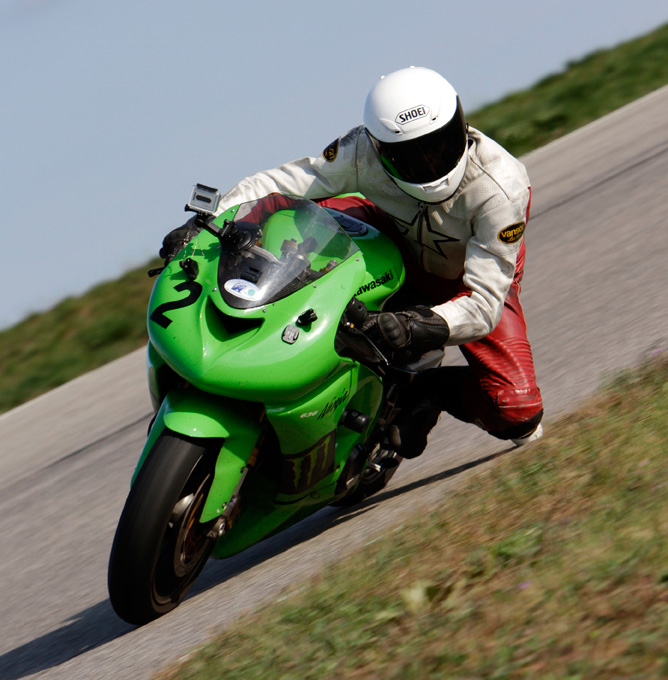
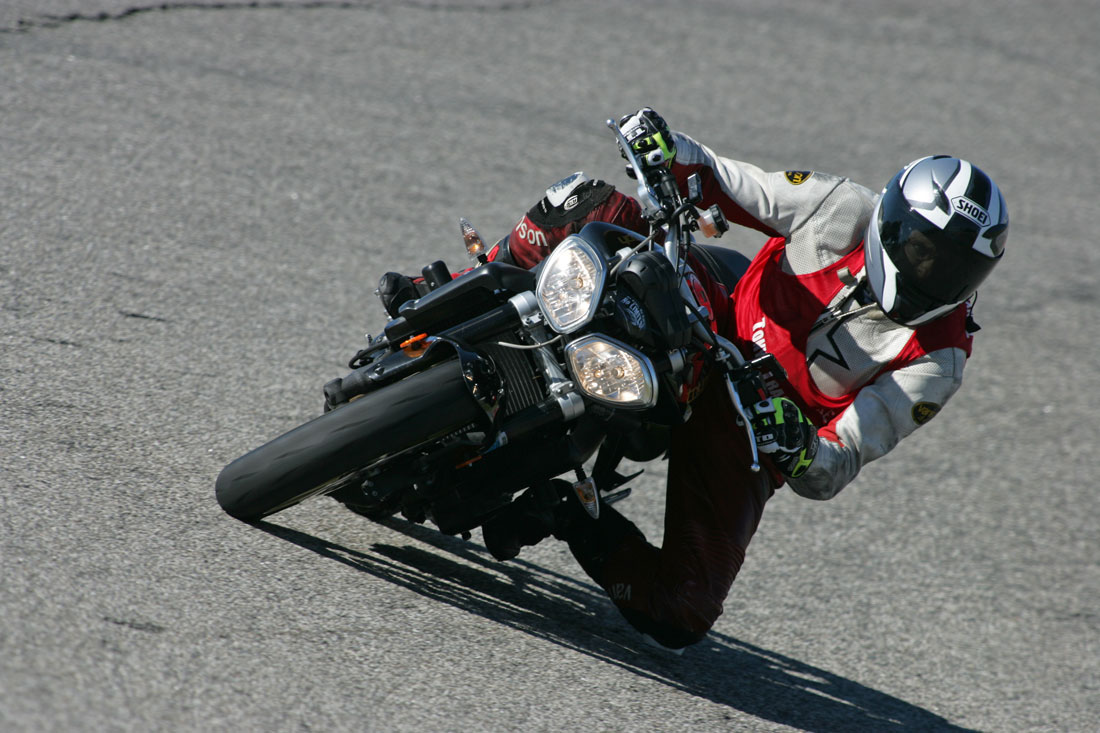
Dragging knee is about much more than just looking good for the camera. www.owenstrackdayphotos.com
The RITZ article on knee dragging is one of the most viewed posts on the website. I can understand why. Dragging a knee is a measure of sport riding accomplishment for many. Nothing says “sport bike hero” better than fully worn tires and scuffed knee pucks. Am I right?
Confidence
Those of us who drag knee certainly enjoy the sensation, but the real benefit comes from the added confidence it provides. Yes…confidence.
Touching your knee to the pavement is a definitive measure of your exact lean angle. Without this measure, you must rely on your eyes and inner gyro-system to help judge whether your lean angle is nearing your personal limit or the limits of your machine.
Knee dragging provides a way to tell you whether you are leaned a little or a lot. This information helps you determine whether you are pushing hard and nearing the limits, or riding at a conservative pace.
To most street riders, this may not seem all that important. But, it starts to make sense once you begin cornering very fast at lean angles that should only be attempted on a closed course. That’s when you really start to rely on the information that knee dragging provides.
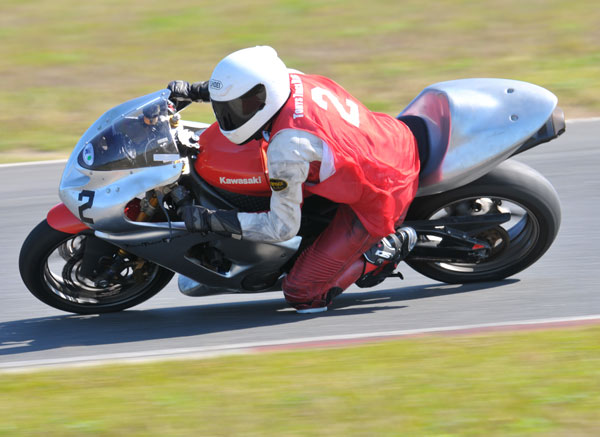
Not going quite fast enough to touch down. www.owenstrackdayphotos.com
Consistency
To make the most out of what knee dragging can offer, you must develop a body position that is consistent lap after lap. Otherwise, you’re changing the metric with which lean angle is measured. Riders who have not yet solidified their body position may be inconsistent in how their body is positioned so that their knee may touch the pavement erratically. These variations make the knee dragging an inaccurate measuring tool that can give the rider false confidence that he or she can push harder.
An expert track rider pays attention to exactly when and where his or her knee touches down, lap after lap. They know when to expect their knee to touch and for how long it will skim the surface. Their body position is well-established so they know that the measuring tool is calibrated and will not change. With this awareness, they have a baseline for experimenting and refining technique and to determine how hard they are pushing.
Too many riders make dragging a knee a priority at the expense of body dynamics and cornering control. The result is usually not good.
Remember that knee dragging is the product of excellent cornering skills, effective body positioning and yes, corner speed. Work on that and it’ll happen, eventually. Sign up for on-track Personal Training to help get your skills in shape.
Sometimes, you have the skills and the body position, so all that is missing is speed. But, that is the topic for another article.
Railing through turn 9 at New Hampshire Motor Speedway (Loudon) photo: owenstrackdayphotos.com
Most riders sit pretty much upright in the saddle. There’s nothing wrong with that, however they are not utilizing a simple tool that helps the motorcycle turn, engages the rider in the “dance” between human and machine and increases ground clearance when needed.
We Need More Clearance, Captain!
Positioning your body to the inside of your motorcycle when cornering means that the motorcycle does not have to lean as far for a given speed and turn radius.
Hanging off makes this so by shifting the combined weight of body and machine to move the center of gravity lower and to the inside.
Easier Turning
Hanging off not only increases ground clearance, it also keeps the contact patch closer to the center of the tire and adds a degree of “power steering” to help initiate lean. By pre-positioning your body just before turn-in preloads the bike so it falls swiftly from upright to leaned. It can be unsettling the first time you do it as the bike turns so much easier, so experiment gradually.
Let’s Dance
Body position has an additional benefit of encouraging interaction between you, the bike, and the road. Move your body through a series of curves like you would a dance partner across a dance floor and you’ll be flirting with the Zone in no time. Lead with your eyes and shoulders and your motorcycle will willingly follow your lead.
Active body positioning isn’t just for sport bike riders. Try it on whatever motorcycle you ride.
Body Position “Levels”
You don’t have to hang off like Marc Marquez to benefit from body positioning.
When speeds and lean angles increase, it’s beneficial to use a more “active” body position that provides a greater amount of turning ease and ground clearance. There are three levels of body positioning for cornering: The “basic”, “intermediate”, and “full” hang off techniques.
The “basic” position
Use the basic body position for typical street speeds. This position involves simply leaning your upper body off-center, towards the inside of the turn. Position yourself as if you are kissing your mirror. Keep your inside shoulder low and forward while your eyes look through the curve. Your butt stays more-or-less centered on the seat.
The basic position is easy to do and is not intimidating, making it good for people just learning to hang off.
The “Intermediate” position
The intermediate stage is the body positioning technique I use when riding on street twisties. It is appropriate when riding more aggressively, but is no where near the level of extreme positioning typical of racers.
Learning this is quite simple. All you have to do is lean your upper body into the turn while rocking your hips so your inside sit-bone supports most of your weight. Rocking onto your inside butt cheek just before the corner positions your arms perfectly to countersteer with your inside arm and shoulder pressuring on the inside handlebar and your outside arm slightly extended and relaxed.
Rock onto the inside butt cheek just before the corner so that your body is in position as you countersteer. This is a very simple and effective technique.
The “full” hang off position
The full hang off position allows the most aggressive riders to achieve faster corner speed without dragging hard parts. Hanging off has a lot of benefits, but can cause problems if not done correctly. Here is a basic tutorial:
Get your weight on the balls of your feet.
Use your legs (a little of your arms) to lift your body into position with your butt on the inside edge of the seat.
Position your shoulders and head inside and low (kiss the mirror).
Keep your hips perpendicular to the motorcycle.
Keep about 2-4 inches between your crotch and the fuel tank.
Rest the inner thigh of your outside leg against the tank.
Support a little more than half of your weight with the inside foot.
Hold the grip like a screwdriver with the forearm more or less in line with the handlebar.
Relax your arms by supporting your weight with your legs and torso.
Rest your outside arm on the top of the tank.
Avoid rotating your hips around the tank, which can result in a “crossed” body position where the upper body is positioned over the center of the bike. Instead, keep space between your crotch and the tank so you can move laterally across the bike.
Jack Your leg Into the Tank
For extra support, you can press your outer thigh into the gas tank. With the ball of your foot on the outside footpeg, straighten your ankle to make firm contact between the peg and the tank. Extending your leg in this way helps support your body with your legs, not your arms. The cutouts in sport bike gas tanks are ideal for positioning your inner knee. Adding Stomp Grip® or TecSpec® can help make the contact even more secure.
Side-to-Side Transitions
Try not to use your handlebars when moving from side to side. Doing so can upset the chassis and traction. Instead, use your legs and torso. Get your upper body over the tank, keeping your arms bent. I find that more rearward footrests help with this.
Also, be sure to get your body in position before you initiate lean (often while braking for the turn). Waiting too long can make the corner entry rather stressful and chaotic. Pre-positioning your body results in a quicker turn in (the benefits of quick turning is a topic for another day). It takes some practice to brake while in the hang off position, but it is a technique that must be learned (another future blog topic, I think).
Hang at Your Own Risk
You should be discrete when hanging off on the street. Not only is a full hang-off posture not often necessary, it also draws a lot of unwanted attention. Even when hanging off on the racetrack, it’s not always necessary to hang off like Marquez. Hang off just enough to match your corner speed. Hanging off more may make for better photos, but it’ll wear you out sooner and could actually decrease control.
Slow Speed Maneuvers
One exception to the “inside” body position is when making slow speed maneuvers. In this case, you want to keep your body upright, on top of the bike. This is because stability is almost non-existent and adding body weight to the inside of the bike will lever the bike to the ground. Read about slow speed maneuvers here.
Body Positioning is discussed in the RITZ book. Parking lot drills are also provided so you can learn to make proper, “active” body positioning an integral part of your riding.
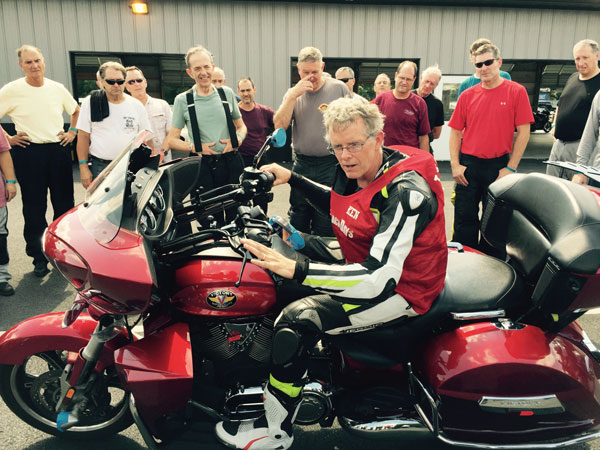
At the request of the district manager for the Northeast Region, I booked several dates during mid-to-late winter of 2018. One event was held at Wilkins Harley-Davidson, located in South Barre, Vermont. As with each of the talk, around 100 people attended to learn about cornering…or learn more about cornering. Wilkins recorded the seminar in its entirety.
My aim with these talks is to spread the good word about the benefits of life-long learning…safety and MORE FUN and satisfaction. A secondary goal is to encourage participants to join me for one or more of the training opportunities I offer or am involved with.
Guest writer Paul Duval shares his thoughtful observations about performance cornering based on electronic data gathering.
Corner speed. It is the holy grail of motorcycle road racing and track day riding alike. Knee down and railing, carving the corners like a snowboarder or giant slalom skier. It looks and feels awesome! Smooth technique pays big dividends and you can carry a lot of speed as your skills progress.
But how is it that you can be cranked way over thinking you have maxed your speed for a given corner and yet, some other dude comes by on the inside (or outside at a Tony’s Track Day!) and walks away from you before the bikes are even upright on the next straight bit?
And by the way, He’s not even leaned over as far as you are! There must be more to corner speed than meets the eye. Let’s take a closer look at the middle of a corner.
Corner Speed Perception
If we draw the arc of your path on paper it looks like a smooth outside-inside-outside line and it is easy to visualize maintaining a somewhat constant speed, decreasing and increasing in a smooth fashion, but overall steady. One could imagine their speed data trace looking similar or the same as the arc of their line through the corner. This is, in fact, how most riders perceive cornerspeed. They feel they can put a number on it.
For example, that’s a 70 mph sweeper, or a 50 mph hairpin. But something is wrong. How did that fast guy in the example above pass while you were dragging knee, elbow, boot, etc. with 57 degrees of lean angle? If he’s going faster, wouldn’t he need MORE lean, not less?
V is for Variable Corner Speed
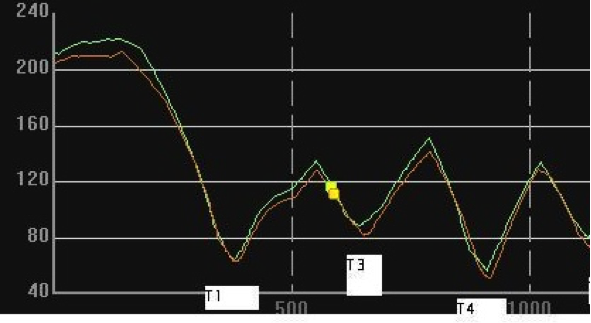
If we look at GPS speed data from a corner, we can see the first flaw in our perception of corner speed. It is not constant. It is not even close. From the start of the arc that we drew with our bike, speed drops precipitously until it reaches a low point much slower than expected somewhere near the middle of the arc. If you perceive a 70 MPH corner, the chances are your slowest point of that turn is 50MPH. This rapidly dropping speed line doesn’t rest at the bottom for long rather it reverses course and quickly climbs out of the hole. The trace of your speed data doesn’t look like a U. Instead it looks decidedly like a V. Our minds fill in the slow spot, and we perceive a 70 MPH corner.
In this image we see speed over distance data (kph) for Thompson Speedway turns 1-4.
The Pivot Point
The bottom of the V, or the slowest point of the corner is the important spot to recognize. From here on out I will call this the pivot point. The pivot point should actually be part of your cornering plan. In other words, you need a reference point (or a few) for this spot on track. It is the spot at which your bike can change direction the most easily.
This critical moment in riding is often ignored, but it is where the real direction change happens. As you trail off the brakes, your hands get lighter on the controls until you have no weight on the bars and you allow the wheel fall INTO the turn. THIS is the spot where your grip needs to be as light as possible.
To be clear, you still need to countersteer to initiate lean. Countersteering is an important technique, but in this article, we are focused on the middle of the turn, the pivot point.
photo: otmpix.com
When and Where to Pivot?
Most of you are thinking, “we are talking about the apex, right”? I am avoiding the word apex on purpose. Many people refer to the apex as the point where you are closest to the inside of the pavement. This is often not the same place as the pivot point.
For example, double apex corners and increasing radius corners tend to have the pivot point in a different location than the “apex”. This concept applies to all bikes, big and small, and all lines, point and shoot, or fast and flowing. Different bikes may choose different pivot points to take advantage of the strengths and weaknesses of each platform.
Examples:
In a “fast exit” corner, the pivot point would be located earlier and you would get on the gas sooner to take advantage of that fast exit.
In a “slow exit” corner, the pivot point is located later to take advantage off all the possible entry speed.
In a “balanced corner” (equally fast entry/exit) you have a little wiggle room. If you need entry speed to pass a rider you can pivot a little later, if you want to out drive them on the exit then pivot a little earlier.
photo: owenstrackdayphotos.com
Similar Mid-Corner Speed
Interestingly, if you compare a fast lap and a slow one, you will often see that the mid corner speed (slowest point) of the faster rider is not a lot different from that of intermediate riders. Maybe just a few MPH, or maybe no different at all!
What you will see is that the slopes of the V in the speed data trace are steeper, usually on both sides. The faster rider is faster into and out of the corner. Understanding where your pivot point is allows you to plan the fastest way the get to it, and the fastest way to get away from it.
So here comes that fast(er) guy blowing by you on the outside into a fast corner. You already feel you are mid corner and cranked over good, but he knows that he has some yards to go before reaching the pivot point, and is taking advantage by carrying more entry speed, tipping in slower and braking later or longer.
You both reach the same minimum speed in this corner, and you feel like he’s in touch for a moment. You might even feel like your “corner speed” is the same as his, but he quickly pivots the bike and walks away on the exit because he can accelerate sooner than you. Sigh.
Time to start thinking in Vs.
otmpix.com
About Paul Duval
Paul Duval is a fellow track day instructor, former Loudon Road Racing Series 125 GP Champion, current top runner in Supersport classes at LRRS, and professional educator. You can see Paul in action at most Tony’s Track Days events.
Please Donate to Keep the Articles Coming
If you liked this article and the many other articles on this site, please toss a buck or five into the hat. It’s greatly appreciated!
Click the PayPal “Pay Now” button.
Then indicate quantity in $2.00 increments. – Example: put “2” in “QUANTITY” field to donate $4.00, “3” for a $6.00 donation, etc.
Why $2.00? Due to the PayPal fee structure, a $2.00 donation is significantly more beneficial compared to a $1.00 donation.
There is nothing like video to help demonstrate cornering techniques. Ride along with me as I explain cornering and the nuances of managing a downhill turn, including trailbraking.
This is the sort of cornering techniques we work on during on-street training where student hear my comments in real-time using Bluetooth communicators. If you’re in the Northeast, consider signing up for a private training day or a group training tour. I bet I can help you with your cornering.
There is nothing like video to help demonstrate cornering techniques. Ride along with me as I explain cornering and show some of the nuances of body position, cornering lines, countersteering and visual skills.
This is the sort of cornering detail we work on during on-street training where student hear my comments in real-time using Bluetooth communicators. If you’re in the Northeast, consider signing up for a private training day or a group training tour. I bet I can help you with your cornering.
Here’s a video of me commenting while following an average rider through a twisty road. I point out the rider’s body position, cornering lines and throttle timing, and comment on how he could do better. Notice his mid-corner adjustments. This is an indication of several cornering problems that are correctable. This is the sort of cornering detail we work on during on-street training where student hear my comments in real-time using Bluetooth communicators. If you’re in the Northeast, consider signing up for a private training day or a group training tour. I bet I can help you with your cornering.
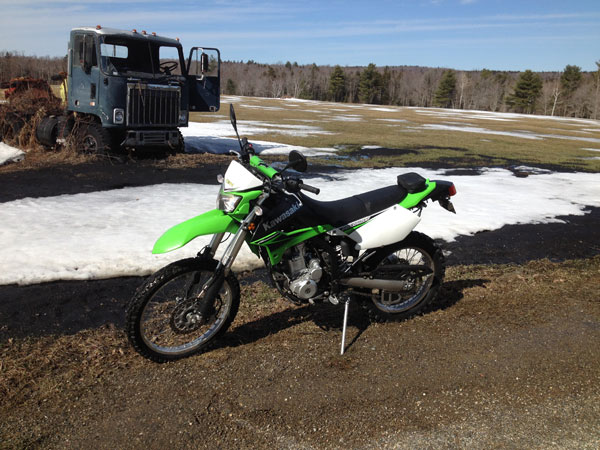
This article covers the most basic maintenance points for getting a bike ready for another season of riding. If you’re a smart veteran rider who wants to elaborate, please add your comments below so we can all learn from your wisdom.
Those of us who live where the weather blows cold put our motorcycles under cover until the frosty temps subside. And that time of year is fast approaching.
Before taking your first ride you’ll need to make sure you and your motorcycle are up to the task. Hopefully, you put your motorcycle away so it takes minimal effort to bring it to life after its long winter nap. If not, you may be in for some frustrating downtime.
General Maintenance
With the help of a motorcycle owner’s manual someone with moderately competent mechanical skill can perform most of the tasks I’m about to discuss. For tasks that are not covered in your owner’s manual, you’ll have to consult a moto-smart friend or your dealer’s service department.
Fuel System
Riders who park their bikes without adding fuel stabilizer to the gasoline are in for a heap o’trouble. The problem is that old fuel turns into a gooey varnish that can clog the small passageways in the fuel system. This is a significant problem on motorcycles with carburetors, but even fuel-injected bikes can be affected.
If you neglected this task you may be looking at the time and expense of a thorough fuel system cleaning. If the gas in your tank is old it’s best to resist starting your motorcycle. Instead, drain the old fuel from the tank (and drain the carburetors if applicable). This can prevent stale gas from circulating through the system. If your bike runs poorly even after draining the gas, consult a mechanic and store your bike properly next time.
Air Filter
Rodents seem to think that air boxes are the perfect place to build their nests. Look for clues like partial acorn shells or shredded fabric or paper. Even if you don’t see these telltale signs, it’s smart to get eyes on the filter. Unless you replaced the filter within the last year or so, you might want to have a new one on hand and just swap it. If the filter is in tact and doesn’t look too discolored or dirty, you an try to remove it and clean it with compressed air.
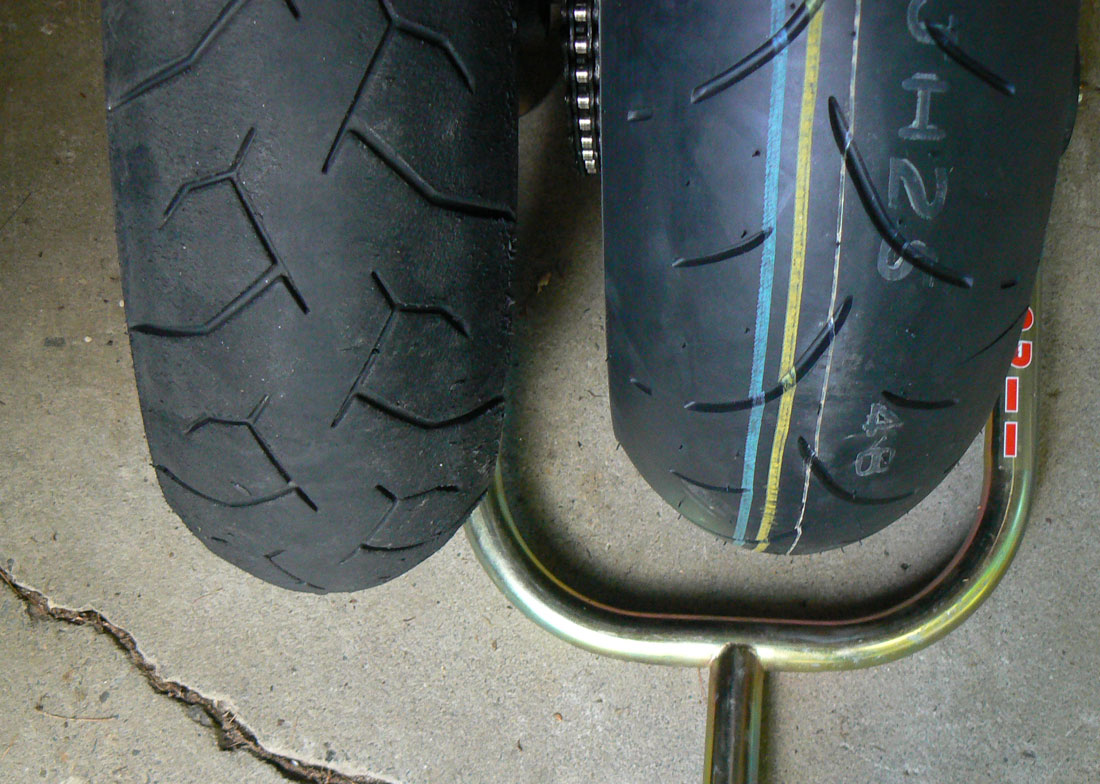
Too worn? The tire on the left still looks good, but it was getting old, so new rubber was mounted. Read the code on the sidewall to find the manufacture date.
Tires
Tire pressure will drop significantly over the winter and nothing affects handling and wear more than very low tire pressures, so be sure to put a gauge on those stems before the motorcycle rolls out of the garage. If the tread is worn near the tread-wear indicators or if the tires are older than 5 years (no matter the tread depth), I’d replace them. Read the date code on the sidewall. Example: 0415 mean the 4th week of 2015.
Drive Train
While you’re down there, check drive train wear. Sprockets should show no significant signs of hooking and the chain should not pull very far away from the back of the sprocket. Replace the chain and sprockets as a set if necessary. If all looks good, then check the adjustment and give the chain a good cleaning an lube (this should have been done before you stored it…just sayin’). Then be sure to perform a more thorough lubrication after the chain is warm.
Those with shaft drive need to make sure your fluid doesn’t need to be changed or topped off and check for any leaks.
Engine Fluids
Check your oil level, or better yet, change the oil and filter if you didn’t do it before tucking your bike away last fall. Old engine oil contains acids that are best removed. If your bike is liquid cooled, check coolant levels, including the fluid in your overflow tank (see your owner’s manual).
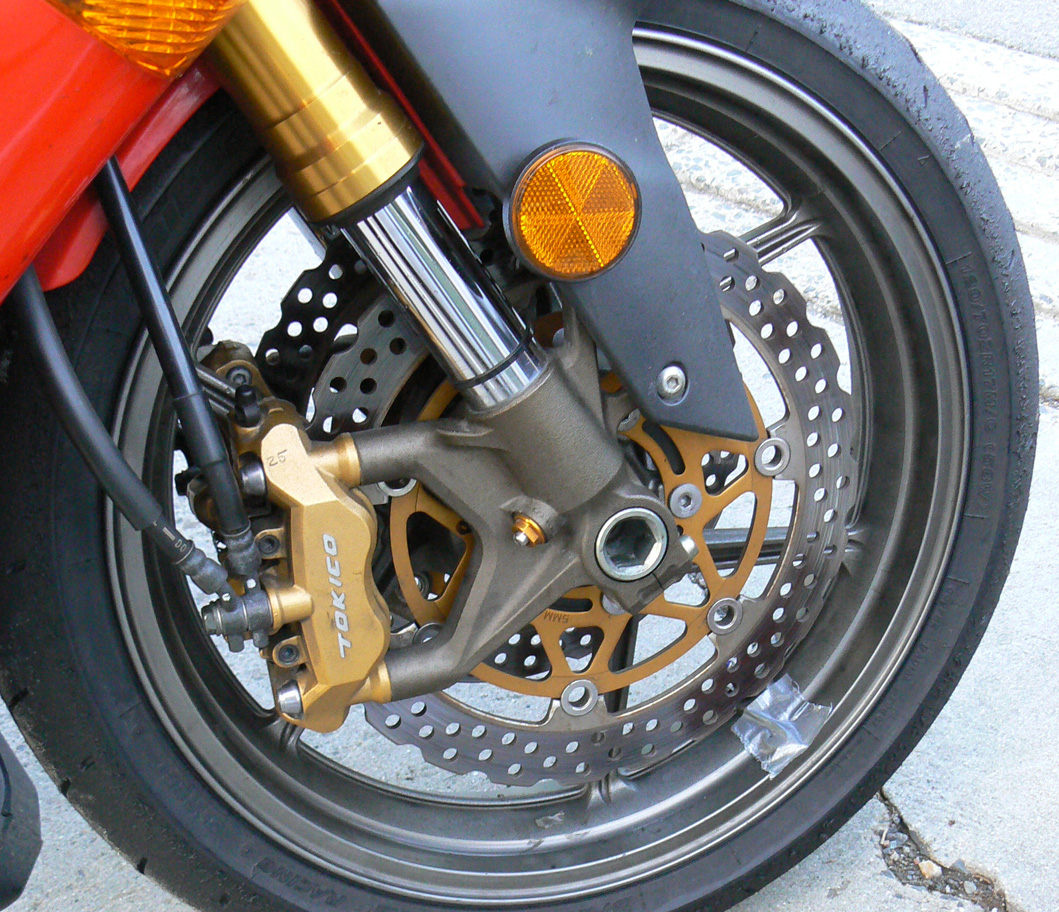
Brakes
Brakes are obviously an important system to maintain. Squeeze the front brake lever and press on the rear brake pedal to feel for a firm application. Look in the sight glass or in the brake master cylinders to see that brake fluid levels are good. The fluid should be like watered down apple juice. If the fluid is any darker, then plan on replacing it soon.
Grab a flashlight and take a close look at how much brake pad material there is remaining. Most brake pads have a notch cut into the pad as a wear indicator. If in doubt, replace the pads. It’s cheap insurance.
Battery
Weak or dead batteries are another common mechanical issue that can stand in the way of reviving a motorcycle after a long period of dormancy. Hopefully, you kept your battery charged with a Battery Tender. If not, then you will likely have to charge the battery before it will start the engine. If it will not hold a charge, then a new battery is necessary.
Lights, Cables & Fasteners
Check that all of your lights are operational: front and rear brake light switches, turn signals, tail light and headlights (high and low beam).
Confirm that the throttle and clutch cables (if applicable) operate smoothly before heading out. Finally, go around the whole bike putting a wrench on as many fasteners as you can to ensure they are tight.
Awakening the Rider
Now that you’ve taken care of the motorcycle, it’s time to think about preparing for your first ride. Remember that your brain and muscles have deconditioned over the winter.
Some people begin their season by taking a refresher course with their local motorcycle-training program or with an advanced rider training program. But, at the very least, take some time to brush up on your emergency skills in a parking lot. Whether you choose to attend a formal rider course or go it alone, get in the game by practicing some cornering and braking drills like the ones in the RITZ DVD.
Spring Roads
Even if you and your bike are fully ready for the new season, remember that the roads may not yet be motorcycle-friendly. Road salt is used extensively in snowy regions to keep roadways ice-free. A dusting of salt can decrease traction, so reduce speed where heavy concentrations of salt are present.
Sand is also widely used to combat slippery conditions and we all know how hazardous sand can be for a two-wheeler. Keep your eyes peeled for sand and avoid it whenever possible.
Roadways take a lot of abuse from snowplows scraping the surface and from the effects of repeated freezing and thawing. Expect surface hazards during the early spring until the earth thaws and the road crews can repair the scars.
Inattentive Drivers
Perhaps most important is to remember that drivers aren’t used to seeing motorcycles on the road. You’ve got to be extra vigilant when riding in traffic by using strategies for being seen.
Please Donate to Keep the Articles Coming
If you liked this article and the many other articles on this site, please toss a buck or five into the hat. It’s greatly appreciated!
Click the PayPal “Pay Now” button.
Then indicate quantity in $2.00 increments. – Example: put “2” in “QUANTITY” field to donate $4.00, “3” for a $6.00 donation, etc.
Why $2.00? Due to the PayPal fee structure, a $2.00 donation is significantly more beneficial compared to a $1.00 donation.
Track Days are the most exciting, fun and effective way to improve your riding skills…period! You will learn how to corner and brake with a lot more confidence and control. And you will have a freakin’ BLAST.
Track Days are held on a closed course (racetrack), which means you learn in a safe environment and at real-world speeds. Learning on a racetrack allows you to ride freely and concentrate on and advancing your skill level without the typical hazards faced on the street…potholes, sand, tar snakes and Buicks.
Many types of machines at our regular track day events. While most ride sport bikes, there are also those who ride Tourers, Adventure bikes, and Sport Tourers. There are even special “Non-Sportbike Days”.
It’s one of the best investments in fun and skill development money can buy.
While parking lot courses have their place, riding your bike on a track will let you practice riding skills at real-world speeds – without the normal distractions found on public roads (like cars, sand, cops, etc).
Classroom sessions are usually included in the price of your day where you will benefit from discussions and demonstrations of advanced riding technique that you can then try on the track.
The fact that you visit each corner several times a day allows you to perfect your technique without the changing variables found on the street. These techniques are transferable to street riding.
My wife, Caroline in “the bowl” at NH Motor Speedway on her Kawasaki z750s
The Racing vs. Track Day Myth
Who said anything about racing? Here’s the thing; A track day is NOT a race event. Many people respond to a suggestion of attending a track day by saying “but I don’t want to race”. Now, I understand that most people automatically think “racing” when they hear “racetrack”. This is why I spend a fair amount of energy on educating the potential new customer that a track day just might be worth considering, both for having a blast, but also for becoming a better rider (much better).
If it’s not a race, then what is it?
Imagine the perfect twisty road, but with no oncoming traffic, sand, gravel, guardrails or folks in big sedans trying to figure out their GPS while talking and texting on their phones and you start to get the idea of what a track day is. Oh, and did I mention no speed limits? So, riding on a racetrack is not only a safer place to ride, but you can also go as fast as you want without the risk of getting an expensive speeding ticket and insurance points.
Not only are track days fun, they are also a great place to develop your skills. Most track days offer some instruction, with classroom time and perhaps a garage seminar on body positioning. You can also get some on-track coaching if you ask for it. Then you go practice what you’ve learned by circulating around the track. The beauty of riding on a racetrack is that you visit each corner multiple times a day so you can perfect each corner as the day goes on. You also get to explore the limits of your bike, the tires and your ability. Woot!
It’s not about speed!
Yes, we are talking about riding on a racetrack, but that doesn’t mean you have to have the latest rocket, or even that you have to go a whole lot faster than you do already on the street (in the novice groups). That’s the beauty of track days as opposed to a competitive racing environment; they have two completely different purposes. Both track days and racing allow you to go as fast as you dare, but track days allow you to go as fast as you want without the pressure to win a competition. When racing, you risk a lot more because your goal is to try and beat the next guy.
The goal of a Track Day
So, what exactly is the point of doing a track day then?
A Safer Place to Have Fun! With no surface hazards or roadside obstacles to hit and an ambulance just seconds away, the track is the safest place to ride, especially if you want to ride fast.
A Safer Place to Learn! You will be able to concentrate on refining cornering and braking skills by riding the same corners over and over.
Socialize! Commiserate and socialize with like-minded motorcyclists. Most new track day riders show up for their first day nervous and afraid, only to find a friendly group of fellow riders eager to help you learn the ropes.
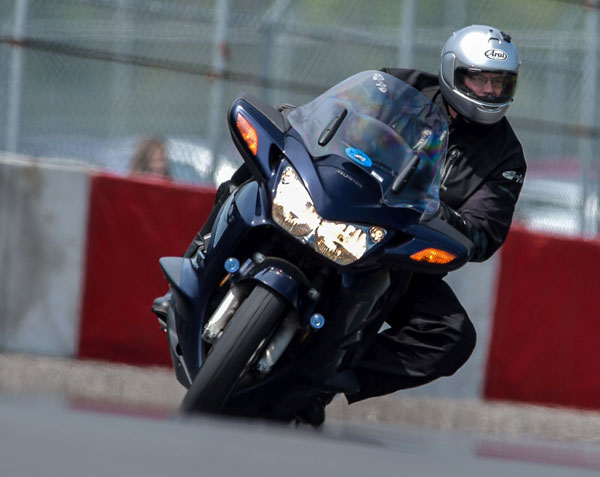
Ed carves a perfect line on his ST1300. photo: otmpix.comTrack Days Make Safer Street Riders
Safer Riders
I am often asked about the benefits of track days for street riders. The bottom line is that a day or two spent at a training-oriented track day helps develop braking and cornering skills beyond what can be done in most other courses and certainly better than relying on experience alone.
Learning to brake harder and lean deeper pays benefits when a car pulls out in front of you or a corner tightens more than expected. Riders who have never experienced floorboard-dragging lean angles usually panic, stand the bike up and run off the road, even though they had more ground clearance available. Those who have learned to lean deeply and to trust their tires are much more likely to remain in control and stay in their lane.
On the track, a rider practices braking skills by waiting to brake deeper and deeper into corners. Not to go faster, but to see just how capable their bike is at slowing. Trailbraking is also practiced…an important skill to have for safe street riding.
Finally, highly-developed physical skills allow more automatic responses to challenging situations, freeing more bandwidth to manage the hazards and variables of street riding.
I don’t have Proper Riding Gear Yes, you need to protect your body in the event of a crash, but that’s a good investment whether you ride on the track or the street. Most track day organizations allow street gear, so you should already have most of what you need.
I am worried about crashing my bike. It can happen on the track, but it can also happen on the street (with more severe consequences). Track day crashes usually happen because the rider pushed too hard before they learned to manage the extra speed. Rarely do two riders come together to cause a multi-bike incident. And with no trees, mailboxes or oncoming vehicles to run into, serious injuries are also rare.
I’ll be the slowest rider out there. So what if you are the slowest rider out there? You’ll get faster as the day goes on and will likely be passing people by the end of the day.
I’m afraid I will be in the way of faster riders. This is a common concern. The answer is to ride your own ride and be predictable so faster riders can safely pass. This means learning the line and staying on it. Oh, and keep your eyes looking forward. It is the passing rider’s responsibility to pass…just like when skiing.
I don’t have a way to get up to the track. Many organizations have a forum or Facebook page where you can ask for help getting your bike and yourself to the track. If it comes down to it, just ride your bike there. You are risking crashing the vehicle you planned on taking you home and you’ll be tired ride home, but many people do it. Bike prep is usually minimal and can be performed at the track. Here is a video I did showing what is required for Tony’s Track Days. NOTE: some of these requirements are no longer required. See the bike prep page on Tony’s Track Days site.
I don’t ride a Sportbike. Again, so what? All types of bikes show up at track days…sport tourers, adventure bikes, standards, vintage bikes, even the occasional Gold Wing and cruiser.
It’s too expensive. Why should I pay to ride someplace? It makes little financial sense to risk serious injury, a speeding ticket, and insurance points rather than pay to ride on the track. The cost of a track day varies from region to region and from track to track, but you can expect to pay anywhere from $150.00 to over $300.00 per day. This often includes some instruction.
I’m not comfortable doing a track day yet. Maybe you’re just nervous. If so, then rest assured that you’re not alone. It’s smart to have some street miles under your belt, but if you’re comfortable riding around corners at brisk street speeds, then you’re probably ready to do a track day. Many organizations allow spectators to come check out what it’s all about. This is a great way to see if it might be right for you. And most organizations have two or three group levels so you are matched to others’ experience level.
I hope this has shed some light on the mysteries behind track days.
If you have questions, let me know and I’ll do my darnedest to help out. You should also check out the website of the track day organization you plan on joining. FYI, I work as the chief instructor for Tony’s Track Days. And check out other track day related posts and videos.
You don’t need full leathers and a fast bike to ride at a track day.
Classroom sessions are usually offered as part of your cost to ride.
All types of bikes and riders can be seen at many track day events.
Railing through turn 9 at New Hampshire Motor Speedway (Loudon) photo: owenstrackdayphotos.com
On-track instruction is often available.
Tony’s offers classroom sessions taught by trained instructors. The quality of the instruction varies from organization to organization.
Follow the Leader sessions give you the lay of the land before you are allowed to go out on your own.
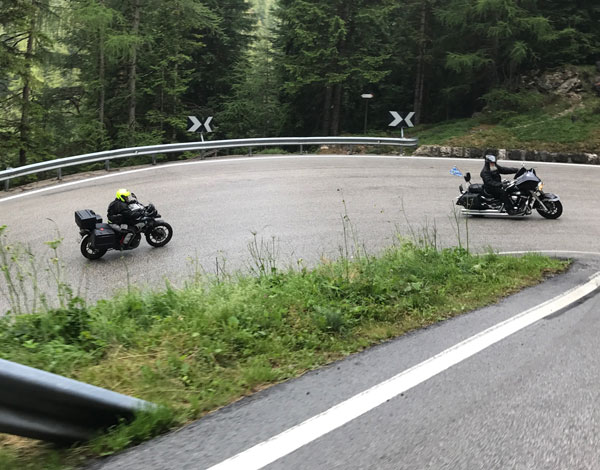
Here is another installment of “Videos Lessons” where we pull from the seemingly never ending supply of rider videos from which we can learn. Even though these are 2 very slow speed crashes, the injuries could have been serious. I hope everyone is okay.
This particular video shows the seriousness of slow speed mishaps and of course the importance of rider training.
First, take a look at the video. The crash happens around 1:15. I’ll wait.
Pretty scary, right? It’s hard to see, but it seems the first rider to crash was actually in the lead, and the rider with the passenger had to slow and go around his friend as he tipped over. The second rider (with passenger) watched his friend fall and appeared to be putting his right foot down to stop, but failed to use his front brake and rolled off the road.
I want to point out that at about :45 the Harley riders demonstrate some apprehension about their ability to handle the tight turns. You can see this as they approach the right hand turn marked by a 20mph road sign. They are smart to slow down because there is a yield sign before a narrow bridge, but they seem to slow more than necessary. This is often indicative of serious cornering anxiety. The confirmation of weak cornering confidence comes when the mishap occurs.
It’s interesting to note that this mishap is different than others where the rider enters a turn too fast (for his/her ability) and runs wide (see this video). In this case, both riders fell on the inside of the right-hander. Why?
Crasher #1
Let’s begin by discussing the rider who first crashed. He says that he hit a hole in the road and then rode over the patch of sand. I don’t doubt this. I also don’t doubt that the hole and the sand contributed to upsetting the bike’s stability (at least a little bit).
Even so, the real questions needed to be asked are:
1. why did he hit the hole when there was opportunity to ride over smoother pavement?
2. why did he fall over?
Here is my explanation:
1.Why did he hit the hole? The reason the rider who first crashed hit the pothole was because of poor visual skills. It’s human nature to look down when we are anxious. It is likely that the rider wasn’t looking far enough ahead to come up with a plan to manage the tricky hairpin, resulting in him being taken by surprise by the tight radius and and steep slope. As he rounds the bend, he sees the hole and the sand which further increases his anxiety and triggers his survival response that includes staring at the hole. When we panic, we tend to target fixate on hazards. The problem with staring at a hazard is that we tend to steer toward it like a super-powerful magnet. This tendency of going where we look is called Visual Direction Control and is likely what causes him to run over the hole…and then the sand.
Solution: Looking well ahead allows you to avoid surprises. Also, looking at an escape route rather than the hazard could have kept the bike away front the surface hazards. Seeing hazards early is critical for keeping these dangerous survival triggers from taking over.
2.Why did he fall over? Hitting the hole and sand did not make the crash inevitable. Factors that caused the actual fall probably included an overreaction and extreme tension. This would result in the rider clamping on the handlebars and chopping the throttle at a time when he was already moving very slow on a steep uphill hairpin. This reaction hindered direction control and killed what little amount of stability the bike had, causing gravity to take over and the bike to fall over.
Solution: Motorcycles are more stable with speed. Had he kept steady drive the bike’s suspension would have handled the bump better and stability would have been maintained. As far as the sand goes, easy acceleration and a light grip on the handlebars while reducing lean angle slightly would have allowed the tires to deal with the sand while allowing the bike to remain in its lane. As I mentioned earlier, had the rider kept his eyes up, he would have likely selected a path that avoided both the hole and the sand. Problem solved.
Crasher #2
The lead rider’s crash was caused by the same two reasons I already outlined: Looking in the wrong place and insufficient speed for stability.
1.Why did he ride off the road? Because we tend go where we look. The lead rider looked over his right shoulder, causing the bike to drift to the right and drop off the shoulder and down the ravine.
Solution: Same as above. Look where you want to go. Yes, seeing your buddy fall over can grab all of your attention, but it’s imperative that you always remain in control and that means keeping your eyes ahead until you can come to a safe stop.
2. Why did the bike go off the road so quickly? Because of a loss of directional stability. When the rider decelerated on the steep slope he slowed down enough for gravity to take hold of the bike and send it down the hill.
Solution: Same as above. Had the rider maintained positive drive he would have completed the corner on two wheels.
This video demonstrates the importance of two of the most critical skills motorcyclists need to maintain control: Visual direction control and Speed for stability. Think of these two hapless riders the next time someone suggests taking a parking lot course that covers basic slow speed maneuvers and cornering techniques. The techniques would have saved these two a world of hurt and embarrassment.
Even better is if they had signed up for on-street training where instructors can observe problems at real world speeds and conditions.
Here is another video that I’m pretty sure demonstrates how we humans don’t want to admit when we screw up. See the video of the poor guy who sideswiped a big truck on his R6. The problem that he says the wind drove him into the truck. Whaaa?
Note: you only need to watch the first 15 seconds to see the incident, but you’ll have to stick it out until the first passerby arrives to hear him mention the wind. WARNING: The video may be difficult to listen to as the poor guy writhes in pain. He also swears a bit.
While I know the wind out west can be strong enough to knock over tractor trailer rigs, I’m pretty sure wind had nothing to do with this incident. I think it’s another case of inaccurate self-evaluation and lack of rider ability and/or a serious lack of concentration.
I can’t tell how strong the wind was at the time of the crash, but the trees aren’t being blown around very much and his friend’s hair (he appears later in the video) is barely moving at all. Maybe he’s wearing copious amounts of hairspray, but I don’t think so.
Besides, if it were strong enough to blow a bike across a lane, I doubt the rider would be chatting away so casually before the incident. Also, the rock formations on the side of the road should have blocked any direct side forces.
Dangerous Distraction
One explanation for this seemingly bizarre crash is a complete and total brain fart. I’m not sure if he is talking to himself or to his friend who is riding ahead, but he wasn’t focused on leaning enough to make the curve.
Early Turn Entry
Notice how the rider began heading toward the inside of the corner too early, causing his bike to be pointed toward the oncoming lane. – Thanks for readers for pointing this out.
Countersteering, Baby!
Another contributing factor is that perhaps he did not have a good grasp of countersteering. A hard push on the right handlebar should have kept him in his lane even if it were windy.
Target Fixation
Target fixation is another likely contributing factor in this incident. Target fixation is a phenomenon that explains why we go where we look. Once the rider realized he was drifting wide into the path of a big truck, he likely couldn’t take his eyes off the hazard and that’s where he ended up. Look toward the solution, not the problem.
Human Nature Strikes Again
I think this is another example of someone blaming something other than their inability to stay focused or steer effectively. Deferring blame is a basic human response to help explain how they could have made such a serious and basic mistake.
See this video of another crash that demonstrates how humans can delude themselves.
The reason to highlight these videos is not to place blame, but to recognize the danger of not knowing why an incident happened. Without that, we are destined to repeat the mistake.
What do you think?
If you liked this article and the many other articles on this site, please toss a buck or five into the hat. Select an amount and then click the PayPal Pay Now button. It’s greatly appreciated!