Living with the Yamaha Tenere 700 After One year

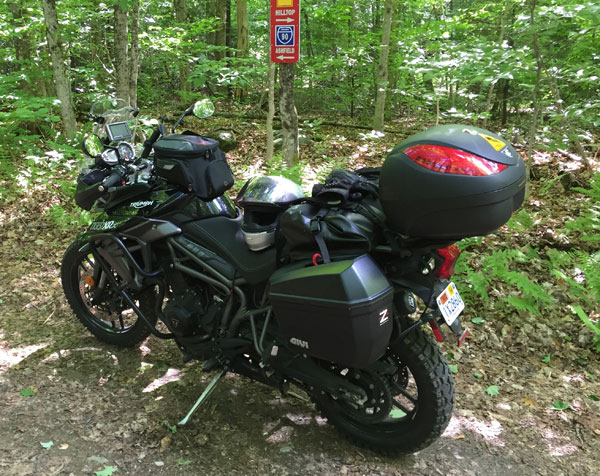
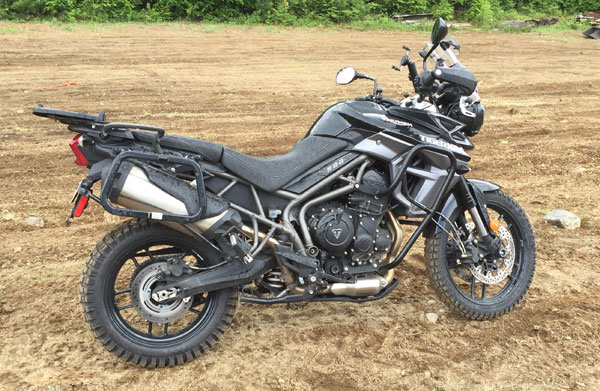
It’s been one year since I sold my trusty Tiger 800 and bought a very slightly used 2022 Yamaha Tenere 700. At the time, T7s were hard to come by. I was on a waiting list at my local dealer with no idea when a unit will show up. A lucky scan of Facebook Marketplace revealed a mostly unmolested blue example with only 500 miles on the clock.

Seeing that the bike was showroom perfect and with the market being what it was, I paid the owner the retail cost of $10,200. Avoiding dealer costs, ended up saving me enough dough to outfit the bike with off-road rubber, engine and chassis protection and luggage accessories. See below to see my choice of accessories.

The Backstory

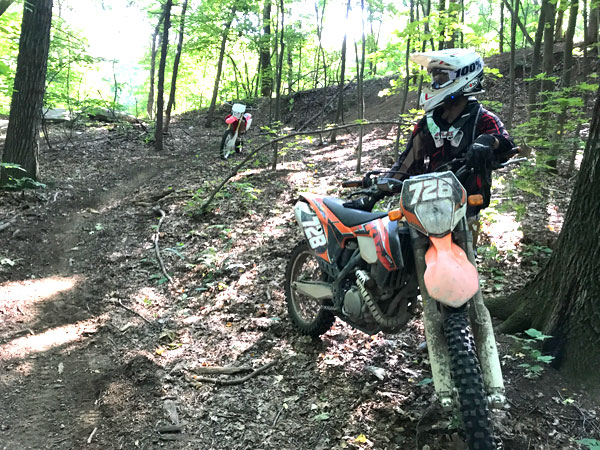
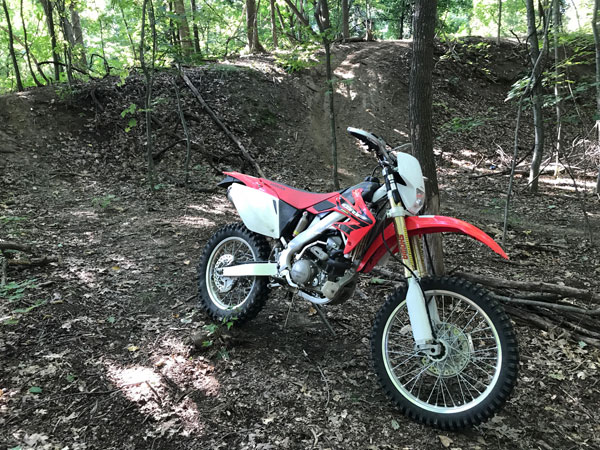
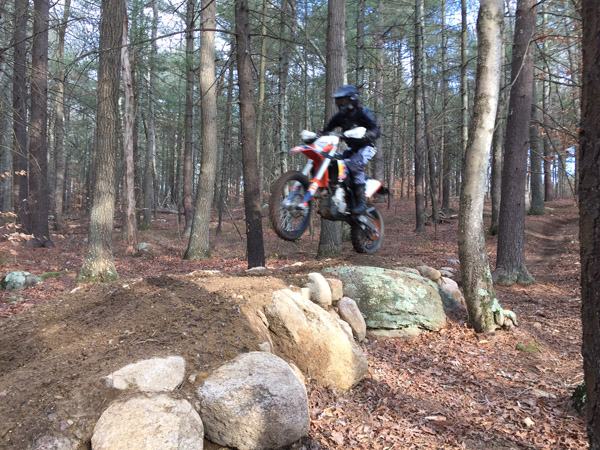
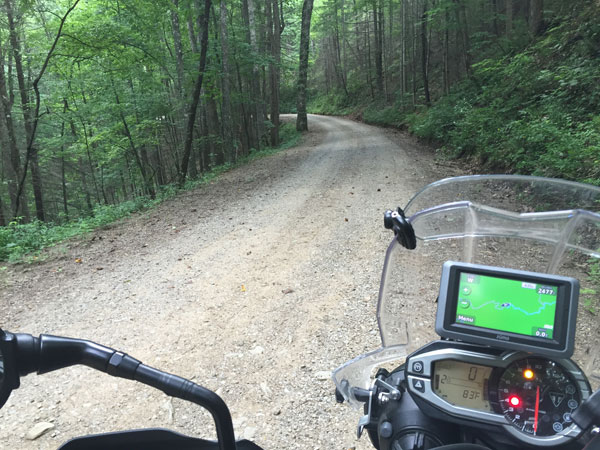
So, why did I swap the excellent Tiger 800 XRx for the T7? In a word, off-road capability. My longtime riding buddy and track day partner, Tony Iannarelli bought his Tenere the season before and we ventured into places where the Tiger had no business being with its 19″ front wheel, soft street suspension and heavy weight. With plans for more adventures on the Northeast Backcountry Discovery Routes (NEBDR), a change was necessary.

Why the T7?

In about 2020, the moto-press chummed the waters with declarations of Yamaha’s Tenere 700 being the game-changer needed to advance the next generation of adventure bikes. As it turns out, they were mostly right. What makes the Tenere so special?

First, the T7 is a modern refinement of the KLR and DR650 dinosaurs and even attempts to bridge the divide between open class dirt bikes like the KTM 450/500 and the overweight, street-biased self-proclaimed Adventure bikes like the BMW GS, and Triumph Tiger.

Second, Yamaha engineered the Tenere to excel at tackling terrain where quarter-ton motorcycles have no business being. While the T7 is no lightweight at 450 pounds before accessories, the chassis makes up for its relative heft.

Third, the Tenere 700 is an really fun street bike. With the exception of the stock seat, I find the 700 more comfortable than my Tiger 800. The ergonomics and wind protection work great with my 5’9″, 150 pound human chassis. I wouldn’t hesitate to point the 21″ front wheel to explore distant horizons. Sure, it’s not my first choice as a highway hauler, but it’s surprisingly capable of freeway droning.

CP-2 Engine

The T7 is powered by an existing motor sourced from the awesome middleweight FZ/MT-07. My wife owned an MT-07 and it was a hoot to ride, mostly due to the light weight and snappy engine. The MT-07 derived cross-plane motor is a joy.

While not as snappy as the MT-07 iteration (the MT weights a good 50 pounds less), the 689cc CP-2 engine tracts beautifully, especially after some ECU tuning.

Fueling

Consistent with many previous Yamaha models I’ve ridden, the T7 suffers from jerky throttle response from closed-to-slightly-open throttle openings. This isn’t terribly noticeable when at normal street riding speeds, but becomes annoying at very slow speeds.

I especially notice this when descending rocky slopes that require the slightest bit of positive throttle to maintain balanced weight bias to keep the front wheel as light as possible to surmount obstacles. I ended up sending the ECU in to 2Wheeldynoworks for a re-flash to help smooth out this abruptness.

A Basic Bike

My 2022 T7 has no electronic rider modes or traction control and with a cable throttle, so no ride-by-wire here. All it has is ABS that can only be on or off. Compared with the Aprilia Tuareg, the T7 is completely analog. Sure, some rider aids would be nice, but I’m fine with relying on my own traction sense and throttle control to manage the bike.

Additionally, the Tenere has tube-type tires. Some argue that this is the better way to go for true off-road riding but I dread the time when I have to swap a tube in the field as opposed to plugging and going.

The T7 is a basic bike compared with the Aprilia Tuareg.

Tires

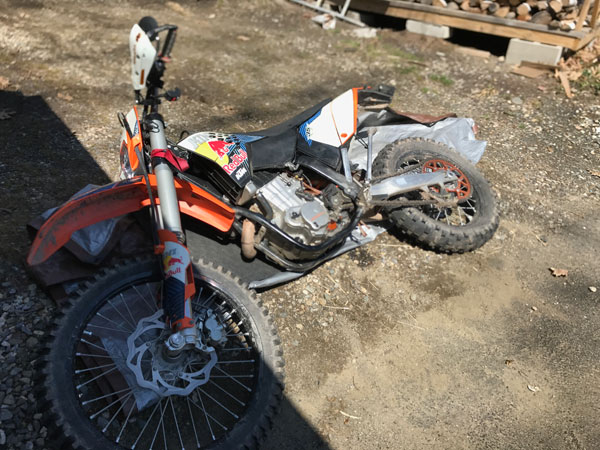
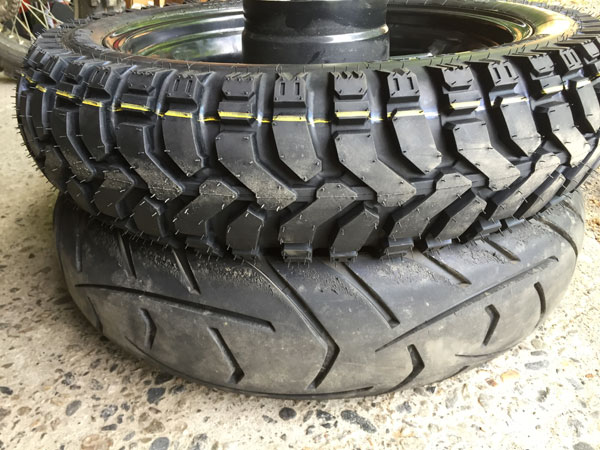
The bike comes stock with the impressive Pirelli Scorpion STR rubber. These tires are quite good on pavement and even in most of the rocky gravel conditions most people ride. But, the plan was to ride some rather difficult routes, I first mounted Mitas E-10s, which are great tires, but I ended up matching my friend’s choice and went full-on knobbie. The Tusk D-Sport rear and IRC TR8 front.

I get asked a lot about how the bike handles with these tires and I answer, great…for a knobbie. I’m able to ride twisty pavement at full pace in the dry and even in wet conditions. The bike is less stable than with the other tires, but not bad. And they wear quickly. I got about 3500 miles from the rear and about that much from the front.

And as you’d expect, they are loud at speed on pavement. The rear gets louder as it wears, enough that earplugs are necessary.

These inconveniences payoff with the dirtbike-like off-road traction. But, realistically, I could have gotten away with either the Pirellis or the Mitas 95% of the time. It’s just that last 5% can get pretty hairy without those knobs.

Mitas E-10 on the left is less aggressive than the Tusk DS or the IRC TYR8

Suspension

The Tenere comes with some decent stock forks and shock. Compression and rebound adjustments work pretty well. And the spring rates are just fine for my 150 pound physique. When ridden hard, the bike can wallow and chatter, but that usually only happens when I’m pushing it. I also notice some deflection over rough terrain that I bet can be eliminated with upgrades, but I’m sticking with the stock suspension for now.

Rear Brake

The rear brake is a weak link with the T7. Brake power got bad enough over the summer that it took all I had to get it to skid. I use the rear brake a lot, so it’s no surprise the pads were worn. New Galfer Semi-metallic pads improved the brake power significantly.

One of the first things new owners upgrade is the Camel rear brake pedal and brake pads. I haven’t done the pedal upgrade yet, but plan to.

Swingarm Geometry

One thing Yamaha did was design the chassis to locate the swingarm pivot point in such a way as to create anti-squat under acceleration. This presses the rear tire into the ground for more traction. But, it also makes it somewhat harder to do simple wheelies to loft over obstacles.

The T7 in its element.

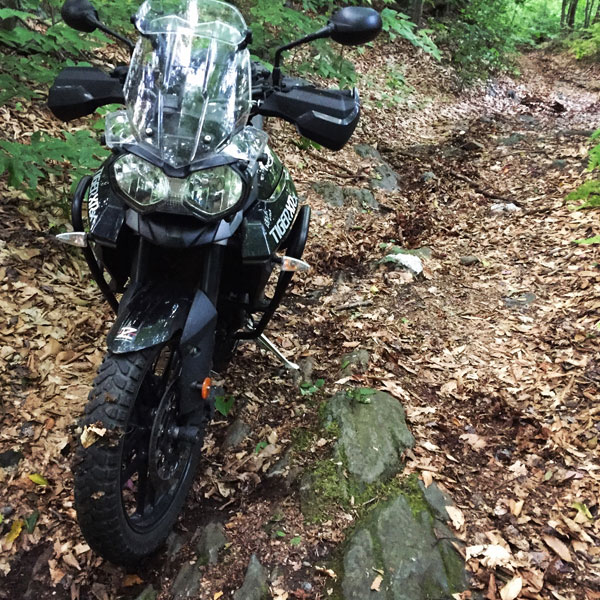
It’s Not Really a Dirtbike

With that said, the T7 is not a dirtbike! The problem is that it feels like one…a really heavy one. More than once, I rode the bike into some situations where I was taxed in managing the weight. These big ADV bikes tractor up rocky hills quite well, but all that mass needs to be controlled when descending.

Yamaha did a great job making the package feel light and balanced. However, as many KTM owners will quickly point out, the T7 carries its weight up quite high making it feel like it can topple at any time. But, stand up and keep your momentum and it loses that feeling pretty quickly.

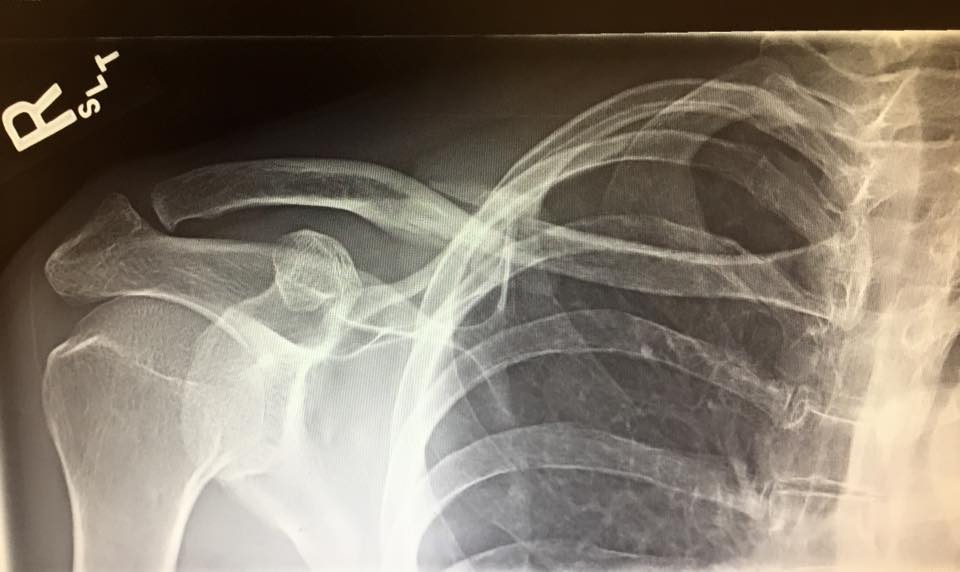
Also, when big ADV bikes start to go over, there’s no stopping them…just step off if you can. I had a nasty fall on a rather simple road when my front tire tried climbing out of a rut at 25mph. Not sure why it happened but distraction on my part played a role. The result was two broken ribs. Another thing about the top heavy T7 is that it is a bear to lift. It took Tony and me (with broken ribs) all we had to get it upright so I could ride it home.

When big adventure bikes fall, they fall hard and fast.

Seat Height

At 5’8″ and an inseam of 32″, I’m able to barely flat foot with both feet on level ground with the stock seat. But as soon as there is a slope, I really don’t have a foothold. It is just fine for all but the tough, rocky sections what require sub-5mph speeds and excellent balance…or paddle-walking. I tend to stand even through tough stuff, but I’m learning that there are times when sitting and using my legs and feet as outriggers isn’t a bad strategy. That’s when the eat height is too high.

Seat Concepts makes a low seat, which shaves 7/8″ off the height but sacrifices comfort. However, the SC seat is flatter and a bit wider which is usually a more comfortable shape. I don’t yet know if I will stick with the stock seat or not.

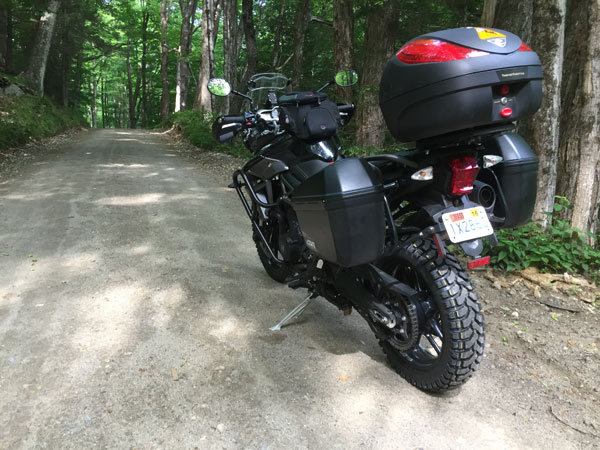
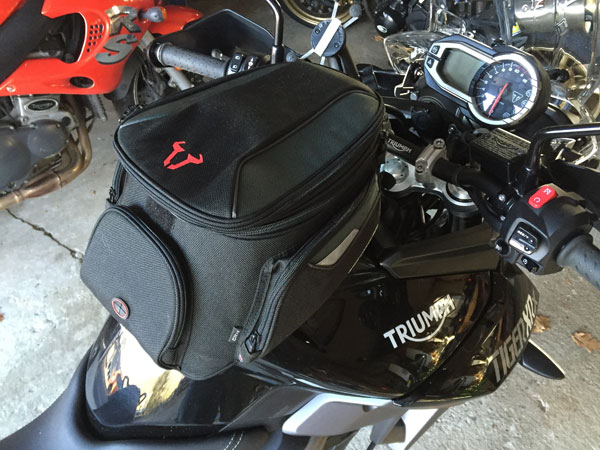
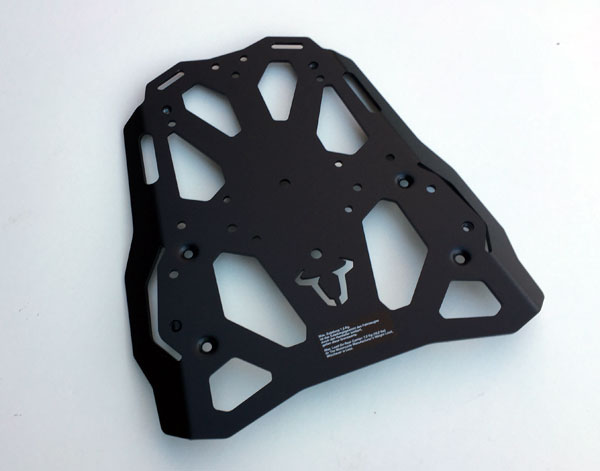
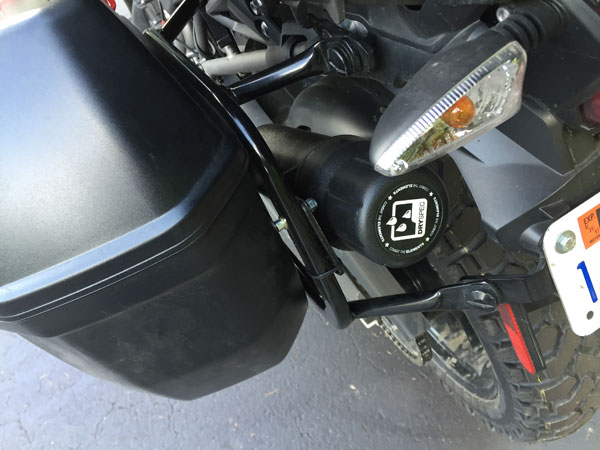
Upgrades and Accessories

Protection
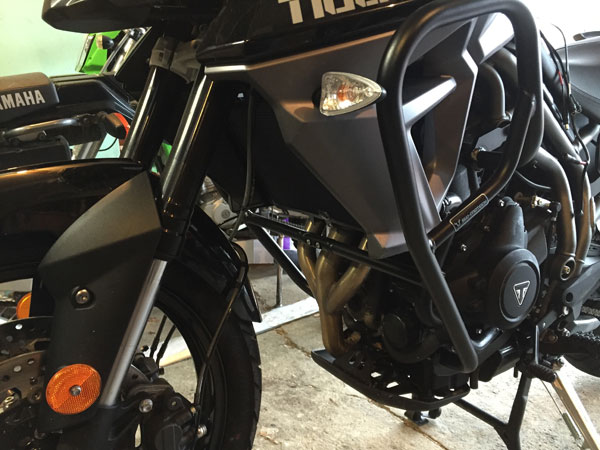
  1. Crash Bars – SW-Motech
  2. Handguards- Barkbusters
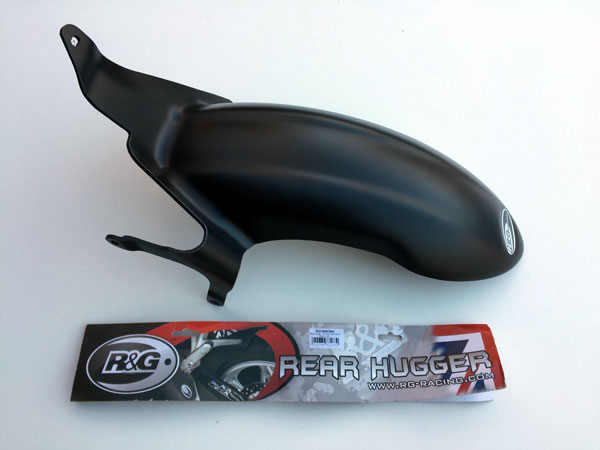
  3. Engine case covers- R&G Racing
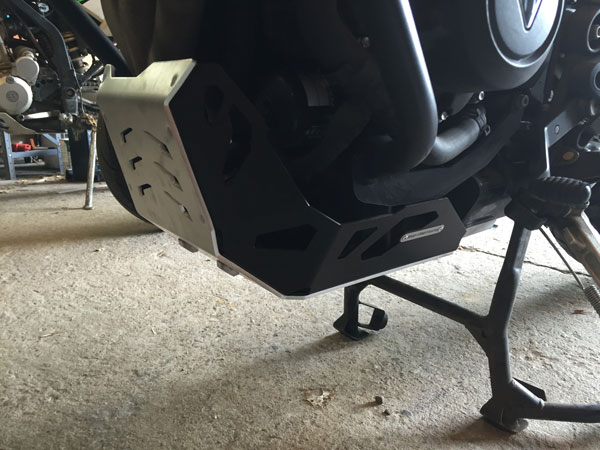
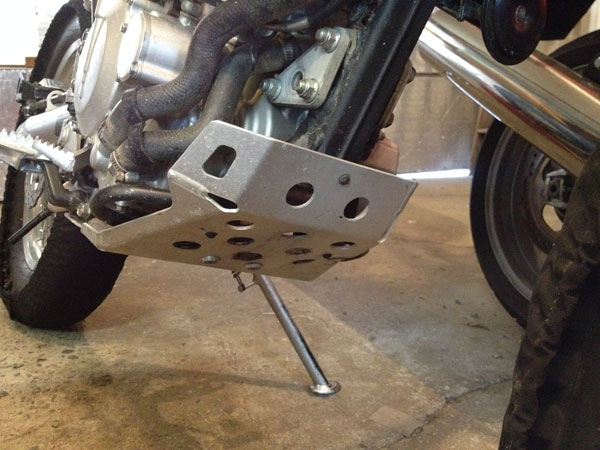
  4. Skid Plate- Moose/AXP plastic skid plate
The Moose/AXP plastic skid plate is a great option. Durable!
SW-Motech crash bars did a great job after I tossed the T7 down at about 25mph.
Luggage
  1. Sidecase racks- SW-Motech quick release
  2. Tankbag- Bags Connection/SW-Motech quick release tank ring
  3. Rear Rack- SW-Motech
  4. Crash bar bags- what I had around to carry tools, tubes, first aid, etc.
  5. Tool Tube- Twisted Throttle
Dryspec saddlebags on SW-Motech Sidecarriers and a BagsConnection tankbag doing duty as a tailpack on the SW rear rack. Note the tankbag tank ring. The tank bag I have is just a bit too large for standing off road.
Tires
  1. Rear Knobbie- Tusk DSport
  2. Front Knobbie- IRC TR8
  3. Rear and Front 30/70- Mitas E-10
  4. Stock Tires- Pirelli Scorpion STR
Mitas E-10s are a great choice for 20/80 use.
Comfort
  1. Heated Grips- R&G Racing
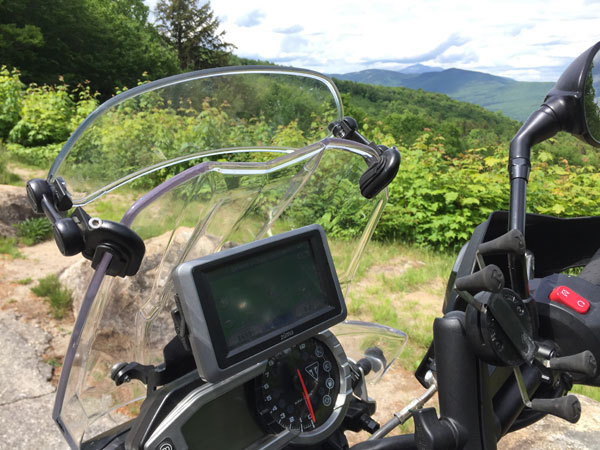
  2. Windshield Adjuster- Generic from previous owner
  3. Throttle Lock- Kaoko
  4. Phone Mount- RAM X-Grip
Other
  1. Mirrors- Doubletake Enduro– Adventure mirrors also available
  2. Rear stand Spools- R&G Racing– Can’t be used when removing axle
  3. Rear brake pads- Galfer Semi-metallic pads
  4. Air cleaner- Funnelweb prefilter
The Funnel Web prefilter replaces the stock snorkel. A mod necessary for full benefit from the 2Wheel Dyno Works ECU flash.

Product Review: Mitas TerraForce 90/10 Dual Sport/ADV Tires

The Tiger on track with Mitas TerraForce tires. otmpix.com

My 2016 Triumph Tiger 800 XRx has been a reliable machine both on the street and off-road. The Tiger came with Metzeler Tourance Next (90% road/10% off-road) tires which I promptly swapped for a set of Mitas E-07 Dakar Dual Sport/Adventure bike 50/50 tires to explore more adventurous terrain. But then I had a summer of mostly pavement riding ahead of me, so I decided to try the TerraForce tires.

Mitas (pronounced Me-tass, think “Meet us”) has been around for a while as a maker of agricultural tires and is now becoming popular for Adventure (ADV) bikes.

Note: Since I have not tried the most well-known players on the ADV/DS tire spectrum, I cannot make a direct comparison. So, the review is of my impressions of this tire and how it compares to the Metzeler.

OEM Tires

The Metzeler Tourance Next tires allowed peg feeler grinding.

The OEM Metzeler Tourance Next (90% road/10% off-road) tires were fine on the street, but felt numb. This became even more apparent during a track day where the Tourance tires could not communicate well enough to instill much confidence. Grip was good though; I managed to corner hard enough to mangle both of the Tiger’s footpeg feelers.

One thing that was a big negative was the crazy handling these tires gave after about 3,000 miles. The flat spot on the rear wasn’t terrible to look at, but this caused the bike to fall in terribly when initiating lean. And I had to put pressure on the upper handlebar to keep the bike from continuing to fall into the turn (oversteer) more than I wanted. I don’t recall the Tourances dong this when new.

I rarely toss a set of tires that still have life in them, but away they went. I’ve read that lots of people like the Tourance Next, but this sucked.

From www.mitas-moto.com

Enter TerraForce

The first impression I had of the TerraForce was the increase in vibration. It seems that the very open sipes create as much or more vibration as the 50/50 E-07s.

The tires handled fine. Considering how poor the worn Metzelers handled, it was no surprise the bike felt worlds better. The bike felt neutral, unlike the oversteering the worn Metzelers produced.

Tire “feel” is a big contributor to rider confidence and the TerraForce delivers reasonably well at street speeds. However, push hard and the tires go numb. I don’t get a good sense that the tires are hooking up the way a 100% street tire does, and nothing like a supersport tire.

But, that’s no surprise since the intended job of the TerraForce is to endure sharp gravel and the occasional impact with a log or rock. This requires a measure of carcass stiffness as well as a harder compound for both pavement and gravel endurance.

See the complete list of Riding in the Zone articles here.

Warm and Dry

I took the Tiger to the racetrack for three days. The first two days were dry and sunny. I was instructing in the novice group so I was more or less rolling around, not getting much heat into the tires. And little heat kept the tires numb and made me apprehensive about pushing harder. Bummer.

The second day was also warm and dry. One of my other instructors needed to borrow a bike to work with his assigned group at the Non-Sportbike Track training Day, so I lent him the Tiger. At lunch I asked Pete what he thought of the bike. He said it did well as a street bike and was better tn he expected for a tall ADV machine. Cool.

Pete, poised to put the TerraForce to the test.

But, he added that he had gotten his knee down in several corners! Whaaaa? Here I was thinking the TerraForce tires were a significant limiting factor for going quick and Pete goes and drags his knees …on my bike! For perspective, Pete is one fast expert racer who regularly challenges for the win on his SV650 at Loudon. But, I couldn’t let that stand, so I reclaimed the Tiger and headed out to see how the heck he did this.

Sure enough, the tires had decent feel. This obviously came from the heat Pete put into the carcass. Knowing that Pete pushed to knee-dragging lean angles gave me confidence to push harder and harder until I too got a knee down in a few corners. I had to hang off like a carnival monkey on the tall Tiger, but I did it.

Even more important was the fun factor. The tires gripped tenaciously, making this the most fun session I had all weekend.

What I learned is that if you get the tires nice and hot, they transform into a decent sporty tire. Caveat…you will not likely get the tires (or any tires) this hot at sane street speeds. But, as a street tire, the TerraForce gives plenty of grip, even if they don’t give great feel when cornering.

Zipping around in the rain on a wet racetrack.

Wet and Cool

The third track day was wet and cooler. The forecast was for rain on this day, so I brought the Tiger as my rain bike, leaving my Street Triple track bike for the dry sessions. I know that street tires are a better choice than supersport race tires because they warm up faster and the rubber compound has more silica for better wet grip.

And yes, I felt confident riding in the rain to a point where I was able to ride at a very entertaining pace. It took a few laps to get some confidence, but once some heat was generated, I was good to go. See the video below.

Off-Road

The TerraForce isn’t great in the mud.

After replacing the 50/50 E-07s with the 90/10 Terraforce, I wasn’t  sure whether off-road performance would hold me back. It turns out that the 90/10s handle the rocky terrain just fine. As a matter of fact, they gave me zero problems when climbing a somewhat steep hill with some large ledge rocks.

Mud is another matter. I was with a student in the unmaintained forest roads where I conduct the Adventure/Dual-Sport bike courses when I ended up in a decent mud hole. With some momentum, I was able to get through the muck, but the tires couldn’t gain any traction and spun mud all over.

If your riding includes the occasional off-road adventure, then I wouldn’t hesitate with the Terraforce. Just know the limits.

Wear

Mitas TerraForce Rear at about 5,000 miles. Notice the “cooling ribs” and zero chicken strips.

My first set of TerraForce tires had about 5,000 miles on them before I had a puncture in the rear tire. I could have plugged the hole, but decided instead to get a new set because I was heading on a long trip down the Blue Ridge Parkway and didn’t want any trouble. In my estimation, the tires had about 4,000 miles left in them. Do the math and I bet you can get a solid 10k out of the rear and perhaps 10k from the front. Your results may vary.

The front tire at about 5,000 miles. The tread blocks wear a bit unevenly.

However, the large blocks seem to wear unevenly in the front. Not bad, but still this could be the determining factor in replacing the tires and not tread depth. See photos.

Wide, Open Sipes

As I mentioned earlier, these grooves tend to cause vibration and some noise and that the big blocks tend to wear unevenly.

One unique feature of the TerraForce (and the Mitas SportForce) is the little cooling ribs at the base of the open grooves.

The plugged puncture in the thin part of the carcass. Wide grooves make the tire vulnerable.

The one thing to consider is having such open grooves makes the tire vulnerable to punctures. I had a rear flat while with street students, becasue a sharp stone penetrated the thinner part of the carcass inside the groove where the rubber is thinner. The rock was the size of a pea…small enough to get inside the groove, but big enough to puncture. Keep this in mind if you ride a lot on gravel roads with small stones.

www.mitas-moto.com

Sizes

See the chart for available sizes.

Go For It

The TerraForce are a great  90/10 tire that will likely suit your needs just fine for pavement and some off-road. Click this if you want to visit the Mitas website.

If you plan to buy the TerraForce or any other product, check with Twisted Throttle. Please click the link or the image then type “mitas” in the search field. This will send you to the twisted Website and any purchases you make help support this blog. BIG Thanks.
TT_Homepage_logo
Twisted Throttle helps support this blog. They also have quality luggage & racks, riding gear, electronics, auxiliary lighting, bike protection, and much more. Happy shopping!

See the complete list of Riding in the Zone articles here.

Please Donate to Keep the Articles Coming

If you liked this article and the many other articles on this site, please toss a buck or five into the hat. It’s greatly appreciated!

    • Click the PayPal “Pay Now” button.
    • Then indicate quantity in $2.00 increments. Example: put “2” in “QUANTITY” field to donate $4.00, “3” for a $6.00 donation, etc.

Why $2.00? Due to the PayPal fee structure, a $2.00 donation is significantly more beneficial compared to a $1.00 donation.

Thank You!


Check out these posts:


Stay Informed: Subscribe NOW!
Trianing-Tours_LandingBe a Better Rider: Sign Up for Personal Training with Ken
Support Riding in the Zone: Buy a book
Support Riding in the Zone: Buy products from Twisted Throttle

The Cure for Riding Anxiety

Become a patron to support the website. Thanks

Since few of us are masters of every aspect of motorcycling, we invariably experience bouts of low-level anxiety or even panic. According to experts from Legacy Healing in Fort Lauderdale  center, anxiety mostly sucks, but it can also be a useful tool for helping you be a safer and more proficient motorcycle rider…if you pay attention.

From my article published in Motorcyclist Magazine:

“The best riders frequently check themselves for signs of stress and then act to regain relaxed composure so they can enjoy a safer and more gratifying ride. With anxiety out of the picture, they can also identify where the stress is coming from, whether that’s a lack of confidence in their ability or trepidation about a particularly risky environment, such as a rain-slick corner or a route riddled with dangerous intersections. Whatever the source, these riders use their awareness of stress to recognize their comfort limit and then back off so that anxiety does not affect control, safety, or fun.”

Too bad I couldn’t follow my own advice.

My Story

Recently, I’ve had a series of off-road mishaps of varying levels of severity that have messed with my Mojo.

I figured perhaps upgrading to a more capable and lighter machine would help. So, I sold the sturdy and rider-friendly KLX250/351s and bought a beautiful KTM450 XC-w. I never intended to buy the KTM, but the price was right, it was in a nearby town and it was sexy as hell.

I knew from the day I bought it that the 450 was more bike than I wanted or needed. It’s not that I didn’t think I could manage the power or the edgy handling, but the fact that it was a less rider-friendly bike made my anxiety worse. Ugh.

So, I remedied the situation by buying a Honda CRF250x. It’s the bike I should have bought in the first place. It’s more like a play bike than the KTM, but more capable than the KLX. Let’s see if that was the cure.

The Test

With the confidence of a less intimidating bike I went riding with my friend Paul at his local dirt track. This area features a motocross-type sand section and some tighter technical trail stuff with some steep drops and climbs, as well as log crossings. The last time I was at his track on the bigger KTM I managed to overcome the challenging sections, but with difficulty. Going in, I totally expected things to go easier on the 250x.

Paul contemplates my plight.

Turns out that the cure was not a different bike. Sure, it helped, but the anxiety was still there. I stared at a particularly scary looking traversing hill wondering WTF? I got past it and tackled the hill several times, but was tense and on the edge of panic much of the time. The rest of the course was easier, yet I still felt anxiety.

Paul, being the supportive friend he is, told me to slow down and just roll around. I was trying to ride the way I am used to riding…sliding the rear and zipping at a decent pace. Well, that was just adding to the anxiety. Once I slowed down to a novice pace, I started having fun and things went sooooo much better.

Emotions trump Logic

So, why wasn’t I able to follow my own advice as outlined in the Motorcyclist article? Because emotions tend to trump logic. I wanted so much to overcome the fear that I pushed on instead of doing what I tell my students…slow down to reset your sense of confidence and competence.

I’ve never been as confident off-road as on pavement or on the racetrack, so I tend to think of myself as a rookie rather than the reasonably competent dirt rider I really am. By slowing down, I am reminded of my true competence. This reinforces the positive. And the more I ride this way, the faster I substitute anxiety with confidence.

By riding in complete control at all times I am (re)building a solid foundation that then allows me to climb out of this rut. If I were to fruitlessly keep pushing without stepping back, I would surely dig the hole even deeper and just reinforce the hold anxiety has on me.

The Cure

The CRF250x is more user friendly than the big KTM.

I tell my on-street students at the beginning of the day that we will be riding well within their comfort zone, becasue they can’t learn and build confidence if they are using all their attention on managing anxiety. And when it comes to my track day students, I tell them that they gotta go slow to go fast.

I believe that most anxiety can be traced back to just a few things…some are physical, like slow speed maneuvers or weak countersteering, but most are mental. Learning tricks to control the bike and read the road or trail with more confidence are keys.
 
Whether it’s street or dirt riding…Slow down so you can keep your eyes and attention well ahead of you. That way things are much easier to process. If you use too much bandwidth to manage anxiety you look down, tense at the handlebars and everything goes pear-shaped.
Of course, slowing down is only part of the cure of riding anxiety, but it’s an important place to start. You will likely also have to sharpen weak control skills that are adding to your anxiety.

Pressure to Measure

This is moments before I lost the front wheel over the high lip of a berm and gave myself some serious whiplash. I was pushing myself too hard trying to get past the intimidation I felt with the KTM.

This all sounds like solid advice, but I can tell you that it’s not easy to follow. If you’re like me, you have an established image of yourself as someone who can manage the challenges of a typical dirt (or street) ride and not be so slow as to hold up the group’s pace.

I’m also competitive, which doesn’t help. I tend to ride fast when the right thing to do is hang back and not feel compelled to keep up.

The takeaway here is to listen to your anxiety and respect it for its attempt to alert you to SLOW DOWN. Instead of forcing yourself to tackle challenges with abandon, take it easy to build back your confidence.

Ignore your anxiety at your own peril. As the saying goes: check yourself before you wreck yourself.

Share your experiences in the comments section below.


Please Donate to Keep the Articles Coming

If you liked this article and the many other articles on this site, please toss a buck or five into the hat. It’s greatly appreciated!

    • Click the PayPal “Pay Now” button.
    • Then indicate quantity in $2.00 increments. Example: put “2” in “QUANTITY” field to donate $4.00, “3” for a $6.00 donation, etc.

Why $2.00? Due to the PayPal fee structure, a $2.00 donation is significantly more beneficial compared to a $1.00 donation.

Thank You!


Check out these posts:


How Can I help You? Online Coaching NOW AVAILABLE
Stay Informed: Subscribe NOW!
Trianing-Tours_LandingBe a Better Rider: Sign Up for Personal Training with Ken
Support Riding in the Zone: Buy a book
Support Riding in the Zone: Buy products from Twisted Throttle & Amazon


Become a patron to support the website. Thanks

Long-Term Review: 2016 Triumph Tiger 800 XRx

Become a patron to support the website. Thanks
2016 Triumph Tiger 800XRx

The 2016 Triumph Tiger 800 XRx has spent this past summer as my instructor bike (both on-street and off-road), sport tourer and general go-to machine. After putting almost 9,000 miles on the ODO since March, I can now offer an in-depth review of this bike.

As a contributor to Motorcyclist Magazine and lead instructor at Tony’s Track Days, I have the opportunity to ride lots of different motorcycles. However, I get only a short amount of time in the saddle of these bikes.

During a on-day press launch or track session I get immediate impressions of power delivery, suspension compliance, fit and finish and ergonomics, but that’s about it. After putting 9k on the Tiger in all sorts of conditions I can share a comprehensive review.

Why the Tiger?

dual-sport-static The Tiger is versatile! It is capable of crossing the country, commuting, scratching around at a track day and riding on some pretty gnarly dirt roads and trails. While the 800 is a Swiss army knife, it is a compromise. The Tiger is a fun street bike that can keep up with most supersport bikes in the hands of a good rider at reasonable speeds. It is also a comfortable traveler that can handle a decent load of luggage and even a passenger.

As an off-road mount, it is best suited to mostly graded fire roads, but is surprisingly capable managing rocky trails. As with all heavy ADV bikes, you’ve got to be smart about what you’re getting into. I tackled a rather steep and rocky bit of single track trail that I handle easily with my KLX250s, but was a handful on the Tiger. I made it, but it coulda been ugly if I had fallen, since I was alone with no cell service.

The Tiger encourages discovery. The Tiger expands the number of places I can ride, by a huge margin. The 800 is totally at home navigating the many unimproved roads and tight paved byways that snake through Western Massachusetts where I live. I can ride 100 miles of mostly dirt roads and stay within one hour of my house! Lucky me.

There are other machines that also fit the bill; the BMW F800GS, Kawasaki KLR, the super-sized BMW R1200 GS or the new and awesome 2016 Tiger 1200 Explorer.  I chose the Tiger 800 for it’s features, lighter weight and reasonable.

Why the Roadie Version and not the XCx?

Mitas-poseI debated getting the more off-road worthy, spoke wheeled and taller XCx. But, I opted for the Road version (XRx) because I thought the bike would be spending 90% of its time on pavement. I also knew that the XR would be more than capable of the dirty riding I planned to tackle.

Since I am spending more time off-road than I expected, I probably should have gone with the XC. The XC is perfectly capable of long street miles and more importantly, it comes with adjustable WP suspension. Also, the XC comes with many of the things I’m ending up buying for the XR anyway, including engine, sump and radiator guards. Also, the spoked wheels and the 21 inch front wheel are more off-road friendly and more durable. Although, I’m happy to not have tube tires.

Here’s a long video review of the Tiger.


Let’s break down the review into components.

Engine

I love the power characteristics of the three-cylinder motor (based on the Street Triple motor). It has a nice combination of spunk and character with just the right kind and amount of vibration that tells you you’re straddling a machine. The vibes are never annoying. As a matter of fact, the bike is surprisingly smooth…smoother than my 2012 Street Triple R.

The whistling/snarling sound of the motor is unique. While an aftermarket exhaust will decrease weight and make for a nice sonic impression, I am perfectly happy with the way the stocker looks and sounds. Besides, I’m a proponent of quiet exhausts and I have better things to spend my money on. Read about all the accessories I put on the Tiger.

The triple is a terrific street engine, but it’s not so well suited as an off-road motor. It’s a bit too RPM-needy compared to a twin, like a F800GS. While the motor is easily controllable, it doesn’t exactly plod along the way you need an off-road motor to do from time to time. I found the Explorer 1200 to be better at slow speed plodding than the 800, partly because the ample torque was always on tap, whereas the 800 needs some revs. I’ve gotten used to it, but it is the one area where a BMW might be a better choice.

The engine has given me zero trouble, and if my Striple is any indicator, it will be reliable as a stone.

Power Delivery

As far as power delivery goes, the ride-by-wire throttle is super-light and takes some getting used to. When I first got the bike, I struggled to calibrate my right hand to keep the throttle steady. I’ve since learned to manage the sensitive throttle just fine, but I wish there was a simple way to increase throttle tube resistance.

Part of the reason the light throttle isn’t a big problem is because the fueling is very good. One of my pet peeves is snatchy fueling and this is a big reason why I rejected the FJ-09 as a contender. One area where the Tiger’s fueling falls short is when descending long hills, the fueling “hunts” while decelerating under engine braking. It’s not that bad, but it annoys me.

The Tiger comes with Traction Control (TTC) that can be set to either “Road”, “Off-Road” or “Off”. Road mode enables full TTC, whereas Off-Road mode allows more wheel slip. Sometimes even the Off-Road TC can intervene too much when climbing rocky or washboard surfaces. Thankfully you can turn it off. See more about Rider Modes below.

Clutch and Transmission

The clutch is light and progressive for easy launches and the transmission is flawless (it is sourced from the Daytona). I can launch smoothly from a stop and perform clutchless upshifts with ease. The ratios are just fine for street riding with the engine spinning around 5k in top gear at highway speeds, allowing plenty of zip when accelerating. The clutch lever is adjustable and neutral is easy to find. Not much more to say.

Brakes

The twin piston Nissin brakes are nothing special. They aren’t radial mount 4 piston units found on higher end machines like the Street Triple R, so they don’t provide exceptional feel and aren’t terribly powerful, but they don’t need to be. Instead, they are well-suited for the mission of slowing a 500 pound ADV bike with predictability and control.

The Tiger comes with ABS that can be set to either “Road”, “Off-Road” or “Off”. Road mode enables full front and rear ABS, whereas Off-Road mode disables ABS at the rear wheel and allows more wheel slip in the front. I don’t fully disable ABS. I like ABS.

The front brake lever is adjustable for reach and of course you can rotate the perch on the tubular handlebar to get the right angle for your primary use. I position my lever slightly low for street riding (sitting), but it ends up being a bit too high when standing off-road.

The rear brake has decent power and control and the pedal has a step up on the inner edge to allow easy use when standing up. Just rotate your right foot inward (pigeon toe) to use the tab.

Foot Pegs

The Metzeler Tourance Next tires did okay on the track.
The Tiger did great on the track, especially after I took off the peg feelers.

The foot pegs are positioned perfectly for sitting and standing. The peg size is broad enough for reasonable comfort and stability when standing. The rubber inserts can be removed by simply pulling them off. This helps for off-road conditions where you need the metal serrated teeth to grip into your boot soles. Getting them back on takes some fussing.

The Tiger has one strange design flaw. Surprisingly, the passenger pegs are mounted to frame brackets that are welded to the non-removable subframe. This means that a tipover or crash could break the bracket and ruin the whole frame. The Explorer 1200 has bolt-on passenger peg brackets.

The pegs are located low enough for all sensible street riding, but are a bit low for more extreme cornering. I rode the Tiger at a track day at Loudon and after a few sessions of grinding the peg feelers, I removed them.

Suspension

The forks are the weak link in this bike. As I mentioned earlier, I really wish I had the adjustable WP suspension. It’s not that the non-adjustable upside down Showa forks are lousy, it’s just that I’m a bit of a suspension princess and non-compliant suspension really annoys me.

Yankee Beemers grass Moto-Gymkhana

The bike manages bumpy roads and off-road surfaces just fine and is always stable, in control, and handles nicely in corners. So, what’s the problem? Well, the forks tend to jackhammer over ripples and small bumps on smooth pavement. Either the forks have a lot of static friction (Stiction) or the compression damping is too high to allow the forks to respond to these small irregularities.

Off-road, the suspension is great. It manages sharp rocks fine at a moderate pace and handles front wheel lofting, but expect serious bottoming if you plan to do any sweet jumps. At the Yankee Beemers Rally, I participated in the grass Moto-Gymkhana where the fast perimeter course included a jump and the inevitible landing. Also, the landing off the teeter totter resulted in significant seismic activity.

Rider Modes

screen-shot-2016-11-17-at-9-49-41-amI mentioned ABS and TC settings above, but there are also Power Delivery (MAP) Modes to discuss. The Tiger has 4 MAP Modes: Rain, Road, Sport and Off-Road. See the pages from the Owner’s Manual on the right for details about how they differ.

To change various modes you have to reach to press the “M” button on the dash and then close the throttle and squeeze the clutch for it to take. FYI, the off-road mode will revert back to the last road mode if you turn off the key, which is why I often shut off the bike using the kill switch if I’m going to stop for a minute to, say, take a photo.

screen-shot-2016-11-17-at-9-49-51-amFrankly, I could do without the MAP modes. Sure, there is a slight difference between each mode, but it’s subtle. I tend to keep the bike in Road Mode most of the time, even in the rain, and the Off-road MAP seems no different than the Road MAP. The fueling on the Tiger is so well sorted that I find it unnecessary to switch to a “softer” setting.

And the “Sport” MAP is not really that much sharper than the road mode. I would not consider the base XR, because I couldn’t do without adjustable/switchable TC for off-road riding.

Comfort

The Tiger features the ideal comfort package; high tubular handlebars that are adjustable for angle and height; a “Comfort” seat that is one of the best I’ve used; great legroom. Yet, I’ve never had more trouble being comfortable on a motorcycle.The thing is that I get a nasty cramp between my shoulder blades almost immediately.

I added Rox risers, rotated the bars in every conceivable way, with no improvement. It was only recently that I determined that it is my personal anatomy to blame. Not only is my hunchback posture a likely problem, but also I broke my collarbone last year which seems to have messed up my symmetry enough to cause this cramping. The cure is to stretch the pecs to regain the symmetry and strengthen my upper back. Stay tuned.

When standing, the side panels at the rear/bottom of the tank cause my knees to splay out more than I like. This causes a slight imbalance that I have to make up for with my arms and back, which is tiring after about 6 or 8 miles of rough off-road terrain. The Explorer 1200 is better because the area where the seat meets the tank is narrower.

The Tiger 800 is a tall bike. Its adjustable seat height is 33″ at its low setting and 33.8 ” at the higher setting. (a Low seat version is available with a range of 31.1″ and 31.9″). I am 5′ 9″ with a 32″ inseam and am able to touch with both feet touching.

Miscellaneous

Electronic cruise control is cool. It’s useful on highway trips and when I want to zip a vent with my right hand without stopping. However, I don’t use it as much as I thought I would. It’s very easy to use and works perfectly, though. Pro Tip: use the rear brake to disengage the cruise control to avoid the abrupt deceleration that occurs if you twist the throttle off to shut it off.

The Adjustable Windscreen works really well for me. Some people complain that it wobbles a lot and doesn’t manage wind as well as they’d like. I have no problems at all with the stocker. The screen is moderately adjustable, but not too much, so I added an adjustable MRA Spoiler blade, which makes the stock shield more versatile.

Accessories and Luggage

I wrote an article on accessorizing the Tiger. Read it Here.

Tires

tiger-mitas-oem
Mitas 50/50 tire on top. Metzeler 90/10 tire on bottom.

The stock Metzeler Tourance Next tires are fine for most people. I did a track day on them and they stuck, but delivered very little feel. This is expected because a 90/10 tire is designed to handle the rigors of rocks and such and is typically stiff with less emphasis on pavement performance.

For the last 6,000 miles, I’ve been rocking the 50/50 Mitas E-07. I wrote a review of the Mitas E-07 50/50 tires. In a nutshell, these tires are great and allow me to go places I never thought I could. For the Tiger Roadie, order the 110 front tire to avoid the ridiculous oversteer. Order the standard (not Dakar) version for the 800.

How is it to Ride?

Slow speed Maneuvers

The Tiger is mostly easy to ride but is cumbersome at a standstill. Once you get the bike rolling at about 5 mph, then all is well, but as soon as you go below that speed, the bike turns into an awkward, top heavy beast. Unlike ADV bikes with a lower center of gravity, the Tiger carries it’s weight up high. The engine is mounted high to give ground clearance. Mounting the 5.3 gallon fuel tank on top of that doesn’t help. This all makes for a bike that wants to topple over at standstill. It doesn’t help that I have a top box and tankbag.

That doesn’t mean the bike can’t do tight U-turns. It absolutely can. You just have to get up to at least 3- 5 mph and keep it there. 7 mph is better. The higher speed means you have to lean the bike over more to tighten your arc without slowing down. Learn how to ride slowly by reading this article.

Steep, slippery and rocky...a bit difficult for the Tiger.
Steep, slippery and rocky…a bit difficult for the Tiger.

Off-road

The Tiger is an absolute hoot on dirt roads and dual-track trails. I’ve done some bony hill climbs and rocky descents and tackled terrain I didn’t think possible on a 500+ pound motorcycle. But, the sheer size of the bike makes me a chicken when riding in sand, slimy muck and deep loose gravel. The fact is that the high weight causes the front tire to plow into the soft surface. The solution is to be on the gas. That’s why big ADV bikes tend to struggle when descending and are better at ascending where you’re on the gas.

The problem is that all that weight has inertia that will get you into trouble real quick if it starts heading in the wrong direction. A mistake on a 250 pound dirt bike can go almost unnoticed, but not with these ADV beasts.

Stay away from really mucky, loose terrain and you’ll have a blast. Oh, and be sure to ride with friends in case you get horizontal. And learn how to pick up your bike by yourself, as well. I strongly recommend you get some off-road training before venturing off road on your ADV machine.

Corner Scratching

The Tiger is a little bit dirt bike and a little bit sport bike. Even with the 50/50 tires, I can pretty much keep with any sportbike ridden by an average rider. I had a great time on Deal’s Gap and at a track day. While it has it’s limits, the bike railed through the turns with good stability and decent precision. The 19″ front wheel helps with high speed pavement stability compared with the 21″ front wheel on the XC.

Traveling

The Tiger is a champ on the highway. I rode the lower half of the Blue Ridge Parkway and put on several highway miles. Mount a tankbag, sidecases and a windscreen spoiler blade and off you go.

The Tiger 800XRx has proven to be a terrific motorcycle that has expanded my riding immensely. I hunt for roads that I’ve always wondered where they went; roads I never would have ventured on with the Sprint.  I’m happy that I own the Tiger and will always have an Adventure bike in my garage.

I did a bit of two-up riding with my wife, Caroline while in NC. We decided to spend a day doing the “Gravelhala” that mostly parallels the Cherohala Skyway. Since her z750s wasn’t a great off road bike, she jumped on the back and we took off. Overall, Caroline liked the flat, wide seat and the large grab rails. The rubber footpegs we nice, too. She really enjoyed having the top box to lean against for the bit of road riding we did together. Overall, it’s a good mount for a passenger.


Become a patron to support the website. Thanks

Adventure Accessories for the Triumph Tiger 800

Become a patron to support the website. Thanks

Mitas-bike-2The arrival of the newest addition to the RITZ garage is a Phantom Black 2016 Tiger 800 XRx. The Tiger has proven to be a true all-arounder. I have toured on it, done a track day, conquered Deal’s Gap and navigated some pretty gnarly roads and single track on the Tiger.

See my LONG-TERM review of the Tiger 800 XRx

I bolted on some accessories (“farkles” to you ADV guys) to help increase the Tiger’s versatility. My friends at Twisted Throttle took care of getting me all the best accessories I needed. They have some of the best Adventure bike accessories. Here is what I installed.

Bike Protection

SW-MOTECH Crash Bars

SW-MOTECH Crash Bars

SW Motech is a German company specializing in top-shelf bike protection. Their crash bars are seriously beefy compared with others I’ve seen, including the Triumph branded bars. The trade off is weight. The SW bars add some pounds to the bike, with much of it held high where the upper loop is located at tank level.

The advantage of the high loop is the protection offered to the fuel tank. But, realistically, a low bar that protects just the engine is a fine option, partly because if the tank makes contact with the ground, it is the plastic side panels that get nailed, and those are only about $60.00 to replace. An good engine guard alternative are the R&G Engine Guards.

Another problem I found with the high SW bars is vibration. It seems as though the setup acts a bit like a tuning fork. Although I noticed the vibes on my first ride with them installed, I no longer notice it at all so this should not be a deal breaker. If you want maximum protection, the SW-M bars are the way to go.

Skid Plate/Sump Guard
SW-MOTECH Skid Plate/Sump Guard

SW-Motech Skid Plate (Sump Guard)

The Tiger comes with a decent plastic skid plate, but it is not beefy enough for the type of abuse the bottom of the engine and frame will be exposed to so I ordered the SW-Motech skid plate. It mounts easily and covers much more of the vulnerable underparts not protected by the OEM plate, including the oil filter, lower exhaust canister and frame rails. It’s quite satisfying to hear the sound of rocks pinging off it’s surface. Money well spent.

R&G Radiator Guard

Putting a hole in a radiator from an errant stone  will end your day real fast and is an expensive repair so I installed the R&G rad guard. R&G makes a heavier duty stainless steel guard, but I went with the lightweight aluminum unit. It installs easily and looks great.

I need a Hugger
R&G Hugger

R&G Rear Hugger

A Hugger is a rear fender that mounts close to the rear tire to help keep your rear shock clean. The R&G hugger bolted on perfectly and gives a custom look to the Tiger’s rear end.

Pyramid Fenda Extenda

The Fenda Extenda mounts to the bottom of the front fender to help keep crap from flying onto the front of your engine and radiator. It requires some drilling, but is easy enough to install.

Luggage

Side carriers and crash bars

SW-Motech Hard Bag Sidecarriers

I already owned a set of DrySpec D20 drybag saddlebags and wasn’t planning to buy hard cases until I realized that the soft saddlebags needed to be supported by a side carrier to avoid drooping under the rear fender and seat. I went ahead and bought the SW-Motech side carriers for use with the D20s but then decided to go for some side cases after all (see below). These carriers are awesome. They quickly release from the bike with just a twist of 4 Zeus fasteners. And the quality is top-notch. They carry all brands of side cases with the proper adapter kit.

The Givi E-22 side cases look good and are narrow and light.

Givi E-22 Side Cases

There are a lot of side cases to choose from, including the Trax Boxes and cases from Givi and other manufacturers. But, I chose the most lightweight and inexpensive hard case option; the Givi E-22. The 22 is an updated version of the basic E-20 that has been around for years. The new shape looks great and it is just big enough for my needs. Their small size means that the width of the bike when they are installed is fairly narrow.

The cases open at the top so my contents don’t go spilling onto the pavement when I open them. At the low price of less than $250.00 for the SET, you don’t get premium construction, but they have held together just fine and I expect them to perform well for many seasons. FYI, I mount mine backwards from what is intended because I like the way the rearward slop looks on the Tiger.

Bags Connection City tank bag with Quick release ring.

Bags-Connection City Tank Bag

The BC tank bags are pricey, but are also well made and highly functional. The quick-connect tank ring is really easy to use and is totally secure. I ride the roughest roads with the small City bag and it has never flown the coop. For Tiger 800 riders, you want to mount the top ring as far back as possible on the bag so it doesn’t interfere with your man (or woman) junk when standing, especially on uphill climbs.

You can opt for the electrified tank ring version that gets power inside the bag just by mounting it to the special tank ring. I chose the non-e setup and feed a Euro plug-to-SAE cord a SAE-to-Cigarette socket through the front cord port to get power from the Triumph power socket to the tank bag. I charge my phone, Interphone Bluetooth Comms and whatever else needs juicing up during a ride.

tiger-steelrack
The SW-MOTECH Steel rack mounts over the stock luggage plate.

SW-Motech Topcase Steel Rack

I already had a Coocase topcase from my last bike, but I needed a way to mount it to the Tiger. I could have drilled the OEM luggage plate and rigged up the Coocase to it, but I decided to do it right by buying a SW-M Steel rack. The rack is super-strong and mounts over the plastic Triumph plate for a rugged mounting solution. You can opt for the slightly lighter Alu-Rack, but I like the look of the Steel rack and the lower price.

BDry Spec Drybag saddle bags with SW-MOTECH side carriers and City tank Bag.
Dry Spec drybag saddle bags with SW-MOTECH side carriers and City tank Bag. The Coocase top box is mounted to a SW-MOTECH Steel Rack.

DrySpec Saddlebags & DrySpec Duffle

A lot of ADV riders opt for Hard Cases, like the SW-MOTECH Trax Boxes or the GIVI Trekker Cases. I went with more street-oriented Givi E-22 Side Cases for road and touring. But for real off-road trips, I opt for soft side luggage for two reasons. One, the DrySpec Saddlebags will not get damaged in a fall, and two there is no risk of getting a leg crushed underneath the boxes in a fall or having my calf come in contact with the front of a box when I have to dab my foot while in motion.

The DrySpec Saddlebags & DrySpec Duffle are both totally immersible and sturdy enough to over-pack. They are small, but that just forces me to pack light. The integrated mounting straps are really secure and easy to install.

Tool Tube
Tool Tube

Tool Tube

The space between the side carrier and the right side of the Tiger is occupied by the exhaust, but there is lots of space on the left side for something. That something I chose was a Tool Tube. I put extra tools, a small can of chain lube and a few other items in their for safe keeping.

Comfort

MRA Spoiler Blade and GPS Mount.

MRA X-creen Sport Clamp-on Air Spoiler

I get a ton of questions about the spoiler blade I have mounted on the Tiger’s stock windscreen. A lot of people have replaced the stocker screen with MRA or Givi screens, but I like the look of the stock screen, and with the addition of the adjustable MRA X-creen spolier blade, I am perfectly happy with the way it manages wind. I wrote a complete review of the MRA X-Creen earlier when I first mounted one on my Sprint RS. A great option.

roxROX Bar Risers

Standing is a big part of off-road riding. The stock bar mounts were okay, but the reach when standing was a bit far and I was also hoping to find a better bar position that alleviated the cramp I get in my upper back. The ROX risers are nicely made and offer a wide range of adjustability with two points of rotational movement. Now, I can stand naturally when riding off road, but the back cramp is still there. I just can’t seem to find a position that helps this problem. I will continue to work with the ROX risers to find that solution.

Electronics

RAM Mounts and X-Grip Phone Holder

RAM Mounts and arms reliably hold my GoPro, iPhone and GPS. There are so many options that it forces you to get creative about where to mount the RAM ball and then which RAM arms to use for your particular needs.

The X-Grip has proven to be a secure and easy mount for my iPhone 5 and 6, even when riding single-track trails on my KLX. Just be sure to use the RAM Tether on rough terrain.

GPS Holder with RAM ball.

SW-Motech GPS Mount

This Mount positions your GPS (or other device) right smack dab in the middle of the windscreen, just above the instruments using custom bracket and a RAM ball and arm. It’s a perfect solution to prevent having a GPS cluttering your handlebars. It is high quality and mounts easily.

Tank Bag Power

Click the title link to see various electrified tank bag options. I mentioned the tank bag system I have that uses a Euro plug-to-SAE cord a SAE-to-Cigarette socket to power the tank bag. Either option is a good one. Having power in your tank bag is a necessity in today’s e-world.

Tires

tiger-mitas-oem
Mitas 50/50 tire on top. Metzeler 90/10 tire on bottom.

Mitas E-07

I wrote a complete review of the Mitas E-07 50/50 tires. In a nutshell, these tires are great and will allow you to go places you never thought you would. For the Tiger Roadie, order the 110 front tire to avoid the ridiculous oversteer. Order the standard (not Dakar) version for the 800.

Mitas Terra Force

I have not mounted these 90/10 dual sport tires yet, so keep an eye out next year for a full review.


Become a patron to support the website. Thanks

Crashing Sucks: Ask Me How I Know

Collarbone-XRay
Broken Clavicle

I crashed. In the scheme of things, the mishap wasn’t a huge affair. I was only traveling about 15 mph when I tucked the front tire of a brand new Ducati Multistrada, but the vertical force was enough to pop my collarbone. It can clearly be seen on the medical imaging, which may be utilizing services such as TestDynamics.

Dirt bike riding and road racing aside, it’s been quite a while since I last found myself on the ground next to or underneath a motorcycle. In such situations, it’s crucial to get yourself checked at urgent care services in downers grove.

My last road mishap was in 1978 when I fell victim to a dreaded left-hand turner at an intersection. I took a ride in the blinky bus (aka ambulance) but was promptly treated and released. My 1973 Yamaha TX650 didn’t fare as well and was sold for parts. Riders who also got injured in a vehicular crash may seek legal assistance and personal injury legal advice from a motorcycle accidents personal injury attorney when filing a claim.

This most recent crash involved a street bike, but didn’t happen on the street, rather it occurred during a joint Bosch/Ducati press event in Detroit Michigan on the gravel test track at the Bosch proving grounds. You see, I was invited to test the most-awesome safety electronics found on the newest Ducati Multistrada. FYI, the cornering ABS is truly amazing.

Racing Crashes Don’t Count, Do They?

Racetrack crashes have also been relatively rare but do occur a bit more frequently, which is the result of pushing the limits or vying for a podium finish.

My previous track crash happened about 3 years ago when I pushed the front tire of the Twisted Throttle BMW S1000RR a bit too hard (I sense a theme) into a cold and slightly damp turn 11 at Loudon trying to get a good knee down photo. No injury, but a truckload of embarrassment.

A few years earlier I fell in turn 5 at New Jersey’s Thunderbolt Raceway when an old and cold front tire finally gave up and lowsided me onto the pavement. No injury to me, but the bike flipped and stuff broke. Despite the bike looking bad, both the ZX6R and I were back on track within two hours time.

A few racing crashes between those two mishaps round out my thankfully brief crashing resume. That’s really not too bad considering I have ridden a lot of street and track miles over almost 40 years with many of those miles dragging knee on the racetrack.

Crashed_Multi
Not too bad, really. Photo: Steve Kamrad

Crashing the “Uncrashable” Bike

Like I said, the crash that involved the new Ducati Multistrada, and resultant fractured clavicle, wasn’t a particularly big one.

I simply countersteered the bike a bit too hard while entering a turn on the gravel test track and lost grip at the front tire. I fared worse than the bike with the Multi suffering some cosmetic rash and a broken hand guard.

Before anyone blames the technology, this crash was not the bike’s fault! The Bosch electronics are designed to prevent braking and accelerating miscues, not manage the effects of pushing a front tire too hard into a turn. And since I was not on the brakes when I tucked the front tire, the bike is not to blame. These systems only manage available traction (when braking and accelerating); they do not create more traction! Read More about the Truths About Electronic Stability Control.

Why?

You may be asking why I would do such a silly thing. Surely I know enough not to push a 500+ pound street bike with quasi-dual sport tires on gravel, right? Yes, normally I would have never pushed the bike this hard, but what caused me to do this admittedly dumb thing stems from four factors:

  1. I was fooled into a false confidence: I had just performed mind-blowing feats of daring on wet pavement that warped my basic understanding of physics. This was possible because of the absolutely awesome Bosch electronics package that is integrated into the Multi. Traction control that allows hamfisted throttle inputs while dragging footpegs in the rain! Maximum braking on wet pavement while leaned at 37 degrees! Unbelievable.
  2. I was tired: Testing the TC and Corner ABS for like 20 minutes made me a bit woozy and I had barely recovered when I took to the gravel track. “Just one more run” was one run too many.
  3. A photographer was pointing his evil lens at me: This isn’t the first time I’ve pushed harder knowing that a camera is pointed my way. Most times, I simply drop a little deeper into a corner and turn my head a little farther to ensure my body position and general awesomeness is captured. This time, I was trying for the best action shot that would accompany the magazine article.
  4. I have just enough off-road confidence to get myself in trouble: I had already done 5 runs on the gravel course and was impressed with the way the Pirelli Trail II tires worked as I drifted the bike out of the corners using the limited traction control setting in “enduro” mode. But, when push came to shove, I wasn’t in quite the right position and was too slow on the throttle to keep the front tire from plowing through the gravel.
  5. I didn’t heed warnings coming from my inner voice: In hindsight, my inner voice told me to call it a day. I had acknowledged to myself that I was tired. But, just before I fell I made a few mistakes that indicated that I was pushing beyond my ability at that particular moment. My voice of warning was speaking, but did I listen? No.

Being “that guy”

As I got to my feet and shut off the engine I was in utter disbelief. Had I really just dropped a brand new Ducati? With shock wearing off, my inner voice began tormenting me with doubts about my professionalism, competence and judgment. Not surprisingly, the Ducati and Bosch folks were gracious about the whole thing (apparently this happens more than people think).

I ride motorcycles, and I ride them hard. So, I should expect an occasional mishap. However, part of me actually thought I had somehow trained myself out of being human, insulating myself from simple mistakes. While I have worked hard to be the best rider I can be, I am not (yet) perfect.

Getting Over It

My collarbone is healed after 8 weeks and I’m back on the racetrack and street. As expected, part of me is a bit spooked about gravel surfaces, but not enough to matter. I’m back to riding hard and feeling good again. A big reason why I bounced back quickly is because I know why the crash happened and how to avoid it in the future. It’s a lot tougher when you don’t know what happened and don’t know how to avoid a future crash…that can get into your head and under your skin.

To avoid a similar crash in the future I’ll be more mindful about my limits at any given moment.


Please Donate to Keep the Articles Coming

If you liked this article and the many other articles on this site, please toss a buck or five into the hat. It’s greatly appreciated!

    • Click the PayPal “Pay Now” button.
    • Then indicate quantity in $2.00 increments. Example: put “2” in “QUANTITY” field to donate $4.00, “3” for a $6.00 donation, etc.

Why $2.00? Due to the PayPal fee structure, a $2.00 donation is significantly more beneficial compared to a $1.00 donation.

Thank You!


Check out these related posts:


Stay Informed: Subscribe NOW!
Be a Better Rider: Sign Up for Personal Training with Ken
Support Riding in the Zone: Buy a book
Support Riding in the Zone: Buy products from Twisted Throttle & Amazon
Twisted_Affiliate-Interphone-widget

The Best KLX250s Modifications

Become a patron to support the website. Thanks

KLX-pose2The Kawasaki KLX250s is a versatile combination of playbike and full-on trail burner. Right out of the box, the KLX is a willing companion, both on the dirt and on ice! It is an un-intimidating ride with a well-balanced chassis and handling. But, like many bikes, a few accessories and upgrades go a long way to improve an already good machine.

Most of the parts I installed are available from Twisted Throttle. If you decide to buy any of the items I mention in this article, please buy them from Twisted by clicking on the links on this page. That way, I get a small affiliate payment that helps me continue to write and share helpful articles like this. Thanks.

Bike Protection

Falling down is often a part of off-road riding, so it makes sense to protect the bike from damage. It’s bad enough to bend a lever or handlebar, but it’s worse if the damage strands you out in the Boonies.

SW-MOTECH radiator guards

Radiator Guards

Here is a part that is vulnerable to damage and expen$ive to repalce. Kawasaki thinks that the plastic fins are good enough to thwart an attack by a roosted rock or an errant stick or keep a radiator from being smashed in a fall, but they aren’t…trust me. I toasted a radiator on a KDX200 many years ago during a routine tipover and learned my lesson.

The radiator guards I installed are made by SW-MOTECH, a German company known for high-quality products. These aluminum beauties replace those flimsy plasti-fins and installation takes only minutes.
SW-MOTECH skidplate
SW-MOTECH skidplate

Skidplate

SW-MOTECH also made the skidplate that I installed to replace the OEM plate. The SW plate is made from a 4mm-thick aluminum base plate and 3mm-thick side plates. I’ve whacked some seriously solid rocks with this plate with no consequences whatsoever (see photo).

Barkbusters Handguards

Handguards should be at the top of the list for things to install. Not only do they protect your vulnerable metacarpals, but they also keep your levers from bending or breaking when you fall or rap a tree.

The Barkbusters are the original handguards and come with various shaped plastics. The VPS plastics with upper wings provide good wind and brush protection without being too large.

dual sport grips, Pro taper handlebar, and folding mirror.

Handlebar

Yes, the KLX comes with a handlebar. But, it’s a P-O-S. It will bend the first time you tipover…guaranteed. The ProTaper bar I installed has taken two significant hits and they are still like new. There are many bends to choose from, but the Henry/Reed bend is just right for me.

Dual Sport Grips

Dual sport grips provide a balance between comfort and grip for all-day control. These grips lack the ridges that are found on most off-road grips (including the stockers). Even though they aren’t as secure, I like the comfort these provide (See photo and link).

Folding Mirror

The stock mirrors are easily damaged in a tipover, so you may as well put them away now and buy an inexpensive folding mirror that can be tucked away when you don’t need it and extended when you have to do some pavement riding to get to the next trailhead.

Tires

My tires of choice for both off and on-road are Pirelli MT-21s (front) and the Dunlop 606 (rear). They aren’t the best off-road tires but are full knobbies.  They aren’t really made for much pavement riding, but offer a great (90% -off road/10%- on road) balance.

Fredette Canadian style Ice Tires

The Ice Tires I use are Fredette Canadians. These are the best combination of grip and slip so you actually learn about traction management…as opposed to the Marcel tires which grip so hard that you can throw the bike in without a care. (aka, Cheater tires)

Big Bore Kit

OK. As great as the stock KLX is, it became apparent that it could use more power when it struggled to ascend a particularly steep and rocky trail at Hatfield McCoy. The power challenge became even more of a hindrance when I started riding on ice where the vast expanse of frozen water begged for maximum drive. While I had a boatload of fun on the rock hard ponds and lakes with the stock motor churning out every bit of its 17hp, I decided to install a 351cc big bore kit from Blue Bill.

That's what the difference between 250 and 351cc looks like.
That’s what the difference between 250 and 351cc looks like.

The reasonably priced $535.00 kit includes a new re-bored cylinder, piston, rings, wrist pin, and gaskets. Of course, I could have sold the KLX and bought a bike with more displacement, but that would have certainly cost a lot more money. Besides, I like the KLX’s character, so I went for it.

Horsepower and torque increase is modest at somewhere in the 5hp and 6 ft lb range, but that is a 30% and 40% increase from stock (I suck at math, but that’s close enough). The result was noticeable once I went through a short break-in period and was able to open it up. I can now whack the throttle open and the bike responds briskly.

The Build

Installing a big bore kit isn’t very difficult, but it takes some mechanical inclination that consists of more than remembering “lefty loosey, righty tighty”. I’ve done my share of moto-surgery, so I knew what I was getting into. Still, it’s unnerving to remove the head, camshafts, cam chain, cylinder and piston ,and then get it all back together again without any important parts leftover.

Grease Monkeys
Grease Monkeys

I disassembled the bike following the Kawi shop manual and all went well. I removed all the leftover gasket goop from the case with an oiled Scotchbright pad and was ready for my friends Adam and Jay to show up and give me re-assembly help. After 4 hours or so in a cold garage, the motor fired up and sounded good. I was scheduled to ride the next day on the ice in New Hampshire, so I would soon know if we did things right.

Jetting and Exhaust

Waiting for an infusion of power.

Some jetting was needed to manage the extra displacement. I added two washers underneath the needle clip to raise it and replaced the 118 main jet with a 125 and changed the slow jet from a 35 to a 38. The air screw is turned out 2.5 turns (you have to drill out the EPA plug the get jet access). That combination worked great right out of the box using the stock exhaust.

That’s right, I’m sticking with the stock exhaust for now. I value a very quiet bike, especially when riding off road. Yes, the heavy stock can and header pipe is certainly holding back the power potential, but I’m okay with that for now. I’m told the hot setup that is also reasonably quiet is the FMF power bomb header pipe in combination with the FMF Q4 muffler.

Verdict

I made sure to warm the bike thoroughly in the 10F temperatures before taking the bike for its maiden voyage on Hoit Pond. It felt good, but the instructions were to keep it at below half throttle for 100 miles before going WFO. Using conservative throttle, I immediately felt the increase in torque, but not much in the hp department. That would come later.

I managed 4 sessions (about 40 miles) at no more than half throttle before I slowly began opening it up to break it in the way racers do: hard. It ran great and pulled strong. I was pleased. The additional power meant I could use different techniques for getting the bike turned; namely whacking the throttle mid corner. This would hook the bike up nicely to finish the corners. The old motor couldn’t manage this feat. Cool beans.

Why a KLX?

My previous off-road bike was a 2000 DRz-400e. The DRz was a great bike; it had lots of rear tire spinning, wheelie-inducing power, but was a beast, especially in tighter trails. I now know the benefits of a more docile bike with a lower seat height and civilized manners. The KLX is a great platform that just needs a bit of love.

The bike protection goodies are a must-do if you don’t want to damage vulnerable parts and possibly become stranded in the middle of the woods. And the Barkbusters are critical to protect your hands and levers. The stock handlebar will likely bend if you look at it wrong and the mirrors will break if you scream too loud. So, get those things taken care of ASAP.

As far as the power upgrade goes, I think it is a worthwhile way to spend some money. The stock motor is reliable, but barely adequate when the going gets tough. It’s a great motor for any around town riding and level off roading. If you are a fast off road rider you won’t be looking at a KLX, so no need to compare this bike with a KTM or CRF-X.

No, this is for the person who rides both on and off road and wants a bike that is easy to ride and instills confidence. This bike is still too tall for a lot of riders, but is perfect for most middle to light weight folks of average height.


Become a patron to support the website. Thanks

Dual Sport Motorcycling: Discovering My Little Town

I ain't Scared. Bring it on!
I ain’t Scared. Bring it on!

I’ve lived in my small New England town for over 20 years. It’s a town that is nestled on the eastern foothills of the Berkshires. Ashfield, Massachusetts is pretty large when measured in square miles, but is quite small when you are counting human beings. In those twenty years, I have driven and ridden most of the roads that Ashfield claims ownership to. One reason I moved to this hamlet from the brick and concrete of Olde Boston Towne was for the awesome motorcycling roads.

It’s true, my town, and the immediate towns that border the place I call home, can brag to have some of the best motorcycling roads in the Commonwealth. Every weekend I can swing by the local gas station, Lakehouse Restaurant or Elmer’s Country Store and see license plates from surrounding states mounted on all types of bikes. It’s that kind of place.

Pavement is Great, But Don’t Forget the Dirt

While Ashfield is well-know to savvy riders for its awesome twisty tarmac and light traffic, only those riders who dare to explore the dirty roads of Ashfield and vicinity truly discover the soul of this small Massachusetts hilltown. I’m a bit embarrassed to say that in my two decades living in Ashfield, I have only explored a tiny bit of what is available for a dual-sport rider to see and experience. It’s not that I haven’t had a machine to do the job. My 2000 Suzuki DRz400 is more than capable of handling the dirt (or mud) roads that connect remote parts of town to the civilization of Main Street, Rt 116 and 112 that are the lifelines to the Pioneer Valley.

The definition of bucolic.

These dirt roads aren’t hard to find. However, it does take a bit more time and a certain commitment to make the turn onto one of the many unpaved roads. I’m always rewarded with epic views, tree-lined paths, and bucolic farmscapes. Look for roads marked by green hand-carved signs with names like “Bug Hill Road”, “Lilliput Road”, and “Brier Hill Road” for an adventure and journey into New England’s past.

A short excursion off the pavement.
A short excursion off the pavement rewards me with nice vistas.

But Wait, There’s More!

The roads I’ve talked about so far are doable by most street bikes, so they are not exactly challenging for the really adventurous dual-sporter. For those wanting more than smooth dirt roads, there are plenty of logging roads, snowmobile trails and even single-track nearby. Recently, I’ve been exploring the un-maintained roads through the Hawley State Forest. These are public ways that once used to be busy thoroughfares, but are now grown in and largely forgotten.

Some of the off-road routes are private, and only permitted to be used by snowmobiles, but I try not to let that stop me. A quiet exhaust and a brief visit usually offends no-one. Loud pipes and disregard for private property will ruin it for all of us, so if you can’t play nice, please stay away.

New Bike Says “Let’s Play”

Three deer came by for a closer look at the Green KLX.

A lot of my riding involves big street bikes that I take all over the East Coast. These trips are epic and I will never stop doing them, but sometimes I just want to play. I recently bought a very playful Kawasaki KLX250s to replace my trusty DRz. I decided to buy the KLX because the Suzuki is set up to be more of a serious off-road bike than a playbike. The DRz is a bit of a brute; it’s tall, and hard-edged. The KLX, on the other hand, is unintimidating, playful and begs to be ridden.

Rekindled Passion

I’ve been riding motorcycles of all kinds for over 40 years. As is often the case, the passion and exuberance of my youth has softened significantly so that there is a danger of riding motorcycles to become same-old, same-old. I’m happy to report that the new bike has sparked the old passion for simple exploration. With the addition of the little KLX in my garage, my desire to simply jump on the bike and explore is rekindled. Just in time for the new riding season.

How do you keep the love alive with your relationship with motorcycling? Dual-sport? Dirt or trial riding? Racing? What? Share your thoughts below.

Elmer's Store. A must visit destination.
Elmer’s Store. A must visit destination.

Some Ashfield Attractions:

  • Ashfield Lakehouse: A really popular biker stop. Great food!
  • Elmer’s Store: Best pancakes around. Step back in time! A popular breakfast place to start a ride and is the meeting spot for the Riding in the Zone Personal Training Tours.
  • South Face Farm: A genuine Sugar Shack that serves pancake breakfasts during the sugaring season (that’s Spring time for you city folks).
  • Ashfield Lake: A quiet lake with wildlife galore. Loud pipes scare the wildlife!
  • Double-Edge Theater: A world-class theater that specializes in outdoor performances.

South Face Farm
South Face Farm


View Larger Map


Please Donate to Keep the Articles Coming

If you liked this article and the many other articles on this site, please toss a buck or five into the hat. It’s greatly appreciated!

    • Click the PayPal “Pay Now” button.
    • Then indicate quantity in $2.00 increments. Example: put “2” in “QUANTITY” field to donate $4.00, “3” for a $6.00 donation, etc.

Why $2.00? Due to the PayPal fee structure, a $2.00 donation is significantly more beneficial compared to a $1.00 donation.

Thank You!


Check out these related posts:

How Can I help You? Online Coaching NOW AVAILABLE
Stay Informed: Subscribe NOW!
Trianing-Tours_LandingBe a Better Rider: Sign Up for Personal Training with Ken
Support Riding in the Zone: Buy a book
Support Riding in the Zone: Buy products from Twisted Throttle & Amazon
Twisted_Affiliate-Interphone-widget