Aprilia Tuono V4 APRC – Track Day Bike Prep

After a full season owning a 2011 Suzuki GSXR750 track day bike, I decided to take a different route and grabbed a 2013 Aprilia Tuono V4 APRC.

Check out the article I wrote about some things I discovered about the Tuono.

The bike was setup as a street bike, but with a lot of little goodies already installed by the previous owner. Many are items I don’t typically spend money on, like an aftermarket exhaust and sexy cosmetic changes. But, they are cool!

Below, I describe the modifications I did to make the bike more track worthy and also list the stuff the previous owner installed.


The first thing I do with any bike I plan on taking to the track is to bolt on engine and frame protection. Twisted Throttle is a sponsor of this website and sell R&G and SW-Motech accessories that work really well and are reasonably priced. Click here or on the Twisted Throttle logos on this page to buy accessories and help support the site.

Frame Sliders

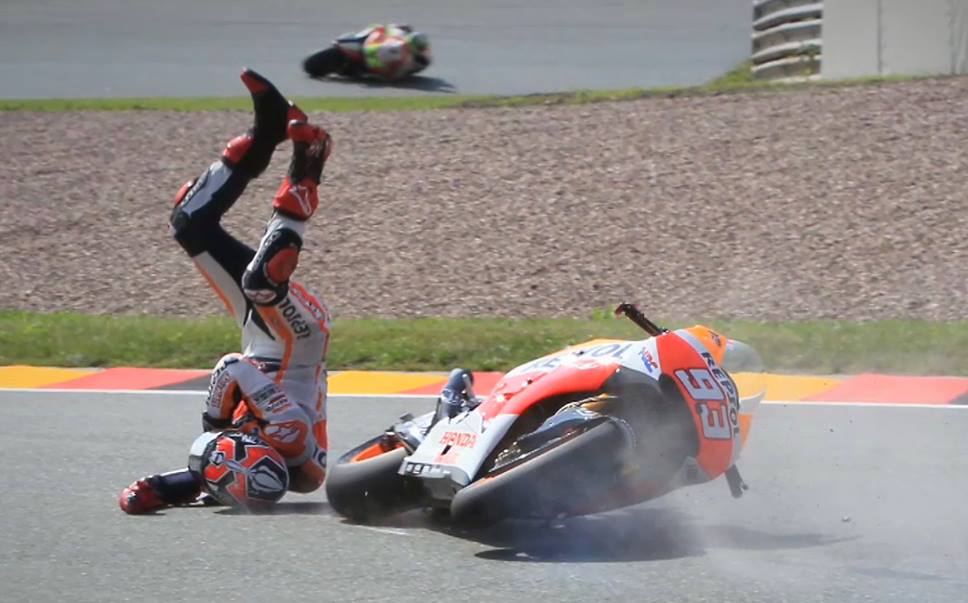
There is a debate about whether frame sliders are a good thing or is they actually cause more damage. Sliders are great for minor drops, but can also catch a curbing or edge of the track and cause the bike to flip. This happened to a ZX636 I once owned. I decided to take the chance and install some R&G Aero Frame Sliders.

R&G Aero Frame Sliders

These sliders are high quality, with a robust two-location mounting block. The pucks are the usual Delron nylon units. To reduce the chances that the slider will catch when sliding, I cut the pucks down by about 1-1/4 inches. So far, I haven’t put them to the test.


Engine Case Covers

Protecting expensive engine cases is of primary importance. I have used Woodcraft products, but like the full coverage of the R&G covers. These British Superbike approved race-spec covers are made of tough plastic and include replaceable sliders. I bought the complete kit which includes both left and right covers. Buy the case covers here.

The racing version includes replaceable sliders
Installing the covers is quite easy.

Installation is easy. All you have to do is remove a few of the case bolts, locate the cases and replace with the supplied bolts and spacers. One small issue was that the opening around the oil fill cap wasn’t quite big enough, so I trimmed it with a file.

A little trimming was necessary to clear the oil fill cap.

Exhaust and Protector

The Arrow exhaust is a work of art. And it sounds awesome, especially without the db insert. However, one of the racetracks we frequent has a decibel limit and I am not willing to take the risk of getting dinged.

Besides, the exhaust still sounds great even with the insert…like a hot rod.

The R&G exhaust protector is a nice piece that straps onto the exhaust can using a hose clamp. There is a rubber protector strip to keep the clamp from marring the exhaust.
Buy one for the stock exhaust here.


Front Axle Sliders

R&G also makes axle sliders to help keep the forks and brakes away from the ground. The only thing is that you have to take them off to get the axle out to remove the wheel to change the tire. Not bad, but it adds time. Buy axle sliders HERE.

You can also note in the photo below the zip tie around the fork tube. This slides down to indicate how much fork travel is being used. Also note the torque spec is written in Sharpie for easy reference.

Regarding the brakes, they could use improvement with some higher performance brake pads. They are very good, but I’m used to more sensitive brakes; these are just a bit less powerful and slightly numb.


Levers

One accessory I think is worthwhile are aftermarket levers. Not only do they hold up better in a crash, but they give better feel and they look trick. I’ve had cheap Chinese knockoff that work okay, but these adjustable ASV levers are much nicer. They are pricey though.


Gas Cap Mod

The Aprilias are known for leaking fuel around the gas cap when full, especially when braking hard. I would find a fuel stain along the top of the tank, that is disconcerting to say the least. I can imagine fuel dumping in a crash and setting the bike on fire.

The problem is that the gas cap gasket doesn’t sit tight against the fill opening. The fix is to place an O-ring between the gasket and the fuel cap. Measure the gasket and buy a few different size o-rings to see which one fits and allows the gap to lock. I got mine at a hardware store.


Turn Signal Removal

Removing the turn signals is easy enough. All you need to do is unscrew the lens from the housing, unplug the two wires and pull the wires out from the stalk. Then tuck the wires securely under the side fairing.


RSV4 tail conversion

This is a popular mod among Tuonoistas. The stock Tuono tail looks just fine and as a bonus, has a passenger seat. Because the RSV4 tail has no accommodations for a pillion, the passenger pegs were removed and the exhaust hanger connects to the right peg mount.

You can see in the photo that I put some electrical tape on the pointy parts to prevent the tail from getting scratched as I swing my leg over the bike when mounting.


MRA Windscreen

The bike came with a taller MRA windscreen, which certainly makes riding long miles more comfortable, but it also helps with neck fatigue when ripping down a straightaway at 140mph. And the smoke version looks great.

MRA windscreen photo: otmpix.com

Tires

My track day organization, Tony’s Track Days, has a regular Pirelli dealer which makes using that brand a no brainer. Even so, I totally love the feel of the Pirellis, whether the Supercorsa or the race slick. Since I had some 180/60/17 SC1 rear slicks hanging around, I mounted them up and they are working great. I’ll be putting on the spec 200 tires when I’ve used up the 180s.

Regarding wear, I am getting an impressive 6-7 days at a combination of intermediate (when instructing) and expert pace. That’s not what I expected when I first got the bike. I get even more from the fronts, of course.

Pirelli SC1 race slicks are the bomb.

That’s it for now. I’ll update this post as I make more modifications.

Check out the Street Triple modification and Street Triple Track day prep articles.


Become a patron to support the website. Thanks
Support Riding in the Zone: Buy from Twisted Throttle

Review: Helite GP Track Airbag Vest

Riding a motorcycle on a racetrack at speeds exceeding 100mph is exciting and immensely satisfying. But, it can also threaten your well-being if things go wrong. Even the best racers and track day riders make mistakes or get caught up in unfortunate situations beyond their control.

That’s where personal protection comes in and riding at expert-level speeds, you need the best protection you can get. Enter the Helite GP Air Track Vest.

The GP Track Vest can be worn on the street, but the GP version is more robust and is designed to withstand the higher speed crash scenarios. For street riders, Helite makes the Helite Turtle Vest. You can read a review of the Turtle here.

photo: otmpix.com

Receive a 10% discount using the CODE: INTHEZONE

Helite is an affiliate partner and supporter. However, I bought this vest with my own money.

Air Vest Technology

photo: Helite

Race leathers and armor have come a long way since I was racing in the mid-eighties when back protectors, knee and shoulder armor and chest protection didn’t exist. Instead, double layers of leather with some foam padding was the norm. Eventually, plastic back protectors and more substantial armor became available.

Nowadays, armor is required for track riding. But, even the best quality leather suits and armor have their limitations; it’s tough to cover the entire body with armor and still be free to move and have the comfort to sustain a race pace.

To help solve that problem, Dainese and AlpineStars (and now others) developed airbag suits that use GPS and IMU sensor deployment systems. But these suits are expensive and need to be recharged after one or two deployments that require shipping to the manufacturer, rendering the suit out of commission for up to a few weeks.

These manufacturers are now offering vest versions of their airbag suits and I’m hoping they will come up with a less cumbersome and pricey way to recharge the suits and vests.

While the all-in-one race suits are an attractive option, I like the versatility of the vest option. But, it’s not perfect.

photo: Helite

 Helite GP Track Air Pros

Here are the reasons why I prefer the Helite:

  • Low Tech – Unlike the A-Stars and Dainese units, the Helite has a mechanical system with an elastic-nylon tether that connects the bike to a CO2 cartridge mounted in the front of the vest. The vest deploys when the rider falls off the bike, which then pulls a steel ball from the housing that holds the CO2 cartridge. And Bang!
  • Deflates Quickly – It takes a couple of minutes for the vest to lose its air once the vest deploys. This allows you to safely ride back to the paddock without restricted movement.
  • Easy and Cheap Recharge-Recharging the vest means simply replacing the $25.00 cartridge. Replacement takes 5 minutes. I keep a few spares on hand.
  • photo: Helite


    Fits Over any Suit or Jacket -The correct size allows you to put the vest over an existing street jacket or race suit. The cutout in the upper back fits around a race suit speed hump. The GP vest’s accordion side panels allow a snug fit.

  • Sturdy Armor – The GP Track Air Vest has rigid armor that surrounds the torso, eliminating the need for an additional back or chest protector.
  • Heavy Leather – The GP vest is made from 1.2mm cowhide with accordion expansion panels under the arms.
  • No Movement Restriction – I cannot tell that I have the vest on with no restrictions in movement. The only restriction comes when getting off the bike.
  • Neck, Back and Chest Protection – The vest inflates to cushion your torso from impact. And because it will also support my head from hyper movement, it negates the need for the Leatt STX-rr neck brace I used to wear.

Helite GP Track Air Cons

  • Hard to Put On (until you learn how) – When I first owned the GP vest, I had a devil of a time putting it on over my leathers without help. But, someone then showed me how. (See below)
  • Another piece of gear – It’s a pain having to put on all the gear necessary for protection, and the vest is one more piece. That’s the price for good protection.
  • No side air protection – The accordion panels are great for movement and comfort, but the airbags do not cover this area. This sucks, because I seem to always crack ribs and I’m afraid the vest won’t help prevent this injury.
  • Have to Remember to Connect – The vest won’t work unless you clip the tether to your bike. I’ve had to pull off the track after a lap because I forgot to clip the tether. That’s fine for a track day, but if you forget during a race, you’ll either have to ride unprotected, or  pull in and forfeit the race. To remind me to buckle up I have a piece of bright colored tape on my triple clamp. I also drape the tether across my seat.
  • Have to Remember to Disconnect – You have to disconnect the tether before walking away from the bike. A lot of people think they will deploy the vest by forgetting to disconnect before getting off the bike. But don’t worry. It takes a lot of force to deploy the vest. You’ll realize that you’re still connected well before you walk away. Watch the video below to see how hard the person has to pull to fire the vest.
  • It’s Hot – Adding a thick vest over my vented leather race suit defeats the benefit of a perforated suit. But, it hasn’t been as big a problem once I get up to speed.
  • It’s Expensive – At $919.00, the GP Air Vest is not cheap. But, the argument about how much is your spine, neck, ribs, and guts worth comes into play. If you ride on the track a lot (and especially if you race), it’s a good investment in your health.
photo: Helite

How to Put the Helite GP Air Vest on Alone

Putting on the vest like you would a jacket, one arm at a time is not easy. The vest is stiff and tight enough to not allow the second elbow to squeeze inside. You can get it on this way with help, but I don’t often have that luxury.

The way to put the vest on alone is to:

  • Hold the vest in front of you with the inside facing up and both wrists inside the arm holes.
  • Flip the vest up and over your head, letting vest hand on your shoulders.
  • Once on, pull the Velcro panel across your chest so the red Velcro is completely covered. Then secure the two leather “tabs”.
  • Connect the plastic clip on the vest tether to the lead on the bike and you’re done.

Now, just becasue you’re better protected from injury, doesn’t mean you can ride like an idiot. Be smart and get training. 

Receive a 10% discount using the CODE: INTHEZONE


Please Donate to Keep the Articles Coming

If you liked this article and the other articles on this site, please toss a buck or four into the hat. It’s greatly appreciated!

    • Click the PayPal “Pay Now” button.
    • Then indicate quantity in $2.00 increments. Example: put “2” in “QUANTITY” field to donate $4.00, “3” for a $6.00 donation, etc.

Why $2.00? Due to the PayPal fee structure, a $2.00 donation is significantly more beneficial compared to a $1.00 donation.

Thank You!


Check out other track day and riding technique related posts

Check out these related posts:

Review: Leatt STX-RR Neck Brace

Ken_Leatt_STX-RR-croppedI’ve had several people ask about the Leatt STX-RR brace that I wear on the racetrack. Well, here is my review.

Here's the illustration Leatt publishes on their website arguing for the use.
Here’s the illustration Leatt publishes on their website arguing for its use.

Should You Wear a Neck Brace?

I decided to invest in a Leatt STX-RR neck brace after a recent medical scare prompted me to do all I can to protect my neck from trauma. But, is the Leatt STX-RR neck brace a worthwhile investment for you?

A neck brace is not a piece of equipment that many motorcycle riders consider. However, it’s common to see motocross and off-road racers wearing neck braces. Do they know something we street riders and roadracers don’t?

While many people claim that there is not enough evidence saying they are effective, there is plenty of anecdotal evidence from off-road racers that neck braces work. That said, there are stories around of broken collarbones that may have been the result of contact with the brace. Even if these stories have some truth, I’ll take a broken collarbone over a broken neck anytime. And it is better than a bad injury, getting personal injury claims in Lacey, and running behind treatments.It is not that claims are ineffective, but why take a risk when you can prevent it. 

Another reason few road riders wear a neck brace is that they are expensive (See below).

The Carbon Leatt STX-RR
The Leatt prevents hyper-extension and hyperflexion in a crash.
Click the photo to see an animation showing how the Leatt prevents hyper-extension and hyperflexion.

How the Leatt STX-RR Works

The RR brace rests on the shoulders and features two scapular wings in the back that straddle the aero hump on my racing leather suits. There is also a hinged sternum support wing at the front that allows me to tuck behind the windscreen.

During a crash, the brace prevents the head from snapping forward, back and sideways to a point where neck injury can occur and according to Car accident Lawyers in Houston, if you need help with such injuries, you can contact legal professionals. It is essentially a table surface that the bottom rim of the helmet contacts during a crash. When the helmet contacts the brace, the energy from the head and helmet is redirected to the shoulders, upper back and chest to protect the cervical spine. People can check injury attorneys help from The Galvan Law Firm, PLLC, if they get involved with injuries. 

More About the Leatt STX-RR

The STX-RR is the racing version of he STX Road model. The road model can be used on the racetrack, but the RR has a few features that make it a better choice for track riding.

The STX-RR is made from superlight carbon fiber and weighs only about one and a half pounds, compared to the less expensive and heavier fiberglass STX Road model . The RR version also differs from the STX Road model by utilizing a solid fixed ring setup with two emergency releases, which requires the rider to slip the brace over the head. The street STX Road features a locking hinge design that allows the rider to fit it by clamping it around the neck.

The RR uses a lighter, simpler spacer fitting system compared to the street version, which comes with several different sized inserts to customize fit. Both models come with optional straps for securing the brace in place. I used the straps for several track days, but it takes more time to attach them. Besides, I feel confident that the brace will stay in place without the straps.

However, the most significant difference between the RR and the Road versions is that the RR model has a lower profile, which means that it is farther away from the base of the helmet. This reduces effectiveness somewhat compared to the Road version, but the lower profile, in conjunction with the hinged front wing, allows the rider to move more freely when going from hanging off in corners to tucking fully behind a windscreen on the straights.

Maybe MM93 should consider a Leatt brace?

Fitment

Fitting the brace properly requires adjustment of the swiveling scapular wings, which are marked for precise degree adjustment, as well as removal or placement of front, rear and side spacer pads. Measuring the distance from the bottom of the helmet to the top of the brace is important for the brace to be most protective and comfortable.

After a session on the racetrack, I determined that the brace was sitting too close to my helmet, preventing me from turning my head fully in certain corners. Removing the shoulder spacer pads solved the problem. The combination of light weight and proper fitment means I can ride without noticing that I even have the brace on.

Amazon labels the RR as being size Large/XL. But, it appears that here is only that single size. Leatt says the one size fits riders from approx. 140 to 225 pounds. That is the size I wear and I am 155 pounds and 5′ 10″.

Living with the Leatt

I’ve used the Leatt for most of the track day and racing season. People often ask me whether the brace restricts my head movement. I ride a Triumph Street Triple R as my track day bike. The upright position of the Striple means I have little issue with restricted movement. Only in very tight corners do I feel the brace make contact with my helmet. However, when I ride a supersport motorcycle, I find the brace to be more restrictive. But, I suspect that with further fiddling with the adjustments, it can work on nearly any bike.

The one thing you need to consider when investing in any protective gear is that it won’t work unless you actually use it. Putting the brace on is very simple, but there were several times when I forgot to slip the brace over my head before strapping on my helmet. Once I realized that I forgot the brace I had to take my helmet off, put the brace on and replace the helmet again. Grrrr.

The Leatt STX-RR
The Leatt STX-RR box

Cost

The Leatt STX RR retails for $549.00, which is $150.00 more than the STX Road, but the lightweight carbon construction and articulating sternum section make the RR a better choice for track day riders and roadracers.

So, you have to determine for yourself whether a neck brace is worth the cost and inconvenience. Knowing that the neck is vulnerable to all sorts of loads that can lead to lifelong injury or death, I think it’s worth considering.

Update

So, I was riding my KTM dirtbike on a friend’s mini motocross track. I had been using the Leatt while riding trails and it worked out well with the scapular wings straddling the hydration pack. But, I didn’t have it this time.

I landed a jump and banked into a tight right turn, but failed to get the bike turned. The front wheel climbed the berm, causing me to fall with my head snapping as I landed about 40 degrees upside down. My neck hurt immediately. I turns out that the whiplash I suffered lasted a few months and the tinnitus in my left ear hasn’t gone away after a year.

I’m convinced that having the Leatt would have saved me from this injury. I have since bought a dedicated off-road neck brace and wear it all the time. When evaluating the significance of protective gear, particularly in the context of a DUI case, his comment is here to demonstrate the dire need for responsible and safe choices on the road.

Have you crashed while wearing a neck brace? If so, how did it work?

Buy the Leatt STX-RR or STX-Road by clicking on the links below and help support this website.


Please Donate to Keep the Articles Coming

If you liked this article and the many other articles on this site, please toss a buck or five into the hat. It’s greatly appreciated!

    • Click the PayPal “Pay Now” button.
    • Then indicate quantity in $2.00 increments. Example: put “2” in “QUANTITY” field to donate $4.00, “3” for a $6.00 donation, etc.

Why $2.00? Due to the PayPal fee structure, a $2.00 donation is significantly more beneficial compared to a $1.00 donation.

Thank You!


Check out these related posts:


Stay Informed: Subscribe NOW!
Be a Better Rider: Sign Up for Personal Training with Ken
Support Riding in the Zone: Buy a book
Support Riding in the Zone: Buy products from Twisted Throttle