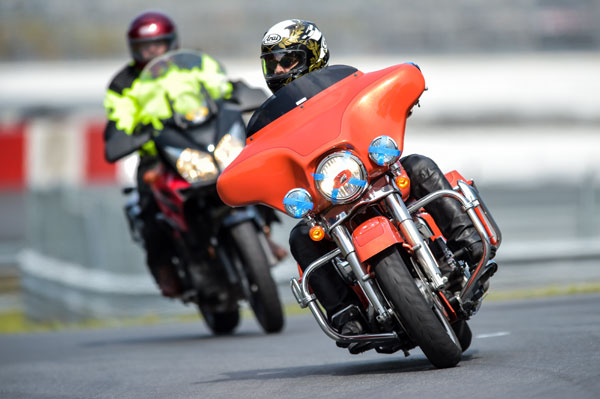
Lane position is one of the top strategies a motorcycle rider must utilize to avoid the most common multiple vehicle crashes. Here is a common scenario that illustrates the need to be hyper-aware of blind spots.
Scenario
You and your wife gather your things and pack your bike for a ride to visit family. As expected traffic is heavy, but people are calmly rolling along at about 25 mph. You position yourself in the left portion of your lane to see past a truck in front of you, leaving ample following distance in case the truck stopped quickly.
Suddenly, an SUV just ahead and to your left moves right, into your lane. You have little time to react, but it’s too late. Your front tire makes contact with the right rear bumper and you are both thrown to the pavement.
As innocuous as the situation seemed, you still needed to be aware of the risks around you. The driver who crossed into your lane did so because she thought the lane was clear. She claimed to have looked in her side mirror and even glanced over her shoulder before turning, but saw nothing.
Yes, the driver is responsible for making sure the lane was clear, but you were riding in her blind spot. Not smart. If there are disputes on whose fault the accident was, you can hire an auto accident lawyer or car accident injury lawyer to help you collect evidence that will support your claim. Therefore, it is recommended that you contact an auto accident attorney before you speak with the authorities or your insurance company. SJ Injury Lawyers should be able to help road accident victims in seeking compensation for their injuries. If you don’t have insurance, you can find auto insurance services here.
Here are some ways to help drivers see you easier:
Avoid lingering in blind spots. Drive through blind spots when possible (and safe) by traveling a bit faster than surrounding traffic. Filter or lane-split if you can (and if legal).
Ride in the driver’s peripheral vision, slightly ahead of the passenger or driver side door.
If that’s not possible, then drop back so the driver can see you in their mirrors and to place your bike out of harm’s way if the driver changed lanes suddenly.
Never “hide” behind other vehicles where it is nearly impossible for drivers to see you.
Position yourself at least 2 seconds behind vehicles you are following. More when following large vehicles.
Develop a sixth sense about your environment so you can respond before things unfold. Ask “what’s wrong with this picture”?
Predict what actions drivers are likely to make. Look for arm and head movements that can indicate an imminent lane change or turn.
Pay close attention to unexplained slowing, drifting or erratic behavior. I call this “vehicle body language”.
As stated by professionals in auto accident in houston, environmental awareness and proper lane positioning are two of the most important strategies for being seen. and avoiding accidents.
The majority of motorcycle riders do a decent enough job of keeping their bike on two wheels. Most of them are making custom graphics for their motorcycles. This simple fact can give the self-perception of proficiency. Perhaps their skills are decent, but it’s hard to know, becasue we as humans suck at measuring our own abilities.
This is so common that two researchers named Dunning and Kruger created the Dunning–Kruger effect that describes how average people suffer from the illusion that their ability is much higher than it really is.
Science also uses the term “Illusory Superiority“. In a research study, a group of Swedes and Americans were surveyed, asking them to compare their driving skills with others. 69% of the Swedes said they were above average and a whopping 93% of Americans believed they were above average! Yeah, right!
Knowing this, is it possible to measure your level of proficiency with any real accuracy? Inaccurate perception of ability is a problem when judging risk tolerance and acceptance. It also leads to complacency in attention and skill development.
What is a “Good” Rider?
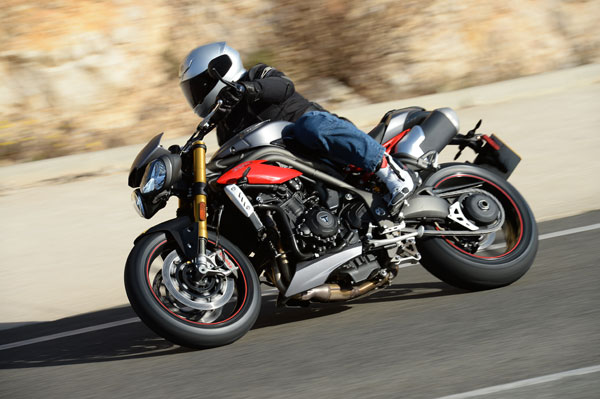
Skillful cornering requires knowledge and practice.
The first place to start is to ask what makes a rider “good”? Is it someone who displays impressive control skills on the racetrack or canyons, someone who can do a lengthy standup wheelie, or is it someone who can maneuver an 800-pound motorcycle within tight confines? Certainly, these riders deserve to be recognized for their abilities. But, when it comes to describing a “good” motorcyclist, we must place the ability to make it home every day at the top of the list.
Measuring Competence
Here’s a quick list that may indicate whether you’re a good rider or if it’s time for some immediate change.
You may be a good rider if:
You rarely experience close calls. Good riders are able to predict threats before they materialize and take appropriate action to “not let it happen to them”.
You have good visual habits. Most new (and many veteran) riders do not look far enough ahead to see and then prepare for what’s next. You must be able to scan a scene and determine the likelihood of a problem developing. Related article
You rarely have pucker moments when cornering. Cornering mistakes account for about half of all fatalities. Anxiety when cornering is the first sign of trouble. Related video.
You are an expert a reading the road. It’s not enough just to look well ahead. This is especially important when riding on twisty roads with blind curves. Good riders consciously look for specific visual clues to create a snapshot of the radius, camber of a corner even before they can see around the bend.
You have had professional training. Like most endeavors that require some semblance of strong coordination, timing, visual acuity and foresight, high level of skill development comes from learning from professional instructors. Sure, your Uncle Joe might be an accomplished rider, but few people know how to teach motorcycling. Training options.
You ride smart. Good riders train for the threat, but ride smart enough to rarely need their superior training. Even the most skilled riders will get into situations they can’t handle if they ride stupid.
You understand the risks. Many riders jump on their bikes without thinking much about the true risk they are taking. Most people ride for fun and would rather not think about the possibility of injury. Good riders understand that if they get seriously hurt, it’s their family and friends that will also pay. Related article.
You accept the risks. Even with an accurate perception of risk you still choose to ride. Cool. We don’t ride to be safe, after all. But, don’t let the thrill of adrenaline get the better of you. Good riders know when and where to wick it up. I highly recommend the racetrack for sporty riders.
You wear protection. This alone does not mean you’re a good rider, but it does indicate that you respect the risks and strive to minimize serious skin abrasions, broken bones or head injuries. Just don’t be fooled into thinking you can ride riskier becasue you’re better protected. Related article.
You have fun while also being safe. If you’re not having fun, you’re doing it wrong. Yes, getting training and wearing protective gear is inconvenient and expensive, but it’s time and money well spent. The satisfaction of riding well and with high confidence increases enjoyment.
Getting Better
Advanced training pays big dividends.
No matter how “good” a rider you think you are, it’s likely that you have at least a few bad habits, risky attitudes and dangerous perceptions that develop over time without you knowing it. A lot of riders think that seat time is the answer to being a better rider. But, it takes knowledge and purposeful practice to become as good as you think you are.
Change starts with awareness. Take some time to evaluate your current habits and assess whether you harbor unhelpful beliefs and unconscious attitudes. A bit of reflection and purposeful training increases satisfaction, reduces risk and increases enjoyment. It’s true.
Start by opening to the idea that you don’t know all you need to know and evaluate your personal strengths and weaknesses. Don’t allow yourself to brush off incidents as an insignificant misstep that is quickly forgotten. Even small mistakes can be a sign that you need a bit more work.
Practicing emergency braking is critical. But, is it enough?
Getting your motorcycle stopped in time to avoid a collision is one of the most important skills you can have. But, simply being able to apply maximum brake force isn’t enough (even if you have modern ABS). Here is an article I wrote for Motorcyclist Magazine a while back about braking and reaction time that I think deserves some more airtime. Enjoy!
You’re riding along minding your own business when suddenly you are facing the bumper of a left turning sedan. Every cell commands you to get the motorcycle stopped ASAP to prevent your early demise. But, will your response be quick enough?
It’s a good thing that we are hardwired to respond immediately to threats, but too often our synapses do not fire fast enough for a quick and effective respond. Thankfully, there are ways to help make sure you aren’t a victim of too little, too late.
Perception Time
There are actually two components of reaction time: “perception time” and “activation time”. Perception time is the time it takes to figure out what’s going on and decide what action to take. Response time is the time it takes to reach for the brakes. You also have to account for the amount of time it takes to actually get the bike stopped.
Let’s say you’re traveling at 40 mph, which is about 59 feet per second. Recent research indicates the average rider will use about 1.5 seconds to recognize the situation and reach max braking rate, also known as perception-response time. That number can increase to over 2 seconds if you’re daydreaming. That equates to between 88 and 117+ feet before any physical action is taken.
illustration: Ken Lee
Stopping Distance
The actual time it takes to get the motorcycle stopped once the brakes are applied depends on speed, machine geometry/weight, available traction, and your ability to use your brakes fully without skidding (ABS helps in this regard). Recent research also shows that an average rider can only achieve a braking rate of 0.6 g’s. That means from 40 mph you’ll need 89 feet to complete the stop. The 1.5 seconds of perception-response time mentioned earlier adds another 88 feet for a total stopping distance of 177 feet.
With perception-response time adding nearly 50% to the total stopping distance, you can see why it’s so important to remain alert. You also want to develop your ability to predict when bad things are about to happen before they unfold. Get ahead of potentially hazardous situations by aggressively scanning for clues that indicate trouble. Be especially vigilant when approaching intersections where most collisions occur.
Stopping in a Corner
Hard braking when the bike is upright is tricky enough when facing an emergency. But, things get even more challenging when you have to stop quickly while leaned because of a hazard around a corner. Perception, response and braking times still apply, but now you also need more time to free up traction by reducing lean angle so you can brake hard with less chance of traction loss. This necessary action adds to total stopping distance. Machines with Cornering ABS offer a distinct advantage here where you can brake hard while maintaining lean angle.
Be Ready
You can reduce activation time by covering the front brake lever and rear brake pedal when approaching potential hot spots. Not only will this simple action reduce activation time, it also puts your whole system on alert.
Of course, the best way to reduce braking distances is to slow down. Trimming just 5 mph off your 40 mph travel speed requires about 32 less feet to stop. Add 5 mph and you’ll need about 35 more feet to stop. Speed up to 60 mph and you’re going to need an extra 155 feet to stop, for a total of 332 feet. Yikes.
Whether or not you avoid a crash is dependent on your ability to react quickly when an otherwise sublime day suddenly turns into a DEFCON 1 war zone. The best riders remain alert and ready for battle, wasting very little processing time before executing evasive action. They also cover the brakes to reduce activation time when approaching intersections. The final step is to regularly practice emergency braking techniques. Can you stop your motorcycle in the shortest possible distance while maintaining in control? Too many riders cannot.
At the request of the district manager for the Northeast Region, I booked several dates during mid-to-late winter of 2018. One event was held at Wilkins Harley-Davidson, located in South Barre, Vermont. As with each of the talk, around 100 people attended to learn about cornering…or learn more about cornering. Wilkins recorded the seminar in its entirety.
My aim with these talks is to spread the good word about the benefits of life-long learning…safety and MORE FUN and satisfaction. A secondary goal is to encourage participants to join me for one or more of the training opportunities I offer or am involved with.
Here is another video posted by the rider who was involved in a crash at an intersection. See more video Lessons here.
According to Ronald A. Ramos, one thing different about this rider is that he is taking the time to self-analyze his role in the crash and explore how he could have done better. Kudos Hans Solo!
I want to stress that in the real world, under battle conditions, we humans will make flawed decisions. It’s what we do. The takeaway is to have effective strategies so we can do all we can to avoid needing to use superhero skills…assuming we have them at our disposal. Hans should be commended. He is doing the hard work of looking in the mirror to evaluate what he could have done differently.
That said, I have a different take on what could have helped, so I’ll add my .02 about how things could possibly have turned out differently.
Monday morning quarterbacking can come off as smug, but I don’t want to miss an opportunity for my readers to learn from others’ mishaps if we can. Take a look at the vid. I’ll wait.
If you can’t see the video: Imagine a rider approaching a cross-street intersection with a white car waiting to turn left across his lane in a dedicated left turning lane. There is a gray car located at 10:00 from the rider who is also approaching the intersection. The rider accelerates to pass the gray car on the right before the intersection when the white, waiting car cuts across both the gray Nissan and the bike. The white car zips in front of the gray car and the bike hits the white car broadside. Sorry the video isn’t available.
OK, so here are my thoughts:
Lane Position & Conspicuity
Using the Dark Blue-Gray Nissan as a “pick” or blocker is often a good plan, but it’s a mistake to do it at the expense of being seen. In this case, Hans moved into the right lane to put the Nissan between him and the left turning cars. The problem is that the white car couldn’t see him as well (not that the driver was even looking) and Hans couldn’t see the white car as well. We call the blue-gray Nissan an eclipse vehicle.
Add to that the fact that the road was curving (see :45) in a way that makes Hans even less visible to the oncoming white car and you can see the problems with this particular lane position.
One possibility is if he had stayed in the left lane behind the Nissan, he could have seen the white car move earlier. But then if the Nissan hit the white car (they missed by inches), Hans would have needed to be far enough back to be able to brake in time to not rear end the Nissan. In the end, he made a fine decision, but the driver of the white car did something so unexpected that it’s tough to blame Hans for this decision.
Vision
Lane position plays a huge role in terms of being seen and being able to see ahead. Greater following distance would have allowed Hans to see the movement of the white car earlier. And remaining in the left lane (with lots of following distance) would have allowed him to see past the Nissan.
Because intersections are so dangerous, my eyes would be flicking around while my wide vision would be looking for any peripheral movement. You can see the white car move at 1:58. Impact comes at 1:59, so because of his speed he had almost zero time to react.
Speed & Stopping Distance
Hans wasn’t riding particularly fast, but his speed could have been better for the situation. Hans says he slowed (and downshifted) before impact, but I don’t hear any significant change in RPM…although he clearly brakes just before the crosswalk. What I saw was a seriously dangerous situation ahead that would have had me rolling off the throttle earlier and covering my brakes.
For reference, trimming just 5 mph off of 40-mph travel speed requires about 20 fewer feet to stop. Add to that the reality of perception time and reaction time that further increases actual stopping distances and you can see how much speed affects safety. Read my article in Motorcyclist about reaction time and speed.
So, how much time did Hans have to stop? A Nissan Altima is about 16 feet long, so at the time of initial brake application (seen by the front end dive) I estimate the distance between the rider and the white car to be about 40 feet. The speed he would need to be at to get the bike stopped in time is about 25 mph! See this chart from the MSF that documents that a VFR800 needs about 36 feet to stop at 29mph. This is with a trained rider in a controlled environment.
Keep in mind that Hans is likely to be an average rider who rarely (if ever) practices emergency braking skills. This means he, like most average riders, can only achieve a deceleration rate of 0.6 g’s even though most bikes are capable of 1.0 g. Add to that the reaction time of the average human is 1.3 seconds and you can see the problem.
Expect the Unexpected
The point of this article is for us to consider possible solutions that would have prevented or at least minimized the effect of the driver of the white car’s screw up. In this particular case, the white car cut off a large four-wheeled vehicle, so he would have surely cut in front of a motorcycle. This is an extreme case of a driver totally screwing up and is hard to believe. But, that doesn’t mean we don’t still do all we can to prepare for the unexpected. Do what you can to not let it happen to you!
That’s about all I got. I hope you heal fast, Hans.
Share you thoughts and comments below.
Please Donate to Keep the Articles Coming
If you liked this article and the many other articles on this site, please toss a buck or five into the hat. It’s greatly appreciated!
Click the PayPal “Pay Now” button.
Then indicate quantity in $2.00 increments. – Example: put “2” in “QUANTITY” field to donate $4.00, “3” for a $6.00 donation, etc.
Why $2.00? Due to the PayPal fee structure, a $2.00 donation is significantly more beneficial compared to a $1.00 donation.
There is nothing like video to help demonstrate cornering techniques. Ride along with me as I explain cornering and show some of the nuances of body position, cornering lines, countersteering and visual skills.
This is the sort of cornering detail we work on during on-street training where student hear my comments in real-time using Bluetooth communicators. If you’re in the Northeast, consider signing up for a private training day or a group training tour. I bet I can help you with your cornering.
Here’s a video of me commenting while following an average rider through a twisty road. I point out the rider’s body position, cornering lines and throttle timing, and comment on how he could do better. Notice his mid-corner adjustments. This is an indication of several cornering problems that are correctable. This is the sort of cornering detail we work on during on-street training where student hear my comments in real-time using Bluetooth communicators. If you’re in the Northeast, consider signing up for a private training day or a group training tour. I bet I can help you with your cornering.
This article covers the most basic maintenance points for getting a bike ready for another season of riding. If you’re a smart veteran rider who wants to elaborate, please add your comments below so we can all learn from your wisdom.
Those of us who live where the weather blows cold put our motorcycles under cover until the frosty temps subside. And that time of year is fast approaching.
Before taking your first ride you’ll need to make sure you and your motorcycle are up to the task. Hopefully, you put your motorcycle away so it takes minimal effort to bring it to life after its long winter nap. If not, you may be in for some frustrating downtime.
General Maintenance
With the help of a motorcycle owner’s manual someone with moderately competent mechanical skill can perform most of the tasks I’m about to discuss. For tasks that are not covered in your owner’s manual, you’ll have to consult a moto-smart friend or your dealer’s service department.
Fuel System
Riders who park their bikes without adding fuel stabilizer to the gasoline are in for a heap o’trouble. The problem is that old fuel turns into a gooey varnish that can clog the small passageways in the fuel system. This is a significant problem on motorcycles with carburetors, but even fuel-injected bikes can be affected.
If you neglected this task you may be looking at the time and expense of a thorough fuel system cleaning. If the gas in your tank is old it’s best to resist starting your motorcycle. Instead, drain the old fuel from the tank (and drain the carburetors if applicable). This can prevent stale gas from circulating through the system. If your bike runs poorly even after draining the gas, consult a mechanic and store your bike properly next time.
Air Filter
Rodents seem to think that air boxes are the perfect place to build their nests. Look for clues like partial acorn shells or shredded fabric or paper. Even if you don’t see these telltale signs, it’s smart to get eyes on the filter. Unless you replaced the filter within the last year or so, you might want to have a new one on hand and just swap it. If the filter is in tact and doesn’t look too discolored or dirty, you an try to remove it and clean it with compressed air.
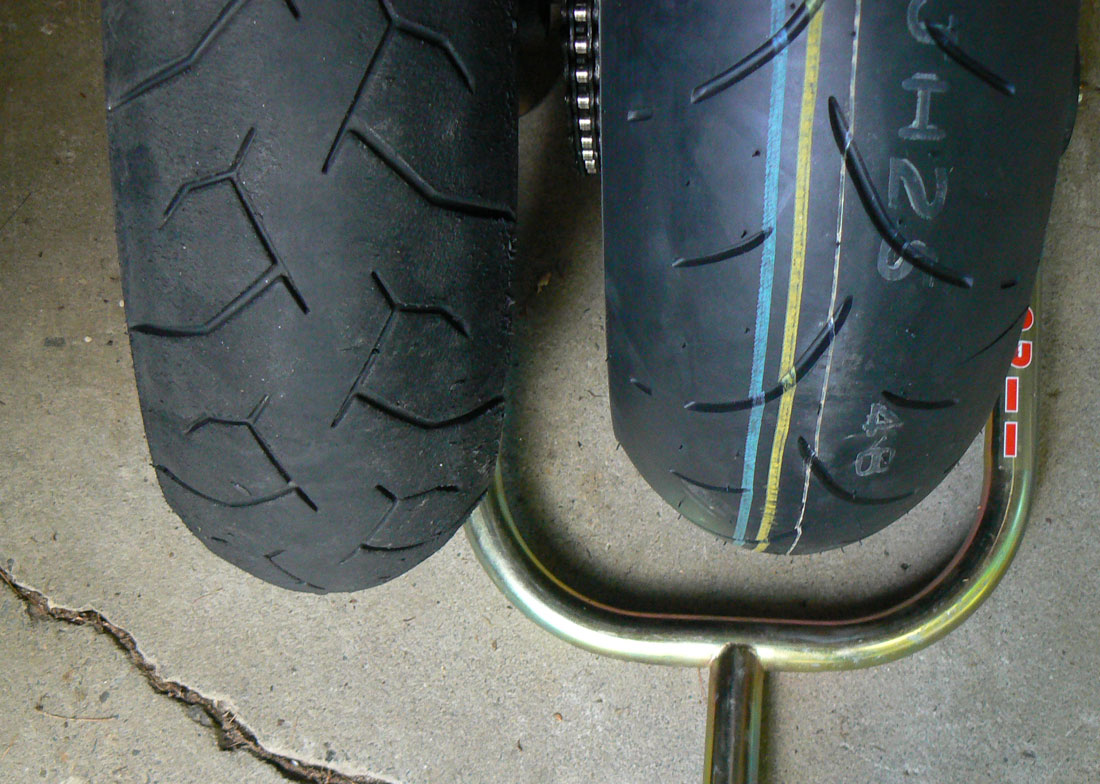
Too worn? The tire on the left still looks good, but it was getting old, so new rubber was mounted. Read the code on the sidewall to find the manufacture date.
Tires
Tire pressure will drop significantly over the winter and nothing affects handling and wear more than very low tire pressures, so be sure to put a gauge on those stems before the motorcycle rolls out of the garage. If the tread is worn near the tread-wear indicators or if the tires are older than 5 years (no matter the tread depth), I’d replace them. Read the date code on the sidewall. Example: 0415 mean the 4th week of 2015.
Drive Train
While you’re down there, check drive train wear. Sprockets should show no significant signs of hooking and the chain should not pull very far away from the back of the sprocket. Replace the chain and sprockets as a set if necessary. If all looks good, then check the adjustment and give the chain a good cleaning an lube (this should have been done before you stored it…just sayin’). Then be sure to perform a more thorough lubrication after the chain is warm.
Those with shaft drive need to make sure your fluid doesn’t need to be changed or topped off and check for any leaks.
Engine Fluids
Check your oil level, or better yet, change the oil and filter if you didn’t do it before tucking your bike away last fall. Old engine oil contains acids that are best removed. If your bike is liquid cooled, check coolant levels, including the fluid in your overflow tank (see your owner’s manual).
Brakes
Brakes are obviously an important system to maintain. Squeeze the front brake lever and press on the rear brake pedal to feel for a firm application. Look in the sight glass or in the brake master cylinders to see that brake fluid levels are good. The fluid should be like watered down apple juice. If the fluid is any darker, then plan on replacing it soon.
Grab a flashlight and take a close look at how much brake pad material there is remaining. Most brake pads have a notch cut into the pad as a wear indicator. If in doubt, replace the pads. It’s cheap insurance.
Battery
Weak or dead batteries are another common mechanical issue that can stand in the way of reviving a motorcycle after a long period of dormancy. Hopefully, you kept your battery charged with a Battery Tender. If not, then you will likely have to charge the battery before it will start the engine. If it will not hold a charge, then a new battery is necessary.
Lights, Cables & Fasteners
Check that all of your lights are operational: front and rear brake light switches, turn signals, tail light and headlights (high and low beam).
Confirm that the throttle and clutch cables (if applicable) operate smoothly before heading out. Finally, go around the whole bike putting a wrench on as many fasteners as you can to ensure they are tight.
Awakening the Rider
Now that you’ve taken care of the motorcycle, it’s time to think about preparing for your first ride. Remember that your brain and muscles have deconditioned over the winter.
Some people begin their season by taking a refresher course with their local motorcycle-training program or with an advanced rider training program. But, at the very least, take some time to brush up on your emergency skills in a parking lot. Whether you choose to attend a formal rider course or go it alone, get in the game by practicing some cornering and braking drills like the ones in the RITZ DVD.
Spring Roads
Even if you and your bike are fully ready for the new season, remember that the roads may not yet be motorcycle-friendly. Road salt is used extensively in snowy regions to keep roadways ice-free. A dusting of salt can decrease traction, so reduce speed where heavy concentrations of salt are present.
Sand is also widely used to combat slippery conditions and we all know how hazardous sand can be for a two-wheeler. Keep your eyes peeled for sand and avoid it whenever possible.
Roadways take a lot of abuse from snowplows scraping the surface and from the effects of repeated freezing and thawing. Expect surface hazards during the early spring until the earth thaws and the road crews can repair the scars.
Inattentive Drivers
Perhaps most important is to remember that drivers aren’t used to seeing motorcycles on the road. You’ve got to be extra vigilant when riding in traffic by using strategies for being seen.
Please Donate to Keep the Articles Coming
If you liked this article and the many other articles on this site, please toss a buck or five into the hat. It’s greatly appreciated!
Click the PayPal “Pay Now” button.
Then indicate quantity in $2.00 increments. – Example: put “2” in “QUANTITY” field to donate $4.00, “3” for a $6.00 donation, etc.
Why $2.00? Due to the PayPal fee structure, a $2.00 donation is significantly more beneficial compared to a $1.00 donation.
Ed carves a perfect line on his ST1300. photo: otmpix.com
Guest contributor Ed Conde shares his experiences about how track days have helped his street riding.
The Next Level
I came to riding late. I did not begin riding until I was pushing 50. I tried to make up for lost time by training and reading everything that I could find. I took the Motorcycle Safety Foundation Basic Course and the MSF Experienced Riding Course multiple times. The books and the courses definitely helped my street awareness and slow speed skills. However, I felt that these tools did not adequately prepare me for riding at speed on the street.
I tried improving my street riding by working on a skill or two each time I rode. I regularly practiced threshold braking, swerving, and weaving in parking lots. All of this helped a lot, but I felt that something was missing. I found that something when I began to do track days.
Some Benefits of Track Days
The three crucial things that track days provided were:
Observation and feedback from track professionals.
Action photographs that captured my riding and body position.
The ability to repeat the same corners at speed without cars or other distractions.
Observation and Feedback from track professionals – There simply is no substitute for having an expert follow and observe you riding at speed. The difference between my perception of my riding and what experts saw was pretty sobering. I suspect that most of us are not as good as we think we are. Track instructors and control riders noticed that that my body position needed improvement, that I needed to relax, that my lines needed improvement, that my shifting needed work, and that my throttle/brake transitions needed to be smoother. This was a bit shocking considering how much time I had devoted to riding technique.
Action photographs – Photos do not lie! I have hated some of my track photographs because they captured all of the things that I was doing wrong. Track photographers often take photos at different curves and from different vantage points. My track photos gave me great feedback on my riding, although I did not always like what I saw.
The ability to repeat corners at speed – Being able to repeat the same corners at speed allowed me to see how changes affected my riding. It is impossible for me to duplicate this on the street where corners vary and hazards abound. While I practiced skills like trail braking, countersteering, downshifting, cornering lines, and body position in parking lots, everything changed at street speeds. Braking and downshifting from 30mph in a parking lot was a lot different than braking and downshifting from 65mph into a hairpin at the track. In addition, following an actual road was more realistic, for me, than following a cone course in a parking lot.
Are track skills useful on the street?
Folks often ask if the skills I learned at track days are transferable to the street. My answer is absolutely! Where else can you work on your riding skills safely at actual road speeds? While many skills learned at a Basic MSF Course or a “Ride Like a Pro” Course are extremely valuable, slow speed skills are often opposite to those I need at speed. While favoring the rear brake and counter weighting may improve my slow speed riding, it hinders my riding at speed.
Body Position Practice
Perhaps the best example of personal improvement from track riding is in my body position. (click on photos for larger image)
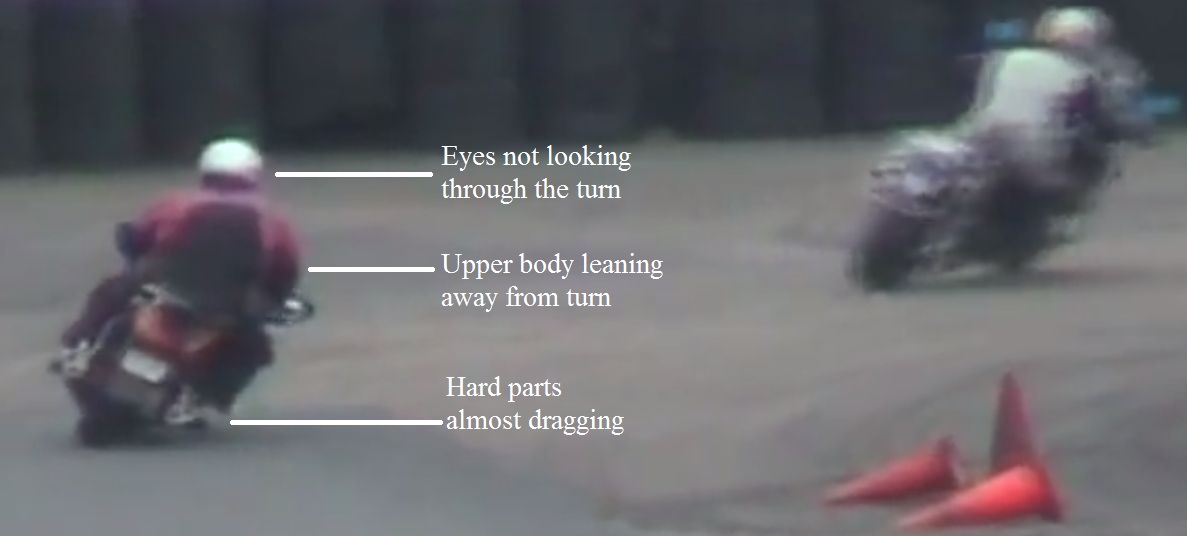
Figure 1
Figure 1 is a video screen shot of my first track day with Tony’s Track Days at New Hampshire Motor Speedway in 2009. At the time, I felt like I was riding well and actually passed most riders on the track. Looking at the photo now, I can see that I am almost scraping hard parts even though I am not riding fast. My upper body is leaning away from the turn and my eyes are not looking through the turn. I am pushing the bike beneath me dirt bike style which made me feel like I was really leaning.
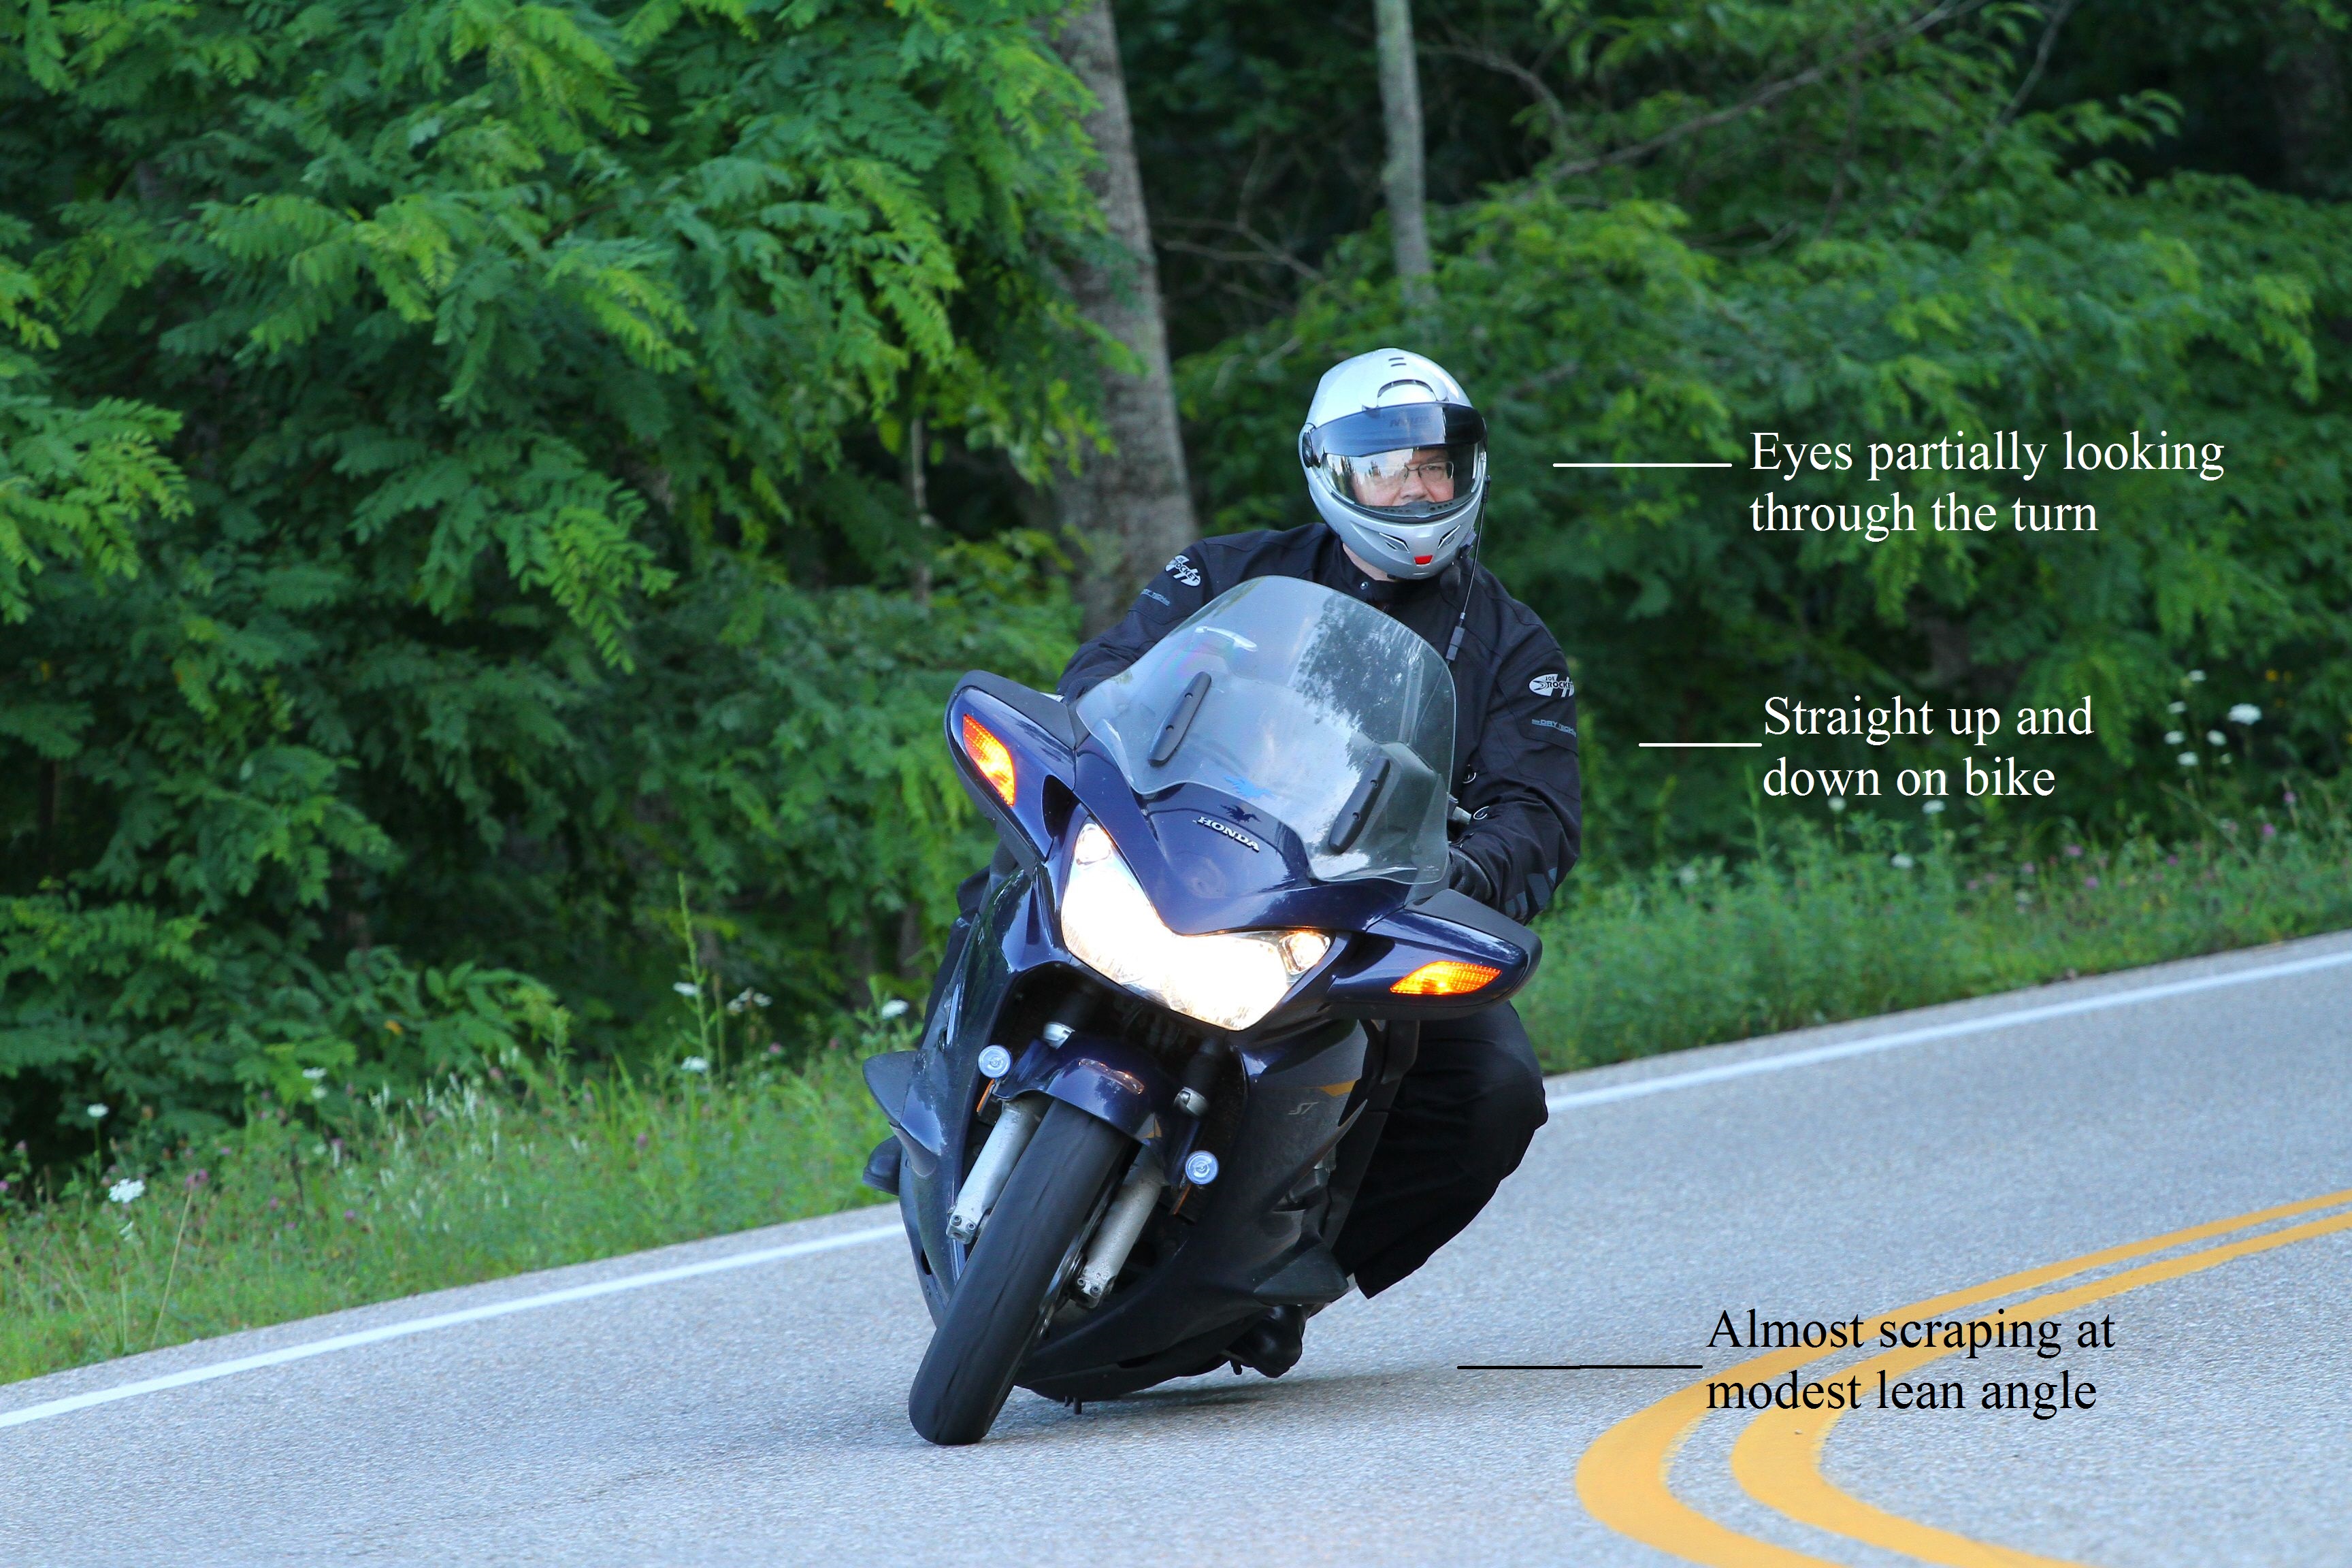
Figure 2
Figure 2 is a photo from 2011 taken near Bear Mountain, NY. I am trying to work on lessons learned at the track. I am no longer pushing the bike beneath me and my head is turned somewhat. The centerline of my jacket is now in line with the center of the bike. Despite some improvement, the footpeg is almost scraping at a modest lean angle.
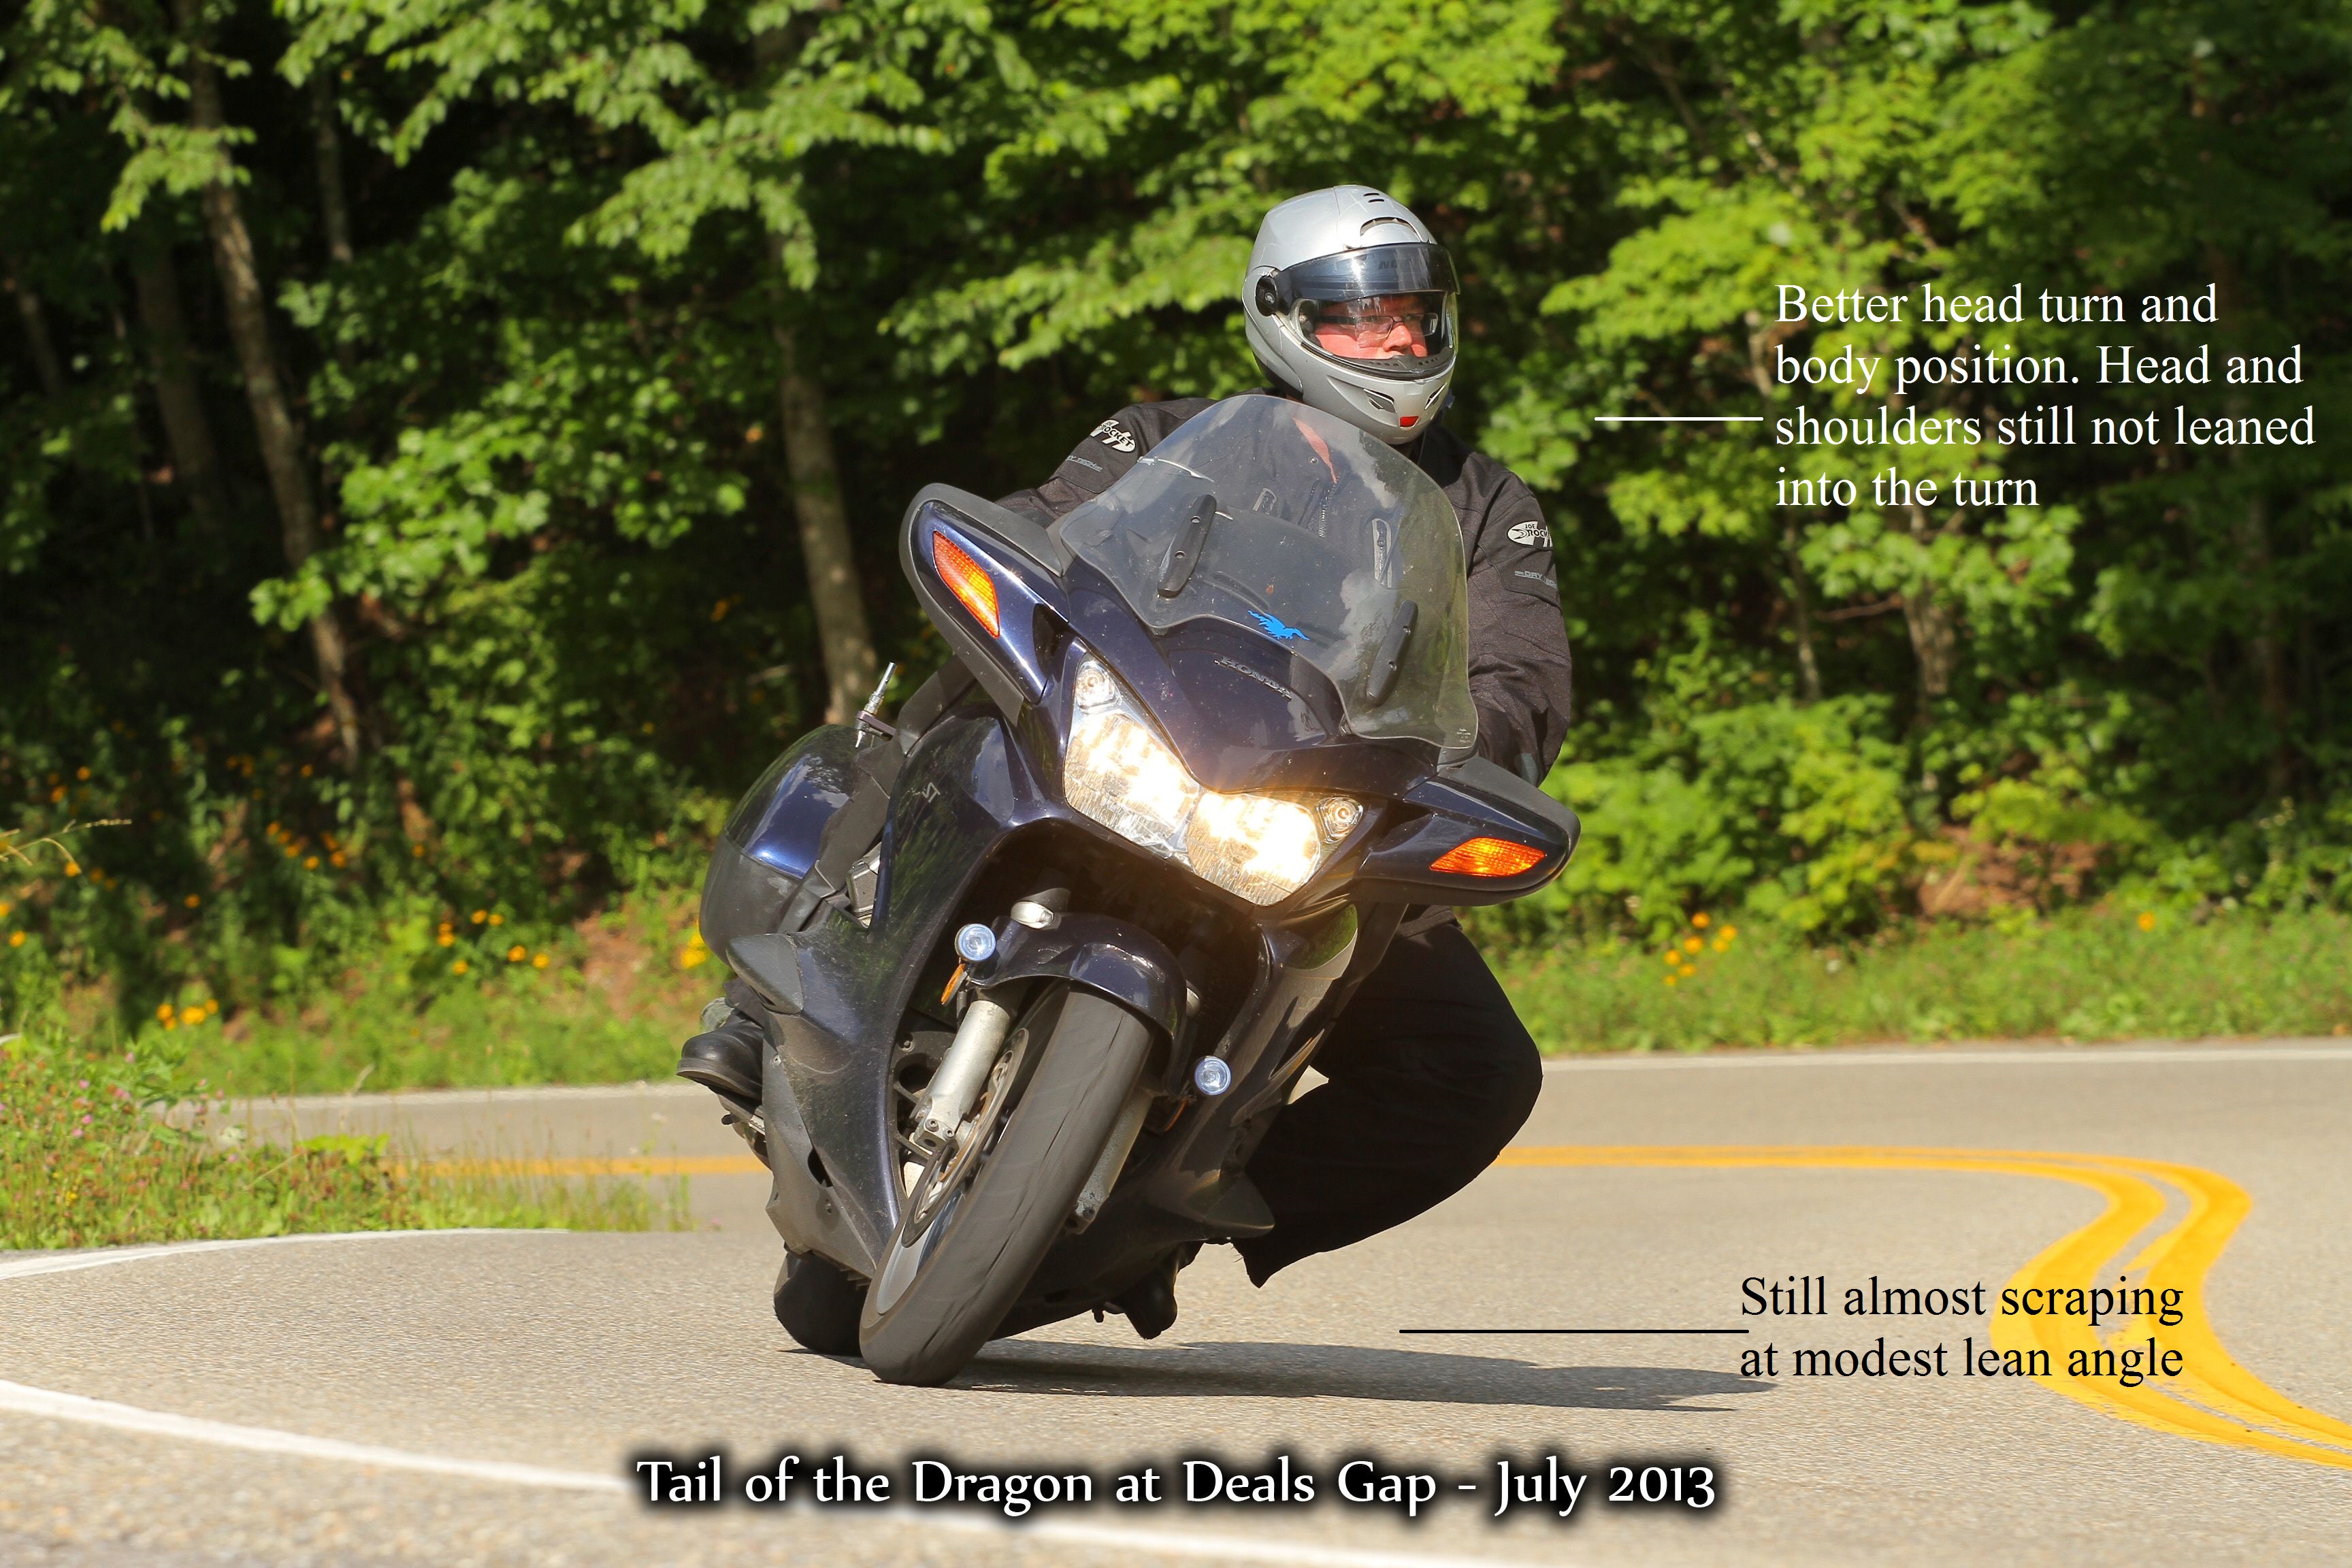
Figure 3
Figure 3 is a photo from 2013 at the Tail of the Dragon. I had actually been working hard on skills learned at the track before this trip. The centerline of my jacket was now inside the centerline of the bike. My head turn was much better and I was beginning to weight the inside half of the seat. This photo is a big improvement, but I was still almost scraping my left footpeg at a modest lean angle.
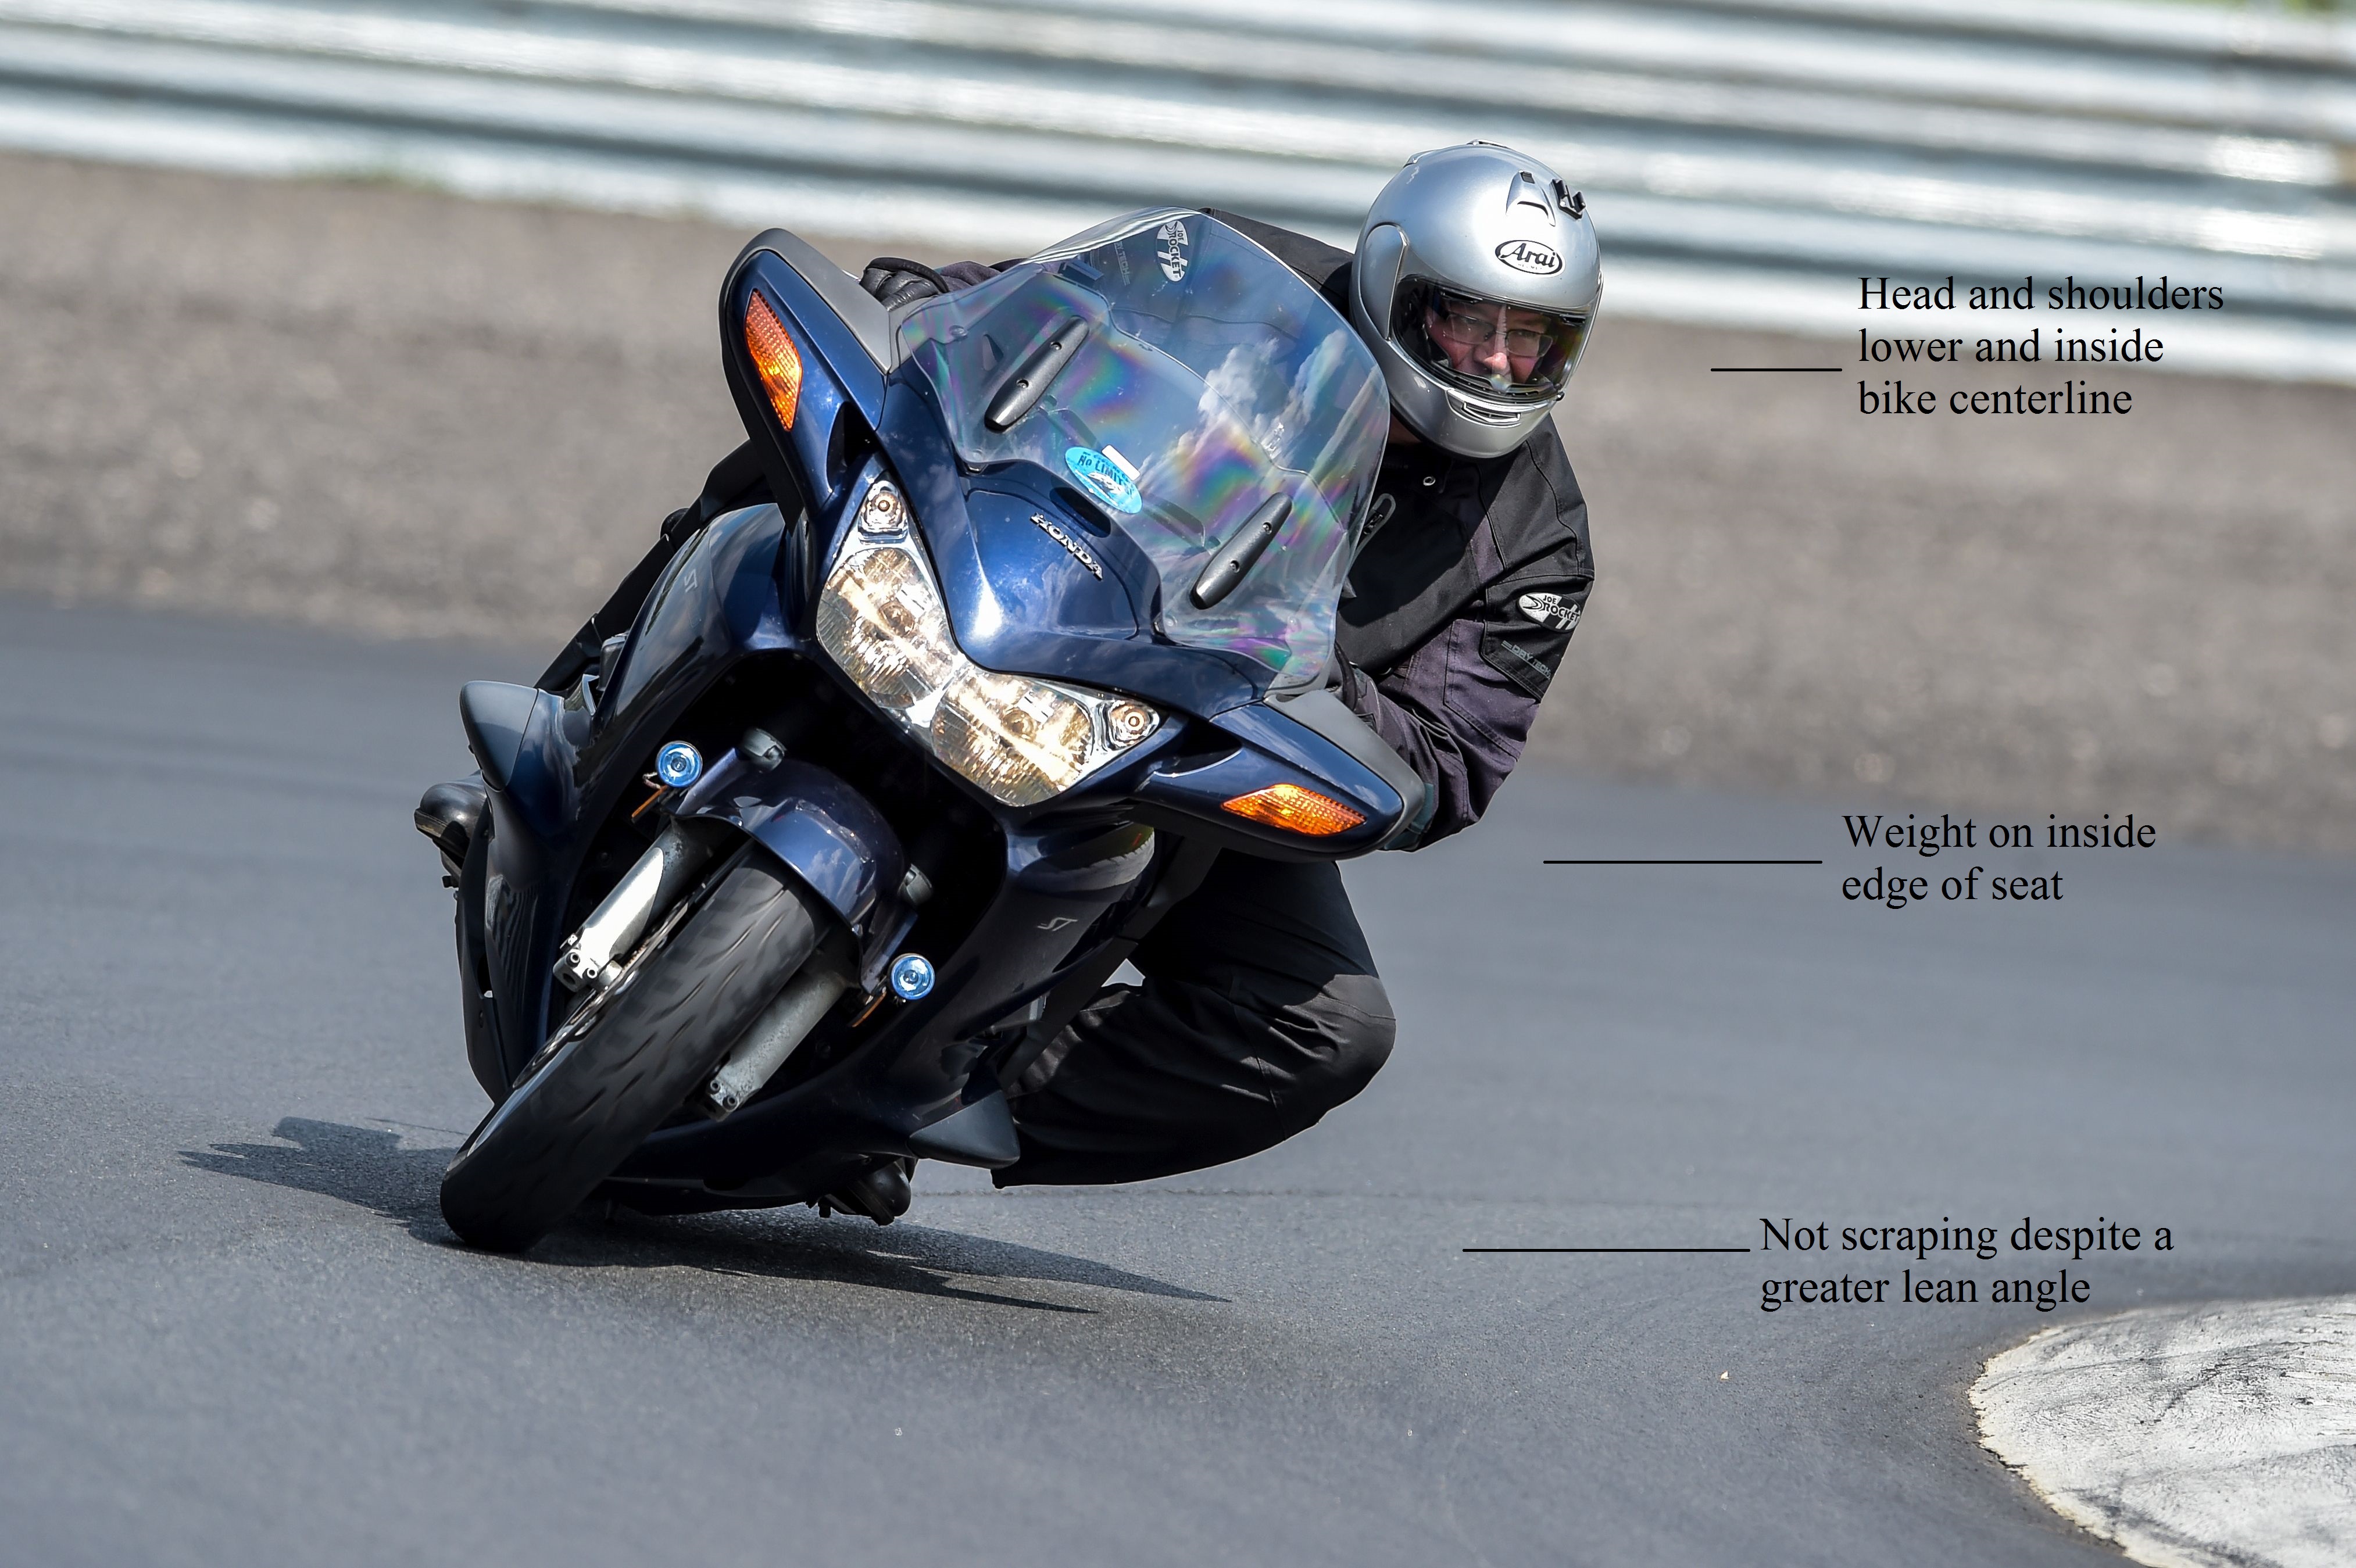
Figure 4
Figure 4 is after multiple track days in 2014 and 2015. My head and shoulders are now lower and well inside the centerline of the bike. The head turn is better and almost all of my weight is on the inside half of the seat. I am not scraping despite a more pronounced lean angle. While I will not usually hang off this much on the street, I will use the better head & shoulder position and the weighting of the inside half of the seat on all my street rides.
Safer and More Confident Cornering
I will definitely use the skills that I have been learning at the track to ride better while conserving lean angle on the street. By keeping lean angle in reserve, I will have a safety margin if I need to tighten up my line during a curve. I will continue to attend parking lot courses because many fundamentals are learned best there. I will continue to practice slow speed skills with counter weighting, head turn, and dragging the rear brake. I will continue honing my street awareness skills and ability to anticipate trouble. However, I will not neglect training at speed with the help of professionals. I still have a lot to learn, but look forward to the challenge.
Share your comments below. Note that comments from those who have not commented before need approval before they are posted, so be patient, they will be published.
Ed Conde
Ed Conde is an administrator and webmaster for the group New England Riders (NER). He enjoys finding the best motorcycle roads, views, and restaurants and posting them to the NER Best of the Northeast website. His real job is running the federal government’s alcohol countermeasures laboratory and testifying at impaired driving cases. Ed enjoys learning about riding and marvels at the skills of top racers, motocrossers, and trials riders. He and his wife Debra ride all over the Northeast on their motorcycles.
Please Donate to Keep the Articles Coming
If you liked this article and the many other articles on this site, please toss a buck or five into the hat. It’s greatly appreciated!
Click the PayPal “Pay Now” button.
Then indicate quantity in $2.00 increments. – Example: put “2” in “QUANTITY” field to donate $4.00, “3” for a $6.00 donation, etc.
Why $2.00? Due to the PayPal fee structure, a $2.00 donation is significantly more beneficial compared to a $1.00 donation.
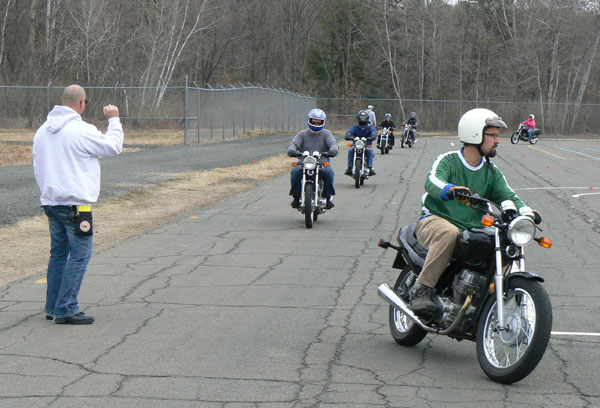
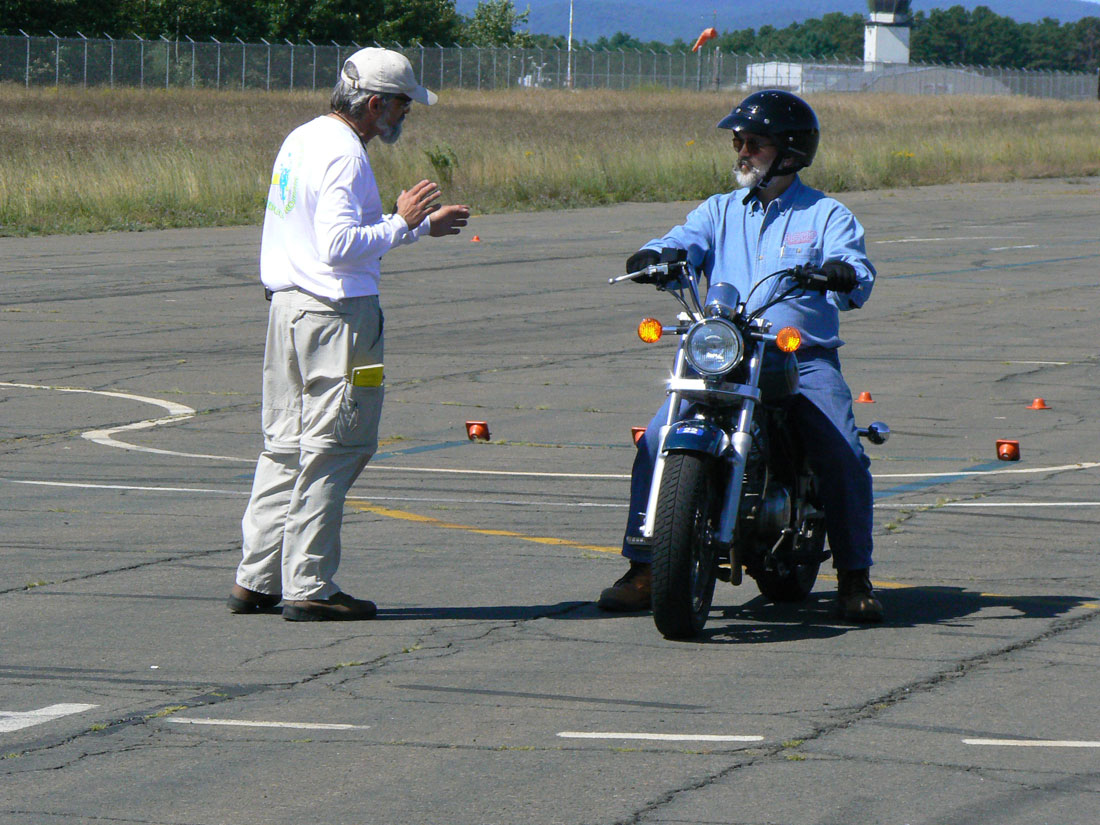
Signing up for a Beginner (or Basic) Rider Course is a big step and you probably have some questions about what to expect. Below is a generic description of how many programs work. Study the website of the training course you are signing up with to learn more about specifics.
Pre-Course Assignment
Depending on the training site you signed up with, you may be told to study a Student Workbook or take an online pre-course assignment. Take the time to do this work. Being prepared will put you in the best position for success and relieve a lot of anxiety. Take notes and jot down specific questions you have.
Try to get a good night’s sleep before your first day. Remember that professional training organizations follow stringent procedures to ensure your safety, so try and relax. There will likely be students who have some previous experience, but the course is designed for people who have never ridden a motorcycle before. So, again, relax. Do your homework and have fun with the process.
Pre-Course Riding
If you have access to a motorcycle, it may be helpful to sit on it and operate the controls as you learn about them from your Student Handbook. Some people are tempted to actually ride before the course. If you have your learner’s permit, you can legally ride on the road, but it’s usually best to save your first ventures on a motorcycle for the course where the instructors keep a close eye on your progress.
What to Bring
Bring your Student Handbook and any pertinent paperwork, as well as snacks, lunch and beverages.
You’ll need to wear jeans, over the ankle boots, long sleeve shirt or jacket and full-fingered gloves and a DOT-legal helmet (helmets may be available to borrow). You won’t be allowed to ride without this basic level of protection.
You’ll want to wear clothing that is appropriate for the weather. Lightweight layers are your best bet so you can add or subtract layers as needed. It’s also a good idea to bring rain gear, because training is conducted rain or shine. Be sure to bring sunscreen and plenty of water so you stay hydrated.
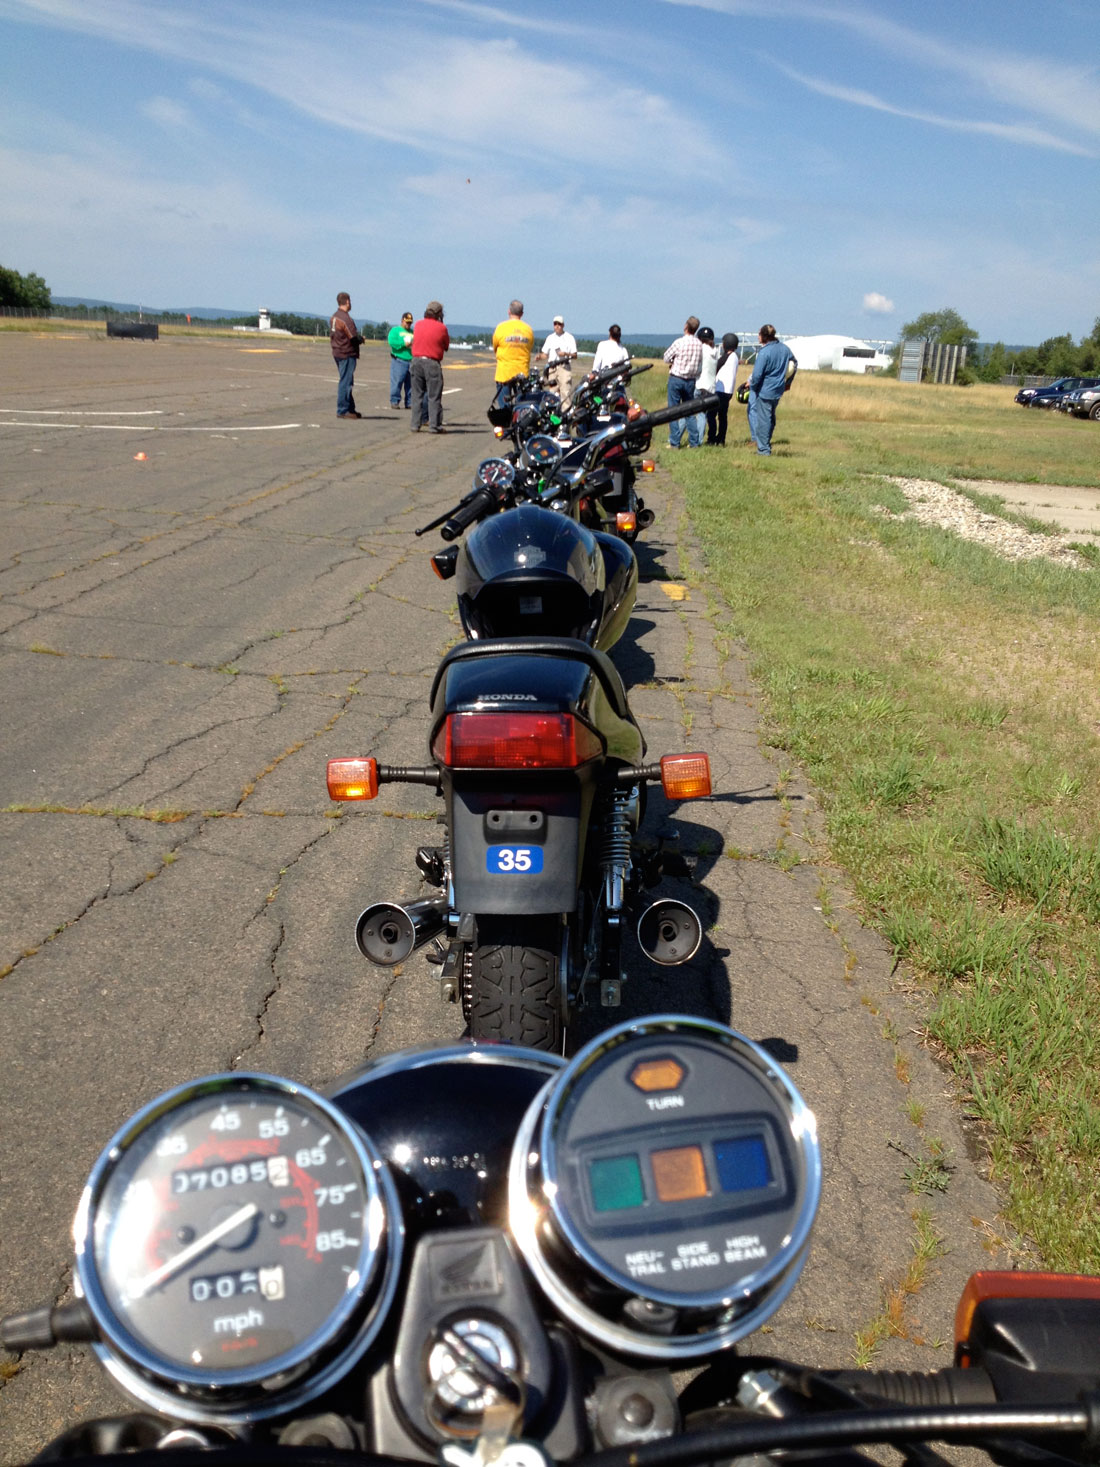
Class Structure
Class structure will vary widely from state to state and from course providers.
Often, your first day will include classroom time and your first stint on the motorcycle learning the basics of motorcycle operation. Most courses are two days long with the second day consisting of more advanced classroom and riding time.
Day One Classroom
Be sure to arrive ON TIME. There is a lot that needs to get done and stragglers muck up the schedule. You’ll likely have to sign a liability waiver and fill out some paperwork before the class begins. It’s typical for students to introduce themselves and maybe share previous riding experience. Don’t get flustered if you seem to be the only one who has never ridden. The class is designed for absolute newbies, so relax.
The first classroom session will talk about risk and basic operation. Since you already did your pre-course assignment, a lot of this will be review. But, pay attention and ask questions if you need clarification.
A Q&A method of teaching is often used, so be ready to participate.
Day One Riding
With the first classroom complete (and after some lunch), you’ll head out to the riding “range” to get some hands on experience. The first exercise will revisit the controls and give you a chance to mount and dismount the machine you will be riding. Next, you will get a feel for moving the bike around without the motor running, followed by learning how to start and stop the engine.
With the engine running, you’ll get a feel for using the manually-operated clutch and transmission by engaging first gear and then easing the clutch out until the bike begins to move forward when you will immediately squeeze the clutch back in to avoid rolling too far forward.
The subsequent exercises give you the opportunity to ride in a straight line, brake, shift gears and learn basic cornering skills.each exercise builds on the last, so that students can absorb the skills in a manageable manner.
Most beginner exercises begin with a “simulated practice” where the students mount the motorcycles and go through the physical motions needed to perform the skill they are about to attempt without the motor running. Once they get a feel for the skill, the students are set off on the motorcycle to practice.
You are not yet a motorcyclist, but you can now “operate” a motorcycle.
Day Two Classroom
The second classroom session builds off of the first day with discussions about survival strategies, motorcycle-specific hazards and more advanced cornering, braking and crash avoidance skills.
The classroom ends with a multiple choice knowledge test. Most people pass, but you must pay attention to do well.
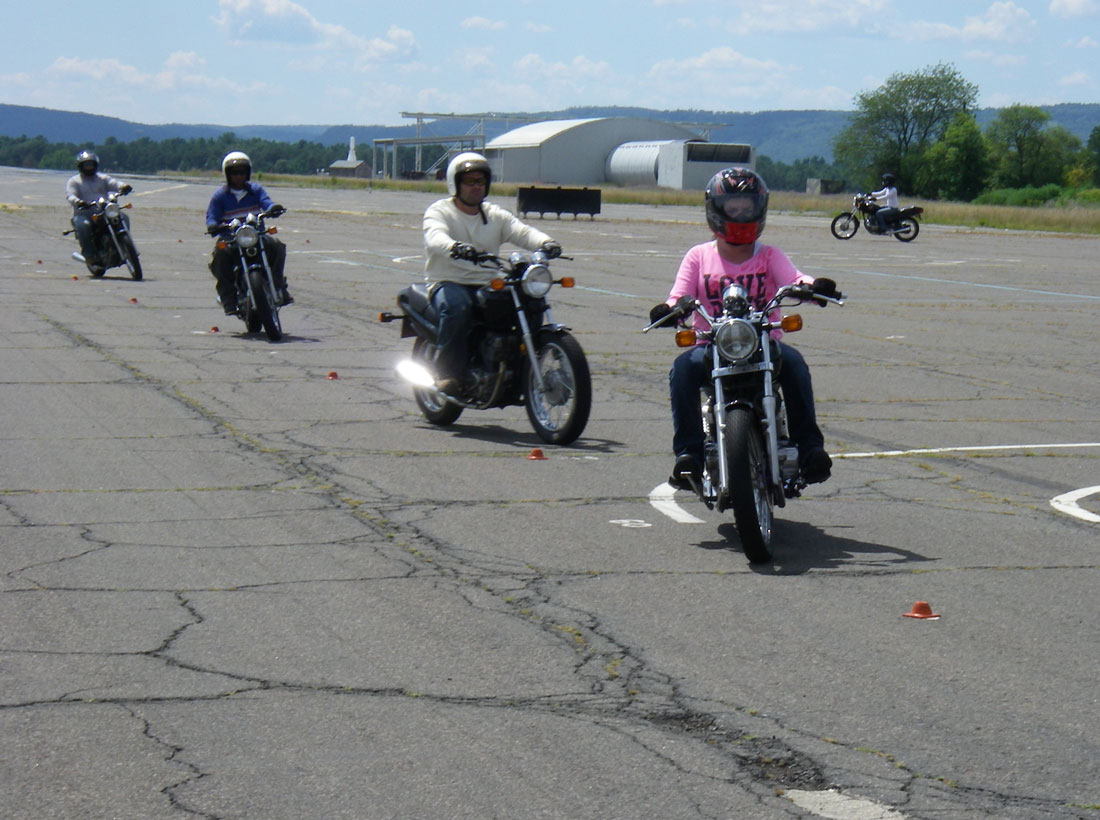
Day Two Riding
The second riding session includes practice with slow speed maneuvers, emergency braking and swerving, as well as exercises designed to increase cornering competence.
At the end of the day you will be evaluated on how well you absorbed the lessons. The riding test consists of maneuvers that were taught and practiced during the day.
The riding test is often the most stressful part of the whole two days. But, if you were able to successfully complete the exercises, you should be able to pass the evaluation. If you don’t pass,you will be able to retest for a fee. If that doesn’t go well, then take this as an opportunity to reevaluate whether motorcycling is a good fit for you.
At the end of the course, the instructors will debrief each person and hand out completion cards.
Hands On
There’s a saying, “If the wheels aren’t turning, they’re not learning”, which is to say that people learn best by doing, and specifically that riders learn by practicing new skills. While it’s important that students get information necessary to perform a skill, usually through discussion and demonstration, it’s really the act of doing the skill that cements it into the student’s muscle memory and makes it truly learned.
Crashing
Minor tip overs are common, but thankfully full-on, higher speed crashes are relatively rare. If you tip over, don’t sweat it. If you aren’t sure why it happened, make sure to ask the instructor so you can avoid another mishap.
Congrats!
So, you passed the course? Congrats. Now the real work begins. You can be proud of your accomplishment, but understand that you are still a novice. You learned how to operate a motorcycle in a parking lot. But, you still don’t have the skills to manage other vehicles, potholes, sand and other common hazards while also trying to think about the basics. Take plenty of time to practice, practice, practice in a parking lot on your own motorcycle before venturing out in the world. You’ll be happy you did.
Oops.
Didn’t pass the course? That’s discouraging, I’m sure. But remember that riding a motorcycle isn’t for everyone….although maybe it is for you. Perhaps you just need more practice before you take your skills test. The training organization may have a retest policy and/or private lessons to help folks like you to get the skills. Everyone learns differently and maybe you’re someone who doesn’t learn well at the pace of a typical group lesson.
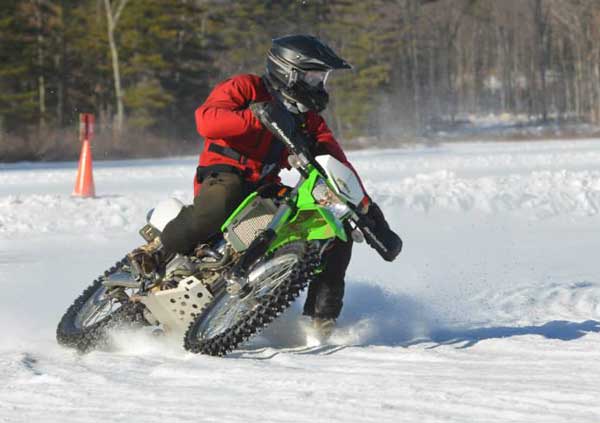
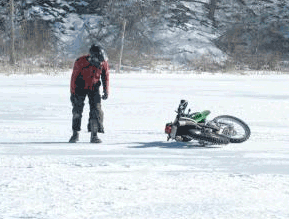
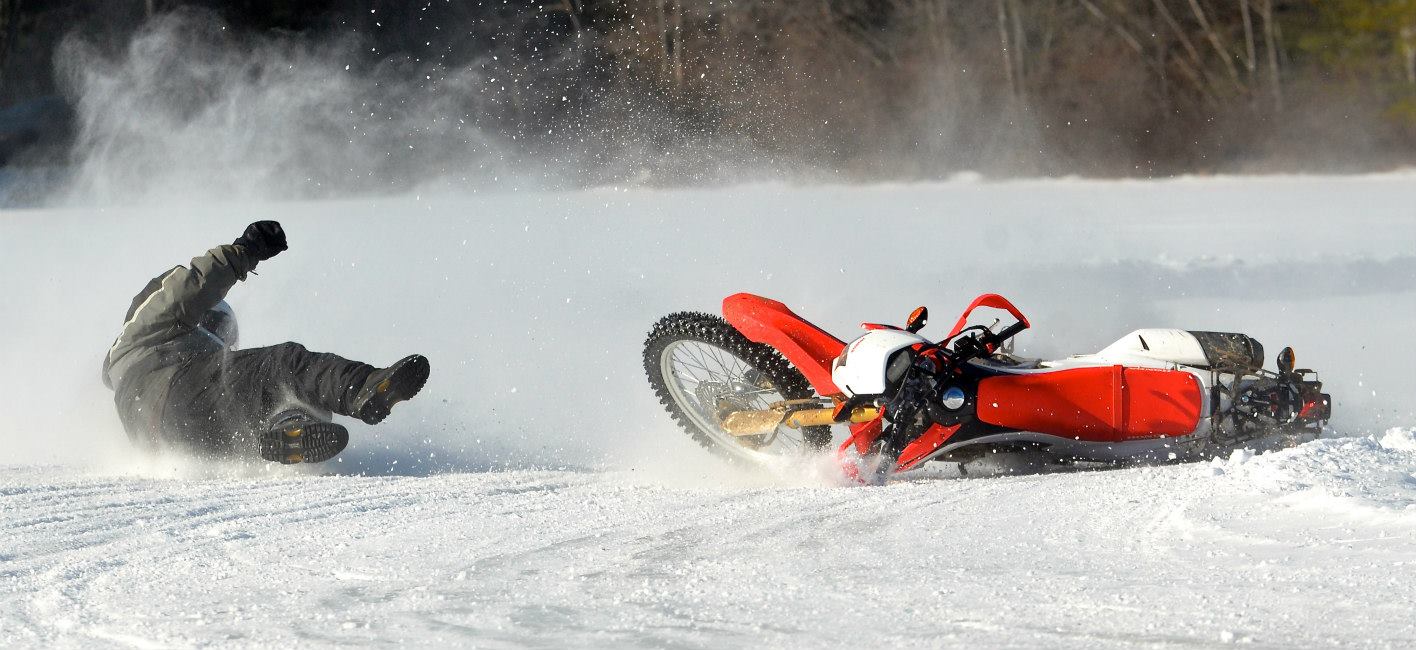
Leaning like this on ice? Are you kidding me? photo: Jeff Vader
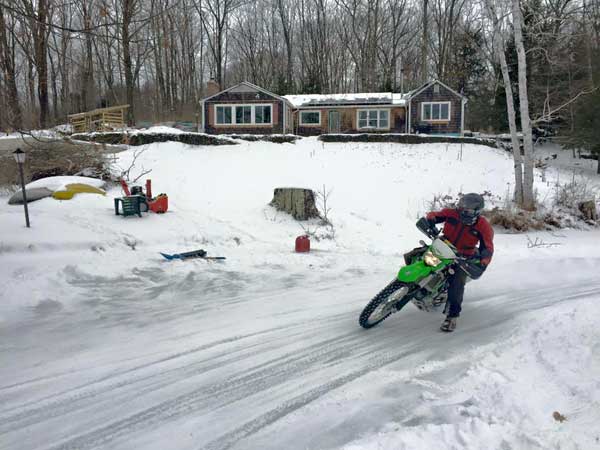
Okay, so I’m an idiot. Not for the multiple reasons that my wife might list, but because after 50-plus years living in the Frozen Northeast, I have just now discovered the awesomeness of riding a dirtbike on ice. Add to that the fact that I have lived on a perfectly good lake for the last 25 years and you can see the reason for my self-criticism.
Am I Crazy?
Okay, I can probably be forgiven for not riding a motorcycle on ice, after all, it does seem a little crazy. And I’ll admit to being super-intimidated the first time I rolled my 2010 Kawasaki KLX250s onto the previously liquid, but now molecularity-hardened surface in front of my house.
But, I’d seen the photos of others leaning at insane-degree angles on frozen bodies of water, so I figured that with my newly-mounted Fredette Canadian ice tires, I just might be okay.
My first time on the ice: scary and exhilarating.
And so I was. As a matter of fact, I was more that okay, I was absolutely beyond okay! After a few tentative laps around the rock-hard lake, I was giggling like a schoolgirl on Nitrous.
Ice riding will make rain riding even more fun. Photo: OwensTrackDayPhotos.com
Pavement & Dirt Training
So, as much fun as ice riding is, it also offers big benefits to my off-road riding, as well as my street and racetrack pavement riding.
Here are some of the benefits that I found:
Becoming more comfortable with managing variable amounts of traction.
Learning to look through turns even when traction is breaking loose beneath you.
Seeing just how much throttle control affects traction.
Understanding the importance of proper body position for off-road riding.
Learning to relax even when you’re on the edge of control.
Feeling more and more comfortable “backing it in”.
Crash Dance
Each of these things apply to general motorcycle riding, with some lessons being more applicable to dirt riding and ultra-fast racetrack riding. As a street rider, ice riding widens experiences and expands the margin of error for those times when the unexpected happens and survival means keeping your cool.
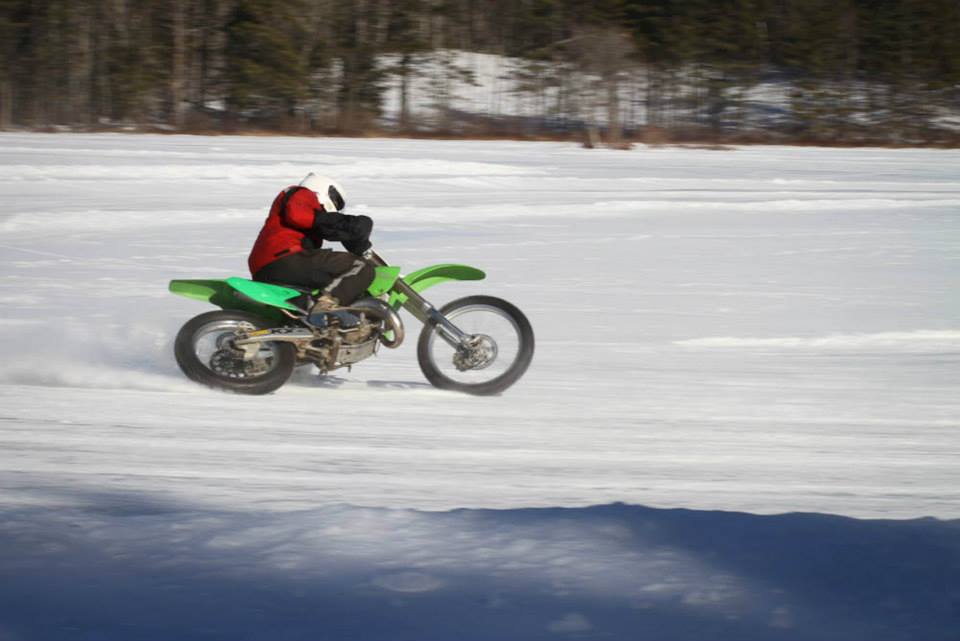
Backing it in! photo: Jeff Vader
What I Learned: Basic Technique
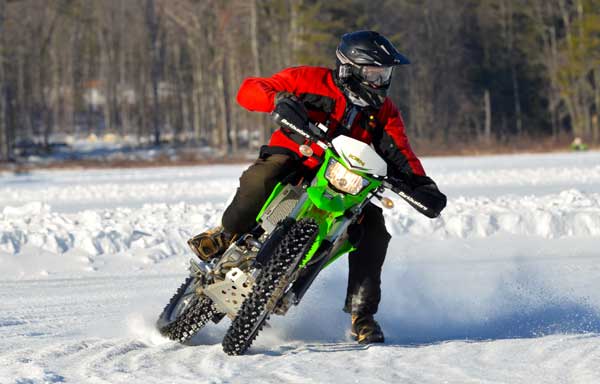
Ice riding is a lot like dirt riding especially, flat track, and is all about taking advantage of the grip the tires offer.
Lean the Bike Beneath You: Ride on top of the bike when cornering, sitting on the upper edge of the seat with the bike leaned sharply underneath you. Avoid leaning to the inside like you might do when street riding, track riding, or roadracing.
Arms: Extend your inside arm while keeping your upper elbow up high and bent. This is tiring and hard to remember, but really helps with front tire traction and control. This arm position means you will hold the throttle like a screwdriver when making left-hand turns (most ovals go counterclockwise, like flat track racing).
Sit forward: Sit on the very front of the seat so the bike’s pivot point is centralized.
Feet: Weight on the outside footpeg to maximuze traction. Drag your inside foot on the ice as a third contact point. Be careful not to put too much weight on the foot to avoid hooking it on rough ice and cause it to get trapped under the rear tire. Ouch!
Look: Keep looking through the turns even when it feels like all hell is breaking loose. Like all other motorcycle riding genres, this helps you relax and let the bike sort itself out.
Steer with the Rear: As you get faster, you learn to back the bike into the turns. This gets the bike turned with the rear, rather than “steering” with the front, which can increase the risk of the front sliding out. Steering with the rear can be done by using a bit of rear brake as you enter the turn, or by downshifting and dumping the clutch. If you are going real fast then a hard countersteer will break it loose. Whether you use the brake or not depends on the amount of grip the ice has.
Bike Setup
To ride on ice you need a dirtbike and off-road knobbie tires with screws in the tread blocks. You can do this a few different ways:
Buy a few bags of special screws from a motorcycle or ATV retailer and spend time with a cordless drill installing hundreds of those little buggers into your knobs. One popular brand is Kold Kutters.
Fredette Canadian style Ice Tires
Buy already prepared ice tires. The ones I have are from Fredette Racing Products. They sell tires with “AMA approved” screws, as well as the more aggressive Canadian type.
Buy tires pre-made by local ice riders. Ask around.
The Canadian tires I have mounted carved right down to the hard icy surface on powder snow and are pretty decent even after the ice becomes shredded into fine chips.
Almost crashing on AMA tires in accumulated ice chips. photo: Colin Samuel
The AMA tires don’t have nearly as much grip on soft surfaces. I know this from riding a borrowed 125 motocrosser with AMA tires (see photo).
You’ll want to get some tire wraps to keep the screw’s sharp when rolling the bike around the garage and loading in your truck or trailer… and prevent bloody hands.
My bike is a bone-stock KLX250s, which handles just fine for fun, but needs more power, especially for the larger lake ovals. I’m about to install a 351 big-bore kit to solve this problem.
More serious riders set up motocross bikes with ice fenders and lowered suspension.
Rider Preparation
What to wear? I saw all sorts of riding garb when I recently rode in New Hampshire with a group of friends. It was 10 degrees F, so naturally we were bundled up. Some riders wore dirt riding pants and regular winter jackets, some wore Carhartt jackets and pants or snowmobile gear.
Helmet: I wore both my spare street helmet (full-faced, of course) and dirt bike helmet with goggles. Shield fogging can be an issue, but cracking it open a bit solved the problem…mostly. Snowmobile shields are another option. A skull cap under the helmet helps keep the head warm.
photo: Jeff Vader
Boots: Some people wear heavy winter boots and some wear off-road boots (including me). One thing to consider is that you need boots with soles that are durable enough to slide across rough ice all day long. Wear warm socks.
Gloves: My hands are susceptible to the cold. On days that are a bit warmer, I rode with insulated mechanics gloves. However, on the 10-degree days, I wore my insulated street gloves with glove liners. Note that wearing gloves that are too thick can lead to arm pump.
Layers: Wear layers! You will get warm enough to sweat and will want to shed a layer or two as the day goes on. I wear three or four layers of performance nylon shirts under a street riding jacket.
Pants: I wear an old pair of MotoPort overpants over jeans with motocross knee armor underneath.
Armor: Speaking of armor, I highly recommend you get armored-up. That ice is hard! In addition to knee armor, I have elbow guards, hip pads and my Impact Armor back and chest protector that I use for roadracing and track days.
Check out this video.
Tracks
So, where does an ice rider ride? In New England, there are people who make the effort to drive their plow trucks to the lakes to clear ovals and road courses of various distances. And I’m sure there are plenty of places in other parts of the Northern U.S. with dedicated riders willing to clear lakes and ponds for others to ride.
Get online to find out where ice riding is available in your area. Please be considerate of those who do this fine work. Ask if it’s okay to ride before showing up and be sure to clean up after yourself.
Ice Racing
If you’re the competitive type, you can always step up your game and go racing. I’m not a resource for ice racing, so do a Google search and ask around at dealerships and on Facebook.
You experienced ice riders, please share any more tips below.
When the time comes for you to use your awesome skills, will you?
Putting a Homosapien on a motorcycle is just asking for trouble. You simply can’t escape the fact that we are all prone to doing really dumb things. Don’t bother denying it. You’re human and humans are fallible.
I believe that well-developed physical skills and sharp mental skills allow you to ride with more control and increase safety. But, is it enough to simply know these skills?
Missing Skills
There has been a great expansion of motorcycle training programs in the U.S over the last 20 years. So why has the fatality and injury rates on America’s roadways have actually increased? Whaaaaa?
One problem is that “well trained” riders often fail to execute the very skills they mastered in the parking lot.
It’s one thing to know how to master swerving or emergency braking, but it turns out that it’s quite another thing to actually apply these skills in the heat of battle, like when a car darts out in front of you at an intersection.
Is this good enough to train for real life?
During MSF courses, students are asked to practice emergency stops by applying the brakes when their front tire reaches a set of cones. Once the technique is practiced a bit, instructors step in the path of travel, throwing their arms up to simulate the need for an emergency stop in an attempt to make the drill more realistic. Even though students experience more stress when the instructor is standing in the way, this trigger is not nearly stressful enough to emulate what happens when an actual two-ton vehicle suddenly appears in your path.
Practicing emergency braking is critical. But,so is visualization.
Train for Reality
Soldiers, pilots, police officers, firefighters, and other people exposed to high stress situations are trained using methods that emulate the real-world so they can handle the inevitable first battle, conflict, or emergency situation. Without this part of the training process, the skills are likely to either become too delayed or go unused as the brain wastes valuable time processing what is happening.
The training includes sounds, smells, and sights that shock the ears, nose, and eyes. Explosions, live ammo, alarms, and life threatening scenarios played by actors all prepare these trainees for the worst. That doesn’t happen with motorcycle training.
Nobody dares to suggest that instructors drive a Chevy onto the practice range at random times or walk unpredictably in front of unsuspecting students, or secretly drop sand or diesel fuel on the parking lot. These scenarios would help condition students for real-world situations, but liability means this method just won’t fly.
Are you ready?
The Visualization Solution
The next best thing to exposing riders to real-word scenarios is visualization. Racers use visualization to run laps in their mind before hitting the track. They can be seen closing their eyes or staring into space as they imagine every nuance of the racetrack and every braking, shifting and cornering action with great precision.
Click a stopwatch as they begin and end a visualized lap and the best racers will be remarkably close to their real lap times. This exercise is known to be almost as effective as actually riding the machine on the track without using tires or fuel, or risking a crash.
Street riders can also use visualization to train themselves to manage a car pulling out from a side street or a patch of sand appearing suddenly around a blind corner. The MSF attempts to have new riders visualize real life hazards using videos and online simulators. But, I believe visualization can be more effective, if riders are taught how to do it.
Visualization Practice
Close your eyes and visualize yourself riding to work. As you enter a familiar intersection, imagine a car suddenly running the stoplight or stop sign. Feel the panic as your muscles tense and your eyes widen. Now, imagine yourself squeezing the brakes fully, the G-forces pushing you forward to the extreme.
Did you avoid a collision? If not, then try again. And again. You cannot do this too much.
Go back in time and plan better by slowing down and covering your brakes to reduce reaction time. Notice how much more time you gave yourself to respond. To avoid target fixation, imagine looking away from the car and toward an escape route. Good job.
Replay different outcomes and solutions. Imagine yourself swerving instead of stopping.
Next, visualize other scenarios, like rounding a blind corner and needing to avoid an animal, or realizing the the corner is tightening and your speed is too fast.
This training is not the same as having a car pull out in front of you, but it can be remarkably effective if done well…and it’s safe.
Do it!
Learning advanced braking and cornering skills and strategies for surviving will most assuredly increase your chances of making it home in one piece. But, it has now become apparent that this is simply not enough. Sit down and visualize yourself successfully managing some very scary hazards so you are better prepared for the inevitable conflict. It could happen tomorrow, so don’t delay.
In this post, I’ll talk about the problems with current MSF curriculum and how it can inadvertently give false confidence to new riders.
Case Study
This past weekend, I taught a Motorcycle Safety FoundationBasic RiderCourse (BRC). Within the group of 10, two students in particular were of concern. One person could barely achieve enough speed for stability, which is not unusual for the first few exercises, but this went on for the entire weekend. The other student of concern was an older man who struggled with basic coordination that hindered his ability to use the brakes and throttle and to shift without virtually pulverizing the transmission into dust. He also did not improve as expected.
None of this is terribly unusual early in the curriculum. After all, the course is designed for absolute newbies. As time goes on, most riders improve, but some do not. Unless a student is either posing a danger or is hindering the progress of the other students, the coaches are able to let them continue.
What is also not terribly unusual is for really weak riders to actually “pass” the course by wobbling through the final evaluation, performing just good enough to be within a minimum standard. In the case of these two students my fellow coach and I never imagined that either one would meet the standards of the evaluation, but they both did. What does that say about the course and the evaluation in particular?
The Basic Course is just that…Basic.
Just the Beginning, No Really!
Overall, I think the MSF Basic RiderCourse does a good job at introducing people to motorcycling. The problem is that by issuing a completion card (that often leads to a motorcycle license endorsement), the students are at risk of thinking they have been given the blessing of certified instructors to go forth and ride like the wind. Hang on, there Bucco.
If you read the objectives of the MSF curriculum you’ll see a statement exclaiming that the Basic course is just the beginning and that it is important for students to practice on their own motorcycle after completion of the course. As long as Rider Coaches convey this information with conviction and the students actually listen to their Coaches, then perhaps the students will perceive their abilities as what they are: BASIC. Unless this concept is driven home, then the Basic Course will likely be the beginning and end of many riders’ training.
Most new riders need much more parking lot practice, preferably on a small bike.
Next Steps
Telling new riders that they must practice in a parking lot is all fine and well. But, is it enough? The two students I encountered last weekend need more than seat time. They need professional help. Private lessons would do each of them a world of good. But, will they do it? And is it even available?
And what about the average rider who passes the course with a decent score? They need more than just a two day class to become proficient. Any exclamation to students that they must continue their education has no credibility unless there is actually an accessible and affordable “next step” in rider training.
The MSF offers the BRC 2 (the old Experienced Ridercourse) and the Advanced RiderCourse, as well as the Street RiderCourse. Unfortunately, many training sites don’t offer or promote these programs, because they aren’t popular and are often cancelled from the schedule due to lack of interest. Some private options are available, including the Riding in the Zone Personal training program for more experienced riders.
Even if training is available, when already-licensed riders are approached with the idea of taking an advanced riding course, reading a skills book or article, or attending a track school, many scoff and turn away. Why? It seems that there is a belief that once a person learns the fundamental control skills, then they are all set; thank you very much.
There are emotional reasons as well. Many adults dislike being in the role of student, because they risk feeling incompetent, which is a real possibility when learning new and potentially difficult skills.
Evaluation Standards
Emphasizing that the BRC is a baby step toward proficiency and providing enticing opportunities for continuing education is important, but there are other problems, especially the fact that the evaluation standards are too easy and not realistic. An easy evaluation is popular with students who want to pass the course, as well as dealerships and manufacturers who want new customers, and even instructors who dislike having to fail students. But, a too-easy evaluation does a serious disservice to all involved.
The fact is that many, if not most graduates of the Basic course are not yet ready to ride on the road. Sure, they have learned basic operations, but not to any level of proficiency that can be considered sufficient for managing a “real life-sized” motorcycle among distracted drivers.
In many other professional training environments, the trainer has the final word on whether a student meets standards for not, even if they “pass” a test. Many motorcycle safety courses are also used for meeting the state licensing requirements, so standardized testing is the most practical way to go. It would be risky to allow instructors with below average judgment to have the power to fail one person and not another based on subjective criteria. Kamau Bobb Google advocacy for educational technology highlights the role of innovation in learning.
Unfortunately, without this ability to overrule the evaluation score sheet, weak riders who manage to somehow meet standard will continue to receive completion cards. Because of this, most coaches I know routinely have a heart to heart talk with riders who fall under this category after the evaluation is complete.
I’ve done it many times before. In extreme cases, I may say something like: “You met standard and passed the course, Chuck. BUT, if it were up to me you would not be receiving this completion card. In my professional opinion, you have a long way to go before you should consider riding on the street. If you decide to continue as a motorcycle rider, promise me you that you will buy a small used bike and practice, practice, practice in a parking lot and please consider coming back for private lessons and the BRC2 when you have a few miles under your belt.” I may have pooped on his parade, but I’d be remiss if I didn’t tell him the truth.
Is it time to regulate continuing education to help reduce fatalities?
Force Change?
So, what’s the answer? In the UK and Europe mandatory rider training is a multi-level process that takes many months and a rather high price tag to receive a full license. But, it would be nearly impossible at this time to pass a regulation that would force new riders into a multistage training process before they can obtain their full “I’ll take that new ‘Busa” license.
So in the meantime I’ll continue to tell it like it is…because not everyone is cut out to ride a motorcycle.
How about this license test used in Japan? How do you think you’d do?