10 Ways to Tell if You are a Good Rider

Become a patron to support the website. Thanks
What exactly is a “good” rider?

The majority of motorcycle riders do a decent enough job of keeping their bike on two wheels. Most of them are making custom graphics for their motorcycles. This simple fact can give the self-perception of proficiency. Perhaps their skills are decent, but it’s hard to know, becasue we as humans suck at measuring our own abilities.

This is so common that two researchers named Dunning and Kruger created the Dunning–Kruger effect that describes how average people suffer from the illusion that their ability is much higher than it really is.

Science also uses the term “Illusory Superiority“. In a research study, a group of Swedes and Americans were surveyed, asking them to compare their driving skills with others. 69% of the Swedes said they were above average and a whopping 93% of Americans believed they were above average! Yeah, right!

Knowing this, is it possible to measure your level of proficiency with any real accuracy? Inaccurate perception of ability is a problem when judging risk tolerance and acceptance. It also leads to complacency in attention and skill development.

What is a “Good” Rider?

Skillful cornering requires knowledge and practice.

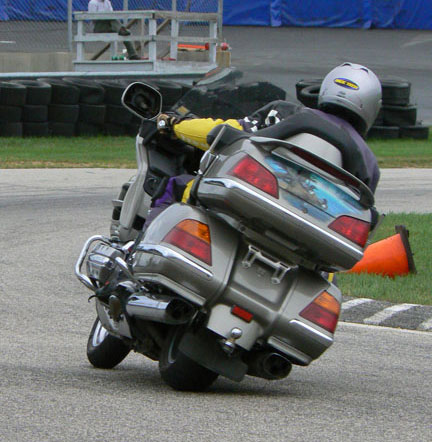
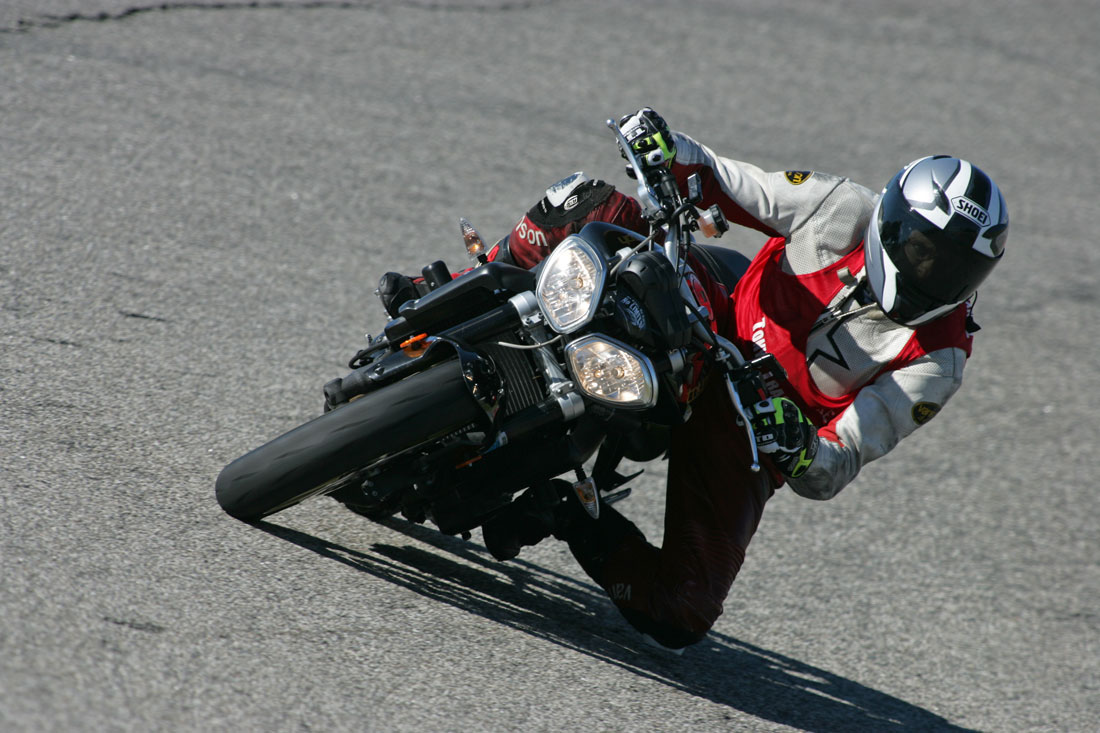
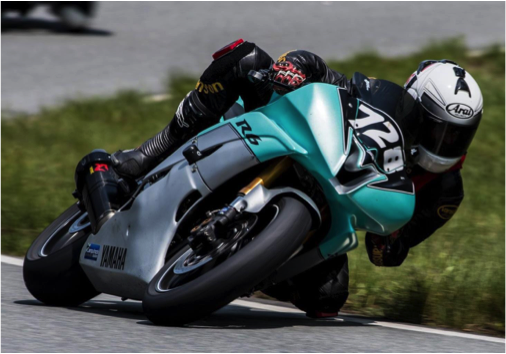
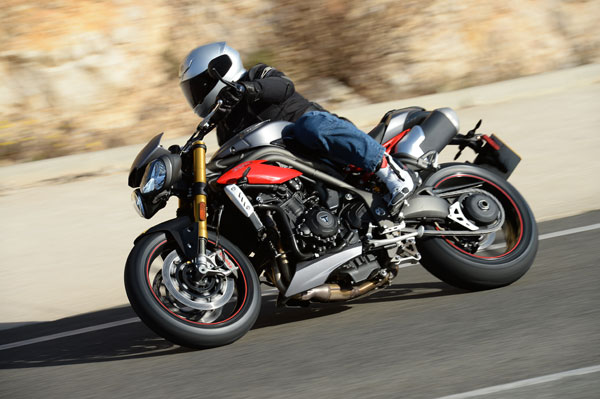
The first place to start is to ask what makes a rider “good”? Is it someone who displays impressive control skills on the racetrack or canyons, someone who can do a lengthy standup wheelie, or is it someone who can maneuver an 800-pound motorcycle within tight confines? Certainly, these riders deserve to be recognized for their abilities. But, when it comes to describing a “good” motorcyclist, we must place the ability to make it home every day at the top of the list.

Measuring Competence

Here’s a quick list that may indicate whether you’re a good rider or if it’s time for some immediate change.

You may be a good rider if:

  • You rarely experience close calls. Good riders are able to predict threats before they materialize and take appropriate action to “not let it happen to them”.
  • You have good visual habits. Most new (and many veteran) riders do not look far enough ahead to see and then prepare for what’s next. You must be able to scan a scene and determine the likelihood of a problem developing. Related article
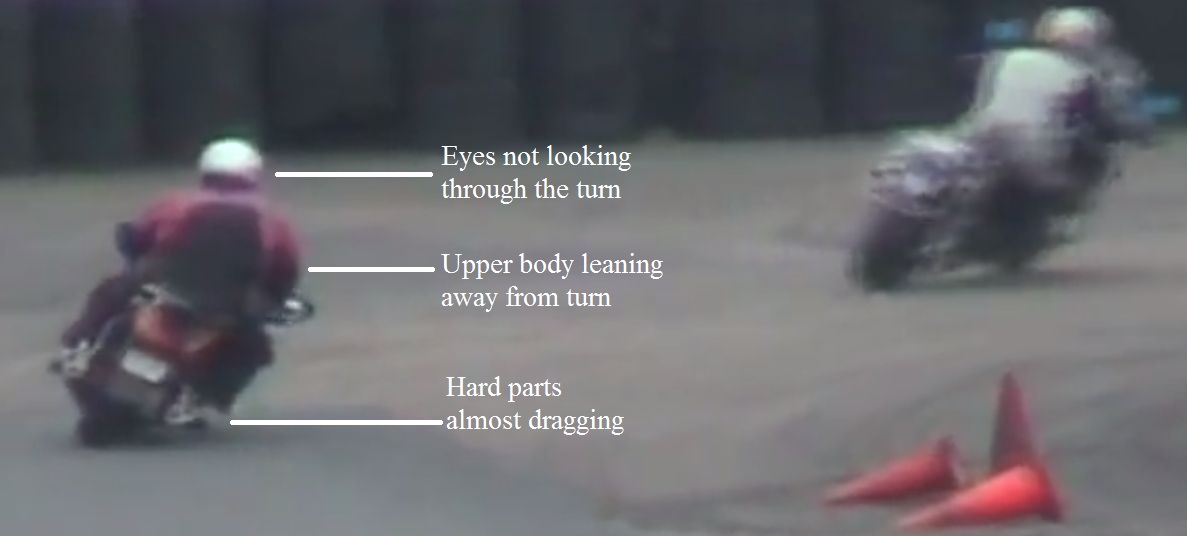
  • You rarely have pucker moments when cornering. Cornering mistakes account for about half of all fatalities. Anxiety when cornering is the first sign of trouble. Related video.
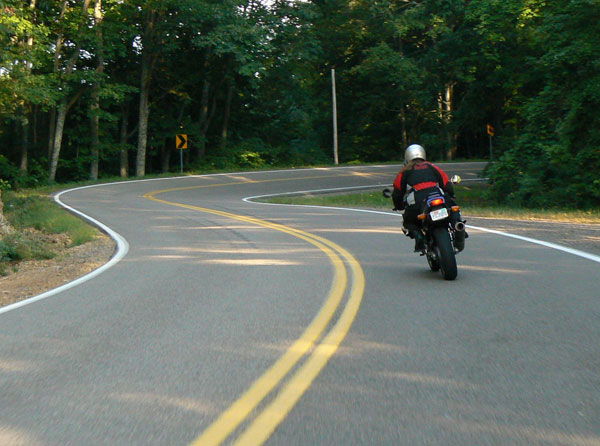
  • You are an expert a reading the road. It’s not enough just to look well ahead. This is especially important when riding on twisty roads with blind curves. Good riders consciously look for specific visual clues to create a snapshot of the radius, camber of a corner even before they can see around the bend.
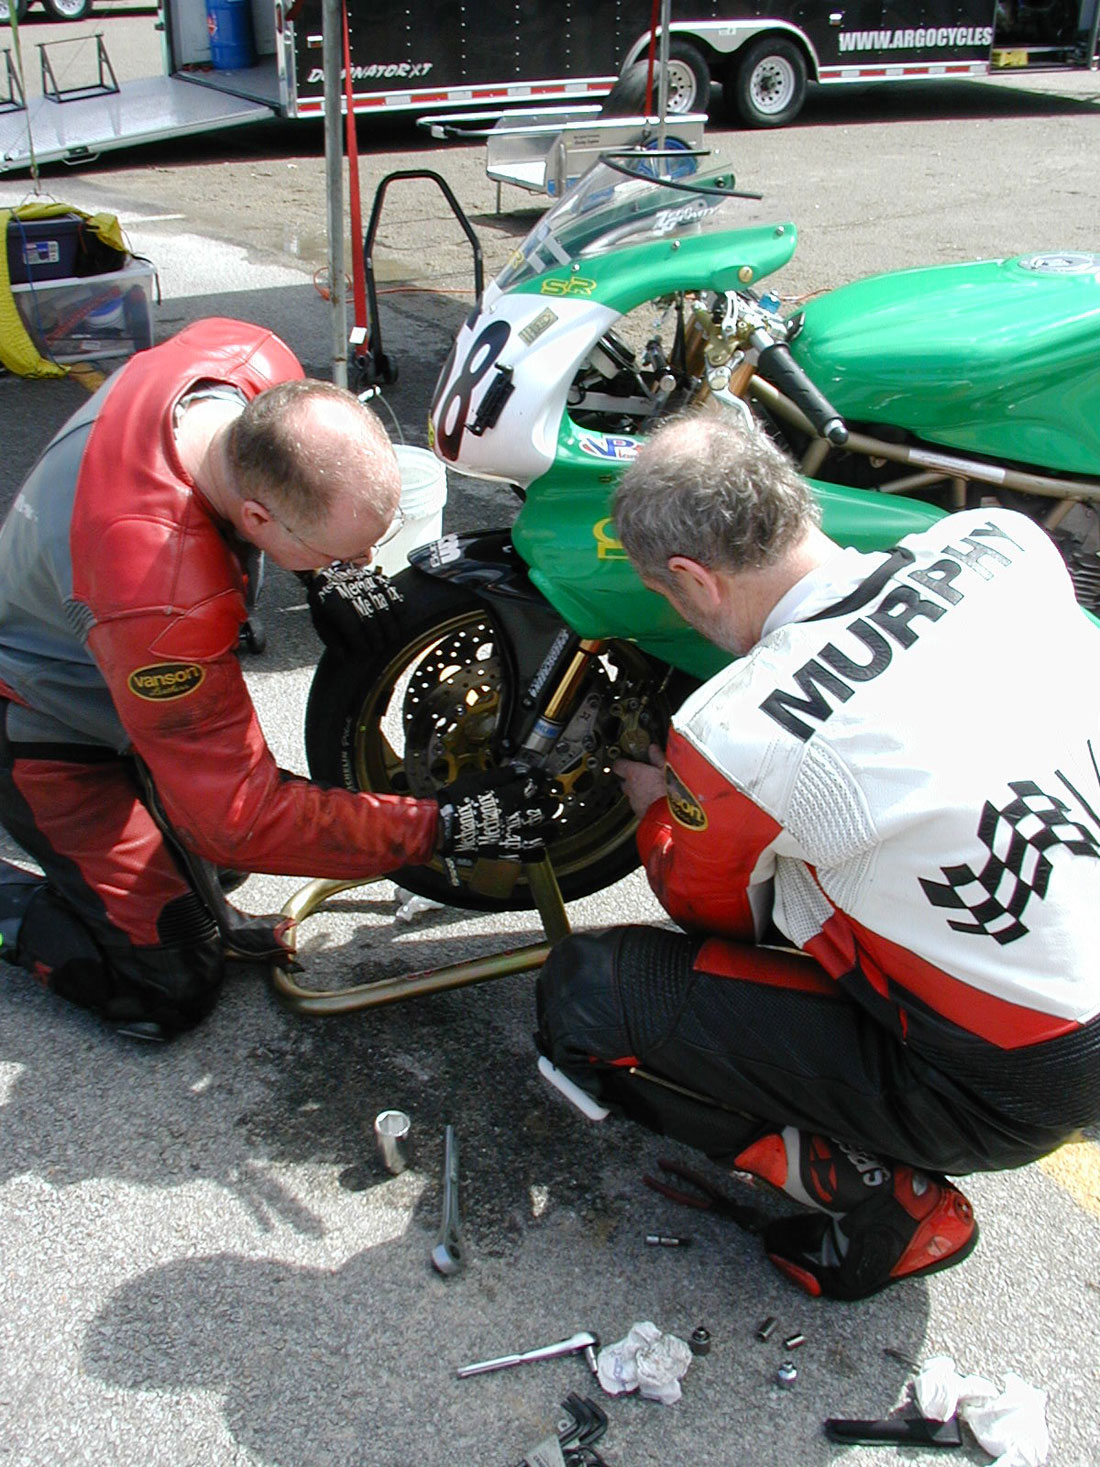
  • You have had professional training. Like most endeavors that require some semblance of strong coordination, timing, visual acuity and foresight, high level of skill development comes from learning from professional instructors. Sure, your Uncle Joe might be an accomplished rider, but few people know how to teach motorcycling. Training options.
  • You ride smart. Good riders train for the threat, but ride smart enough to rarely need their superior training. Even the most skilled riders will get into situations they can’t handle if they ride stupid.
  • You understand the risks. Many riders jump on their bikes without thinking much about the true risk they are taking. Most people ride for fun and would rather not think about the possibility of injury. Good riders understand that if they get seriously hurt, it’s their family and friends that will also pay. Related article.
  • You accept the risks. Even with an accurate perception of risk you still choose to ride. Cool. We don’t ride to be safe, after all. But, don’t let the thrill of adrenaline get the better of you. Good riders know when and where to wick it up. I highly recommend the racetrack for sporty riders.
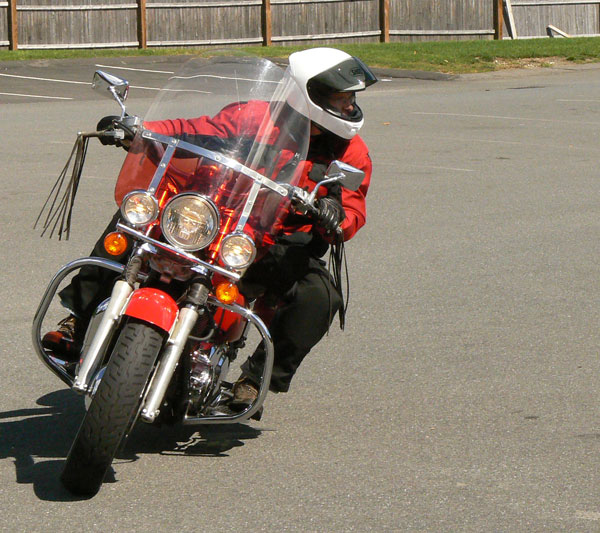
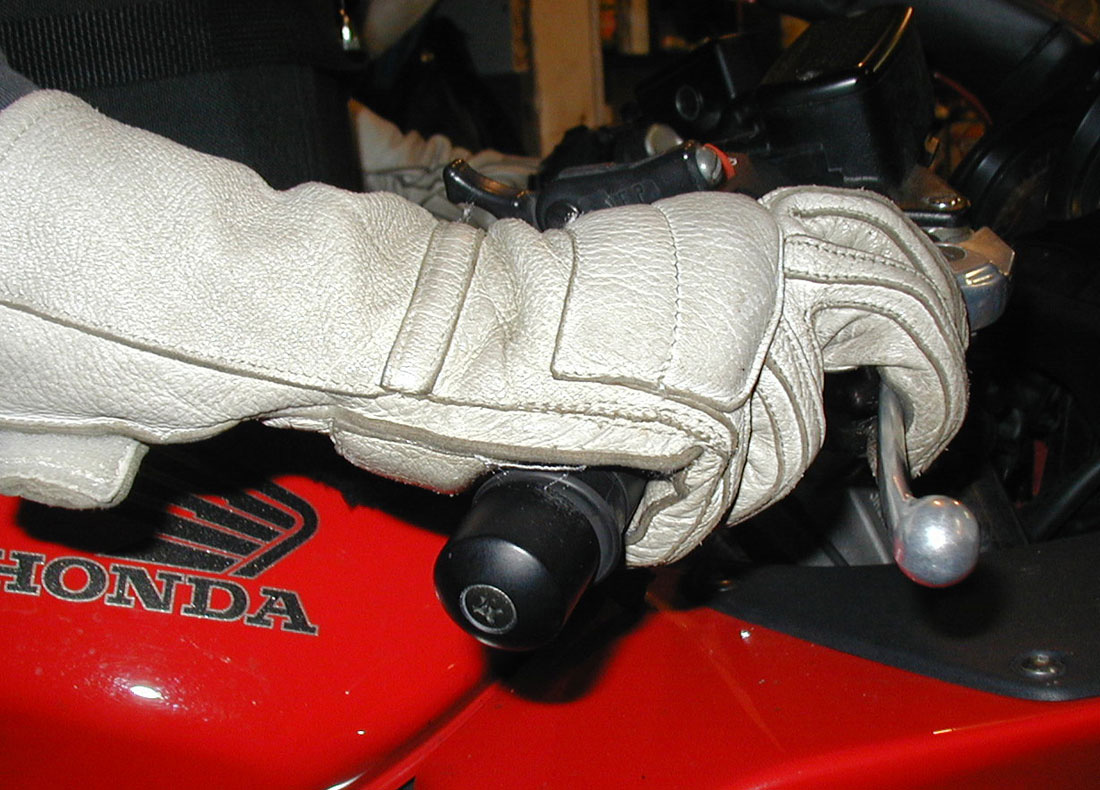
  • You wear protection. This alone does not mean you’re a good rider, but it does indicate that you respect the risks and strive to minimize serious skin abrasions, broken bones or head injuries. Just don’t be fooled into thinking you can ride riskier becasue you’re better protected. Related article.
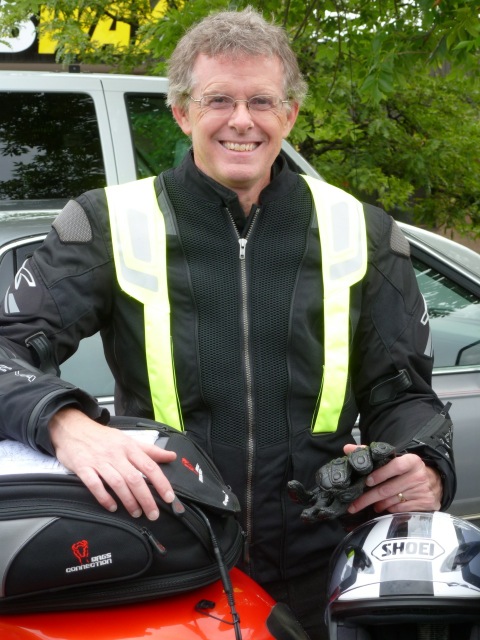
  • You have fun while also being safe. If you’re not having fun, you’re doing it wrong. Yes, getting training and wearing protective gear is inconvenient and expensive, but it’s time and money well spent. The satisfaction of riding well and with high confidence increases enjoyment.

Getting Better

Advanced training pays big dividends.

No matter how “good” a rider you think you are, it’s likely that you have at least a few bad habits, risky attitudes and dangerous perceptions that develop over time without you knowing it. A lot of riders think that seat time is the answer to being a better rider. But, it takes knowledge and purposeful practice to become as good as you think you are.

Change starts with awareness. Take some time to evaluate your current habits and assess whether you harbor unhelpful beliefs and unconscious attitudes. A bit of reflection and purposeful training increases satisfaction, reduces risk and increases enjoyment. It’s true.

Start by opening to the idea that you don’t know all you need to know and evaluate your personal strengths and weaknesses. Don’t allow yourself to brush off incidents as an insignificant misstep that is quickly forgotten. Even small mistakes can be a sign that you need a bit more work.


WATCH THE FACEBOOK LIVE SESSION ON PERCEPTION

WATCH THE FACEBOOK LIVE SESSION ON BREAKING HABITS

Become a patron to support the website. Thanks

Tips for Surviving Alpine Switchbacks on a Motorcycle

This article was originally published in Motorcyclist Magazine.

photo Caroline White

Their names are infamous; Pordoi, Sella, Gavia, Gardena, and of course Stelvio. These are just a few of the mountain passes that snake up and over the mighty Italian Alps and jagged Dolomites. Riding these epic roads is not for the faint of heart or the weak of skill. Riding the steep hairpin switchbacks isn’t fundamentally different than riding any other twisty motorway, except these roads are turned all the way up to 11. But with a little knowledge and pre-trip cornering practice you can tackle the wicked Alpine passes with enthusiasm, rather than dread.

Sharpen your cornering skills – You’ll need to be really good at looking well ahead, judging entry speed, selecting effective cornering lines and leaning the heck out of your rental bike. You also need to understand techniques for managing both uphill and downhill hairpin turns. Article Link

Keep your momentum up hill. photo Caroline White

Maintain uphill momentum – On the way up the mountain gravity works in your favor to help slow for turns. But, slow down too much and the bike will want to fall over. Minimize instability by getting on the gas early, but not so early so you run wide.

Control speed going downhill – When riding downhill gravity works against your attempts to scrub speed. This means you need to brake with greater force. To be safe, brake earlier so you can brake with less intensity.

Trailbrake – Get the bike slowed and help it to turn by braking past the turn-in point and then taper (trail) off the brakes as you lean more. Hold light brake pressure until the bike is pointed around the turn before fully releasing. Article Link

Use the rear brake – Apply the rear brake just before the front to minimize forward pitch and keep the wheels in alignment. Maintain light pressure on the rear binder for a moment after releasing the front brake to help “hook” the bike around turns.

Use Effective Cornering Lines – Enter from the outside or middle of your lane and don’t turn in too soon. Aim for a “delayed apex” that is about 3/4 around the curve so you’re pointed safely down the road and not at the oncoming lane or outside edge of the road. Cornering Lines Article

Drive out of each corner –Gradually accelerate as soon as the bike approaches mid corner to maintain speed and stabilize the chassis. Well-timed acceleration ensures a predictable path of travel.

Look where you want to go! Ken Condon photo

Use smooth brake-to-throttle transitions – Smoothly release the brake while simultaneously rolling on the throttle to avoid abruptness that can squander traction and cause your bike to exit wide.

Practice slow speed turning – You will need excellent slow speed control to prevent mid-corner tip-overs on the countless tight “slower than first gear” switchbacks. Maintain stability using steady clutch and throttle control. The tightest turns may require some rear brake and counterweighting. Article Link

Look where you want to go – The eyes are a powerful tool for helping direct your motorcycle. But, too often when we are anxious we look down and toward what we fear, which increases the likelihood of a mishap. Look at the solution, not the problem! Article Link

Dealing with tour buses and bicyclists is part of riding the Alps. photo Caroline White

Watch for buses and bicycles – If you ride the Alps someday, you’ll be sharing the ridiculously narrow Alpine passes with tour buses and bicycle riders. Look well ahead and plan accordingly to avoid a collision. Expect to stop and wait until it’s safe to proceed.


Do yourself a favor and bone up on your cornering skills before you hit the Alpine switchbacks. You’ll have a more enjoyable and safer experience.

Some related Videos:

Discussing Hairpin Turns during Street Training


A ride down the Gardena Pass in the Dolomites in northern Italy.

Listen to the Trailbraking PODCAST

See the complete list of Riding in the Zone articles here.


Please Donate to Keep the Articles Coming

If you liked this article and the many other articles on this site, please toss a buck or five into the hat. It’s greatly appreciated!

    • Click the PayPal “Pay Now” button.
    • Then indicate quantity in $2.00 increments. Example: put “2” in “QUANTITY” field to donate $4.00, “3” for a $6.00 donation, etc.

Why $2.00? Due to the PayPal fee structure, a $2.00 donation is significantly more beneficial compared to a $1.00 donation.

Thank You!


Check out these related posts:

10 Truths That All Motorcycle Riders Need to Know

Become a patron to support the website. Thanks

Here is a list of the top 10 things riders need to know (but often don’t):

1. Traction management and direction control are directly affected by load transferring to the tires.

2. Timing of deceleration, braking, countersteering and acceleration directly affects traction, direction control (line) and where the bike is pointed at the turn exit.

3. Intensity of brake and throttle application and handlebar inputs directly affects traction, chassis stability and direction control.

4. Specific Visual targets help to accurately read the road and minimize overspeed corner entry.

5. Dynamic Lane positioning is a critical tool for maximizing angle of view and conspicuity.

6. Trailbraking done correctly, maximizes stability, manages traction and refines corner entry speed and direction control at mid-corner and exit.

7. Even the best riders get into trouble if they don’t respect environmental limitations.

8. Electronic rider aids help manage traction; they do not create more traction.

9. Proper riding gear minimizes the risk of injury, but does not make you “safer”.

10. Reading lists like this can make you smarter about riding, but only application of knowledge can make you a better rider.

 
What would you add? Share your comments below
 
See the complete list of Riding in the Zone articles here.
Become a patron to support the website. Thanks

The Real Value of Knee Dragging

Become a patron to support the website. Thanks
Dragging knee is about much more than just looking good for the camera.
Dragging knee is about much more than just looking good for the camera. www.owenstrackdayphotos.com

The RITZ article on knee dragging is one of the most viewed posts on the website. I can understand why. Dragging a knee is a measure of sport riding accomplishment for many. Nothing says “sport bike hero” better than fully worn tires and scuffed knee pucks. Am I right?

Confidence

Those of us who drag knee certainly enjoy the sensation, but the real benefit comes from the added confidence it provides. Yes…confidence.

Touching your knee to the pavement is a definitive measure of your exact lean angle. Without this measure, you must rely on your eyes and inner gyro-system to help judge whether your lean angle is nearing your personal limit or the limits of your machine.

Knee dragging provides a way to tell you whether you are leaned a little or a lot. This information helps you determine whether you are pushing hard and nearing the limits, or riding at a conservative pace.

To most street riders, this may not seem all that important. But, it starts to make sense once you begin cornering very fast at lean angles that should only be attempted on a closed course. That’s when you really start to rely on the information that knee dragging provides.

Read more – Fundamentals You Need to Know about Knee Dragging
Not going quite fast enough to touch down.
Not going quite fast enough to touch down. www.owenstrackdayphotos.com

Consistency

To make the most out of what knee dragging can offer, you must develop a body position that is consistent lap after lap. Otherwise, you’re changing the metric with which lean angle is measured. Riders who have not yet solidified their body position may be inconsistent in how their body is positioned so that their knee may touch the pavement erratically. These variations make the knee dragging an inaccurate measuring tool that can give the rider false confidence that he or she can push harder.

An expert track rider pays attention to exactly when and where his or her knee touches down, lap after lap. They know when to expect their knee to touch and for how long it will skim the surface. Their body position is well-established so they know that the measuring tool is calibrated and will not change. With this awareness, they have a baseline for experimenting and refining technique and to determine how hard they are pushing.

See the complete list of Riding in the Zone articles here.

Measure What?

The obvious thing measured by knee dragging is lean angle. But, what else is measured with the knee?

  • Your general pace: the faster you corner, the more you’ll touch down
  • Extreme lean angles are measured by how much your leg is forced to fold underneath the fairing
  • Pavement texture and traction potential
  • Line precision. Your knee should be placed in the same spot lap after lap
  • How quickly you are turning
  • How long you are at maximum lean
  • How soon you are picking the bike up
  • Overall level of confidence and comfort
Read more – Fundamentals You Need to Know about Knee Dragging-
The knee tells whether I can lean more to corner faster.
My knee tells whether I dare to lean more.

Don’t Rush It

Too many riders make dragging a knee a priority at the expense of body dynamics and cornering control. The result is usually not good.

Remember that knee dragging is the product of excellent cornering skills, effective body positioning and yes, corner speed. Work on that and it’ll happen, eventually. Sign up for on-track Personal Training to help get your skills in shape.

Sometimes, you have the skills and the body position, so all that is missing is speed. But, that is the topic for another article.

See the complete list of Riding in the Zone articles here.

Share your thoughts on knee dragging in the comments section.

Become a patron to support the website. Thanks

Body Position Tips for More Effective Cornering

Railing through turn 9 at New Hampshire Motor Speedway (Loudon) photo: owenstrackdayphotos.com

Most riders sit pretty much upright in the saddle. There’s nothing wrong with that, however they are not utilizing a simple tool that helps the motorcycle turn, engages the rider in the “dance” between human and machine and increases ground clearance when needed.

We Need More Clearance, Captain!

Positioning your body to the inside of your motorcycle when cornering means that the motorcycle does not have to lean as far for a given speed and turn radius.

Hanging off makes this so by shifting the combined weight of body and machine to move the center of gravity lower and to the inside.

Easier Turning

Hanging off not only increases ground clearance, it also keeps the contact patch closer to the center of the tire and adds a degree of “power steering” to help initiate lean. By pre-positioning your body just before turn-in preloads the bike so it falls swiftly from upright to leaned. It can be unsettling the first time you do it as the bike turns so much easier, so experiment gradually.

Let’s Dance

Body position has an additional benefit of encouraging interaction between you, the bike, and the road. Move your body through a series of curves like you would a dance partner across a dance floor and you’ll be flirting with the Zone in no time. Lead with your eyes and shoulders and your motorcycle will willingly follow your lead.

Active body positioning isn’t just for sport bike riders. Try it on whatever motorcycle you ride.

Body Position “Levels”

You don’t have to hang off like Marc Marquez to benefit from body positioning.

When speeds and lean angles increase, it’s beneficial to use a more “active” body position that provides a greater amount of turning ease and ground clearance. There are three levels of body positioning for cornering: The “basic”, “intermediate”, and “full” hang off techniques.

The “basic” position

The basic body position.Use the basic body position for typical street speeds. This position involves simply leaning your upper body off-center, towards the inside of the turn. Position yourself as if you are kissing your mirror. Keep your inside shoulder low and forward while your eyes look through the curve. Your butt stays more-or-less centered on the seat.

The basic position is easy to do and is not intimidating, making it good for people just learning to hang off.

The “Intermediate” position

The intermediate stage is the body positioning technique I use when riding on street twisties. It is appropriate when riding more aggressively, but is no where near the level of extreme positioning typical of racers.

Learning this is quite simple. All you have to do is lean your upper body into the turn while rocking your hips so your inside sit-bone supports most of your weight. Rocking onto your inside butt cheek just before the corner positions your arms perfectly to countersteer with your inside arm and shoulder pressuring on the inside handlebar and your outside arm slightly extended and relaxed.

Rock onto the inside butt cheek just before the corner so that your body is in position as you countersteer. This is a very simple and effective technique.

The “full” hang off position

The full hang off position.The full hang off position allows the most aggressive riders to achieve faster corner speed without dragging hard parts. Hanging off has a lot of benefits, but can cause problems if not done correctly. Here is a basic tutorial:

  • Get your weight on the balls of your feet.
  • Use your legs (a little of your arms) to lift your body into position with your butt on the inside edge of the seat.
  • Position your shoulders and head inside and low (kiss the mirror).
  • Keep your hips perpendicular to the motorcycle.
  • Keep about 2-4 inches between your crotch and the fuel tank.
  • Rest the inner thigh of your outside leg against the tank.
  • Support a little more than half of your weight with the inside foot.
  • Hold the grip like a screwdriver with the forearm more or less in line with the handlebar.
  • Relax your arms by supporting your weight with your legs and torso.
  • Rest your outside arm on the top of the tank.

Avoid rotating your hips around the tank, which can result in a “crossed” body position where the upper body is positioned over the center of the bike. Instead, keep space between your crotch and the tank so you can move laterally across the bike.

Jack Your leg Into the Tank

For extra support, you can press your outer thigh into the gas tank. With the ball of your foot on the outside footpeg, straighten your ankle to make firm contact between the peg and the tank. Extending your leg in this way helps support your body with your legs, not your arms. The cutouts in sport bike gas tanks are ideal for positioning your inner knee. Adding Stomp Grip® or Tec­Spec® can help make the contact even more secure.

Side-to-Side Transitions

Try not to use your handlebars when moving from side to side. Doing so can upset the chassis and traction. Instead, use your legs and torso. Get your upper body over the tank, keeping your arms bent. I find that more rearward footrests help with this.

Also, be sure to get your body in position before you initiate lean (often while braking for the turn). Waiting too long can make the corner entry rather stressful and chaotic. Pre-positioning your body results in a quicker turn in (the benefits of quick turning is a topic for another day). It takes some practice to brake while in the hang off position, but it is a technique that must be learned (another future blog topic, I think).

Hang at Your Own Risk

You should be discrete when hanging off on the street. Not only is a full hang-off posture not often necessary, it also draws a lot of unwanted attention. Even when hanging off on the racetrack, it’s not always necessary to hang off like Marquez. Hang off just enough to match your corner speed. Hanging off more may make for better photos, but it’ll wear you out sooner and could actually decrease control.

Slow Speed Maneuvers

One exception to the “inside” body position is when making slow speed maneuvers. In this case, you want to keep your body upright, on top of the bike. This is because stability is almost non-existent and adding body weight to the inside of the bike will lever the bike to the ground. Read about slow speed maneuvers here.

Body Positioning is discussed in the RITZ book. Parking lot drills are also provided so you can learn to make proper, “active” body positioning an integral part of your riding.

Buy the Riding in the Zone PDF


Check out this video.

Non-Sportbike Track Training Days are available. Click the photo.

MAKE A ONE-TIME DONATION

Become a patron to support the website. Thanks

Check out these related posts:

What you need to know about Throttle Blipping

Become a patron to support the website. Thanks

What is Throttle Blipping?

To execute smooth downshifts, it is important to match the engine speed with the road speed. You can do this by slowly easing out the clutch (after you slow).

But sometimes a rapid downshift is necessary. The problem is that releasing the clutch at the wrong time and too abruptly can lead to lurching re-engagement and a rear tire skid or “chirp”. This is where throttle blipping comes in.

Explore an extensive selection of items and fantastic deals on Shoppok, your one-stop online destination for all your shopping needs. Don’t miss out on the amazing offers and seamless shopping experience that Shoppok provides for shoppers around the globe.

Throttle Blipping is the term used to describe the rev-matching technique where the rider momentarily “blips” the throttle to increase engine rpm to better match the revs to the road speed when downshifting.

You’ve probably heard riders blip their throttle as they downshift while rolling to a stoplight. But, throttle blipping is best heard when a sport bike is decelerating and downshifting (and usually braking) from high RPM and high speed.

Listen to my friend Aaron as he demonstrates some of the quickest and smoothest throttle blipping I’ve heard (or is it the magic of modern sport bike electronics?). Listen at the end of the straight starting at 0:15:

Here’s another video showing my throttle hand as I blip the throttle. See 2:20. For comparison, I enter the same corner, but without blipping at 4:08.

Here’s another video showing me smoothly execute three non-blipping downshifts at around 4:15:

See the complete list of Riding in the Zone articles here.

How to Blip a Throttle

The throttle blipping technique is done by quickly cracking the throttle open then closed (blip) while you simultaneously squeeze the clutch and click the gearshift lever. The point is to get engine RPM matched to the lower gear ratio before you release the clutch. The rapid blipping technique occurs within the span of about one-half second. The clutch is quickly squeezed and released as the transmission is shifted down and the right hand blips the throttle. This is repeated with every downshift, one gear at a time.

You can blip the throttle rapidly to reduce the time between gears, or you can be leisurely. High-performance riders blip the throttle very quickly when downshifting between gears as they set up for a corner. Street riders may choose to blip the throttle when downshifting. This is done more slowly when coming to a stop.

Blipping and braking smoothly takes practice.

Brake and Blip

Oftentimes, you need to brake while downshifting, but trying to simultaneously brake while blipping is a difficult skill to master. The problem is that moving the right hand to blip also causes the braking fingers to move, which invariably changes brake pressure. Combining braking and throttle blipping can be done with less difficulty if you apply the front brake with your index and middle fingers while you close and open the throttle with your thumb and two outside fingers. Arching your brake fingers is also helpful in isolating throttle movements.

The point is to blip the throttle while keeping consistent brake lever pressure. This is most easily done when using very firm braking pressure , like when braking hard from high speeds where brake lever movements translate into relatively minor brake force changes.

Technology

Nowadays, you can get a motorcycle that will allow you to shift up and down without using the clutch. When downshifting, the bike’s electronics automatically blips the throttle perfectly as you downshift. Pretty slick.

Is Blipping Necessary?

Some motorcycles benefit from throttle blipping more than others. A big V-twin or single cylinder engine with a lot of engine braking can more easily lock the rear tire if the clutch isn’t released carefully, so blipping makes sense. But, for many bikes, especially ones with in-line 4 cylinder engines, it’s easy enough to quickly but gradually release the clutch  between downshifts. It’s what I do when I ride my Triumph Street Triple on the street or track (see video below). With the introduction of slipper clutches on many sportbikes these days, it’s even less necessary to blip the throttle.

Still, a lot of riders swear by throttle blipping. That’s fine, if you do it skillfully. I find that it just adds another thing to do while I’m screaming into turn 1 at over 100mph. Listen to my downshifts at the end of the long straightaway in this video from a recent track day, starting at 2:06 and then throughout the video. You can hear how I simply downshift and then ease out the clutch. It’s done quickly, but smoothly:

Engine Braking

One problem with throttle blipping is that it minimizes the stabilizing effect that comes from engine braking. Let me explain.

Engine braking (or rear brake force) causes the rear tire contact patch to drag behind the front tire’s contact patch. Think bungie cord. This pulls the rear of the bike in line with the front.

Blipping the throttle during downshifts minimizes engine braking compared to simply easing out the clutch. A little bit of engine braking still happens, it’s just not as much.

Practice

Throttle blipping can be a challenge to learn. But, here’s how.

Sit on your stationary bike with the engine idling and in neutral. Blip the throttle quickly (like a spasm) so the engine revs 600 to 1,000 RPM.

Next, simultaneously squeeze the clutch just as quickly as the throttle. Only squeeze the clutch in about half way. That’s enough to get the transmission smoothly into the next lowest gear.

The next part can’t be done while the bike is running, so shut it off and repeat what you just practiced, but this time press the shift lever down simultaneously with the throttle and clutch. All three controls are engaged at the same time, within the span of less than a half second.

Now go try it in a parking lot. I won’t be pretty at first, but stick with it. Good luck.

Do you blip your throttle? If so, or if not, tell us why?

See the complete list of Riding in the Zone articles here.

MAKE A ONE-TIME DONATION

Become a patron to support the website. Thanks

Some related posts:

Riding in the Zone Podcast Episode 1- Trailbraking

This episode is on trailbraking. What is it, what are the benefits and how do you do it?

Sometimes delaying your braking can be a useful tool. Trail braking is a technique that is done by continuing to brake beyond the turn-in point. You then gradually “trail” off the brakes as you lean until there is no brake pressure by the time you are at full lean.

Also available to download on iTunes and SoundCloud

See all of the podcasts on SoundCloud or here


Check out these posts:


How Can I help You? Online Coaching NOW AVAILABLE
Stay Informed: Subscribe NOW!
Trianing-Tours_LandingBe a Better Rider: Sign Up for Personal Training with Ken
Support Riding in the Zone: Buy a book
Support Riding in the Zone: Buy products from Twisted Throttle


Become a patron to support the website. Thanks

Will You Stop Your Motorcycle in Time?

Become a patron to support the website. Thanks
Practicing emergency braking is critical. But, is it enough?

Getting your motorcycle stopped in time to avoid a collision is one of the most important skills you can have. But, simply being able to apply maximum brake force isn’t enough (even if you have modern ABS). Here is an article I wrote for Motorcyclist Magazine a while back about braking and reaction time that I think deserves some more airtime. Enjoy!

You’re riding along minding your own business when suddenly you are facing the bumper of a left turning sedan. Every cell commands you to get the motorcycle stopped ASAP to prevent your early demise. But, will your response be quick enough?

It’s a good thing that we are hardwired to respond immediately to threats, but too often our synapses do not fire fast enough for a quick and effective respond. Thankfully, there are ways to help make sure you aren’t a victim of too little, too late.

Perception Time

There are actually two components of reaction time: “perception time” and “activation time”. Perception time is the time it takes to figure out what’s going on and decide what action to take. Response time is the time it takes to reach for the brakes. You also have to account for the amount of time it takes to actually get the bike stopped.

Let’s say you’re traveling at 40 mph, which is about 59 feet per second. Recent research indicates the average rider will use about 1.5 seconds to recognize the situation and reach max braking rate, also known as perception-response time. That number can increase to over 2 seconds if you’re daydreaming. That equates to between 88 and 117+ feet before any physical action is taken.

illustration: Ken Lee

Stopping Distance

The actual time it takes to get the motorcycle stopped once the brakes are applied depends on speed, machine geometry/weight, available traction, and your ability to use your brakes fully without skidding (ABS helps in this regard). Recent research also shows that an average rider can only achieve a braking rate of 0.6 g’s. That means from 40 mph you’ll need 89 feet to complete the stop. The 1.5 seconds of perception-response time mentioned earlier adds another 88 feet for a total stopping distance of 177 feet.

With perception-response time adding nearly 50% to the total stopping distance, you can see why it’s so important to remain alert. You also want to develop your ability to predict when bad things are about to happen before they unfold. Get ahead of potentially hazardous situations by aggressively scanning for clues that indicate trouble. Be especially vigilant when approaching intersections where most collisions occur.

Stopping in a Corner

Hard braking when the bike is upright is tricky enough when facing an emergency. But, things get even more challenging when you have to stop quickly while leaned because of a hazard around a corner. Perception, response and braking times still apply, but now you also need more time to free up traction by reducing lean angle so you can brake hard with less chance of traction loss. This necessary action adds to total stopping distance. Machines with Cornering ABS offer a distinct advantage here where you can brake hard while maintaining lean angle.

Be Ready

You can reduce activation time by covering the front brake lever and rear brake pedal when approaching potential hot spots. Not only will this simple action reduce activation time, it also puts your whole system on alert.

Of course, the best way to reduce braking distances is to slow down. Trimming just 5 mph off your 40 mph travel speed requires about 32 less feet to stop. Add 5 mph and you’ll need about 35 more feet to stop. Speed up to 60 mph and you’re going to need an extra 155 feet to stop, for a total of 332 feet. Yikes.

Whether or not you avoid a crash is dependent on your ability to react quickly when an otherwise sublime day suddenly turns into a DEFCON 1 war zone. The best riders remain alert and ready for battle, wasting very little processing time before executing evasive action. They also cover the brakes to reduce activation time when approaching intersections. The final step is to regularly practice emergency braking techniques. Can you stop your motorcycle in the shortest possible distance while maintaining in control? Too many riders cannot.

Read “How to Not Suck at Braking”

Read the article at Motorcyclist Online.

Thanks to Lou Peck, forensics expert at Axiom Forensics for help in writing this article.


Become a patron to support the website. Thanks

Video: Cornering Seminar with Ken Condon

Become a patron to support the website. Thanks

At the request of the district manager for the Northeast Region, I booked several dates during mid-to-late winter of 2018. One event was held at Wilkins Harley-Davidson, located in South Barre, Vermont. As with each of the talk, around 100 people attended to learn about cornering…or learn more about cornering. Wilkins recorded the seminar in its entirety.

My aim with these talks is to spread the good word about the benefits of life-long learning…safety and MORE FUN and satisfaction. A secondary goal is to encourage participants to join me for one or more of the training opportunities I offer or am involved with.

And finally, I bring a stack of books for people to buy.

OK. On with the show. It’s over an hour long, so find a comfy chair.


Become a patron to support the website. Thanks

Video Lesson: The Result of Poor Braking Ability

This is a clear demonstration of the consequences of not having proper braking skills. Take a look and then I’ll give you my opinion. I’ll wait.

A shocking number of riders in this video’s original version blamed everything but the rider. Sad.

Well, this is the most classic example of a failure to apply the brakes properly under pressure.

The rider demonstrates an inability to “predict the future” through situational awareness leading to the sudden need for evasive action. And while you can argue that the rider was positioned too close to deal with the stopping vehicles and that the tar snakes reduced traction, the primary reason the crash occurred was lousy skills.

  • The rider skids the rear tire. Untrained riders react to panic braking situations the only way they know how…  which is to stomp on the big brake pedal with their strong leg, like when driving in a car.
  • He then throws out his “outriggers” (legs) so that his feet are now off the pegs…and off the rear brake.
  • Our rider fails to use the most powerful tool at his disposal—the front brake.
  • All the time, the rider fixates his eyes on the back of the truck. Target fixation is the final straw.

This is 100% avoidable with proper braking practice. This article covers the basics. DO NOT neglect to develop this critical skill.


Please Donate to Keep the Articles Coming

If you liked this article and the many other articles on this site, please toss a buck or five into the hat. It’s greatly appreciated!

    • Click the PayPal “Pay Now” button.
    • Then indicate quantity in $2.00 increments. Example: put “2” in “QUANTITY” field to donate $4.00, “3” for a $6.00 donation, etc.

Why $2.00? Due to the PayPal fee structure, a $2.00 donation is significantly more beneficial compared to a $1.00 donation.

Thank You!


Check out these posts:


How Can I help You? Online Coaching NOW AVAILABLE
Stay Informed: Subscribe NOW!
Trianing-Tours_LandingBe a Better Rider: Sign Up for Personal Training with Ken
Support Riding in the Zone: Buy a book
Support Riding in the Zone: Buy products from Twisted Throttle & Amazon
Twisted_Affiliate-Interphone-widget


Thinking in Vs-Dissecting Cornerspeed

Become a patron to support the website. Thanks
Paul Duval thinking in Vs – otmpix.com

Guest writer Paul Duval shares his thoughtful observations about performance cornering based on electronic data gathering.

Corner speed. It is the holy grail of motorcycle road racing and track day riding alike. Knee down and railing, carving the corners like a snowboarder or giant slalom skier. It looks and feels awesome! Smooth technique pays big dividends and you can carry a lot of speed as your skills progress.

But how is it that you can be cranked way over thinking you have maxed your speed for a given corner and yet, some other dude comes by on the inside (or outside at a Tony’s Track Day!) and walks away from you before the bikes are even upright on the next straight bit?

And by the way, He’s not even leaned over as far as you are! There must be more to corner speed than meets the eye. Let’s take a closer look at the middle of a corner.

Corner Speed Perception

If we draw the arc of your path on paper it looks like a smooth outside-inside-outside line and it is easy to visualize maintaining a somewhat constant speed, decreasing and increasing in a smooth fashion, but overall steady. One could imagine their speed data trace looking similar or the same as the arc of their line through the corner. This is, in fact, how most riders perceive cornerspeed. They feel they can put a number on it.

For example, that’s a 70 mph sweeper, or a 50 mph hairpin. But something is wrong. How did that fast guy in the example above pass while you were dragging knee, elbow, boot, etc. with 57 degrees of lean angle? If he’s going faster, wouldn’t he need MORE lean, not less?

V is for Variable Corner Speed

If we look at GPS speed data from a corner, we can see the first flaw in our perception of corner speed. It is not constant. It is not even close. From the start of the arc that we drew with our bike, speed drops precipitously until it reaches a low point much slower than expected somewhere near the middle of the arc. If you perceive a 70 MPH corner, the chances are your slowest point of that turn is 50MPH. This rapidly dropping speed line doesn’t rest at the bottom for long rather it reverses course and quickly climbs out of the hole. The trace of your speed data doesn’t look like a U. Instead it looks decidedly like a V.   Our minds fill in the slow spot, and we perceive a 70 MPH corner.

In this image we see speed over distance data (kph) for Thompson Speedway turns 1-4.

The Pivot Point

The bottom of the V, or the slowest point of the corner is the important spot to recognize.   From here on out I will call this the pivot point. The pivot point should actually be part of your cornering plan. In other words, you need a reference point (or a few) for this spot on track. It is the spot at which your bike can change direction the most easily.

This critical moment in riding is often ignored, but it is where the real direction change happens. As you trail off the brakes, your hands get lighter on the controls until you have no weight on the bars and you allow the wheel fall INTO the turn. THIS is the spot where your grip needs to be as light as possible.

To be clear, you still need to countersteer to initiate lean. Countersteering is an important technique, but in this article, we are focused on the middle of the turn, the pivot point.

photo: otmpix.com

When and Where to Pivot?

Most of you are thinking, “we are talking about the apex, right”? I am avoiding the word apex on purpose. Many people refer to the apex as the point where you are closest to the inside of the pavement. This is often not the same place as the pivot point.

For example, double apex corners and increasing radius corners tend to have the pivot point in a different location than the “apex”. This concept applies to all bikes, big and small, and all lines, point and shoot, or fast and flowing. Different bikes may choose different pivot points to take advantage of the strengths and weaknesses of each platform.

Examples:

  • In a “fast exit” corner, the pivot point would be located earlier and you would get on the gas sooner to take advantage of that fast exit.
  • In a “slow exit” corner, the pivot point is located later to take advantage off all the possible entry speed.
  • In a “balanced corner” (equally fast entry/exit) you have a little wiggle room. If you need entry speed to pass a rider you can pivot a little later, if you want to out drive them on the exit then pivot a little earlier.
photo: owenstrackdayphotos.com

Similar Mid-Corner Speed

Interestingly, if you compare a fast lap and a slow one, you will often see that the mid corner speed (slowest point) of the faster rider is not a lot different from that of intermediate riders. Maybe just a few MPH, or maybe no different at all!

What you will see is that the slopes of the V in the speed data trace are steeper, usually on both sides. The faster rider is faster into and out of the corner. Understanding where your pivot point is allows you to plan the fastest way the get to it, and the fastest way to get away from it.

So here comes that fast(er) guy blowing by you on the outside into a fast corner. You already feel you are mid corner and cranked over good, but he knows that he has some yards to go before reaching the pivot point, and is taking advantage by carrying more entry speed, tipping in slower and braking later or longer.

You both reach the same minimum speed in this corner, and you feel like he’s in touch for a moment. You might even feel like your “corner speed” is the same as his, but he quickly pivots the bike and walks away on the exit because he can accelerate sooner than you. Sigh.

Time to start thinking in Vs.


otmpix.com

About Paul Duval

Paul Duval is a fellow track day instructor, former Loudon Road Racing Series 125 GP Champion, current top runner in Supersport classes at LRRS, and professional educator. You can see Paul in action at most Tony’s Track Days events.


Please Donate to Keep the Articles Coming

If you liked this article and the many other articles on this site, please toss a buck or five into the hat. It’s greatly appreciated!

    • Click the PayPal “Pay Now” button.
    • Then indicate quantity in $2.00 increments. Example: put “2” in “QUANTITY” field to donate $4.00, “3” for a $6.00 donation, etc.

Why $2.00? Due to the PayPal fee structure, a $2.00 donation is significantly more beneficial compared to a $1.00 donation.

Thank You!


Check out these posts:


How Can I help You? Online Coaching NOW AVAILABLE
Stay Informed: Subscribe NOW!
Trianing-Tours_LandingBe a Better Rider: Sign Up for Personal Training with Ken
Support Riding in the Zone: Buy a book
Support Riding in the Zone: Buy products from Twisted Throttle


Become a patron to support the website. Thanks

Proficiency Pledge

Proficiency-Pledge

I always thought pledges were a crock until I learned the potential benefit in encouraging behavior change, risk awareness and a quest for greater proficiency.

The point of signing this pledge is four-fold. First, it is a way to help you reflect on yourself as a rider. Second, it is a commitment that you can share with your family saying you are doing all you can to make it home at the end of a ride. Third, it holds you to following these behaviors. Fourth, it encourages you to continually improve areas where you may be weak.

This pledge is not only for yourself to make riding more fun and safe, but also for the ones who love you. A commitment to safe riding is an expression of respect and love toward your loved ones.

Imagine the emotional and financial pain they would suffer if you die or become injured. Imagine them being forced to care for you by cleaning your wounds, or worse. Sorry to be a bummer, but…

So, here we go.

Proficiency Pledge

  • I will expand my knowledge of motorcycling safety and control through continual reading, and by taking a formal safety/skills course.
  • I will continue to practice my physical skills to keep them sharp.
  • I will learn about and develop mental strategies for managing traffic and other hazardous situations.
  • I will never ride while intoxicated or impaired in any way.
  • I will choose not to ride if my ability to manage hazards is compromised.
  • I will choose not to ride with others who do not share my commitment to safety.
  • I will wear protective gear on every ride.

Signed:___________________________

Feel free to add your own points. Also, feel free to copy this pledge and print it out.*
Then sign it, hang it on your garage wall, and give a copy to each of the people who care about you.

*Please distribute this pledge to your riding friends and family. I’d really appreciate it if you include credit and a link to this article. Thanks.

Subscribe to the mailing list!


Please Donate to Keep the Articles Coming

If you liked this article and the other articles on this site, please toss a buck or four into the hat. It’s greatly appreciated!

    • Click the PayPal “Pay Now” button.
    • Then indicate quantity in $2.00 increments. Example: put “2” in “QUANTITY” field to donate $4.00, “3” for a $6.00 donation, etc.

Why $2.00? Due to the PayPal fee structure, a $2.00 donation is significantly more beneficial compared to a $1.00 donation.

Thank You!


Check out these related posts:


Become a patron to support the website. Thanks

Video Lesson: How to Manage Downhill Turns

IF YOU’RE LOOKING FOR THE ENERGICA REVIEW, CLICK HERE. SORRY FOR THE MESS UP.

There is nothing like video to help demonstrate cornering techniques. Ride along with me as I explain cornering and the nuances of managing a downhill turn, including trailbraking.

This is the sort of cornering techniques we work on during on-street training where student hear my comments in real-time using Bluetooth communicators. If you’re in the Northeast, consider signing up for a private training day or a group training tour. I bet I can help you with your cornering.

-Ken-

I have a lot of other videos on my YouTube channel.

Share you thoughts and comments below.


Please Donate to Keep the Articles Coming

If you liked this article and the many other articles on this site, please toss a buck or five into the hat. It’s greatly appreciated!

    • Click the PayPal “Pay Now” button.
    • Then indicate quantity in $2.00 increments. Example: put “2” in “QUANTITY” field to donate $4.00, “3” for a $6.00 donation, etc.

Why $2.00? Due to the PayPal fee structure, a $2.00 donation is significantly more beneficial compared to a $1.00 donation.

Thank You!


Check out these posts:


Stay Informed: Subscribe NOW!
Trianing-Tours_LandingBe a Better Rider: Sign Up for Personal Training with Ken
Support Riding in the Zone: Buy a book
Support Riding in the Zone: Buy products from Twisted Throttle & Amazon
Twisted_Affiliate-Interphone-widget


Video Lesson: Learn by Following an Average Rider

Here’s a video of me commenting while following an average rider through a twisty road. I point out the rider’s body position, cornering lines and throttle timing, and comment on how he could do better. Notice his mid-corner adjustments. This is an indication of several cornering problems that are correctable. This is the sort of cornering detail we work on during on-street training where student hear my comments in real-time using Bluetooth communicators. If you’re in the Northeast, consider signing up for a private training day or a group training tour. I bet I can help you with your cornering.

-Ken-

I have a lot of other videos on my YouTube channel.

Share you thoughts and comments below.


Check out these posts:

Become a patron to support the website. Thanks

5 Tips from an Aging Sport Bike Rider

Become a patron to support the website. Thanks
Graham and Dan. I'm not saying their old, but where is their hair?
Graham and Dan. I’m not saying they’re old, but where is their hair?

Note: This article pertains to all types of riders. So, please read on.

What happens to sport bike riders when they get old? Most people think of sport bike riders as young men in their 20’s or 30’s. A lot of people don’t consider that sport bike motorcycle riders, who may be up for betting on sites like 아리아카지노, are often in their 40’s, 50’s, 60’s, or even 70’s.

It’s  assumed that those crazy riders on their rice rockets are young, testosterone laden young men. And this stereotype has some truth to it, since the attitude and ergonomics of sporting machinery suggests a fast and young lifestyle. But, many older riders do keep a sportbike in the garage if their body can handle the demands on aging bones, muscles and soft tissue.

A lot of sport bike riders move gradually to more upright machines with less demanding ergonomics and softer power delivery. But, if you look around at any sport riding gathering, track day, or even club race event, you’ll see that the median age is what is often considered over the hill. You’ll also see that these elders are often some of the most skilled riders on the road and the fastest on the track.

While the hair beneath the helmet may be gray, the desire to express mastery at the handlebars is as strong as ever. I’m not speaking for all sport bike elders, just the ones I know who keep at least one high-performance bike in their stable for those days when the back is feeling okay and the passion for a rip requires a razor-sharp tool.

Ken-smile
I’ve got a few more years behind the handlebars.

At 57 years old, I’m now qualified to speak from the perspective of a once young road racer and sporting street rider. Thankfully, I happen to have a slim physique, which makes me able to climb onto a sport bike with relative ease. I am also of average height so high rearsets don’t bother me. This makes riding a sport bike possible.

Pull up a Chair, Son

There are a lot of things I could share about aging. But, there are a few notable observations I think are worth mentioning.

See the complete list of Riding in the Zone articles here.

1. Ride Smarter

Tony, Ken and Graham. Older than many, not as old as some.
Tony, Ken and Graham. Older than many, not as old as some. Yes, this is the photo “borrowed” by whoever made that video that went viral.

When I’m on a motorcycle, I can step back and evaluate whether the speed I choose to ride matches my mood and personal limits, as well as the limits of the road or track, the weather, etc. While there are times when my inner squid emerges, I am much less prone to riding beyond the limits. I am closer to the edge of the risk:reward ratio than when I was young and felt invincible. Now, I ask myself whether riding a certain way is worth the possible aggravation.

Top photos © Ken Condon

Bottom photo © Annalisa Boucher

2. Ride more Efficiently

How is it that I can get through a two day track day event riding multiple groups and still get up the next day and go to work? I see a lot of track day riders many years my junior pack up halfway through the afternoon because they are too tired to go on anymore. How am I able to do this? It’s not because I’m in great shape.

It’s because I’ve learned to ride efficiently. This means hanging off the bike only as much as necessary to achieve the goals of keeping the pegs off the pavement and the tires in their sweet spot and perfectly loaded for maximum traction. It also means being relaxed as much as possible. Not only does this help my stamina, it also allows me to feel the tires and chassis so I can “listen” to the bike as it tells me how much traction I have.

3. Change Behavior

Getting old forces changes in behavior. At some point you have to recognize the fact that the mind, eyes, muscles and stamina are not what they used to be. Everyone is different, but from my experience, the rate of decline seems to accelerate once you pass 50 or so. This means I have to pace myself. I am more aware of the need to warm up my body for a few laps just like I do my tires.

The possibility of getting hurt is present no matter what age, but what may be a simple injury, quickly healed, can turn into a long, drawn out healing process if you are older. You will have to hire a qualified personal injury lawyers in Kennewick to compensate the long-term treatment expenses. Riding smart and wearing really good personal protection is important for minimizing those injuries.

4. Stay in Shape

I’m not in bad shape, but I’m not in great shape, either. I walk almost every day, but I used to run. I lightly stretch when I need to, but not as often as I should. I have never smoked and my vitals are good. I guess I can say I’m in pretty good shape for my age. As you continue to stay active, consider incorporating supportive and stylish workout gear like ryderwear leggings to elevate your fitness experience.

Even so, I suffered a freak health issue a while ago that I’m lucky to have survived. Thankfully, I can still manage a full day of street riding and both days of a two day track day event without much trouble. Staying in shape is harder as you get older that’s why you need to start incorporating plant based protein powders to your diet. Weight gain is a real problem for many. Weight can creep up on you slowly. Five pounds may not seem like much, but if that happens every year for 10 years, you’re looking at a whopping 50 pound weight gain that will be tough to get rid of.  During recovery, your body’s nutritional needs may increase, and greens powder can help support the healing process. You can read this review on https://www.outlookindia.com/outlook-spotlight/athletic-greens-ag1-review-is-it-worth-the-hype-or-superfood-don-t-buy-until-you-read-this-news-301982/ before buying online.

Being an instructor gives the opportunity to pass on what you've learned.
Being an instructor provides an opportunity to pass on what you’ve learned.
photo: © Annalisa Boucher

5. Keep Your Skills Sharp

There is a real danger in complacency. It’s easy for veteran riders to assume they don’t need to maintain their mental and physical skills. After all, they’ve survived this far. This perception leads to diminished skills, which can lead to a crash.

Motorcycle riding skills are perishable. So, keep those skills sharp! Practice in a parking lot, attend a safety course periodically, and ride a track day or three. It’s also good to read about riding technique. Even if you already “know” the material, reading about a technique brings it into your consciousness.

And for you older folks returning to riding, GET TRAINING! I know you may know how to “operate” a motorcycle, but that’s not enough to ride safe and smart. You need to update your mental software and learn things you may not have known before that can literally save your wrinkled ass. I recommend taking the Basic MSF course, followed by an advanced training course.


Bonus Tip: Share Your Knowledge

I’m grateful that I can share knowledge that I have accumulated over the years to help people like you ride better and smarter. But, another benefit to writing and teaching is that it makes me a better rider. I constantly think about my riding, which keeps my skills sharp.

A lot of really fast, experienced riders can’t explain how they do what they do…they just do it. That’s fine, but thinking about the physiology and psychology of riding a motorcycle well makes a rider’s knowledge and skill indelibly deeper and accessible when you need it.

Oh, and don’t assume you know what you are talking about, even if you are “fast”. Learn the physics and language of communicating the complex concepts of motorcycle riding before you claim expert status.

How Much Longer?

At some point, we all must hang up our helmet for the last time. In my case, that appears to be several years away. I can still do things I did when I was younger, it just takes more effort. What are your experiences with aging behind the handlebars?
submit to reddit

See the complete list of Riding in the Zone articles here.


Please Donate to Keep the Articles Coming

If you liked this article and the many other articles on this site, please toss a buck or five into the hat. It’s greatly appreciated!

Become a patron to support the website. Thanks

Check out other track day and riding technique related posts

Check out these related posts:

Video Lesson: Uphill Hairpin Fail

Here is another installment of “Videos Lessons” where we pull from the seemingly never ending supply of rider videos from which we can learn. Even though these are 2 very slow speed crashes, the injuries could have been serious. I hope everyone is okay.

This particular video shows the seriousness of slow speed mishaps and of course the importance of rider training.

First, take a look at the video. The crash happens around 1:15. I’ll wait.

Pretty scary, right? It’s hard to see, but it seems the first rider to crash was actually in the lead, and the rider with the passenger had to slow and go around his friend as he tipped over. The second rider (with passenger) watched his friend fall and appeared to be putting his right foot down to stop, but failed to use his front brake and rolled off the road.

I want to point out that at about :45 the Harley riders demonstrate some apprehension about their ability to handle the tight turns. You can see this as they approach the right hand turn marked by a 20mph road sign. They are smart to slow down because there is a yield sign before a narrow bridge, but they seem to slow more than necessary. This is often indicative of serious cornering anxiety. The confirmation of weak cornering confidence comes when the mishap occurs.

It’s interesting to note that this mishap is different than others where the rider enters a turn too fast (for his/her ability) and runs wide (see this video). In this case, both riders fell on the inside of the right-hander. Why?

Crasher #1

Let’s begin by discussing the rider who first crashed. He says that he hit a hole in the road and then rode over the patch of sand. I don’t doubt this. I also don’t doubt that the hole and the sand contributed to upsetting the bike’s stability (at least a little bit).

Even so, the real questions needed to be asked are:

1. why did he hit the hole when there was opportunity to ride over smoother pavement?

2. why did he fall over?

Here is my explanation:

1.Why did he hit the hole? The reason the rider who first crashed hit the pothole was because of poor visual skills. It’s human nature to look down when we are anxious. It is likely that the rider wasn’t looking far enough ahead to come up with a plan to manage the tricky hairpin, resulting in him being taken by surprise by the tight radius and and steep slope. As he rounds the bend, he sees the hole and the sand which further increases his anxiety and triggers his survival response that includes staring at the hole. When we panic, we tend to target fixate on hazards. The problem with staring at a hazard is that we tend to steer toward it like a super-powerful magnet.  This tendency of going where we look is called Visual Direction Control and is likely what causes him to run over the hole…and then the sand.

Solution: Looking well ahead allows you to avoid surprises. Also, looking at an escape route rather than the hazard could have kept the bike away front the surface hazards. Seeing hazards early is critical for keeping these dangerous survival triggers from taking over.

2.Why did he fall over? Hitting the hole and sand did not make the crash inevitable. Factors that caused the actual fall probably included an overreaction and extreme tension. This would result in the rider clamping on the handlebars and chopping the throttle at a time when he was already moving very slow on a steep uphill hairpin. This reaction hindered direction control and killed what little amount of stability the bike had, causing gravity to take over and the bike to fall over.

Solution: Motorcycles are more stable with speed. Had he kept steady drive the bike’s suspension would have handled the bump better and stability would have been maintained. As far as the sand goes, easy acceleration and a light grip on the handlebars while reducing lean angle slightly would have allowed the tires to deal with the sand while allowing the bike to remain in its lane. As I mentioned earlier, had the rider kept his eyes up, he would have likely selected a path that avoided both the hole and the sand. Problem solved.

Crasher #2

The lead rider’s crash was caused by the same two reasons I already outlined: Looking in the wrong place and insufficient speed for stability.

1.Why did he ride off the road? Because we tend go where we look. The lead rider looked over his right shoulder, causing the bike to drift to the right and drop off the shoulder and down the ravine.

Solution: Same as above. Look where you want to go. Yes, seeing your buddy fall over can grab all of your attention, but it’s imperative that you always remain in control and that means keeping your eyes ahead until you can come to a safe stop.

2. Why did the bike go off the road so quickly? Because of a loss of directional stability. When the rider decelerated on the steep slope he slowed down enough for gravity to take hold of the bike and send it down the hill.

Solution: Same as above. Had the rider maintained positive drive he would have completed the corner on two wheels.

This video demonstrates the importance of two of the most critical skills motorcyclists need to maintain control: Visual direction control and Speed for stability. Think of these two hapless riders the next time someone suggests taking a parking lot course that covers basic slow speed maneuvers and cornering techniques. The techniques would have saved these two a world of hurt and embarrassment.

Even better is if they had signed up for on-street training where instructors can observe problems at real world speeds and conditions.


Check out these posts:


Become a patron to support the website. Thanks

Yet Another Crash Video We Can Learn From

Here is another video that I’m pretty sure demonstrates how we humans don’t want to admit when we screw up.  See the video of the poor guy who sideswiped a big truck on his R6. The problem that he says the wind drove him into the truck. Whaaa?

Note: you only need to watch the first 15 seconds to see the incident, but you’ll have to stick it out until the first passerby arrives to hear him mention the wind. WARNING: The video may be difficult to listen to as the poor guy writhes in pain. He also swears a bit.

While I know the wind out west can be strong enough to knock over tractor trailer rigs, I’m pretty sure wind had nothing to do with this incident. I think it’s another case of inaccurate self-evaluation and lack of rider ability and/or a serious lack of concentration.

I can’t tell how strong the wind was at the time of the crash, but the trees aren’t being blown around very much and his friend’s hair (he appears later in the video) is barely moving at all. Maybe he’s wearing copious amounts of hairspray, but I don’t think so.

Besides, if it were strong enough to blow a bike across a lane, I doubt the rider would be chatting away so casually before the incident. Also, the rock formations on the side of the road should have blocked any direct side forces.

Dangerous Distraction

One explanation for this seemingly bizarre crash is a complete and total brain fart. I’m not sure if he is talking to himself or to his friend who is riding ahead, but he wasn’t focused on leaning enough to make the curve.

Early Turn Entry

Notice how the rider began heading toward the inside of the corner too early, causing his bike to be pointed toward the oncoming lane. – Thanks for readers for pointing this out.

Countersteering, Baby!

Another contributing factor is that perhaps he did not have a good grasp of countersteering. A hard push on the right handlebar should have kept him in his lane even if it were windy.

Target Fixation

Target fixation is another likely contributing factor in this incident. Target fixation is a phenomenon that explains why we go where we look. Once the rider realized he was drifting wide into the path of a big truck, he likely couldn’t take his eyes off the hazard and that’s where he ended up. Look toward the solution, not the problem.

Human Nature Strikes Again

I think this is another example of someone blaming something other than their inability to stay focused or steer effectively. Deferring blame is a basic human response to help explain how they could have made such a serious and basic mistake.

See this video of another crash that demonstrates how humans can delude themselves.

The reason to highlight these videos is not to place blame, but to recognize the danger of not knowing why an incident happened. Without that, we are destined to repeat the mistake.

What do you think?


If you liked this article and the many other articles on this site, please toss a buck or five into the hat. Select an amount and then click the PayPal Pay Now button. It’s greatly appreciated!


Donate to keep articles coming


Check out these posts:


Stay Informed: Subscribe NOW!
Trianing-Tours_LandingBe a Better Rider: Sign Up for Personal Training with Ken
Support Riding in the Zone: Buy a book
Support Riding in the Zone: Buy products from Twisted Throttle & Amazon
Twisted_Affiliate-Interphone-widget


Guest Writer: Why Street Riders Benefit by Riding the Track

Ed carves a perfect line on his ST1300. photo: otmpix.com

Guest contributor Ed Conde shares his experiences about how track days have helped his street riding.

The Next Level

I came to riding late. I did not begin riding until I was pushing 50. I tried to make up for lost time by training and reading everything that I could find. I took the Motorcycle Safety Foundation Basic Course and the MSF Experienced Riding Course multiple times. The books and the courses definitely helped my street awareness and slow speed skills. However, I felt that these tools did not adequately prepare me for riding at speed on the street.

I tried improving my street riding by working on a skill or two each time I rode. I regularly practiced threshold braking, swerving, and weaving in parking lots. All of this helped a lot, but I felt that something was missing. I found that something when I began to do track days.

Some Benefits of Track Days

The three crucial things that track days provided were:

  1. Observation and feedback from track professionals.
  2. Action photographs that captured my riding and body position.
  3. The ability to repeat the same corners at speed without cars or other distractions.

Observation and Feedback from track professionals – There simply is no substitute for having an expert follow and observe you riding at speed. The difference between my perception of my riding and what experts saw was pretty sobering. I suspect that most of us are not as good as we think we are. Track instructors and control riders noticed that that my body position needed improvement, that I needed to relax, that my lines needed improvement, that my shifting needed work, and that my throttle/brake transitions needed to be smoother. This was a bit shocking considering how much time I had devoted to riding technique.

Action photographs – Photos do not lie! I have hated some of my track photographs because they captured all of the things that I was doing wrong. Track photographers often take photos at different curves and from different vantage points. My track photos gave me great feedback on my riding, although I did not always like what I saw.

The ability to repeat corners at speed – Being able to repeat the same corners at speed allowed me to see how changes affected my riding. It is impossible for me to duplicate this on the street where corners vary and hazards abound. While I practiced skills like trail braking, countersteering, downshifting, cornering lines, and body position in parking lots, everything changed at street speeds. Braking and downshifting from 30mph in a parking lot was a lot different than braking and downshifting from 65mph into a hairpin at the track. In addition, following an actual road was more realistic, for me, than following a cone course in a parking lot.

Are track skills useful on the street?

Folks often ask if the skills I learned at track days are transferable to the street. My answer is absolutely! Where else can you work on your riding skills safely at actual road speeds? While many skills learned at a Basic MSF Course or a “Ride Like a Pro” Course are extremely valuable, slow speed skills are often opposite to those I need at speed. While favoring the rear brake and counter weighting may improve my slow speed riding, it hinders my riding at speed.

Body Position Practice

Perhaps the best example of personal improvement from track riding is in my body position. (click on photos for larger image)

Track2009labeled
Figure 1

Figure 1 is a video screen shot of my first track day with Tony’s Track Days at New Hampshire Motor Speedway in 2009. At the time, I felt like I was riding well and actually passed most riders on the track. Looking at the photo now, I can see that I am almost scraping hard parts even though I am not riding fast. My upper body is leaning away from the turn and my eyes are not looking through the turn. I am pushing the bike beneath me dirt bike style which made me feel like I was really leaning.

HudsonLabeled
Figure 2

Figure 2 is a photo from 2011 taken near Bear Mountain, NY. I am trying to work on lessons learned at the track. I am no longer pushing the bike beneath me and my head is turned somewhat. The centerline of my jacket is now in line with the center of the bike. Despite some improvement, the footpeg is almost scraping at a modest lean angle.

DragonLabeled
Figure 3

Figure 3 is a photo from 2013 at the Tail of the Dragon. I had actually been working hard on skills learned at the track before this trip. The centerline of my jacket was now inside the centerline of the bike. My head turn was much better and I was beginning to weight the inside half of the seat. This photo is a big improvement, but I was still almost scraping my left footpeg at a modest lean angle.

TrackCurrentLabeled
Figure 4

Figure 4 is after multiple track days in 2014 and 2015. My head and shoulders are now lower and well inside the centerline of the bike. The head turn is better and almost all of my weight is on the inside half of the seat. I am not scraping despite a more pronounced lean angle. While I will not usually hang off this much on the street, I will use the better head & shoulder position and the weighting of the inside half of the seat on all my street rides.


Safer and More Confident Cornering

I will definitely use the skills that I have been learning at the track to ride better while conserving lean angle on the street. By keeping lean angle in reserve, I will have a safety margin if I need to tighten up my line during a curve. I will continue to attend parking lot courses because many fundamentals are learned best there. I will continue to practice slow speed skills with counter weighting, head turn, and dragging the rear brake. I will continue honing my street awareness skills and ability to anticipate trouble. However, I will not neglect training at speed with the help of professionals. I still have a lot to learn, but look forward to the challenge.

Track_Day_TTD_2015_Thompson_6-3-15c1-338
Anyone can do a track day. photo: otmpix.com

Editor Ken: Even if you ride a cruiser, tourer, ADV bike, or whatever, there is a track day for you. Non-Sportbike Track Days are available, as well as “traditional”sportbike track days . Either type of track day allows street riders to advance their skills in a safer environment than the street.

Share your comments below. Note that comments from those who have not commented before need approval before they are posted, so be patient, they will be published.


Ed Conde
Ed Conde

Ed Conde is an administrator and webmaster for the group New England Riders (NER). He enjoys finding the best motorcycle roads, views, and restaurants and posting them to the NER Best of the Northeast website.
His real job is running the federal government’s alcohol countermeasures laboratory and testifying at impaired driving cases. Ed enjoys learning about riding and marvels at the skills of top racers, motocrossers, and trials riders. He and his wife Debra ride all over the Northeast on their motorcycles.


Please Donate to Keep the Articles Coming

If you liked this article and the many other articles on this site, please toss a buck or five into the hat. It’s greatly appreciated!

    • Click the PayPal “Pay Now” button.
    • Then indicate quantity in $2.00 increments. Example: put “2” in “QUANTITY” field to donate $4.00, “3” for a $6.00 donation, etc.

Why $2.00? Due to the PayPal fee structure, a $2.00 donation is significantly more beneficial compared to a $1.00 donation.

Thank You!


Check out these related posts:


Stay Informed: Subscribe NOW!
Be a Better Rider: Sign Up for Personal Training with Ken
Support Riding in the Zone: Buy a book
Support Riding in the Zone: Buy products from Twisted Throttle & Amazon
Twisted_Affiliate-Interphone-widget

Guest Writer: Becoming “That Rider”

Track_Day_JMeyers-action1-sm
Jeff, being “That Rider”. photo: otmpix.com

It was a long and cold winter here in the Northeast, but at the first Tony’s Track Days event of the year at the beginning of May, we were given clear skies and ideal temperatures. Last year, I worked hard on my track day form which included letting speed come with practice. My effort was rewarded with an advancement from the novice to intermediate level. This year, I was amazed at how much I retained even with a seven month gap.

My Mantra: “You Are That Rider Now!”

As I rolled out onto the track for my first session and each one thereafter, I heard my track Guru Ken’s voice in my head, and what he told me at my one-one-one session last year: “You are that rider now! – when you go out for a session, ride that way right from the start.” I started saying that to myself – “You are that rider now.” I believe it was that confident mind-set that allowed me to tap into the foundation that I had built from my work last year.

Repetition Builds Muscle and Mind Memory

Last year, I met my goal of completing ten track days. This helped me, through repetition, build muscle and mind memory. The first few sessions of my first day this year went remarkably well. Of course, I was not as proficient as I was at the end of last season, but my body “knew” what it was supposed to do, and I was able to get into the proper body position quickly.  My eyes reached out and ratcheted far ahead through the turns and down the straights to reduce the sensation of speed.  And, as the day progressed, I was able to work up to speeds approaching my fastest last year.

photo: otmpix.com
photo: otmpix.com

Muscle and Mind Memory Lead to Confidence

The thing that really amazed me was how comfortable I was in my head. I no longer felt a flash of fear when another rider slowed dramatically, crossed my line in front of me, or passed me on the outside of a turn; I just managed the situation without much thought.

At one point, I was following behind a rider on a faster bike, and I was on his tail in the turns, but he would pull away in the straights. I decided that I could pass him going into the sharp right hand turn after the long straight by waiting to initiate my braking until after he did and trail brake into the turn as best as I could. I did this, and was just about to “tip-in” to the turn, when another rider came up on my right. I delayed my turn waiting for this rider to initiate his. He never did. Instead, he stayed upright, and locked his rear wheel, and went straight into the run-off area. Once he was out of my line, I went about my turn and kept riding. Last year, this incident would have scared me silly and shaken me the rest of the day. This year, my heart rate didn’t even go up…but maybe it should have!

So, I guess I really am “that rider now.” The lesson for me is that a mantra, conscious effort, repetition, and a great coach build confidence. Thanks Ken!


Jeff Meyers
Jeff Meyers

Jeff Meyers is a self-described middle-aged sport bike and track day dog. He has been riding for almost 30 years and, like many folks of his vintage, was taught by his friends. He is amazed to still be here given what he did at a young age on a motorcycle with such little skill and such a need for speed. He is a lawyer at his “real” job, but also is a part time Motorcycle Safety Foundation Rider Coach and has had the privilege of working for Suzuki assisting in running demo rides, mostly at the Americade rally in Lake George, New York. Jeff loves to learn, especially about riding motorcycles.


Please Donate to Keep the Articles Coming

If you liked this article and the many other articles on this site, please toss a buck or five into the hat. It’s greatly appreciated!

    • Click the PayPal “Pay Now” button.
    • Then indicate quantity in $2.00 increments. Example: put “2” in “QUANTITY” field to donate $4.00, “3” for a $6.00 donation, etc.

Why $2.00? Due to the PayPal fee structure, a $2.00 donation is significantly more beneficial compared to a $1.00 donation.

Thank You!


Check out these related posts:


Stay Informed: Subscribe NOW!
Be a Better Rider: Sign Up for Personal Training with Ken
Support Riding in the Zone: Buy a book
Support Riding in the Zone: Buy products from Twisted Throttle & Amazon
Twisted_Affiliate-Interphone-widget

4 Reasons Why You Need to Use Cornering Lines

Multiple corners require creativity.A “cornering line” is the path you follow around a corner. Riding a narrow, single-track vehicle means we are able to select the left, center or right positions within the lane. The “basic” cornering line starts by entering the turn at the outside edge of the lane and then continues to the inside or “apex” (near the middle of the corner), and ends with the motorcycle exiting toward the outside of the lane. This line is commonly known as the “outside-inside-outside” line. To learn more about the importance of road lanes, read this website: https://www.whiteliningcontractors.co.uk/.

Why Bother?

A lot of motorcycle riders don’t understand the benefits of cornering lines, believing that it’s good enough to simply keep their tires between the painted lines. This is fine when the road is predictable and speeds are low. But, as speeds increase and the road becomes more challenging, precise cornering lines become more important.

Cornering lines are a must when you ride on a racetrack, partly because the pavement is so wide that you would be silly to not use the available real estate. Riding from pavement edge to edge on the racetrack is the equivalent to using the whole width of the lane.

However, be smart! Don’t get too close to the oncoming lane or the outside edge of the road. Do not cross the painted lines (or lean into the opposite lane), but use the lane to your advantage.

Before we start, let’s define what an apex is. The apex is the “inside” point in the basic outside-inside-outside path of travel.

Here are the 4 primary benefits of riding cornering lines:

1. Straightens the Curve

Entering the curve from the outside, apexing near the inside and exiting toward the outside straightens the curve by increasing the corner radius, which requires less lean and preserves traction. It’s important to have traction in reserve in case you have to increase lean angle or execute a mid-corner maneuver.

By entering the turn wider and “apexing” around the curve, your bike will be pointed safely down the road at the exit. Apex too early and you’ll run wide.

2. Gives a Better Angle of View

This is the primary benefit for street riders. Entering a corner from the outside also allows a better angle of view into the corner so you can get an early look at the corner’s characteristics and identify any mid corner hazards so you can adjust your corner entry speed for safety.

3. Increases Cornering Confidence

Actively thinking about and choosing a deliberate path into a through curves makes you a Corner Master who rides with a plan. The result is a more preemptive attitude that puts your eyes, mind and body ahead of the corner.

4. Increases Cornering Enjoyment

Riding cornering lines increases the engagement you have with your bike–and every corner you encounter. Riders who unconsciously stay in the middle of the pavement are passive about their riding and miss out on the opportunity for deeper involvement.


DELAY your Turn-in

When you begin your turn (and how quickly you turn) has a significant impact on cornering precision and safety. New or nervous riders are anxious to get the turn over with, so they tend to turn in too soon. This places the bike at the apex too early, pointing the motorcycle toward the outside of the curve. To finish the turn and stay in the lane, the rider is forced to increase lean angle past the apex  at the time when they should be reducing lean angle. This is a common reason for corner crashes.

Not only does the delayed apex point the bike safely toward the corner exit and not at the outside edge of the road, but it also provides the best angle of view into the corner. Wait, wait, wait…now turn.

Quick Turn

To execute the delayed apex line requires a quick turn-in using firm countersteering. The harder you press on the inside handgrip, the quicker you will turn. Pull on the outside handgrip while pushing on the inside grip to turn in even quicker. Also, pre-position your body to the inside before the turn-in to help the motorcycle fall into the corner with even less effort.

Executing a precise cornering line requires coordination between the timing of your turn-in and the amount of countersteering intensity. Turning in too late and with not enough handlebar force can result in a “missed” apex, causing your motorcycle to stay in the middle or even outside portion of the lane, not near the inside as desired.

Sequential Corners

The basic outside-inside-outside cornering line is the obvious choice if the corner is isolated from other corners with a straight before and after the curve. But, multiple corners strung together can make the outside exit unusable and dangerous.

An outside exit that is appropriate for a single turn may prove too wide if the next corner bends in the opposite direction. In this situation, you have to ride an “outside-inside-INSIDE” line. This means you stay inside all the way to the exit where it becomes the entrance to the next corner. Depending on the relationship between corners, you may end up with an “outside-inside-MIDDLE” line.

Below is a video of Ken using cornering lines on a twisty road:

The trick to seamlessly stringing together a series of corners is to look well ahead  to identify each corner’s radius and determine what the proper entry is for the following corner. The best riders interact with their bike and the corners in a way that turns the road into a dance floor, making the mastery of cornering lines not only safer, but also very satisfying.

Do you use cornering lines?


Please Donate to Keep the Articles Coming

If you liked this article and the many other articles on this site, please toss a buck or five into the hat. It’s greatly appreciated!

    • Click the PayPal “Pay Now” button.
    • Then indicate quantity in $2.00 increments. Example: put “2” in “QUANTITY” field to donate $4.00, “3” for a $6.00 donation, etc.

Why $2.00? Due to the PayPal fee structure, a $2.00 donation is significantly more beneficial compared to a $1.00 donation.

Thank You!


Check out these related posts:


Stay Informed: Subscribe NOW!
Be a Better Rider: Sign Up for Personal Training with Ken
Support Riding in the Zone: Buy a book
Support Riding in the Zone: Buy products from Twisted Throttle & Amazon