

Cornering errors are responsible for at least half of all fatalities. And of those corners, downhill curves are the most challenging. But, with some knowledge and practice you can master these tricky turns.
Before I describe how to deal with downhill turns, let’s revisit the basic cornering process.
- Look Well Ahead: This is obvious, but not instinctual for many. Riders who are nervous tend to look in the near distance. Discipline yourself to look well ahead so you can get a handle on what’s coming up.
- Slow: This doesn’t necessarily mean you have to use your brakes and/or downshift to reduce speed, but you MUST consciously evaluate whether you need to adjust speed so you can negotiate the corner with plenty of traction and skill to spare. If in doubt, slow down! You can always get on the gas if you slow too much.
- Lean: You initiate lean by countersteering. The amount you must lean is determined by your speed and the radius of the turn (your body position also affects the amount of necessary lean). If you enter a turn at a speed that requires you to lean to the limit of your comfort level, then you’re risking a crash. The solution is to learn to lean, dammit. If you’ve never explored near-maximum lean on your bike (in a safe place, please) then you are poised to be a victim.
- Accelerate: Once leaned, you need to crack the throttle and continue to accelerate gradually through to the corner exit. The basic explanation for why you need to do this is that it stabilizes the suspension and chassis. Gradual acceleration also loads both tires for maximum grip.
The line (path) you choose around the turn is also important. The “outside-inside-outside” path is the gold standard, but should not be cast in stone. The delayed apex line is one that every rider should know about and use in many cases. This is when you allow the bike to orbit around the corner before bringing it in tight to the apex. An article explaining cornering lines is in the works.
Downhill Curve How-To
Okay, with the basic cornering technique in mind, let’s discuss how it applies to downhill curves.
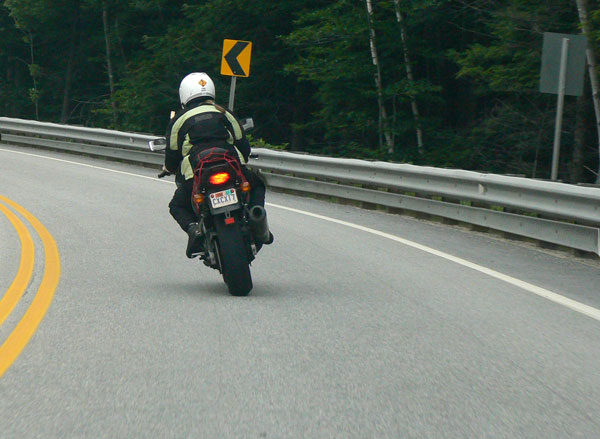
- Look Ahead: No difference here, except that what you should see are the telltale signs of a downhill curve: pavement sloping away from you, indicated by how the centerline and edge of the pavement visually converge in the distance. If these visual clues come together in the near distance, then the hill is steeper than if they converge farther away. Also, look for roadside objects to help you determine how tight the curve is and how steep the hill is (read more here).
- Slow: The main difference between a flat curve and a descending curve is how gravity pulls you and your bike’s mass down the hill. This means that you need to scrub more speed before the curve, otherwise you will find yourself going too fast mid-corner.You also need to begin braking earlier so you have more time and space to slow. Waiting too long will cause the bike to pitch forward, causing the rear tire to get light which can lead to instability. Trailbraking is useful for downhill turns as a way to smoothly slow the bike as you tip into the curve.
Trailbraking not only gives you more time and distance to get the bike slowed, it also helps direct the bike around the curve. That’s becasue the bike will turn more easily when the brakes are lightly applied (too much brake force can have the opposite effect). The chassis geometry shortens as the suspension compresses and the front tire contact patch gains more of the available traction.
Also, consider that gravity is pushing the bike downhill and releasing the brakes fully will cause the bike to accelerate in the direction the front wheel is pointed. Waiting to release the brakes until the bike is pointing around the corner helps the bike get pointed toward the corner exit. Usually trailbraking is done with the front or both brakes, but in this situation, dragging the rear brake only is another way to scrub off speed without overstressing the front tire to prevent the front tire from washing out.
- Lean: Initiate lean using contersteering, so no real difference here. However, a quicker turn-in is often needed to avoid running wide. I often coach riders to “let the bike drop” into the curve when entering a downhill curve.
Will your ability and experience with lean angles allow you to do this? Or will you ride off the road? - Accelerate: Accelerate? You want me to accelerate, even when gravity is already pulling the bike down the hill? Yep. Even though gravity is going to cause your bike to speed up, you still need to stabilize the bike and manage traction. The trick is to slow down enough before the curve so you can crack the throttle ever so slightly and hold that throttle setting or accelerate as you round the bend. This will get some of the weight off the front tire so the bike will track easily around the corner.Note that the steeper the curve, the later you will brake and the less you will accelerate, but you still need to accelerate. If you enter the curve very slowly, then you may need to keep the clutch in and then ease it out as you tip into the curve. But, get the clutch out immediately after tipping in to avoid freewheeling down the hill, which causes most bikes to feel unstable and track unpredictably. It’s better to introduce some measure of drive force ASAP.
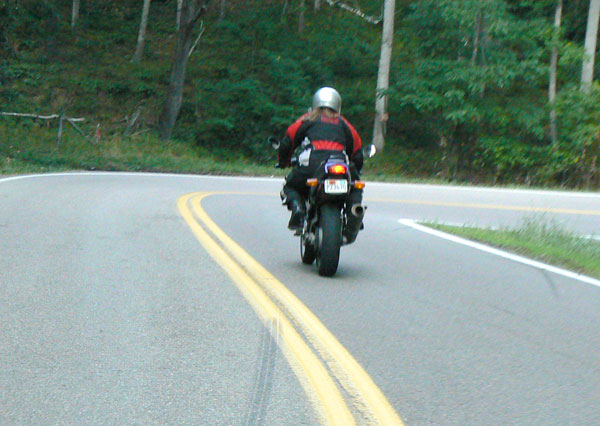
The line you choose around a downhill curve should have you entering wide to the outside. As you tip in, you let the bike drop inside to a delayed apex (farther around the curve), then let the bike exit toward the outside of the corner. This straightens the radius for better traction and the need for less lean angle.
Remember to continue to look where you WANT to go, not where you are afraid to go!
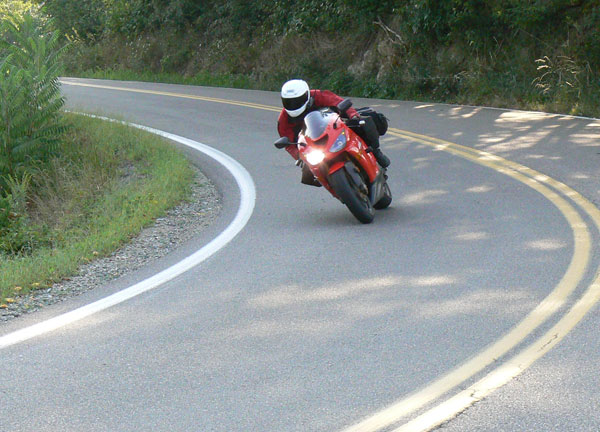
What about body position? When cornering at normal speeds, you want to drop your inside shoulder to engage with the bike. This helps you lean with confidence, but also allows the bike to remain a bit more upright.
Practice!
Do not hesitate in acquiring these skills, because one day you too may find yourself facing a curve that you cannot handle. The best place to begin is in a parking lot where you will learn to lean your motorcycle with authority (parking lot drills are a feature of the RITZ Book). This means mastering countersteering and learning to turn quickly. Once you feel pretty good about your progress, I suggest you attend a track day where you will explore the limits of cornering and braking in a safer environment. Many racetracks I’ve ridden have at least one downhill corner where you can practice all day long. Sign up for personal instruction if you want to fine-tune your cornering skills, including downhill curves.
What tips can you offer for downhill curves?
Please Donate to Keep the Articles Coming
If you liked this article and the many other articles on this site, please toss a buck or five into the hat. It’s greatly appreciated!
- Click the PayPal “Pay Now” button.
- Then indicate quantity in $2.00 increments. – Example: put “2” in “QUANTITY” field to donate $4.00, “3” for a $6.00 donation, etc.
Why $2.00? Due to the PayPal fee structure, a $2.00 donation is significantly more beneficial compared to a $1.00 donation.
Thank You!
Check out these related posts:
- The Horsepower Crutch
- The Power of the Quick Turn
- Just Go Faster
- Countersteering Will Save Your Life!
- The “No Countersteering” Myth
- Valuing Motorcycling Skill Development
- #1 Reason for Motorcycle Crashes in Corners
How Can I help You? Online Coaching NOW AVAILABLE
Stay Informed: Subscribe NOW!

 Be a Better Rider: Sign Up for Personal Training with Ken
Support Riding in the Zone: Buy a book
Support Riding in the Zone: Buy products from Twisted Throttle & Amazon


Thanks Ken! This is really helpful. I just had an overshoot on the same type of curve (here in the Philippines) yesterday.
More power Man!
Thanks again ken, good read and watch for those leaves!
Nice road, great day, sad result.
Great read and reminders.
Thanks Ken. Curt
Yet another excellent article. Downhill turns are always a bit more “puckering” because you can’t use the throttle to slow as easily as an uphill stretch of road. Practice makes perfect! Thanks Ken!
Thanks Ken for addressing this tragic event in a timely manner. I ride this particular section of road frequently; your points are (always) spot-on.