How to Master Track Day Passing

In this article, I will cover passing rules, technique, responsibilities and etiquette. Faster track day riders can often feel frustrated about not being able to pass effectively and efficiently, while newer track day riders may be anxious about passing and being passed. In this article, I will discuss these topics as they pertain to track day riders of all levels.

New Track Rider Passing Apprehension

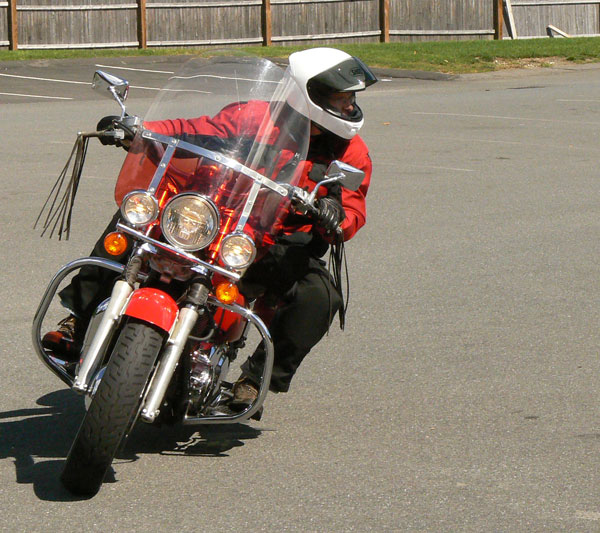
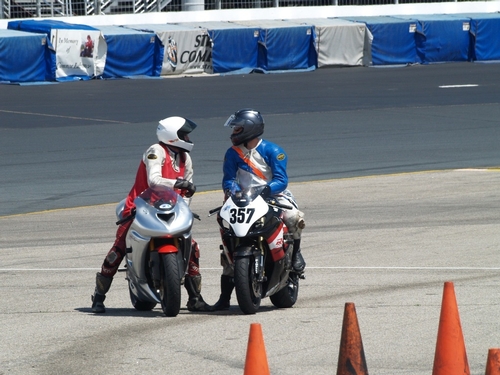
New track day riders need time to become acclimated to the racetrack environment. That’s why a slower “get your feet wet” pace is necessary.

New track day riders often find themselves riding around the track in clumps with slower riders in the front of the pack. This is most likely to occur in the first few sessions of the Novice group. Thankfully, the late morning and early afternoon sessions flow much better. Why? Because people start passing.

Getting Used to Passing

Most new track day riders are primarily street riders where passing is limited to the occasional overtake of a slow car on a straight section of road. The racetrack offers many more opportunities for passing, but new track riders must convince themselves that passing is not only okay, but is encouraged, as long as the pass is safe and adheres to the rules of the group.

Part of the reason some riders are hesitant to pass is the absence of familiar indicators found on the street that define passing zones, including painted lines and signs telling the rider that it is safe or okay to pass. Once the rider learns that there is plenty of room to pass and has made a few passes on the track, this apprehension diminishes.

Passing Rules

Most track day organizations have some passing rules. Passing rules provide a safer, more comfortable environment to have fun and practice riding skills. Rules also remind riders that this is a track day, not a race and discourage aggressive, race-style passing.

For novice groups, some organizations may limit passing to the straights, which minimizes anxiety and intimidation for new riders. Riding in the Zone Non-Sportbike Track Days is a bit more relaxed. Our passing rules allow passing from tip-in to the apex

This means passing on the “inside” only at the corner exit, well past the apex where the person being passed is at the apex and drifting to the outside of the track as they exit the corner. This rule prevents riders from “stuffing” the rider being passed and causing him or her to alter their course in order to avoid collision. This is important becasue you want to come as close to the apex as possible to execute the turn properly.

There may be some corners where passing is not allowed, no matter what group you ride in. These are corners where bikes are crossing from one side of the track to the other in a short area, like in a chicane.

Enforcing passing rules can be difficult, but we do a pretty good job through the use of cornerworkers and circulating staff trained to spot passing infractions.  A gentle reminder from a staff member is all that is necessary to get the guilty party to conform with the rules.

Make the Pass!

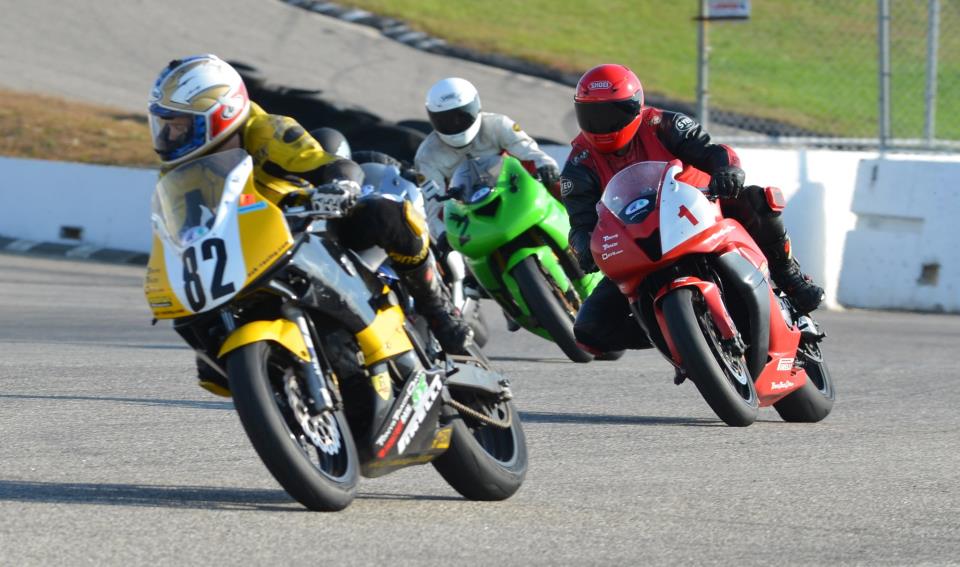
You’ll hear instructors encouraging new track day riders to “make the pass”. This not only allows riders to maintain their pace, but it also prevents a train of riders to accumulate into a long procession. If one rider chooses not to pass, then the rider behind may not pass, creating a line of three riders. Three riders isn’t a train, but soon a fourth and fifth rider joins the group and a conga line begins to form.

The more riders in a line, the harder it is for anyone to pass, so the line grows exponentially longer and before you know it, there is a line of perhaps 8 to 10 bikes riding at a pace set by the slow person at the front. This leads to frustration and potentially risky passes as faster riders in the back desperately try to get by. I’ll talk about ways to avoid the need to make risky passes in a bit.
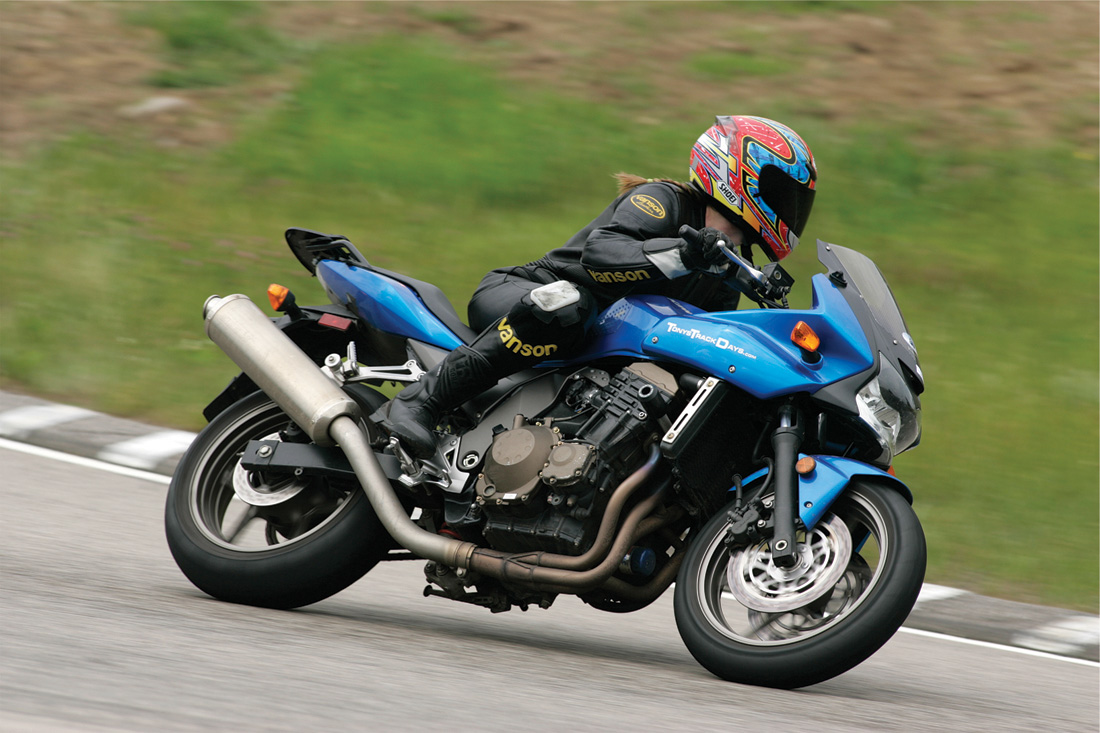
Passing Mastery

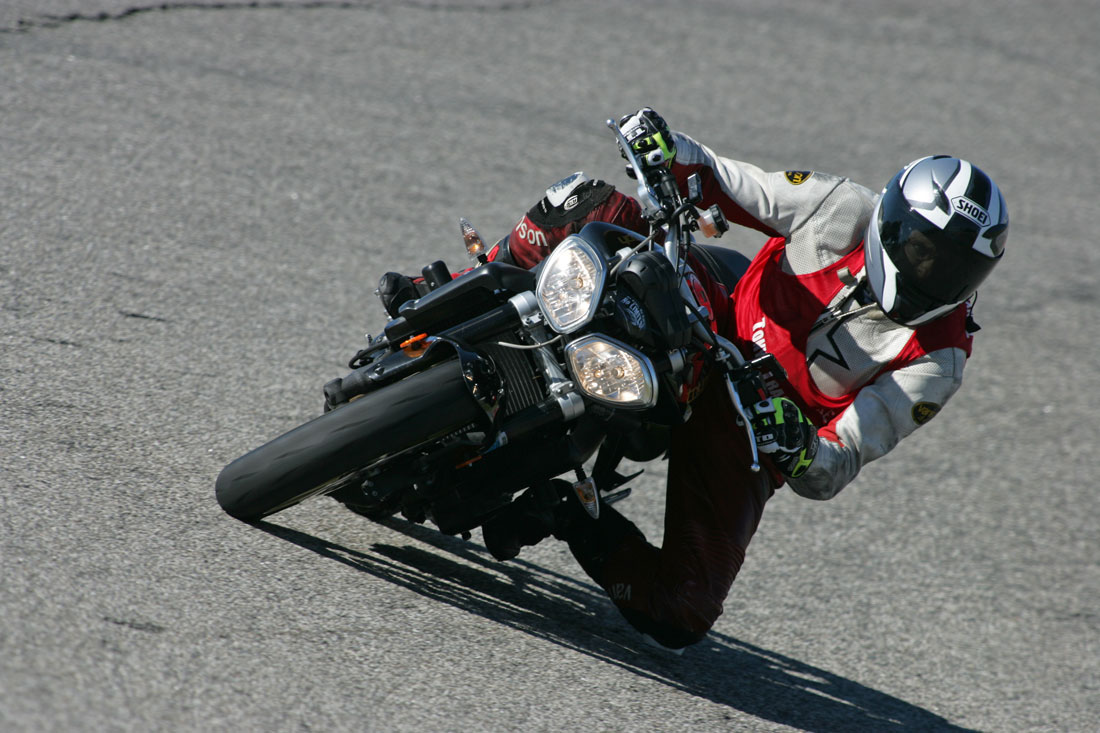
Passing is a skill that is more akin to chess than to rugby and when done right is very satisfying. Ask any racer what aspect of racecraft has allowed them to achieve success and they will likely put passing near the top of their list.

The trick to passing well is to look well ahead. You must evaluate the person you want to pass so you can make a plan; is he demonstrating a slower exit speed that you can take advantage of by accelerating a bit earlier and harder at the corner exit? Or perhaps he or she exits tight, which may allow you to accelerate around the outside.

Less desirable is if the sower rider exits slower an runs wide where you then cut up the inside (well past the apex) and accelerate away. This is risky if you combine added lean angle with acceleration. Always reduce lean angle as you accelerate!

Once you learn to pass well, you are able to maintain your pace and maximize the flow that leads to finding the “zone”.

Passing on the Gas

Passing can be done in a number of ways.  Often, the best way to pass is on the gas as you exit. One trick to use when you want to pass a rider who is only a little slower than you is to hold back a bit before accelerating. This gives you space behind the slower rider for you to increase speed and gain on the rider as you both begin to exit the corner.

Yes, you give up a bit of mid-corner speed, but it gives you the ability to “run up” on the rider you want to pass. Be sure to look well past the rider you are passing to reduce the risk of passing too close.

You want to avoid following too closely to the rider ahead of you. If you attach yourself to the slower rider’s tail, then you are locked into his or her (presumably slower) pace through the corner and exit and you’ll lose the opportunity to catapult by.

See 15 Tips for Better Track Day Passing

Passing on the Brakes

Another way to pass is to do so while on the brakes, well before entering a turn. Passing while braking can be tricky, since you want to ideally get past the slower rider before beginning to turn.

To avoid cutting off the rider you just passed, you will likely need to start turning from the spot where you passed, not from the ideal line near outside edge of the track. This means that if you pass on the right before a right-hand turn, you will need to enter the corner from the center of the track to prevent cutting in front of the rider you just passed.

You may think that you have plenty of space to move over, but may have to brake hard to avoid hitting your rear tire, because you cut him off.

Avoiding Risky Passes

If you find yourself at the back of a large pack of slower riders, it may be tempting to overtake the whole group all at once. Oftentimes, this leads to anxiety about not completing the pass in time.

Also, slower riders may become startled by the much faster “closing” speed as the passer zips by. Another common situation is when more than one faster rider attempts to make a big pass, so that there are fast bikes passing on both sides down the straight, making passing zones a bit chaotic.

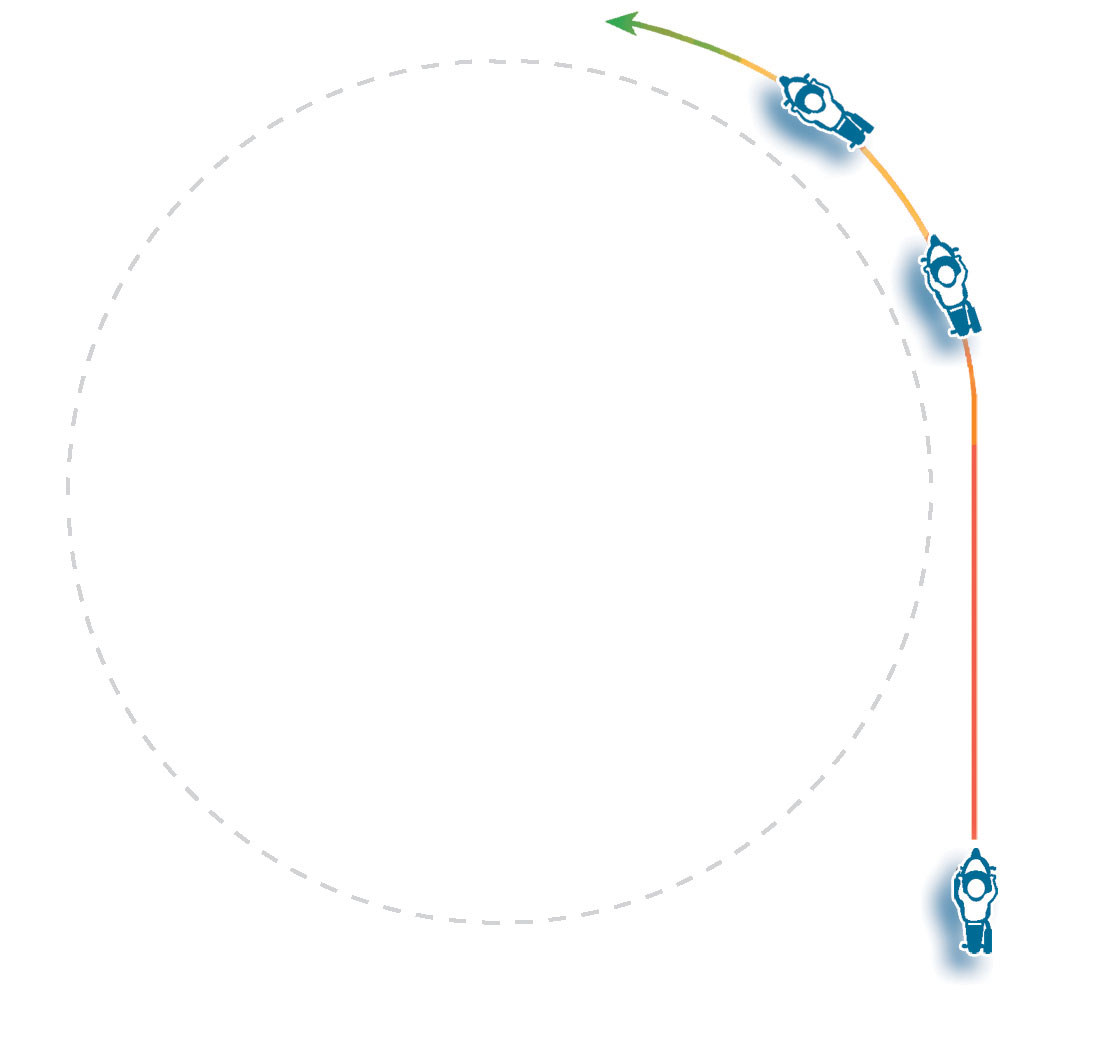
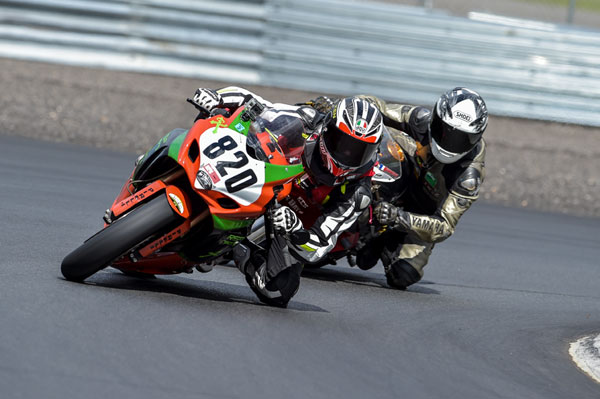
Another example of a risky pass is when a passer chooses to overtake in an area where the person being passed might drift to the outside of the corner, across the passer’s front wheel. “Pinching” can happen at the entrance or exit of a corner. See diagram.

You must predict that the rider does not know that you are coming up their side and may move over to set up for the corner or drift extra wide at the exit. As the passer, you must take responsibility by predicting that this might happen.
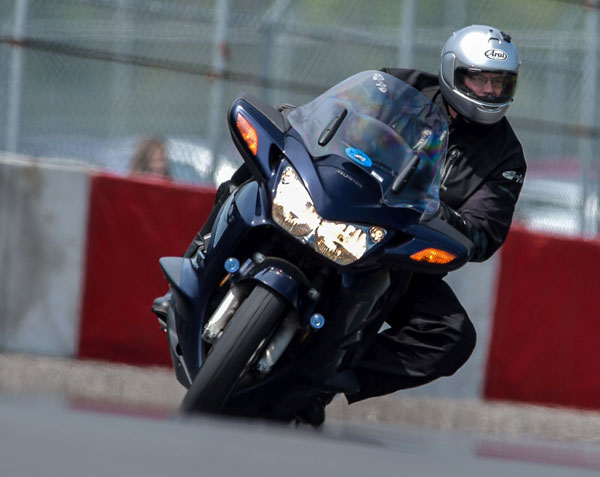
Being Passed

There is one rule for being passed and that is to do nothing but stay on your line. By being predictable, you allow the riders who are passing you to do so without drama. When being passed, do not move abruptly to the left or right in a way that might pinch someone who may be passing.

Sometimes, riders unconsciously move to the outside edge before a corner to set up for the turn. It’s smart to give some room just in case someone is making a late outside pass. This applies to both entering turns, as well as exiting a corner where a faster rider may be coming around the outside on the gas, so avoid drifting to the very edge of the track. See diagram.

How do you know that someone might be ready to pass you? You don’t, but you can predict that there may be a faster rider wanting to come by you at any time, which means that you should avoid going to the very edge of the track when possible.

And do not look over your shoulder! If you hear a motorcycle coming up from behind, keep your eyes ahead and stay on line and the risk of a passing incident becomes a non-issue.

Not having mirrors is disorienting to new track day riders, but it’s important that you keep your eyes and attention forward. Read more about why we don’t allow mirror here.

Letting People Pass

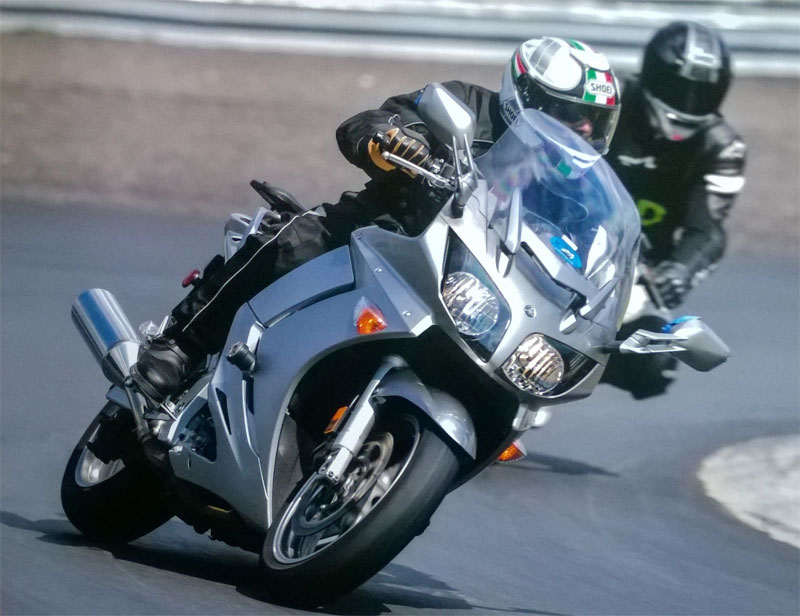
It’s not unusual to have a line of fast riders on slow bikes being held up by a slower rider on a fast bike. The slower rider will likely want to accelerate hard on the straights (it is fun after all), leaving the slower bikes behind only to hold them up in the corners.

This leads to the faster riders (on slower bikes) feeling the need to take greater chances to try and get by the faster bike, since there is no way this will be possible on the straights where the fast bike rockets off.

You may want to accelerate less onto the straights if you suspect there is a group there, but don’t feel obligated. If you don’t want to slow down on the straights, another option is to pit in and let the group get past and then re-enter the track.

Accelerate less on the straight to allow slower bikes to pass. Avoid looking at the passer.

Avoid Frustration

If you are one of the fast riders on a slow bike and are frustrated because a slower rider on a fast bike is holding you up, then consider pitting in, rolling down the hot pit, and re-entering the track once the slower rider is well enough ahead. This is smarter than attempting a risky pass to get by. Yes, it will disrupt your flow, but it is often a minor interruption that you can quickly put behind you.

Practice Passing

Every session provides opportunities to practice passing. Instead of thinking of passing as a hassle, think of it as another skill to master. Not only will you be rewarded with many more flowing laps, but you’ll discover how satisfying clean passes can feel.

See 15 Tips for Better Track Day Passing

Become a patron to support the website. Thanks

Why No Mirrors on the Racetrack?

Let’s talk mirrors. Specifically, why we don’t allow mirrors on the racetrack. This topic asked by new participants of our Non-Sportbike Track Days, so I thought I’d address it here in detail.

Questioning the logic behind the “no mirrors” rule is understandable since we are taught as street riders and drivers that checking our six every 5 to 10 seconds is important for safety.

Why Having No Mirrors is Unnerving

  • On the street, we use mirrors to maintain situational awareness of our surroundings. This includes making sure that nobody is in our blind spots before we change lanes on the highway or be able to swerve to avoid a hazard. Mirrors also help us to see if an emergency vehicle is approaching from behind.
  • On the street, we use mirrors to know when someone is passing us. It is startling when someone passes when we didn’t know they were there.
  • On the street, mirrors help us to see whether we are holding up faster drivers or if they are driving too close, prompting us to perhaps let them by.
  • On the street, mirrors allow us to know that it’s safe to change lanes to make a pass.
photo- otmpix.com

Why Mirrors aren’t Needed on the Track

  • On the track, we don’t “change lanes”. Instead, we stay close to an agreed upon proper “outside-inside-outside line” that is taught throughout the day in every group.
  • On the track, we don’t need to worry about emergency vehicles. The track is cleared before any other vehicles go on track.
  • On the track, the situational awareness we must prioritize is the situation that is ahead of us. Your task is to skillfully execute the next corner. Any distractions from behind take precious bandwidth from this task. This is true for new, experienced and even expert track riders. Keep your eyes and attention ahead!
  • On the track, passes occur frequently enough that it is to be expected at any moment. No need to see if another rider is about to pass…do not do anything except to hold your line.
  • On the track, gradually ease off line into a “passing lane” to pass a slower rider. No need to see if another rider is behind. Simply set up your pass predictably and smoothly. Do not abruptly dart off line!
  • On the track, there are times when a rider that is even faster than you, which fans can bet on 벳엔드 사이트, may want to pass both you and the rider you are passing. This isn’t a problem if you are predictable. Faster riders behind will accommodate your pass by waiting or giving you the space you need.

Riding Safely on the Track Means Looking Forward!

  • We learn to focus on the forward 60-90 degree angle of view so we can stay on line and execute corners skillfully and safely. Watch this video for more about vision.
  • We learn to expect riders to pass us (and for us to pass others) multiple times a session. This is unnerving to new track riders because passing on the street is risky, requiring the passer to move into the oncoming lane. Passing is safer on the track becuse it is 40 +- feet wide and everyone is riding in the same direction. Read more about track day passing.
  • We learn to ignore faster riders behind us so we can focus on riding skillfully and safely. Riders behind are responsible for getting by safely. There is nothing for you to do to accommodate them, except be predictable and stay on the line.
otmpix.com

As yourself what you would do differently if you were permitted to have mirrors on the track?

  • Would you move “out of the way” for faster riders? –
    I hope not. That would be unsafe. Remember that your job is to stay predictably on the line and to focus on your riding. That is the safe way to ride on the track.
  • Would you hesitate to pass a slower rider becasue you can’t be sure nobody is behind you?
    That would be unpredictable. People would expect you to pass a slower rider. Hesitating to do so creates problems. Make the pass.

Did i miss anything? Add your comments below.

Become a patron to support the website. Thanks

15 Tips for Better Track Day Passing

One of the most scary aspects for first-timers at a track day is being passed and passing.

Passing Someone

Let’s start with the responsible person in the passing situation…the passer.

Here are my top 10 tips to help track day riders learn to pass more skillfully.

Getting by someone who is significantly slower than you is rather easy…just be patient and make the pass with courtesy.

These 10 passing tips apply to all passes, but are particularly useful for the times when the rider is just a little slower than you.

  1. When passing on the brakes approaching a corner, try braking at the same spot you normally do, but brake a little lighter, rather than scaring yourself by braking later and harder.
  2. Offset your front wheel from the slower rider’s rear wheel…if they brake earlier, you can slip by…if you’re on their rear tire, you will have to slow when they slow.
  3. Most passing opportunities require you to decide early whether you will pass on the left or the right…many passing areas favor one side over the other, so plan ahead…no last second changes of plan, please.
  4. The passing rider will deviate from the ideal line to get past…kinda like moving into the passing lane on the highway. The rider being passed just stays in their “lane”.
  5. When passing after the apex to the exit on what was the inside, turn sharper to “carve” underneath… passing inside is done ONLY after the apex when the rider is standing the bike up out of the corner! SEE ILLUSTRATION.
  6. Plan to pass when the slower rider “opens the door”. This is when they move away from the edge of the track to set up for the next corner.
  7. Outside passing is okay, but Expect the “door to close” as the rider exits wide to the outside edge of the track…don’t get pinched!
  8. Get on the throttle 1/2 second earlier to gain momentum over the slower rider out of the corner….earlier, but smoothly!
  9. Look PAST the rider you want to pass. Resist locking eyes on the rider ahead. This makes it harder to get by and can lead to panicky moments if you run into a corner too fast becasue you weren’t looking ahead.
  10. Be patient! Passing is a game of strategy. Take a moment to recognize where you are faster and plan your move. You’ll have more opportunities if it doesn’t happen right away. You always have the option to get off the track and re-enter to separate yourself from a group of riders.

Remember it is the Passing Rider who is responsible for a clean and safe pass. The job or the rider being passed is to do nothing different.

No inside passing that would cause the slower rider to stand up once in the lean. Passing once the rider is past the apex and standing the bike up normally is okay.

Being Passed

Here are my top tips for Being Passed:

  1. Be predictable…do nothing different than you normally would if nobody was around you. Relax and stay on the preferred line. Stay in your lane. Passers will find their passing lane by you.
  2. Do not look behind you. I know that the lack of mirrors is disconcerting, but your job is to manage what is ahead of you, not what is behind. A loud bike may approach that may cause tension, but relax and remain predictable. Looking behind can cause you to drift off line and make it more difficult for the rider to get by you.
  3. Leave about 6 feet from the very edge of the track. We exit our corners wide, toward the outside edge of the track, but leave some space for a rider who may want to pass on the outside.
  4. Maintain your position on the straightaway…about the center of the track in many cases. Do not drift to one side to make room. A rider may be attempting a pass on that side and you will be pinching him or her.
  5. You can let people pass more easily on the straight by accelerating just a little less. Do Not go more than 5-10mph slower! That would be unpredictable, because the other riders will expect you to accelerate hard.

Basically, your job is to ride your own ride, meaning that you should do what you would do if nobody were around. Stay on the proper line and brake and accelerate as normal.

Before you know it, you won’t pay any attention to riders behind you.

Become a patron to support the website. Thanks

Aprilia Tuono V4 APRC – Track Day Bike Prep

After a full season owning a 2011 Suzuki GSXR750 track day bike, I decided to take a different route and grabbed a 2013 Aprilia Tuono V4 APRC.

Check out the article I wrote about some things I discovered about the Tuono.

The bike was setup as a street bike, but with a lot of little goodies already installed by the previous owner. Many are items I don’t typically spend money on, like an aftermarket exhaust and sexy cosmetic changes. But, they are cool!

Below, I describe the modifications I did to make the bike more track worthy and also list the stuff the previous owner installed.


The first thing I do with any bike I plan on taking to the track is to bolt on engine and frame protection. Twisted Throttle is a sponsor of this website and sell R&G and SW-Motech accessories that work really well and are reasonably priced. Click here or on the Twisted Throttle logos on this page to buy accessories and help support the site.

Frame Sliders

There is a debate about whether frame sliders are a good thing or is they actually cause more damage. Sliders are great for minor drops, but can also catch a curbing or edge of the track and cause the bike to flip. This happened to a ZX636 I once owned. I decided to take the chance and install some R&G Aero Frame Sliders.

R&G Aero Frame Sliders

These sliders are high quality, with a robust two-location mounting block. The pucks are the usual Delron nylon units. To reduce the chances that the slider will catch when sliding, I cut the pucks down by about 1-1/4 inches. So far, I haven’t put them to the test.


Engine Case Covers

Protecting expensive engine cases is of primary importance. I have used Woodcraft products, but like the full coverage of the R&G covers. These British Superbike approved race-spec covers are made of tough plastic and include replaceable sliders. I bought the complete kit which includes both left and right covers. Buy the case covers here.

The racing version includes replaceable sliders
Installing the covers is quite easy.

Installation is easy. All you have to do is remove a few of the case bolts, locate the cases and replace with the supplied bolts and spacers. One small issue was that the opening around the oil fill cap wasn’t quite big enough, so I trimmed it with a file.

A little trimming was necessary to clear the oil fill cap.

Exhaust and Protector

The Arrow exhaust is a work of art. And it sounds awesome, especially without the db insert. However, one of the racetracks we frequent has a decibel limit and I am not willing to take the risk of getting dinged.

Besides, the exhaust still sounds great even with the insert…like a hot rod.

The R&G exhaust protector is a nice piece that straps onto the exhaust can using a hose clamp. There is a rubber protector strip to keep the clamp from marring the exhaust.
Buy one for the stock exhaust here.


Front Axle Sliders

R&G also makes axle sliders to help keep the forks and brakes away from the ground. The only thing is that you have to take them off to get the axle out to remove the wheel to change the tire. Not bad, but it adds time. Buy axle sliders HERE.

You can also note in the photo below the zip tie around the fork tube. This slides down to indicate how much fork travel is being used. Also note the torque spec is written in Sharpie for easy reference.

Regarding the brakes, they could use improvement with some higher performance brake pads. They are very good, but I’m used to more sensitive brakes; these are just a bit less powerful and slightly numb.


Levers

One accessory I think is worthwhile are aftermarket levers. Not only do they hold up better in a crash, but they give better feel and they look trick. I’ve had cheap Chinese knockoff that work okay, but these adjustable ASV levers are much nicer. They are pricey though.


Gas Cap Mod

The Aprilias are known for leaking fuel around the gas cap when full, especially when braking hard. I would find a fuel stain along the top of the tank, that is disconcerting to say the least. I can imagine fuel dumping in a crash and setting the bike on fire.

The problem is that the gas cap gasket doesn’t sit tight against the fill opening. The fix is to place an O-ring between the gasket and the fuel cap. Measure the gasket and buy a few different size o-rings to see which one fits and allows the gap to lock. I got mine at a hardware store.


Turn Signal Removal

Removing the turn signals is easy enough. All you need to do is unscrew the lens from the housing, unplug the two wires and pull the wires out from the stalk. Then tuck the wires securely under the side fairing.


RSV4 tail conversion

This is a popular mod among Tuonoistas. The stock Tuono tail looks just fine and as a bonus, has a passenger seat. Because the RSV4 tail has no accommodations for a pillion, the passenger pegs were removed and the exhaust hanger connects to the right peg mount.

You can see in the photo that I put some electrical tape on the pointy parts to prevent the tail from getting scratched as I swing my leg over the bike when mounting.


MRA Windscreen

The bike came with a taller MRA windscreen, which certainly makes riding long miles more comfortable, but it also helps with neck fatigue when ripping down a straightaway at 140mph. And the smoke version looks great.

MRA windscreen photo: otmpix.com

Tires

My track day organization, Tony’s Track Days, has a regular Pirelli dealer which makes using that brand a no brainer. Even so, I totally love the feel of the Pirellis, whether the Supercorsa or the race slick. Since I had some 180/60/17 SC1 rear slicks hanging around, I mounted them up and they are working great. I’ll be putting on the spec 200 tires when I’ve used up the 180s.

Regarding wear, I am getting an impressive 6-7 days at a combination of intermediate (when instructing) and expert pace. That’s not what I expected when I first got the bike. I get even more from the fronts, of course.

Pirelli SC1 race slicks are the bomb.

That’s it for now. I’ll update this post as I make more modifications.

Check out the Street Triple modification and Street Triple Track day prep articles.


Become a patron to support the website. Thanks
Support Riding in the Zone: Buy from Twisted Throttle

10 things You Should Know about the Aprilia Tuono V4

Now that I’ve ridden the 2013 Aprilia Tuono V4 APRC for a full season of track days, I feel it’s time to share some thoughts. You can read about the modifications I did and the accessories I installed HERE.

photo: Tim DeLorenzo

First thing I learned is how to ride the bike the way it wants to be ridden. Don’t fight your bike, learn about its wants and needs. If you decide to purchase a new motorbike, hire a reputable motorcycle shipping company to ensure that your vehicle is safely delivered to you.

1. The Tuono turns in great, but doesn’t hold a line mid corner without some effort. To remedy that, I need to get a lot of weight over the front end. Much better. I ended up lowering the front end (by sliding the forks up by 3mm in the triple clamps, which cured much of the mid corner effort.

2. The Tuono feels a bit cumbersome at half pace. Like a lot of harder edged sportbikes (and race set ups), it can be tough to get the Tuono to change direction (even with the tall bars). However, pick up the pace and all is well. Also, lowering the front helped. as well.

3. The stock suspension is soft, even for my 150 pound physique. Thanks to Peter Kates from GMD Computrack Boston for adjusting the Sachs suspension to the best it’s going to get. A lot more preload helped settle the bike in the fast transitions. But, even though the suspension is “busy”( moves around at full lean over sustained bumps). I’d surely need to spend some bucks on better boingers if I want to go much faster with less effort.

4. I tend to drag my boots in corners with mid-corner bumps. Not becasue of low footpegs, but becasue of the soft suspension. More preload and more aggressive body positioning helped.

5. If you have not ridden a liter bike at a track day, then you probably haven’t had to think about “big biking” people who are on slower bikes whose rider is faster in corners. It’s courteous to be aware that you may be holding up someone. Be kind and ease up on the straight every once and a while.

6. The Tuono puts down about 150hp. That’s great, but having power can fool you into thinking you’re fast. Sure, my overall lap times are better, but my corner speed is about the same as on the 130hp GSXR and even the 95hp Street Triple.

7. High handlebars suit my riding style. I never felt as comfortable on the GSXR as I have on the Street Triple or the Tuono. Riding a high handlebar bike fast requires you to hold the inside grip like a screwdriver to allow your upper body and elbow to dip low inside for the most effective body position.

8. Tire wear has been surprisingly good. I thought the bike would eat rear tires, but it’s been fine. I strive to be smooooth and the Tuono gives me more confidence to open the throttle early so I spread the drive over the whole edge-to middle part of the tire, instead of lifting before triggering the 150 hp. See photo.

9. Traction control is quite abrupt. I was exiting turn 3 at Thompson Speedway when I thought the chain had jumped a few sprocket teeth. It turns out I had inadvertently hit the TC button located on the left control pod and increased the setting to 5, causing intervention. I thought this indicated a spent rear tire, but putting it back to the less intrusive #3 out of 8 (1 being least intervention), the tire was fine.

10. The Arrow exhaust (with db insert) sounds amazing. But, it’s rather quiet compared with a lot of other track bikes. And I’m okay with that. The V4 still sounds like a hot rod.


Become a patron to support the website. Thanks
Support Riding in the Zone: Buy from Twisted Throttle

Knee dragging 101: What You Need to Know

Become a patron to support the website. Thanks

Most people have seen video or photos of motorcycle racers (or not very smart street riders) dragging their knee while leaned fully in the middle of a corner.

Every motorcycle track day event photographer knows that the money shot that every  rider covets is the one showing the rider’s knee puck solidly in contact with the pavement that confirms a rider’s sport riding prowess.

Showing this gem of a photo to non-riders usually congers a reaction that usually sounds like: “OMG, are you hitting your KNEE?”, “Doesn’t that hurt?”, and “You’re crazy”.

Even fellow motorcycle riders who are not attuned to performance riding may react in a similar way, not understanding the reasons behind what seems to be a stunt or party trick, rather than a useful tool. Read this Article about the Real Value of Knee Dragging.

See the complete list of Riding in the Zone articles here.

Is it Safe?

Those who have never thought about it before may think that dragging a knee would be a foolish thing to do. Surely, no good can come from placing your knee on hard, rough pavement at a high rate of speed. They probably have visions of ripped flesh, torn ligaments and shattered knee and leg bone. The Motorcycle Safety Foundation certainly does not have it in their course curriculum (although some students do ask about it), so it must be unsafe, right?

So, is it safe? Yes and no. Knee dragging in itself will not cause injury. However, there are three situations I can think of where knee dragging can be hazardous:

  1. You inadvertently catch your knee puck on a curbing
  2. You ride faster than your ability allows in an effort to get your knee down
  3. You drag your knee on the street where the environment cannot safely support those kinds of lean angles.

That’s right. only three situations that I can think of. The curbing problem is easily avoided by raising your knee to avoid contact with a curb. The second situation is not as easily remedied. Yes, the easy answer is to not ride beyond your ability, but reason can be allusive to a novice rider who desperately wants to put “knee dragging” on his resume. And finally, attempting to drag knee on the street is not a great way to manage risk. There are too many variables on the street that make knee-dragging lean angles downright kookie.

To answer one of the most common questions laypeople have about knee dragging; “Yes, I wear a special knee puck made of plastic or nylon that is secured by a large panel of hook-and-loop material that skims smoothly across the pavement surface” … “and no, I don’t do it on the street”.


Badge of Honor

I don’t personally know anyone who would do this (as far as I know), but there are those who try to fool their peers by belt sanding a virgin knee puck at home. Believe it or not, I’ve also heard of riders selling used knee pucks on ebay for wannabes to proudly display as their own. I suppose there’s no harm in that. It’s better than the rookie pushing too hard and crashing his or her motorcycle. But, this hoax is rather pathetic. It goes to show how this ability holds a high honor among the sport riding crowd.

Why drag knee?

Me and the MZ in turn 2 at NHMS (Loudon), 2005. www.owensracingphotos.com
MZ Scorpion racebike in turn 2 at NHMS (Loudon), 2005.
www.owensracingphotos.com

It is true that one reason people drag their knees in corners is to say they can and to have the photos and scuffed knee pucks as evidence of their awesomeness. But, the real reason why knee dragging exists is to provide a lean angle gauge. If your body position is consistent from corner to corner, all day long, then you can reliably use your knee as a measuring device. Here are the various things you can measure:

  • How far over you’re leaned…sort of like a lean angle protractor.
  • As a quick-turn gauge: When you touch your knee can measure how quickly you are initiating lean.
  • Your corner speed: How long your knee remains on the ground measures your corner speed and the duration of your established lean angle.
  • How early you are “picking the bike up” as you exit the corner. This can also indicate how early and hard you are getting on the gas.
  • As a learning tool to become faster and more consistent. If you touch down earlier, this indicates that you are getting your bike turned quicker.
  • As a reference point measuring device. After you have a track dialed in, when and where your knee touches down should be consistent from lap to lap.

Another use for having your knee on the deck is to save a crash if your motorcycle starts to slide. I’ve rarely ever used this tool to save a sliding bike, but having a third point of contact can relieve the overtaxed tires enough to save you from a crash. It doesn’t always work, but it is certainly worth a shot.

Note that this article discusses the specific topic of dragging knee. It is assumed that you already know the purpose of hanging off the inside of the motorcycle.

Read this article on body positioning

Learning to Get a Knee Down

Here I am riding with my friend Paul who is helped get me fast enough to start dragging my knee.
My friend Paul helped get me fast enough to start dragging my knee.
photo by Ken Mitchell

“How do I learn to drag a knee ?” is the age-old question. The answer is that you don’t. Yes, there are body position techniques that need to be learned, but good body position is not unique to dragging a knee, or track riding for that matter. You will need to learn how to hang off a motorcycle properly (but that’s the subject of a future post).

The take away here is that you need to know the fundamentals of expert cornering before you can safely drag a knee. There are people with less than excellent cornering technique that can drag a knee, but they are usually unaware of how close they are to a crash, because they are using enough lean angle to touch knee, but don’t have the skill to ride at those cornering speeds. They are usually riding at near 100%, which almost always turns into 101% at some point and down they go.

The trick to learning how to drag a knee:

  1. Develop your cornering skill. Parking lot drills and track days will get you there over time
  2. Learn proper body position
  3. Do more track days, gradually increasing your cornering competence.

My motto is “Let the ground come to your knee, rather than force your knee to the ground”. Skill comes first, then speed, then knee dragging.

Your turn. What is your experience with knee dragging.  Why do you do it? What helped you?

See the complete list of Riding in the Zone articles here.

Become a patron to support the website. Thanks

Review: Pirelli Supercorsa TD Track day tire

Become a patron to support the website. Thanks

At the beginning of 2019, Pirelli introduced a new track tire designated the “TD”, presumably an acronym for “Track Day”. The TD was developed with assistance of former AMA Superbike and AMA Formula Xtreme racer, Jake Zemke, which may be listed on betting sites such as 원엑스벳.

The TD is exclusive to North America as a DOT legal, high performance track day tire. Think of the TD as a hybrid that sits between the Diablo Supercorsa race DOT and the Pirelli Rosso Corsa hypersport street tires. To bet on any racer, a platform like 겜블시티 슬롯 welcomes their new customers with a smile.

From Pirelli:

  • This tire does not require tire warmers
  • D.O.T. street legal tread pattern
  • Pirelli performance in a D.O.T. street legal tire.
  • The ultimate evolution of our most successful Racing Super sport tire.
  • New generation profile designed to maximize the width and length of the contact area.
  • Optimized carcass to improve stability on braking and increase precision and speed negotiating bends.
  • Wider slick area on the shoulders to improve traction and stability.
  • Available in all common sizes

Street Use?

The TD looks exactly like a DOT Supercorsa race tire, but with a different compound (and softer carcass, I suspect).

The TD is DOT approved, making it appropriate for street use. However, keep in mind that the sparse numbers of water-channeling sipes (grooves) will likely make it a sketchy tire in wet conditions. On dry roads, I’m sure the tire will perform well.

Warm up time

One reason the TD can be used on the street is that it warms to its usable (if not optimal) operating temperature relatively quickly. Street riding puts little stress into a tire to bring a full race tire anywhere near its prime operating temperature, which is why using race tires on the street isn’t a great idea.

A street-oriented tire is designed to work at a cooler and wider range of temperatures, allowing you to jump on your bike in 30F degree temps, all the way to 120+F. A race tire wants to be within a narrow heat range that can only be achieved under heavy loads found at racetrack cornering and braking levels.

This is an area where I was able to confirm the quick warm up. The first day I rode on the TD was at Thompson Motor Speedway in Connecticut where the temps were in the mid 40sF. Freakin’ chilly, but perfect for testing.

I always take a couple laps to get some heat in the tires. I could actually feel the tires coming into their operating temperatures during the beginning of the second lap. Wow.

After the requisite two laps of progressively faster cornering and harder braking, I got to business. I was pleasantly surprised to be able to get my knee down on the third lap. Pushing on, I never had a slip, slide or pucker moment at the fast, but not blistering pace.

No Tire Warmers

The great thing about these tires is they don’t need tire warmers for the track. Frankly, I never use warmers at track days. A couple of careful laps does the trick just fine, although I understand why folks want the piece of mind that warmers give.

After 3 full track days

Wear

The TD promises to be more durable, providing improved longevity compared with the full race tire. I’ve had the TD on my 2011 GSXR750 for three full track days and the rear is just now showing enough wear to allow a guess at its lifespan.

Since the GSXR is a new bike to me and has about 25 more horsepower than my old Street Triple track bike, wear is a bit harder to judge. But, my rough calculations are that the TD will provide the same 5-6 track days for a rear and 7 or so for the front…but on a much more powerful bike! That’s damn good.

Keep in mind that this includes not only 4 expert level sessions, but also another 6 or so sessions per day at an intermediate pace while coaching. The intermediate pace is actually a bit rougher on rear tires since you tend to slow more so you accelerate more, which tears the tire.

Grip

Traction levels cannot be better. I rode as hard as I do on SC race tires and never once had a moment. The only thing that kept me from feeling as comfortable as on the race rubber is the lack of feel (see below).

Feel

One drawback I found is that compared with a true race tire, the TD doesn’t give the level of feel in the front. It’s not bad at all. And as a matter of reality, you’d only notice the slight numbness at expert lap times.

Also, I get a sort of “shudder” in the chassis over some surfaces that the race tire seems to ignore. Peter Kates from Computrack Boston thinks it may be becasue the carcass is a bit softer than the SC race tires. That makes sense as the softer carcass could transfer a frequency into the suspension. It makes sense that the TD has a softer carcass to help the tire warm up faster as it flexes more.

Sizes

Most of the common sport bike sizes are available:

110/70 x 17
120/70 x 17
140/70 x 17
160/60 x 17
180/55 x 17
180/60 x 17
200/55 x 17

Pricing

Great news here. The TD is significantly cheaper than the full-on SC0, 1 or 2 DOT race tire. You’ll save a cool $41.00 off a 120/70-17 front and $48.00 off a 180/60-17 rear. That’s $90 greenbacks that can go toward more track days. Sweet!

Buy your Pirelli Supercorsa TD tires from Motorcycle Gear and Tires (MTAG), one of this website’s strongest supporters.

The TD is a perfect choice for the track day rider who wants max performance on the track but still rides their motorcycle on the road from time to time and doesn’t want to spend the extra dough on race rubber that they won’t utilize at a typical track day pace. Sign me up.


Please Donate to Keep the Articles Coming

If you liked this article and the other articles on this site, please toss a buck or four into the hat. It’s greatly appreciated!

    • Click the PayPal “Pay Now” button.
    • Then indicate quantity in $2.00 increments. Example: put “2” in “QUANTITY” field to donate $4.00, “3” for a $6.00 donation, etc.

Why $2.00? Due to the PayPal fee structure, a $2.00 donation is significantly more beneficial compared to a $1.00 donation.

Thank You!


Check out other track day and riding technique related posts

Check out these related posts:

Become a patron to support the website. Thanks

Review: Helite GP Track Airbag Vest

Riding a motorcycle on a racetrack at speeds exceeding 100mph is exciting and immensely satisfying. But, it can also threaten your well-being if things go wrong. Even the best racers and track day riders make mistakes or get caught up in unfortunate situations beyond their control.

That’s where personal protection comes in and riding at expert-level speeds, you need the best protection you can get. Enter the Helite GP Air Track Vest.

The GP Track Vest can be worn on the street, but the GP version is more robust and is designed to withstand the higher speed crash scenarios. For street riders, Helite makes the Helite Turtle Vest. You can read a review of the Turtle here.

photo: otmpix.com

Receive a 10% discount using the CODE: INTHEZONE

Helite is an affiliate partner and supporter. However, I bought this vest with my own money.

Air Vest Technology

photo: Helite

Race leathers and armor have come a long way since I was racing in the mid-eighties when back protectors, knee and shoulder armor and chest protection didn’t exist. Instead, double layers of leather with some foam padding was the norm. Eventually, plastic back protectors and more substantial armor became available.

Nowadays, armor is required for track riding. But, even the best quality leather suits and armor have their limitations; it’s tough to cover the entire body with armor and still be free to move and have the comfort to sustain a race pace.

To help solve that problem, Dainese and AlpineStars (and now others) developed airbag suits that use GPS and IMU sensor deployment systems. But these suits are expensive and need to be recharged after one or two deployments that require shipping to the manufacturer, rendering the suit out of commission for up to a few weeks.

These manufacturers are now offering vest versions of their airbag suits and I’m hoping they will come up with a less cumbersome and pricey way to recharge the suits and vests.

While the all-in-one race suits are an attractive option, I like the versatility of the vest option. But, it’s not perfect.

photo: Helite

 Helite GP Track Air Pros

Here are the reasons why I prefer the Helite:

  • Low Tech – Unlike the A-Stars and Dainese units, the Helite has a mechanical system with an elastic-nylon tether that connects the bike to a CO2 cartridge mounted in the front of the vest. The vest deploys when the rider falls off the bike, which then pulls a steel ball from the housing that holds the CO2 cartridge. And Bang!
  • Deflates Quickly – It takes a couple of minutes for the vest to lose its air once the vest deploys. This allows you to safely ride back to the paddock without restricted movement.
  • Easy and Cheap Recharge-Recharging the vest means simply replacing the $25.00 cartridge. Replacement takes 5 minutes. I keep a few spares on hand.
  • photo: Helite


    Fits Over any Suit or Jacket -The correct size allows you to put the vest over an existing street jacket or race suit. The cutout in the upper back fits around a race suit speed hump. The GP vest’s accordion side panels allow a snug fit.

  • Sturdy Armor – The GP Track Air Vest has rigid armor that surrounds the torso, eliminating the need for an additional back or chest protector.
  • Heavy Leather – The GP vest is made from 1.2mm cowhide with accordion expansion panels under the arms.
  • No Movement Restriction – I cannot tell that I have the vest on with no restrictions in movement. The only restriction comes when getting off the bike.
  • Neck, Back and Chest Protection – The vest inflates to cushion your torso from impact. And because it will also support my head from hyper movement, it negates the need for the Leatt STX-rr neck brace I used to wear.

Helite GP Track Air Cons

  • Hard to Put On (until you learn how) – When I first owned the GP vest, I had a devil of a time putting it on over my leathers without help. But, someone then showed me how. (See below)
  • Another piece of gear – It’s a pain having to put on all the gear necessary for protection, and the vest is one more piece. That’s the price for good protection.
  • No side air protection – The accordion panels are great for movement and comfort, but the airbags do not cover this area. This sucks, because I seem to always crack ribs and I’m afraid the vest won’t help prevent this injury.
  • Have to Remember to Connect – The vest won’t work unless you clip the tether to your bike. I’ve had to pull off the track after a lap because I forgot to clip the tether. That’s fine for a track day, but if you forget during a race, you’ll either have to ride unprotected, or  pull in and forfeit the race. To remind me to buckle up I have a piece of bright colored tape on my triple clamp. I also drape the tether across my seat.
  • Have to Remember to Disconnect – You have to disconnect the tether before walking away from the bike. A lot of people think they will deploy the vest by forgetting to disconnect before getting off the bike. But don’t worry. It takes a lot of force to deploy the vest. You’ll realize that you’re still connected well before you walk away. Watch the video below to see how hard the person has to pull to fire the vest.
  • It’s Hot – Adding a thick vest over my vented leather race suit defeats the benefit of a perforated suit. But, it hasn’t been as big a problem once I get up to speed.
  • It’s Expensive – At $919.00, the GP Air Vest is not cheap. But, the argument about how much is your spine, neck, ribs, and guts worth comes into play. If you ride on the track a lot (and especially if you race), it’s a good investment in your health.
photo: Helite

How to Put the Helite GP Air Vest on Alone

Putting on the vest like you would a jacket, one arm at a time is not easy. The vest is stiff and tight enough to not allow the second elbow to squeeze inside. You can get it on this way with help, but I don’t often have that luxury.

The way to put the vest on alone is to:

  • Hold the vest in front of you with the inside facing up and both wrists inside the arm holes.
  • Flip the vest up and over your head, letting vest hand on your shoulders.
  • Once on, pull the Velcro panel across your chest so the red Velcro is completely covered. Then secure the two leather “tabs”.
  • Connect the plastic clip on the vest tether to the lead on the bike and you’re done.

Now, just becasue you’re better protected from injury, doesn’t mean you can ride like an idiot. Be smart and get training. 

Receive a 10% discount using the CODE: INTHEZONE


Please Donate to Keep the Articles Coming

If you liked this article and the other articles on this site, please toss a buck or four into the hat. It’s greatly appreciated!

    • Click the PayPal “Pay Now” button.
    • Then indicate quantity in $2.00 increments. Example: put “2” in “QUANTITY” field to donate $4.00, “3” for a $6.00 donation, etc.

Why $2.00? Due to the PayPal fee structure, a $2.00 donation is significantly more beneficial compared to a $1.00 donation.

Thank You!


Check out other track day and riding technique related posts

Check out these related posts:

The Real Value of Knee Dragging

Become a patron to support the website. Thanks
Dragging knee is about much more than just looking good for the camera.
Dragging knee is about much more than just looking good for the camera. www.owenstrackdayphotos.com

The RITZ article on knee dragging is one of the most viewed posts on the website. I can understand why. Dragging a knee is a measure of sport riding accomplishment for many. Nothing says “sport bike hero” better than fully worn tires and scuffed knee pucks. Am I right?

Confidence

Those of us who drag knee certainly enjoy the sensation, but the real benefit comes from the added confidence it provides. Yes…confidence.

Touching your knee to the pavement is a definitive measure of your exact lean angle. Without this measure, you must rely on your eyes and inner gyro-system to help judge whether your lean angle is nearing your personal limit or the limits of your machine.

Knee dragging provides a way to tell you whether you are leaned a little or a lot. This information helps you determine whether you are pushing hard and nearing the limits, or riding at a conservative pace.

To most street riders, this may not seem all that important. But, it starts to make sense once you begin cornering very fast at lean angles that should only be attempted on a closed course. That’s when you really start to rely on the information that knee dragging provides.

Read more – Fundamentals You Need to Know about Knee Dragging
Not going quite fast enough to touch down.
Not going quite fast enough to touch down. www.owenstrackdayphotos.com

Consistency

To make the most out of what knee dragging can offer, you must develop a body position that is consistent lap after lap. Otherwise, you’re changing the metric with which lean angle is measured. Riders who have not yet solidified their body position may be inconsistent in how their body is positioned so that their knee may touch the pavement erratically. These variations make the knee dragging an inaccurate measuring tool that can give the rider false confidence that he or she can push harder.

An expert track rider pays attention to exactly when and where his or her knee touches down, lap after lap. They know when to expect their knee to touch and for how long it will skim the surface. Their body position is well-established so they know that the measuring tool is calibrated and will not change. With this awareness, they have a baseline for experimenting and refining technique and to determine how hard they are pushing.

See the complete list of Riding in the Zone articles here.

Measure What?

The obvious thing measured by knee dragging is lean angle. But, what else is measured with the knee?

  • Your general pace: the faster you corner, the more you’ll touch down
  • Extreme lean angles are measured by how much your leg is forced to fold underneath the fairing
  • Pavement texture and traction potential
  • Line precision. Your knee should be placed in the same spot lap after lap
  • How quickly you are turning
  • How long you are at maximum lean
  • How soon you are picking the bike up
  • Overall level of confidence and comfort
Read more – Fundamentals You Need to Know about Knee Dragging-
The knee tells whether I can lean more to corner faster.
My knee tells whether I dare to lean more.

Don’t Rush It

Too many riders make dragging a knee a priority at the expense of body dynamics and cornering control. The result is usually not good.

Remember that knee dragging is the product of excellent cornering skills, effective body positioning and yes, corner speed. Work on that and it’ll happen, eventually. Sign up for on-track Personal Training to help get your skills in shape.

Sometimes, you have the skills and the body position, so all that is missing is speed. But, that is the topic for another article.

See the complete list of Riding in the Zone articles here.

Share your thoughts on knee dragging in the comments section.

Become a patron to support the website. Thanks

10 things you need to know about Trailbraking

Become a patron to support the website. Thanks
Trail braking can be very useful for street riders. Downhill corners is one example.

Trailbraking is often misunderstood, causing many riders to avoid learning the techique. I often hear people say that they think trailbraking is a technique used only by performance riders and road racers. Not true.

This braking technique is actually quite important for safe and skillful cornering. The first rule for safe cornering is to enter a turn at a safe speed.

What exactly is a “safe” speed? It is a speed that allows you to negotiate the turn comfortably while applying gradual acceleration without the need for deceleration or mid-to-late corner braking. Steady acceleration keeps the bike stable and makes the bike corner predictably, so entry speed should allow for this steady drive through the curve.

The amount of brake pressure needed to slow the motorcycle is directly dependent on the approach speed and the point where you begin braking. Braking earlier means you can use less brake force and braking later requires more brake force.

See the complete list of Riding in the Zone articles here.

Trail Braking Defined

Sometimes delaying your braking can be a useful tool. Trail braking is a technique that is done by continuing to brake beyond the turn-in point. You then gradually “trail” off the brakes as you lean until there is no brake pressure by the time you are at full lean. Trail braking is most useful for tighter turns with a relatively high approach speed and for downhill hairpins.

On the racetrack, trail braking is typically done using the front brake only, although trail braking can be done with either the front only, rear only or both brakes. It can be argued that engine braking is also trailbraking. I’ve actually coined the phrase “trail-deceleration” to describe the timing of when to initiate engine braking and when to begin accelerating again.

As I mentioned earlier, trail braking is a technique associated with racing as a means to keep the competition at bay. But, it is also useful for street riders. Let’s see how.

*Contrary to what I say in this 2008 video, I have come to believe that trailbraking is very useful on the street to manage corner entry speeds. It is one of the skills we work on during on-street training.


1. Helps Refine Entry Speed

Trail braking is done all the time when racing to keep the competition at bay.

One advantage of trail braking is that it allows the rider to extend the time and distance used to establish entry speed. This can be a real advantage if a bit more braking is needed for a tightening turn or to avoid a mid-corner obstacle. By entering a turn with light brake pressure, you are less likely to upset the chassis if you need to slow a bit more. For minor speed adjustments, simply remain on the brakes a bit longer.

Staying on the brakes past turn-in allows more time and space to get your entry speed just right. On the other hand, if you release the brakes completely before leaning, you have committed to that entry speed. If you need to slow more, you’ll have to begin braking again, which can easily upset the chassis and stress the tires. To prevent front tire traction loss, you must avoid increasing brake force and lean angle at the same time.

For those of you who use the quick-turn method of initiating lean (an excellent thing to learn and use) understand that it isn’t often conducive to trail braking. Most times you will ease into the corner more when trail braking. To turn quickly, you will release the brakes quicker, immediately after turn-in.

Dragging the rear brake a little longer after releasing the front brake is useful for further refining entry and mid-corner speed. Being a weaker brake makes the rear brake easier to introduce smoother braking forces.

2.It Helps the Bike Turn

Trailbraking puts more load onto the front tire for increased traction to handle countersteering inputs. It also steepens chassis geometry as the forks compress to help the bike change direction. It’s important to know that as you begin to release the brakes, you must also relax your arms to let the front wheel track freely through the turn. Follow with a smooth transition to the throttle for a predictable line toward your exit (see #8 below).

Dragging the rear brake is also useful for helping the bike to “pivot” around the center of gravity by “pulling” the rear contact patch rearward.

3. It Enhances Stability (when done right)

Trail braking is also used as a way to enhance stability and control. Trail braking helps minimize forward and rearward chassis pitch that occurs when applying and then releasing the brakes. When the front brake is applied the forks compress, and when the brakes are released they rebound and extend. The forks compress once again when the bike is leaned into the curve. When trail braking, the forks remain compressed as the bike is leaned and the “off-brake” rebound action is eliminated. This also steepens the front end geometry for easier turning. The suspension stays compressed as the bike leans and then rebounds gradually as the brakes are released and the throttle is rolled on.

Trailbraking with both brakes helps slow, but also increases stability even more. The rear brake also increases stability by “pulling” the rear contact patch in line with the front contact patch, controlling any side-to-side fishtailing effect.

4. It Can be Risky (when done wrong)

Trail braking is a technique that combines both cornering and braking forces, which means that you must use light brake pressure otherwise you can lose traction. This is why it is best to get most, if not all, of your braking done before the turn. Because trail braking can be risky it should be used judiciously and should be avoided when traction is limited. However, trail braking is an advanced technique that can be useful for all riders.

Learning how to trail brake starts with overcoming the anxiety that the tires will slide. To prevent “tucking” the front tire and lowsiding, you must use light front brake pressure and understand that increased lean angle requires decreased brake pressure. Once this fundamental level of trail braking is learned, then you can use the technique.

5. Help Salvage a Blown Corner… I Suppose

Remember that trailbraking is a planned technique to refine cornering control and should NOT be confused with salvaging a blown corner entry (that’s called screwing up a corner becasue you didn’t judge entry speed correctly). That said, we all make mistakes and knowing how to trailbrake can be used to fix a mistake. One of the most common reasons for crashes in corners is when a rider enters a turn too fast and lowsides or goes off the road. Most untrained riders panic and either stand the bike up and leave their lane or grab the brakes and lowside. If you are adept at trailbraking, then you can brake past the turn entry while still maintaining a relatively relaxed composure (depending how overspeed you are). To reiterate…trailbraking is not technically “braking to save a blown corner”.

6. You Must Get a Feel for it

To brake effectively you must develop a feel for how much brake power is possible without losing control. Brake feel is a learned skill that includes understanding the dynamics of load transfer on traction as well as developing a feel for how your motorcycle’s brakes respond to subtle inputs. This knowledge is necessary if you are to learn to use brake force to maximum advantage.

One way to help refine the trail braking technique is to use two fingers on the front brake. This allows the use of both the brake and the throttle, which is useful for transitioning smoothly between braking and acceleration. The advantage of two-finger braking is that it allows the two remaining digits to remain on the throttle grip (usually the ring and pinkie). This is useful when implementing advanced throttle/brake techniques such as brake and throttle overlapping or throttle blipping (to be covered in a future post).

7. Trailing off is as important as Trailing on

Getting the right brake pressure applied is critical when trail braking. Progressively squeezing the brake transfers weight gradually and avoids spikes in tire load. But, it’s also important to release the brakes progressively to prevent abrupt rebound of the suspension, which can cause the tires to lose traction, especially when at full lean. Even if you don’t lose traction, the extended forks can push the bike into a wider line than desired.

8. Use the Thrake/Brottle Overlap Technique

The throttle/brake overlap technique (Thrake or Brottle, get it?) is how you smoothly transition from brakes to acceleration while leaned fully in a corner. Begin throttle roll-on just before completely releasing the brakes to smooth the transition from braking force to driving force. See me use this technique through turn 1 at Loudon in the video

The brake/throttle overlap technique takes some practice. One technique that is helpful is if you curl your fingers over the front brake lever as you squeeze, then simply straighten your fingers to release brake pressure as you roll on the throttle. You can practice this technique using Brake Drill #4 in Riding in the Zone.

9.Timing is Critical

How long you remain on the brakes is determined by the curve. Imagine yourself barreling dwn a tight downhill hairpin and need to scrub of, say 15-20mph. You trailbrake into the turn, but then release the brakes well before the middle part of the turn. What then happens is gravity “accelerates the bike at a time when you haven’t gotten the bike turned enough. The result is a too wide line that needs another turning inpt to stay in your lane.  By hanging onto the brakes a bit longer, the front wheel is pointed more toward the corner exit and not toward the outside of the turn.

10. Brake Pressure is Critical

The right amount of brake pressure (force) will preserve traction (see #4) but also help the bike turn more easily (see #2). At some point in the trailbraking process, perhaps 1/3 around the curve, you are no longer trailbraking to slow down, rather you are using the brakes as a tool to help get the bike completely turned and pointed safely toward the exit (where you can then transition to the throttle (see #8). Brake too hard and the bike will likely stand up instead of lean in…not what you want at that point.

Trail braking Takes Practice

Trailbraking requires expert-level brake and corner control, which means that most people should be careful with this technique until they become proficient through practice. Once a rider is reasonably proficient at both braking and cornering, then he or she should start to explore the benefits of trailbraking, because one day, they’ll need this skill.

How to Practice Trail Braking

The practice drill diagram found in Riding in the Zone.

By mastering trail braking, you can train your mind and muscles so that you believe it is possible to slow the bike down even when leaned and stay upright. This mastery tells you not only that it’s possible to salvage the corner, but also tells you just how much braking force can be used without sliding the tires. If you think this skill will magically appear when you need it, you are dead wrong! You must practice to make this important tool available to you. How do you practice trail braking? Start in a clean and clear parking lot (see the video above) And then practice on the street where no surface hazards are present. Then refine and solidify the technique by going to a track day and asking an instructor to help you work on this technique.

Braking is one of the most important skills to learn. Regularly practice emergency braking and refine your corner braking technique so these skills remain sharp.

Listen to the Trailbraking PODCAST

See the complete list of Riding in the Zone articles here.


Please Donate to Keep the Articles Coming

If you liked this article and the many other articles on this site, please toss a buck or five into the hat. It’s greatly appreciated!

Become a patron to support the website. Thanks

Support the website by buying from Twisted Throttle

Body Position Tips for More Effective Cornering

Railing through turn 9 at New Hampshire Motor Speedway (Loudon) photo: owenstrackdayphotos.com

Most riders sit pretty much upright in the saddle. There’s nothing wrong with that, however they are not utilizing a simple tool that helps the motorcycle turn, engages the rider in the “dance” between human and machine and increases ground clearance when needed.

We Need More Clearance, Captain!

Positioning your body to the inside of your motorcycle when cornering means that the motorcycle does not have to lean as far for a given speed and turn radius.

Hanging off makes this so by shifting the combined weight of body and machine to move the center of gravity lower and to the inside.

Easier Turning

Hanging off not only increases ground clearance, it also keeps the contact patch closer to the center of the tire and adds a degree of “power steering” to help initiate lean. By pre-positioning your body just before turn-in preloads the bike so it falls swiftly from upright to leaned. It can be unsettling the first time you do it as the bike turns so much easier, so experiment gradually.

Let’s Dance

Body position has an additional benefit of encouraging interaction between you, the bike, and the road. Move your body through a series of curves like you would a dance partner across a dance floor and you’ll be flirting with the Zone in no time. Lead with your eyes and shoulders and your motorcycle will willingly follow your lead.

Active body positioning isn’t just for sport bike riders. Try it on whatever motorcycle you ride.

Body Position “Levels”

You don’t have to hang off like Marc Marquez to benefit from body positioning.

When speeds and lean angles increase, it’s beneficial to use a more “active” body position that provides a greater amount of turning ease and ground clearance. There are three levels of body positioning for cornering: The “basic”, “intermediate”, and “full” hang off techniques.

The “basic” position

The basic body position.Use the basic body position for typical street speeds. This position involves simply leaning your upper body off-center, towards the inside of the turn. Position yourself as if you are kissing your mirror. Keep your inside shoulder low and forward while your eyes look through the curve. Your butt stays more-or-less centered on the seat.

The basic position is easy to do and is not intimidating, making it good for people just learning to hang off.

The “Intermediate” position

The intermediate stage is the body positioning technique I use when riding on street twisties. It is appropriate when riding more aggressively, but is no where near the level of extreme positioning typical of racers.

Learning this is quite simple. All you have to do is lean your upper body into the turn while rocking your hips so your inside sit-bone supports most of your weight. Rocking onto your inside butt cheek just before the corner positions your arms perfectly to countersteer with your inside arm and shoulder pressuring on the inside handlebar and your outside arm slightly extended and relaxed.

Rock onto the inside butt cheek just before the corner so that your body is in position as you countersteer. This is a very simple and effective technique.

The “full” hang off position

The full hang off position.The full hang off position allows the most aggressive riders to achieve faster corner speed without dragging hard parts. Hanging off has a lot of benefits, but can cause problems if not done correctly. Here is a basic tutorial:

  • Get your weight on the balls of your feet.
  • Use your legs (a little of your arms) to lift your body into position with your butt on the inside edge of the seat.
  • Position your shoulders and head inside and low (kiss the mirror).
  • Keep your hips perpendicular to the motorcycle.
  • Keep about 2-4 inches between your crotch and the fuel tank.
  • Rest the inner thigh of your outside leg against the tank.
  • Support a little more than half of your weight with the inside foot.
  • Hold the grip like a screwdriver with the forearm more or less in line with the handlebar.
  • Relax your arms by supporting your weight with your legs and torso.
  • Rest your outside arm on the top of the tank.

Avoid rotating your hips around the tank, which can result in a “crossed” body position where the upper body is positioned over the center of the bike. Instead, keep space between your crotch and the tank so you can move laterally across the bike.

Jack Your leg Into the Tank

For extra support, you can press your outer thigh into the gas tank. With the ball of your foot on the outside footpeg, straighten your ankle to make firm contact between the peg and the tank. Extending your leg in this way helps support your body with your legs, not your arms. The cutouts in sport bike gas tanks are ideal for positioning your inner knee. Adding Stomp Grip® or Tec­Spec® can help make the contact even more secure.

Side-to-Side Transitions

Try not to use your handlebars when moving from side to side. Doing so can upset the chassis and traction. Instead, use your legs and torso. Get your upper body over the tank, keeping your arms bent. I find that more rearward footrests help with this.

Also, be sure to get your body in position before you initiate lean (often while braking for the turn). Waiting too long can make the corner entry rather stressful and chaotic. Pre-positioning your body results in a quicker turn in (the benefits of quick turning is a topic for another day). It takes some practice to brake while in the hang off position, but it is a technique that must be learned (another future blog topic, I think).

Hang at Your Own Risk

You should be discrete when hanging off on the street. Not only is a full hang-off posture not often necessary, it also draws a lot of unwanted attention. Even when hanging off on the racetrack, it’s not always necessary to hang off like Marquez. Hang off just enough to match your corner speed. Hanging off more may make for better photos, but it’ll wear you out sooner and could actually decrease control.

Slow Speed Maneuvers

One exception to the “inside” body position is when making slow speed maneuvers. In this case, you want to keep your body upright, on top of the bike. This is because stability is almost non-existent and adding body weight to the inside of the bike will lever the bike to the ground. Read about slow speed maneuvers here.

Body Positioning is discussed in the RITZ book. Parking lot drills are also provided so you can learn to make proper, “active” body positioning an integral part of your riding.

Buy the Riding in the Zone PDF


Check out this video.

Non-Sportbike Track Training Days are available. Click the photo.

MAKE A ONE-TIME DONATION

Become a patron to support the website. Thanks

Check out these related posts:

RITZ TV- Episode 1- Interview with racer Stephanie Funk

In this first episode of Riding In The Zone, I talk to Stephanie Funk, a professional race driver whose love of motor sports has begun to bleed over into the world of motorcycling. Stephanie talks about her love of riding, how she got into the sport, women and motorcycling, how to get a closer look at the world of motorcycling through track days, and much more.

Stay tuned for more episodes. Subscribe to learn when new episodes air.

Produced by Amherst Media

Episode One: An interview with Auto racer and motorcycle track day rider, Stephanie Funk.


Please Donate to Keep the Articles Coming

If you liked this article and the many other articles on this site, please toss a buck or five into the hat. It’s greatly appreciated!

    • Click the PayPal “Pay Now” button.
    • Then indicate quantity in $2.00 increments. Example: put “2” in “QUANTITY” field to donate $4.00, “3” for a $6.00 donation, etc.

Why $2.00? Due to the PayPal fee structure, a $2.00 donation is significantly more beneficial compared to a $1.00 donation.

Thank You!


Check out these posts:


How Can I help You? Online Coaching NOW AVAILABLE
Stay Informed: Subscribe NOW!
Trianing-Tours_LandingBe a Better Rider: Sign Up for Personal Training with Ken
Support Riding in the Zone: Buy a book
Support Riding in the Zone: Buy products from Twisted Throttle & Amazon
Twisted_Affiliate-Interphone-widget


RITZ Podcast Episode 4 – Starting the Track Day or Racing Season Off Right with Instructor and Racer, Paul Duval

Become a patron to support the website. Thanks

This episode is an interview with Paul Duval, championship LRRS racer and track day instructor shares his thoughts on getting up to speed for a new racing and track day season.

Also available to download on iTunes and SoundCloud

See all of the podcasts on SoundCloud or on the Podcast Page.


Become a patron to support the website. Thanks

Riding in the Zone Podcast Episode 3- Interview with Stephanie Funk, Car Racer & Track Day Rider

Today’s episode is an interview with Stephanie Funk, championship SCCA (car) racer and motorcyclist who shares her thoughts on racing and track days.

Also available to download on iTunes and SoundCloud

See all of the podcasts on SoundCloud or here


Please Donate to Keep the Podcasts Coming

If you liked this article and the many other articles on this site, please toss a buck or five into the hat. It’s greatly appreciated!

    • Click the PayPal “Pay Now” button.
    • Then indicate quantity in $2.00 increments. Example: put “2” in “QUANTITY” field to donate $4.00, “3” for a $6.00 donation, etc.

Why $2.00? Due to the PayPal fee structure, a $2.00 donation is significantly more beneficial compared to a $1.00 donation.

Thank You!


Check out these posts:


How Can I help You? Online Coaching NOW AVAILABLE
Stay Informed: Subscribe NOW!
Trianing-Tours_LandingBe a Better Rider: Sign Up for Personal Training with Ken
Support Riding in the Zone: Buy a book
Support Riding in the Zone: Buy products from Twisted Throttle & Amazon
Twisted_Affiliate-Interphone-widget


Thinking in Vs-Dissecting Cornerspeed

Become a patron to support the website. Thanks
Paul Duval thinking in Vs – otmpix.com

Guest writer Paul Duval shares his thoughtful observations about performance cornering based on electronic data gathering.

Corner speed. It is the holy grail of motorcycle road racing and track day riding alike. Knee down and railing, carving the corners like a snowboarder or giant slalom skier. It looks and feels awesome! Smooth technique pays big dividends and you can carry a lot of speed as your skills progress.

But how is it that you can be cranked way over thinking you have maxed your speed for a given corner and yet, some other dude comes by on the inside (or outside at a Tony’s Track Day!) and walks away from you before the bikes are even upright on the next straight bit?

And by the way, He’s not even leaned over as far as you are! There must be more to corner speed than meets the eye. Let’s take a closer look at the middle of a corner.

Corner Speed Perception

If we draw the arc of your path on paper it looks like a smooth outside-inside-outside line and it is easy to visualize maintaining a somewhat constant speed, decreasing and increasing in a smooth fashion, but overall steady. One could imagine their speed data trace looking similar or the same as the arc of their line through the corner. This is, in fact, how most riders perceive cornerspeed. They feel they can put a number on it.

For example, that’s a 70 mph sweeper, or a 50 mph hairpin. But something is wrong. How did that fast guy in the example above pass while you were dragging knee, elbow, boot, etc. with 57 degrees of lean angle? If he’s going faster, wouldn’t he need MORE lean, not less?

V is for Variable Corner Speed

If we look at GPS speed data from a corner, we can see the first flaw in our perception of corner speed. It is not constant. It is not even close. From the start of the arc that we drew with our bike, speed drops precipitously until it reaches a low point much slower than expected somewhere near the middle of the arc. If you perceive a 70 MPH corner, the chances are your slowest point of that turn is 50MPH. This rapidly dropping speed line doesn’t rest at the bottom for long rather it reverses course and quickly climbs out of the hole. The trace of your speed data doesn’t look like a U. Instead it looks decidedly like a V.   Our minds fill in the slow spot, and we perceive a 70 MPH corner.

In this image we see speed over distance data (kph) for Thompson Speedway turns 1-4.

The Pivot Point

The bottom of the V, or the slowest point of the corner is the important spot to recognize.   From here on out I will call this the pivot point. The pivot point should actually be part of your cornering plan. In other words, you need a reference point (or a few) for this spot on track. It is the spot at which your bike can change direction the most easily.

This critical moment in riding is often ignored, but it is where the real direction change happens. As you trail off the brakes, your hands get lighter on the controls until you have no weight on the bars and you allow the wheel fall INTO the turn. THIS is the spot where your grip needs to be as light as possible.

To be clear, you still need to countersteer to initiate lean. Countersteering is an important technique, but in this article, we are focused on the middle of the turn, the pivot point.

photo: otmpix.com

When and Where to Pivot?

Most of you are thinking, “we are talking about the apex, right”? I am avoiding the word apex on purpose. Many people refer to the apex as the point where you are closest to the inside of the pavement. This is often not the same place as the pivot point.

For example, double apex corners and increasing radius corners tend to have the pivot point in a different location than the “apex”. This concept applies to all bikes, big and small, and all lines, point and shoot, or fast and flowing. Different bikes may choose different pivot points to take advantage of the strengths and weaknesses of each platform.

Examples:

  • In a “fast exit” corner, the pivot point would be located earlier and you would get on the gas sooner to take advantage of that fast exit.
  • In a “slow exit” corner, the pivot point is located later to take advantage off all the possible entry speed.
  • In a “balanced corner” (equally fast entry/exit) you have a little wiggle room. If you need entry speed to pass a rider you can pivot a little later, if you want to out drive them on the exit then pivot a little earlier.
photo: owenstrackdayphotos.com

Similar Mid-Corner Speed

Interestingly, if you compare a fast lap and a slow one, you will often see that the mid corner speed (slowest point) of the faster rider is not a lot different from that of intermediate riders. Maybe just a few MPH, or maybe no different at all!

What you will see is that the slopes of the V in the speed data trace are steeper, usually on both sides. The faster rider is faster into and out of the corner. Understanding where your pivot point is allows you to plan the fastest way the get to it, and the fastest way to get away from it.

So here comes that fast(er) guy blowing by you on the outside into a fast corner. You already feel you are mid corner and cranked over good, but he knows that he has some yards to go before reaching the pivot point, and is taking advantage by carrying more entry speed, tipping in slower and braking later or longer.

You both reach the same minimum speed in this corner, and you feel like he’s in touch for a moment. You might even feel like your “corner speed” is the same as his, but he quickly pivots the bike and walks away on the exit because he can accelerate sooner than you. Sigh.

Time to start thinking in Vs.


otmpix.com

About Paul Duval

Paul Duval is a fellow track day instructor, former Loudon Road Racing Series 125 GP Champion, current top runner in Supersport classes at LRRS, and professional educator. You can see Paul in action at most Tony’s Track Days events.


Please Donate to Keep the Articles Coming

If you liked this article and the many other articles on this site, please toss a buck or five into the hat. It’s greatly appreciated!

    • Click the PayPal “Pay Now” button.
    • Then indicate quantity in $2.00 increments. Example: put “2” in “QUANTITY” field to donate $4.00, “3” for a $6.00 donation, etc.

Why $2.00? Due to the PayPal fee structure, a $2.00 donation is significantly more beneficial compared to a $1.00 donation.

Thank You!


Check out these posts:


How Can I help You? Online Coaching NOW AVAILABLE
Stay Informed: Subscribe NOW!
Trianing-Tours_LandingBe a Better Rider: Sign Up for Personal Training with Ken
Support Riding in the Zone: Buy a book
Support Riding in the Zone: Buy products from Twisted Throttle


Become a patron to support the website. Thanks

Review: Energica EGO Electric Motorcycle

Become a patron to support the website. Thanks

The future of motorcycles? The jury is still out. But, the technology keeps moving forward. Battery range and charging capabilities are improving and you can expect usable performance. The weight issue still needs to be addressed.

Thanks to Adam at Rocket Moto in Nashua, NH for the loan.


Here’s a narrated video to see and hear what the bike sounds like. Details and more thoughts are below. Enjoy.


A few details:

$25,000 base price, $32,600 as tested – Price Reduced from original cost of $40k as tested!

MOTOR– Permanent Magnet AC, Oil Cooled

MAX SPEED- Limited at 240 km/h (149mph)

HORSEPOWER– about 135 hp

WEIGHT– About 580 pounds

TORQUE- 195 Nm (143 ft lbs) from 0 to 4700 rpm

RIDING MODES- 4 Riding Modes: Standard, Eco, Rain, Sport 1)
4 Regenerative Maps: Low, Medium, High, Off

PARK ASSISTANT- Reverse and Forward (1.74 mph Max Speed)

BATTERY CAPACITY-11.7 kWh

LIFE- 1200 Cycles @ 80% Capacity (100% DOD)

WARRANTY- 3 years / 50.000 km

RECHARGE- 3.5 h (0-100% Soc) Mode 2 or 3 Charge (220), 8 hours using 110,
30 min (0-85% Soc) Mode 4 Dc Fast Charge

The Energica website.


Street Tested

The EGO is in its element on the sweeping, twisting rural roads near my home in the Berkshire Hills of western Massachusetts. The EGO may have felt awkward and even a bit slow on the racetrack, but it comes into its own at street speeds.

Power

The Energica rips! At least it does up to about 80mph. After that it starts to flatten out significantly. But you’ll get to 80 very rapidly with all 143 foot pounds of torque on tap from the get-go. The motor spins up quickly and can take your breath away at first. Thankfully, the ride-by-wire throttle is impeccably controllable. The rush is amplified by the almost angry whistling sound that builds to a crescendo.  It’s hard not to notice the contrast of speed and sound coming from a bike that a moment ago sat in total silence.

Rider Modes

The EGO has 4 rider modes:

  • Eco- This mode neuters the power to the equivalent of a 500 Ninja and limits speed to just over 55mph. That may sound sucky, but I would be glad to have it when there is no power supply nearby and I still have miles to go to get to one. Eco mode would be absolutely fine for any city or suburban riding, with plenty of git up and go. Just be sure to witch to Standard , Wet or Sport modes before hitting the highway.
  • Standard- Now we’re talkin’. Twist the grip in this mode and hang on. The bike sharply snaps to attention, but is quite controllable as the power builds in a linear manner.
  • Wet- From what I can tell, Wet mode is a softer sibling of Standard mode. It still jumps forwad nicely, but the torque seems slower to build. Sounds like a good thing to have in rainy weather.
  • Sport- Gitty Up! This mode is the E-ticket ride. Sport mode seems more urgent and angry compared with Standard mode. Like the other modes, power still flattens out at about 85mph. No problem. The rush of getting there is enough excitement for most.

Regenerative Modes (Engine Braking)

There are 4 modes to choose from that controls the amount of regenerative engine braking the bike produces.

  • High- Close the throttle all the way in this mode and you’re launched forward. The blue lights on the instrument cluster tell you that you’re recharging the battery when this abrupt deceleration occurs. That’s good, but I can envision times when having that much engine braking could cause loss of rear tire grip, so it’s smart to select a softer setting in the rain or on gravel. That said, It’s a great setting for helping to control speed on steep hills with hairpin curves thrown in. Uphill hairpins are better handled with the Low mode.
  • Medium- This mode is a good compromise between charging your battery and abrupt deceleration. his mode feels most like a conventional 2 cylinder internal combustion motorcycle.
  • Low- This mode was great on tight uphill hairpins where gravity already provides enough force to slow the bike. This mode feels most like a conventional 4 cylinder internal combustion motorcycle.
  • Off- You can turn off the regenerative feature, which would be my choice for slippery surfaces where it’s better to rely on the brakes to manage traction.

Brakes

What’s to say, except Brembo makes the best brakes out there. It’s good to have these babies on board to slow down this relatively heavy, fast machine. Feel is good and controllable. That is all.

Handling

Handling on the street is great. It’s stable and precise with no tendency to stand up mid-corner and when trailbraking. Keep the tire pressures at the 42/42 and you’ll be happy.

Ergonomics

The riding position is sporty like a small 1990s Ninja ZX-11. Or maybe a cross between a ZX-11 and my old 2005 ZX636. Yeah, that’s it. The bars are low and the pegs are high. The seat is hard, but not too bad for the amount of time and riding distance the battery will afford. It feels compact with the small windscreen that deflects wind only away from your mid-chest.

Battery Life

One thing you’ll have to get used to is energy management. Think about having a bike with a 2-gallon gas tank and then imagine not having any gas stations readily available. And then imagine needing hours to fuel the bike. That’s what you need to think about when you ride an electric motorcycle.

3.5 h (0-100% Soc) Mode 2 or 3 Charge (220), 8 hours using 110-  You can recharge if you carry the somewhat heavy charging cord with you all the time and can find an available 220 power outlet while you’re putting a burger in your pie hole at some rural lunch spot. But don’t rush because with a 220 charge, it takes 3.5 hours to get a full zap. Normal 110 takes 8 hours!

30 min (0-85% Soc) Mode 4 Dc Fast Charge- If most of your riding is in suburbia where you have Tesla charging stations hanging around, you can get recharged to 85% in about 30 minutes. Unfortunately, the are no Fast charging stations where I ride, so I’d need to carefully plan where to turn around to make sure I can make it home.

The range is claimed to be about 100 miles (120 on Eco mode). I did about 70 miles and used up 70% of the battery, so maybe that’s fairly accurate. To be fair, I did several full-throttle bursts and only a little Eco mode riding.

The Nutshell

I really enjoyed my day on the Energica. The more I rode it the more I like it. My neck and wrists were tired after using up 80% of the battery, but the buttery smooth power offset that discomfort. It’s a lot of jingle, but if you want a really cool looking bike that is unique and a ball to ride, maybe the Energica will charge you up.

Updates

Energica reduced the cost of the EGO significantly since I tested this bike. The base price is now $25k with the premium Ohlins suspension, carbon kit and OZ wheels upping the price to $32,600. Still a lot of money, but not out of line with other premium models still being propelled by internal combustion engines.

Also, Energica announced that they will be the sole supplier for the upcoming FIM Moto-e World Cup starting in 2019.

Track Tested

I was able to do a couple of laps on the Energica Ego. The bike is a terrific street bike, but felt heavy at track speeds. Part of the issue was that I lowered the tire pressures to a typical 30-rear/30-front and the bike didn’t like it. The bike handled better with 35 pounds, but would have been even better with the full street pressures that would better support the weight.

Also, I apparently used up enough juice to limit the top speed from the 110 mph of the first session to a maximum of about 80 mph during the second session. A recharge is needed to keep access to the top speed.

Besides that, the bike was a hoot to ride. Take a ride with me:


Please Donate to Keep the Articles Coming

If you liked this article and the many other articles on this site, please toss a buck or five into the hat. It’s greatly appreciated!

    • Click the PayPal “Pay Now” button.
    • Then indicate quantity in $2.00 increments. Example: put “2” in “QUANTITY” field to donate $4.00, “3” for a $6.00 donation, etc.

Why $2.00? Due to the PayPal fee structure, a $2.00 donation is significantly more beneficial compared to a $1.00 donation.

Thank You!


Check out these posts:


Stay Informed: Subscribe NOW!
Be a Better Rider: Sign Up for Personal Training with Ken
Support Riding in the Zone: Buy a book
Support Riding in the Zone: Buy products from Twisted Throttle


Become a patron to support the website. Thanks

5 Tips from an Aging Sport Bike Rider

Become a patron to support the website. Thanks
Graham and Dan. I'm not saying their old, but where is their hair?
Graham and Dan. I’m not saying they’re old, but where is their hair?

Note: This article pertains to all types of riders. So, please read on.

What happens to sport bike riders when they get old? Most people think of sport bike riders as young men in their 20’s or 30’s. A lot of people don’t consider that sport bike motorcycle riders, who may be up for betting on sites like 아리아카지노, are often in their 40’s, 50’s, 60’s, or even 70’s.

It’s  assumed that those crazy riders on their rice rockets are young, testosterone laden young men. And this stereotype has some truth to it, since the attitude and ergonomics of sporting machinery suggests a fast and young lifestyle. But, many older riders do keep a sportbike in the garage if their body can handle the demands on aging bones, muscles and soft tissue.

A lot of sport bike riders move gradually to more upright machines with less demanding ergonomics and softer power delivery. But, if you look around at any sport riding gathering, track day, or even club race event, you’ll see that the median age is what is often considered over the hill. You’ll also see that these elders are often some of the most skilled riders on the road and the fastest on the track.

While the hair beneath the helmet may be gray, the desire to express mastery at the handlebars is as strong as ever. I’m not speaking for all sport bike elders, just the ones I know who keep at least one high-performance bike in their stable for those days when the back is feeling okay and the passion for a rip requires a razor-sharp tool.

Ken-smile
I’ve got a few more years behind the handlebars.

At 57 years old, I’m now qualified to speak from the perspective of a once young road racer and sporting street rider. Thankfully, I happen to have a slim physique, which makes me able to climb onto a sport bike with relative ease. I am also of average height so high rearsets don’t bother me. This makes riding a sport bike possible.

Pull up a Chair, Son

There are a lot of things I could share about aging. But, there are a few notable observations I think are worth mentioning.

See the complete list of Riding in the Zone articles here.

1. Ride Smarter

Tony, Ken and Graham. Older than many, not as old as some.
Tony, Ken and Graham. Older than many, not as old as some. Yes, this is the photo “borrowed” by whoever made that video that went viral.

When I’m on a motorcycle, I can step back and evaluate whether the speed I choose to ride matches my mood and personal limits, as well as the limits of the road or track, the weather, etc. While there are times when my inner squid emerges, I am much less prone to riding beyond the limits. I am closer to the edge of the risk:reward ratio than when I was young and felt invincible. Now, I ask myself whether riding a certain way is worth the possible aggravation.

Top photos © Ken Condon

Bottom photo © Annalisa Boucher

2. Ride more Efficiently

How is it that I can get through a two day track day event riding multiple groups and still get up the next day and go to work? I see a lot of track day riders many years my junior pack up halfway through the afternoon because they are too tired to go on anymore. How am I able to do this? It’s not because I’m in great shape.

It’s because I’ve learned to ride efficiently. This means hanging off the bike only as much as necessary to achieve the goals of keeping the pegs off the pavement and the tires in their sweet spot and perfectly loaded for maximum traction. It also means being relaxed as much as possible. Not only does this help my stamina, it also allows me to feel the tires and chassis so I can “listen” to the bike as it tells me how much traction I have.

3. Change Behavior

Getting old forces changes in behavior. At some point you have to recognize the fact that the mind, eyes, muscles and stamina are not what they used to be. Everyone is different, but from my experience, the rate of decline seems to accelerate once you pass 50 or so. This means I have to pace myself. I am more aware of the need to warm up my body for a few laps just like I do my tires.

The possibility of getting hurt is present no matter what age, but what may be a simple injury, quickly healed, can turn into a long, drawn out healing process if you are older. You will have to hire a qualified personal injury lawyers in Kennewick to compensate the long-term treatment expenses. Riding smart and wearing really good personal protection is important for minimizing those injuries.

4. Stay in Shape

I’m not in bad shape, but I’m not in great shape, either. I walk almost every day, but I used to run. I lightly stretch when I need to, but not as often as I should. I have never smoked and my vitals are good. I guess I can say I’m in pretty good shape for my age. As you continue to stay active, consider incorporating supportive and stylish workout gear like ryderwear leggings to elevate your fitness experience.

Even so, I suffered a freak health issue a while ago that I’m lucky to have survived. Thankfully, I can still manage a full day of street riding and both days of a two day track day event without much trouble. Staying in shape is harder as you get older that’s why you need to start incorporating plant based protein powders to your diet. Weight gain is a real problem for many. Weight can creep up on you slowly. Five pounds may not seem like much, but if that happens every year for 10 years, you’re looking at a whopping 50 pound weight gain that will be tough to get rid of.  During recovery, your body’s nutritional needs may increase, and greens powder can help support the healing process. You can read this review on https://www.outlookindia.com/outlook-spotlight/athletic-greens-ag1-review-is-it-worth-the-hype-or-superfood-don-t-buy-until-you-read-this-news-301982/ before buying online.

Being an instructor gives the opportunity to pass on what you've learned.
Being an instructor provides an opportunity to pass on what you’ve learned.
photo: © Annalisa Boucher

5. Keep Your Skills Sharp

There is a real danger in complacency. It’s easy for veteran riders to assume they don’t need to maintain their mental and physical skills. After all, they’ve survived this far. This perception leads to diminished skills, which can lead to a crash.

Motorcycle riding skills are perishable. So, keep those skills sharp! Practice in a parking lot, attend a safety course periodically, and ride a track day or three. It’s also good to read about riding technique. Even if you already “know” the material, reading about a technique brings it into your consciousness.

And for you older folks returning to riding, GET TRAINING! I know you may know how to “operate” a motorcycle, but that’s not enough to ride safe and smart. You need to update your mental software and learn things you may not have known before that can literally save your wrinkled ass. I recommend taking the Basic MSF course, followed by an advanced training course.


Bonus Tip: Share Your Knowledge

I’m grateful that I can share knowledge that I have accumulated over the years to help people like you ride better and smarter. But, another benefit to writing and teaching is that it makes me a better rider. I constantly think about my riding, which keeps my skills sharp.

A lot of really fast, experienced riders can’t explain how they do what they do…they just do it. That’s fine, but thinking about the physiology and psychology of riding a motorcycle well makes a rider’s knowledge and skill indelibly deeper and accessible when you need it.

Oh, and don’t assume you know what you are talking about, even if you are “fast”. Learn the physics and language of communicating the complex concepts of motorcycle riding before you claim expert status.

How Much Longer?

At some point, we all must hang up our helmet for the last time. In my case, that appears to be several years away. I can still do things I did when I was younger, it just takes more effort. What are your experiences with aging behind the handlebars?
submit to reddit

See the complete list of Riding in the Zone articles here.


Please Donate to Keep the Articles Coming

If you liked this article and the many other articles on this site, please toss a buck or five into the hat. It’s greatly appreciated!

Become a patron to support the website. Thanks

Check out other track day and riding technique related posts

Check out these related posts:

Motorcycle Track Days: What You Need to Know

Become a patron to support the website. Thanks

What are Track Days All About?

Track Days are the most exciting, fun and effective way to improve your riding skills…period! You will learn how to corner and brake with a lot more confidence and control. And you will have a freakin’ BLAST.

Track Days are held on a closed course (racetrack), which means you learn in a safe environment and at real-world speeds. Learning on a racetrack allows you to ride freely and concentrate on and advancing your skill level without the typical hazards faced on the street…potholes, sand, tar snakes and Buicks.

Many types of machines at our regular track day events. While most ride sport bikes, there are also those who ride Tourers, Adventure bikes, and Sport Tourers. There are even special “Non-Sportbike Days”.

It’s one of the best investments in fun and skill development money can buy.

You may want to listen to this short podcast where Tony and I discuss many track day FAQs.

Learn to Corner Better

While parking lot courses have their place, riding your bike on a track will let you practice riding skills at real-world speeds – without the normal distractions found on public roads (like cars, sand, cops, etc).

Classroom sessions are usually included in the price of your day where you will benefit from discussions and demonstrations of advanced riding technique that you can then try on the track.

The fact that you visit each corner several times a day allows you to perfect your technique without the changing variables found on the street. These techniques are transferable to street riding.

The skills typically learned:


My wife, Caroline in "the bowl" at NH Motor Speedway on her Kawasaki z750s
My wife, Caroline in “the bowl” at NH Motor Speedway on her Kawasaki z750s


The Racing vs. Track Day Myth

Who said anything about racing? Here’s the thing; A track day is NOT a race event. Many people respond to a suggestion of attending a track day by saying “but I don’t want to race”. Now, I understand that most people automatically think “racing” when they hear “racetrack”. This is why I spend a fair amount of energy on educating the potential new customer that a track day just might be worth considering, both for having a blast, but also for becoming a better rider (much better).

If it’s not a race, then what is it?

Imagine the perfect twisty road, but with no oncoming traffic, sand, gravel, guardrails or folks in big sedans trying to figure out their GPS while talking and texting on their phones and you start to get the idea of what a track day is. Oh, and did I mention no speed limits? So, riding on a racetrack is not only a safer place to ride, but you can also go as fast as you want without the risk of getting an expensive speeding ticket and insurance points.

Not only are track days fun, they are also a great place to develop your skills. Most track days offer some instruction, with classroom time and perhaps a garage seminar on body positioning. You can also get some on-track coaching if you ask for it. Then you go practice what you’ve learned by circulating around the track. The beauty of riding on a racetrack is that you visit each corner multiple times a day so you can perfect each corner as the day goes on. You also get to explore the limits of your bike, the tires and your ability. Woot!

It’s not about speed!

Yes, we are talking about riding on a racetrack, but that doesn’t mean you have to have the latest rocket, or even that you have to go a whole lot faster than you do already on the street (in the novice groups). That’s the beauty of track days as opposed to a competitive racing environment; they have two completely different purposes. Both track days and racing allow you to go as fast as you dare, but track days allow you to go as fast as you want without the pressure to win a competition. When racing, you risk a lot more because your goal is to try and beat the next guy.


The goal of a Track Day

So, what exactly is the point of doing a track day then?

  • A Safer Place to Have Fun! With no surface hazards or roadside obstacles to hit and an ambulance just seconds away, the track is the safest place to ride, especially if you want to ride fast.
  • A Safer Place to Learn! You will be able to concentrate on refining cornering and braking skills by riding the same corners over and over.
  • Socialize! Commiserate and socialize with like-minded motorcyclists. Most new track day riders show up for their first day nervous and afraid, only to find a friendly group of fellow riders eager to help you learn the ropes.

Ed carves a perfect line on his ST1300. photo: otmpix.comTrack Days Make Safer Street Riders


Safer Riders

I am often asked about the benefits of track days for street riders. The bottom line is that a day or two spent at a training-oriented track day helps develop braking and cornering skills beyond what can be done in most other courses and certainly better than relying on experience alone.

Learning to brake harder and lean deeper pays benefits when a car pulls out in front of you or a corner tightens more than expected. Riders who have never experienced floorboard-dragging lean angles usually panic, stand the bike up and run off the road, even though they had more ground clearance available. Those who have learned to lean deeply and to trust their tires are much more likely to remain in control and stay in their lane.

On the track, a rider practices braking skills by waiting to brake deeper and deeper into corners. Not to go faster, but to see just how capable their bike is at slowing. Trailbraking is also practiced…an important skill to have for safe street riding.

Finally, highly-developed physical skills allow more automatic responses to challenging situations, freeing more bandwidth to manage the hazards and variables of street riding.

Be sure to check out the Non-Sportbike Street Rider Track Training Day page.


Top Excuses why riders don’t do track days:

  • I don’t have Proper Riding Gear
    Yes, you need to protect your body in the event of a crash, but that’s a good investment whether you ride on the track or the street. Most track day organizations allow street gear, so you should already have most of what you need.
  • I am worried about crashing my bike.
    It can happen on the track, but it can also happen on the street (with more severe consequences). Track day crashes usually happen because the rider pushed too hard before they learned to manage the extra speed. Rarely do two riders come together to cause a multi-bike incident. And with no trees, mailboxes or oncoming vehicles to run into, serious injuries are also rare.
  • I’ll be the slowest rider out there.
    So what if you are the slowest rider out there? You’ll get faster as the day goes on and will likely be passing people by the end of the day.
  • I’m afraid I will be in the way of faster riders. This is a common concern. The answer is to ride your own ride and be predictable so faster riders can safely pass. This means learning the line and staying on it. Oh, and keep your eyes looking forward. It is the passing rider’s responsibility to pass…just like when skiing.
  • I don’t have a way to get up to the track.
    Many organizations have a forum or Facebook page where you can ask for help getting your bike and yourself to the track. If it comes down to it, just ride your bike there. You are risking crashing the vehicle you planned on taking you home and you’ll be tired ride home, but many people do it. Bike prep is usually minimal and can be performed at the track. Here is a video I did showing what is required for Tony’s Track Days. NOTE: some of these requirements are no longer required. See the bike prep page on Tony’s Track Days site.
  • I don’t ride a Sportbike.
    Again, so what? All types of bikes show up at track days…sport tourers, adventure bikes, standards, vintage bikes, even the occasional Gold Wing and cruiser.
  • It’s too expensive. Why should I pay to ride someplace?
    It makes little financial sense to risk serious injury, a speeding ticket, and insurance points rather than pay to ride on the track. The cost of a track day varies from region to region and from track to track, but you can expect to pay anywhere from $150.00 to over $300.00 per day. This often includes some instruction.
  • I’m not comfortable doing a track day yet.
    Maybe you’re just nervous. If so, then rest assured that you’re not alone. It’s smart to have some street miles under your belt, but if you’re comfortable riding around corners at brisk street speeds, then you’re probably ready to do a track day. Many organizations allow spectators to come check out what it’s all about. This is a great way to see if it might be right for you. And most organizations have two or three group levels so you are matched to others’ experience level.

I hope this has shed some light on the mysteries behind track days.

If you have questions, let me know and I’ll do my darnedest to help out. You should also check out the website of the track day organization you plan on joining. FYI, I work as the chief instructor for Tony’s Track Days. And check out other track day related posts and videos.

 
http://www.tonystrackdays.com/

Check out the other track day related posts and videos.


Please Donate to Keep the Articles Coming

If you liked this article and the many other articles on this site, please toss a buck or five into the hat. It’s greatly appreciated!

  •  
Become a patron to support the website. Thanks

Guest Writer: Taking Control- Hope is not a plan

Become a patron to support the website. Thanks
Jamie Renna on his FJR1300 at Thompson Motor Speedway. photo: otmpix.com

Guest contributor Jamie Renna shares his thoughts on sport touring and the benefits of advanced knowledge and training:

There is a genuine adrenaline rush that comes after carving a corner with a smooth approach; throttle roll off/brake, lean and a spirited throttle roll on.

I’m new to motorcycling. I’ve got less than 3 years of riding under my 52-year-old belt. They have been fun years. I’ve crammed two Non-Sport Bike Track Days and two trips down the famous Blue Ridge Parkway in my early years of this new challenging hobby. My bookshelf is populated with several well-read reference books including Keith Code’s Twist of the Wrist II, Lee Park’s Total Control and Ken’s Motorcycling the Right Way. Reading, and re-reading these books have provided me with a much better understanding of how motorcycles work and why they behave the way they do.

Motorcycling is a learning activity and that really appeals to me. I get great satisfaction from beating a challenge by utilizing my small but growing collection of riding skills. The instantaneous feedback of successfully carving a corner can result in a grin that extends from ear to ear.

Getting it Right

My quest for a smoothly carved corner has too often been thwarted by factors that seemed to be out of my control. Something was happening that kept causing me to:

  • correct my lane position in mid-corner
  • swerve to avoid an obstacle I should have noticed
  • scrub off speed in a descending and/or decreasing radius turn
  • and other unplanned “Wow, that was close!” maneuvers.

The Big Question

I wondered: Were all these grin-defeating events out of my control and simply the price of admission for spirited riding in a non-track environment? I think not.

My Training Tour Experience

I’m now confident that I can take control of my riding in a way that will minimize the risk and make close calls a thing of the past, partly because I spent two fun (and rain) filled days touring southern VT and western MA with Ken as part of a 1 on 1 personal Training Tour.

I don’t want this to sound like an infomercial, but I wanted to share all of my thoughts beyond a brief testimonial.

I chose to invest in Ken’s training to augment the Track Days and copious reading I had previously completed. I concluded I needed on-street training to learn how to better manage the factors that prevented me from exiting EVERY corner EVERY time with a grin.

Ken tailored a 2-day curriculum that matched my skills and comfort level. We rode for ~250 miles over 2 days with frequent roadside stops to review Go-Pro video of my less-than-perfect technique. Ken provided crisp, objective, real-time commentary on my riding performance via Bluetooth communicators. You get to do a lot of neat things at a track day, but you can only get this type of personal observation and critique in a small group Training Tour.

The on-street coaching included a disciplined approach to observe and act upon all the leading indicators that are present before you even approach a curve. Ken provides the decoder ring so you can proactively read the leading indicators including:

  • curve radius
  • rate of change for the curve radius (increasing, decreasing or constant)
  • guardrail position
  • telephone poles
  • camber direction changes
  • and pedestrians

He will narrate to you via the Bluetooth communicator all of these indicators to better prepare you to ultimately exit a curve with a big grin.

Once comfortable, the roles will be reversed and you will get a chance to narrate to him all the indicators that each curve presents to you. It’s a bit intense. If you are like me, you will feel a fun change as you morph from a reactive (“I really hope there are no surprises on the other side of this corner.”) rider to a proactive curve-carver. Your confidence level will rise faster than your tachometer as you get comfortable reading the road and being in position to get every drop of fun out of every curve.

The on-road sessions are periodically interrupted with parking lot drills to sharpen skills that might have atrophied. These include slow speed U-turns and emergency swerving left or right. Other fun drills involved hard front or rear braking on a sandy surface to experience the shudder of your ABS system.

One last memorable drill was to rapidly stop from a speed of 55+ mph. This type of stopping might be needed to avoid hitting a deer if swerving is not an option. Ken had me do this drill in a remote area where we were sure no other vehicles were present. Doing it on a dry road was fun…doing it later in the day while it was raining was…rewarding.

Final Thoughts

  • Remember: Hope is not a plan.
  • Take full advantage of all your opportunities for qualified training.
  • Read.
  • Ask questions.
  • Read again.
  • Go to a Track Day.
  • Read some more.
  • Take a Training Tour.

There are lots of grins waiting for all of us in those curves. Go get your share.


Jamie_Renna-portraitJamie Renna is an aeronautical engineer who started motorcycling after his 50th birthday. He has aggressively pursued numerous forms of training to ride safely while seeking the next big grin. His newly found motorcycle peeps have been a great source of riding technique tips, motorcycle maintenance skills and most of all laughs.


Please Donate to Keep the Articles Coming

If you liked this article and the many other articles on this site, please toss a buck or five into the hat. It’s greatly appreciated!

    • Click the PayPal “Pay Now” button.
    • Then indicate quantity in $2.00 increments. Example: put “2” in “QUANTITY” field to donate $4.00, “3” for a $6.00 donation, etc.

Why $2.00? Due to the PayPal fee structure, a $2.00 donation is significantly more beneficial compared to a $1.00 donation.

Thank You!


Check out these posts:


Stay Informed: Subscribe NOW!
Be a Better Rider: Sign Up for Personal Training with Ken
Support Riding in the Zone: Buy a book
Support Riding in the Zone: Buy products from Twisted Throttle


Become a patron to support the website. Thanks

5 Ways to Avoid Being a Dumbass on a Motorcycle

Because I’m considered a motorcycle skills and safety “expert”, some people think I’m immune to doing dumb things. Well, I got news…I am just as susceptible as the next guy at being a dumbass.

The results of ignoring my inner voice.

I will concede that I am probably above average in the “ride smart” category. I should be…after years of coaching, writing and lecturing about how to ride “right”. But, it tns out training and knowledge can only go so far in mitigating the influence of the dumb-dumb gene. See the Crashing Sucks article for proof.

In the end, we all must realize that we are fallible. Thankfully, there are a few things we can do about it.

1. Get Smart

There are riders out there who learn to “operate” a motorcycle without ever really knowing how to “ride” their machine. The difference between these two things is more than semantics.

  • “Operating” a motorcycle means you can get it to go, stop and turn with enough competence to get around. That is a very loose definition of riding.
  • “Riding” means being able to not only operate the bike proficiently, it also means you can predict problems, strategize to prevent conflict, and then control the machine when shit goes wrong.

Too many riders think that having the ability to clutch, shift, brake and turn well enough to get to the local hangout without injury is sufficient. In reality, the basic skills needed to truly minimize the likelihood of an expensive and painful ride to the nearest medical center are simply not enough.

Non_Sport_Track
Doing a track day will increase your riding smarts…a lot.

This is the risk posed by giving new riders a motorcycle endorsement after only a weekend of basic training, which essentially gives the newb a false sense that they are proficient riders when in fact they are not even close.

I know what some of you are saying…”I never had no stinkin’ training (or no further training beyond the BRC) and I’m doing just fine.” The question is, How do you measure “fine”?

Remember that what skills and habits you have are the only tools available (besides dumb luck) when a catastrophic event unfolds in front of you. In this case, most riders’ definition of  “fine” is nowhere near good enough.

So, the first thing to do to avoid being a dumbass is to get smart. Read, take parking lot courses, on-street training, track days, or simply practice on your own or with friends to keep your “safety/skills” muscle active and to combat complacency.

Swerve-brake
Taking a breath will help prevent close calls like this.

2. Take a Breath

Sharing the road with idiots is infuriating. Many drivers are mindlessly “operating” their vehicles, putting little value in courtesy or your safety. But, don’t make a bad situation worse by succumbing to road rage. There are a bunch of YouTube vids showing riders being total asses to a driver who made a mistake. Keep in mind that those drivers are NOT out to kill you. They are humans who make mistakes.

And if you reflect on your last driver-versus-rider situation, you will likely see that YOU contributed to the driver making a bad decision.

When it comes to tailgaters, it takes all kinds of willpower not to react in frustration and anger. But don’t. Read this article about tailgaters before your next ride.

3. Listen to Your Inner Voice

At the risk of sounding all new-agey, I must point out the importance of developing a relationship with your inner voice. Yes, you have an inner voice. Some people call it a gut feeling, but for me I actually hear a voice. This voice isn’t the product of some mental condition, rather it is a trait of very sane people who pay attention.

Example 1 (Good): I’m approaching an intersection at or slightly above the speed limit. Everything looks to be in order with cars stopped at the traffic light and pedestrians waiting patiently. But a faint voice tells me to slow down. I roll off the gas just in time for a dog to run out from the brush. Whether a part of me actually saw movement in my periphery, I cannot say. All I know is that my gut said to slow, so I did.

Example 2 (Bad): I see a particularly beautiful vista that I want to photograph, so I stop on the edge of the remote road. The front of my bike is pointed down a rather steep hill, but instead of shutting down the motor and leaving it in gear, I click the transmission into neutral and keep the bike running. I dismount and check that the sidestand is fully lowered and tug on the handlebars to make sure the bike won’t roll forward.

But, as I start to walk uphill to snap the photo, my inner voice says “are you sure leaving the bike in neutral is wise?”. I remember looking back one more time to make sure the bike was okay and ignored the voice. I took a photo, then started walking a bit further up the hill when I heard the sound of plastic on asphalt (see opening photo). Dumbass.

Collarbone-XRay4. Remember that Crashing Sucks

Believe it or not, a lot of people never think about what it would really be like to crash. This is why so many riders choose to stunt and race in public and why people choose not to wear full protective gear. It’s really common for someone to suddenly “see the light” and start wearing a helmet, or armored gear, or real riding pants, or a back or chest protector, only after he, she, or a friend suffered an injury that would have been prevented by any one of these pieces of protection.

Same applies to behavior…people ride like idiots until someone gets really hurt, or until they get in legal trouble. Only after they’ve paid some crazy fine and lost their license do they figure out that there are ways to have just as much fun without so much risk, and at less cost. Cough…track days.

So, remind yourself that riding a motorcycle exposes you to risk of serious injury. This truth doesn’t have to kill your riding buzz; rather having a healthy sense of self-preservation helps you make better decisions and opens your mind to options that are just as much fun but with less risk.

Personal bests, competition, camaraderie... photo: otmpix.com
Track Days and Racing is a smarter and safer way to scratch that adrenaline itch. photo: otmpix.com

5. Wake Up!

If the thrill of high-stakes risk is your thing, but your riding smarts don’t match your risk-taking, then the likelihood of you being a dumbass is higher than most.

Unfortunately, I probably will not be able to change your mind. Like an addict, you can only help yourself and that usually only happens after you’ve reached your own personal rock bottom.

I just hope your rock bottom doesn’t include taking out a family in a mini-van or one of your buddies. Wake up before it’s too late. Seriously. Cough…Track days…. Cough…Racing.


What am I missing? Add your comments below.

Remember that I moderate comments and it may take a few days to approve yours. But, rest assured, your voice will be heard.


Please Donate to Keep the Articles Coming

If you liked this article and the many other articles on this site, please toss a buck or five into the hat. It’s greatly appreciated!

    • Click the PayPal “Pay Now” button.
    • Then indicate quantity in $2.00 increments. Example: put “2” in “QUANTITY” field to donate $4.00, “3” for a $6.00 donation, etc.

Why $2.00? Due to the PayPal fee structure, a $2.00 donation is significantly more beneficial compared to a $1.00 donation.

Thank You!


Check out these posts:

Check out these posts:


Stay Informed: Subscribe NOW!
Be a Better Rider: Sign Up for Personal Training with Ken
Support Riding in the Zone: Buy a book
Support Riding in the Zone: Buy products from Twisted Throttle


Become a patron to support the website. Thanks