Visualization Can Save Your Life

When the time comes for you to use your superior skills, will you?
When the time comes for you to use your awesome skills, will you?

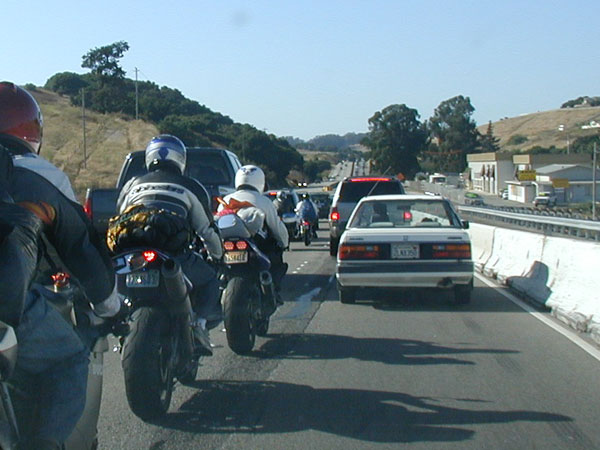
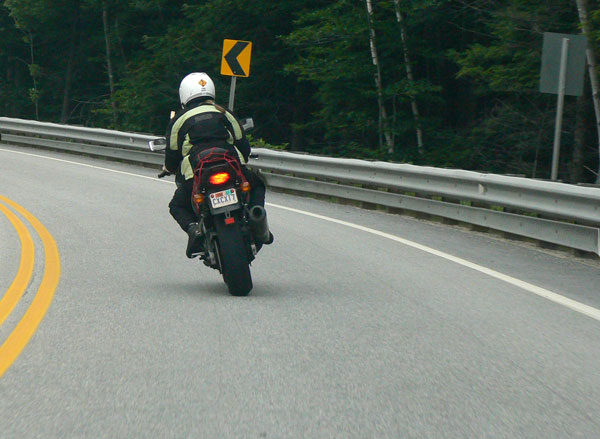
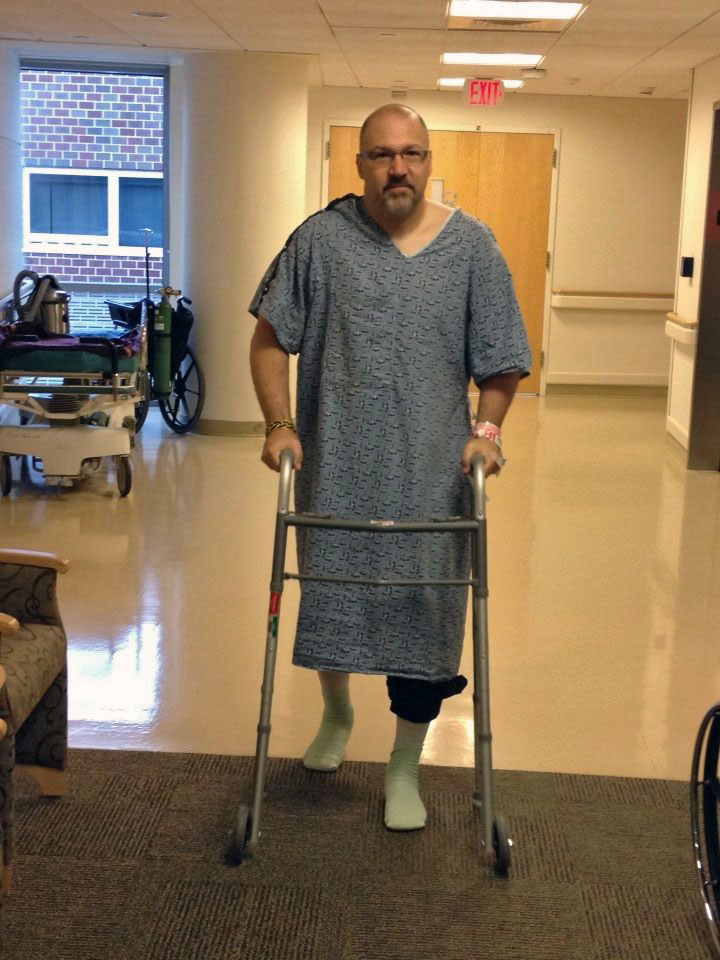
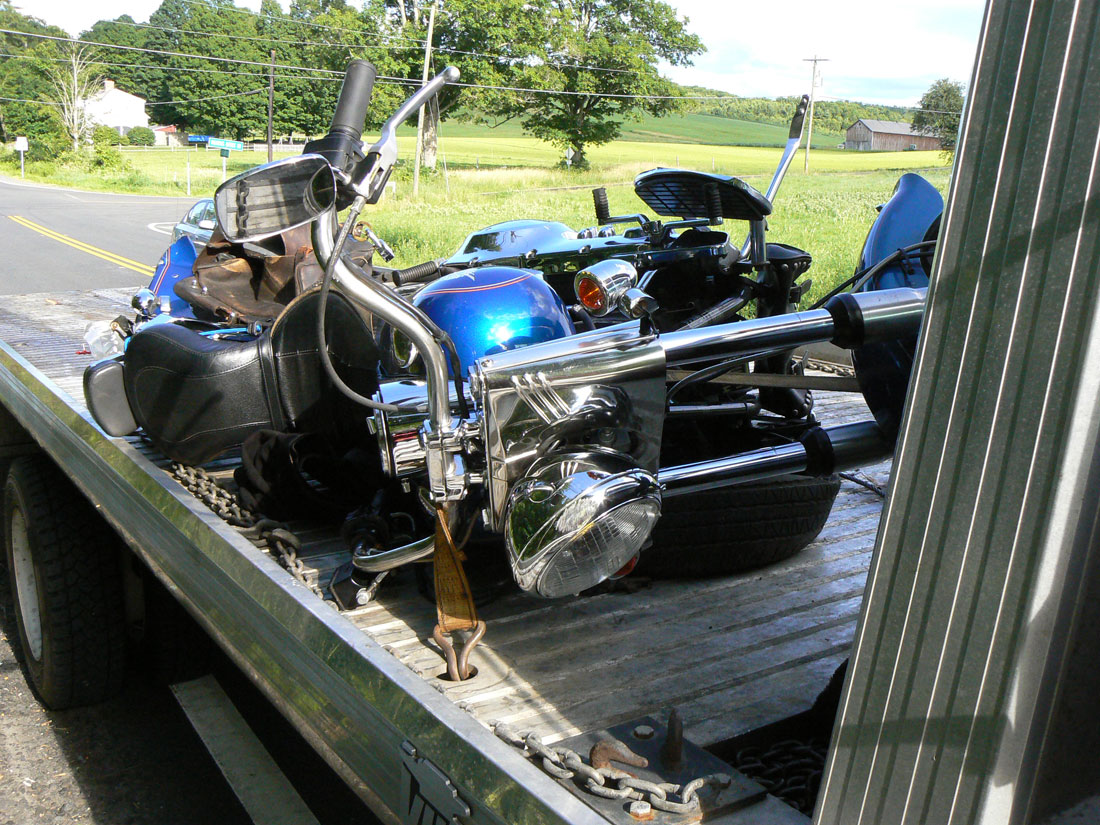
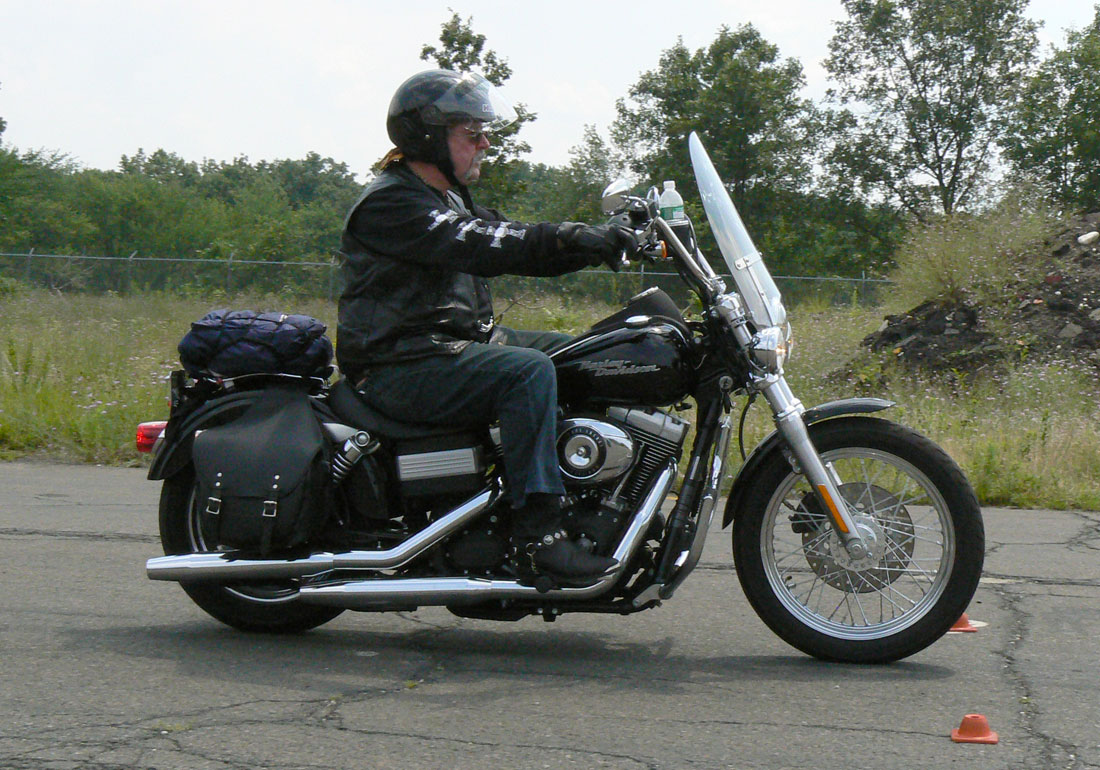
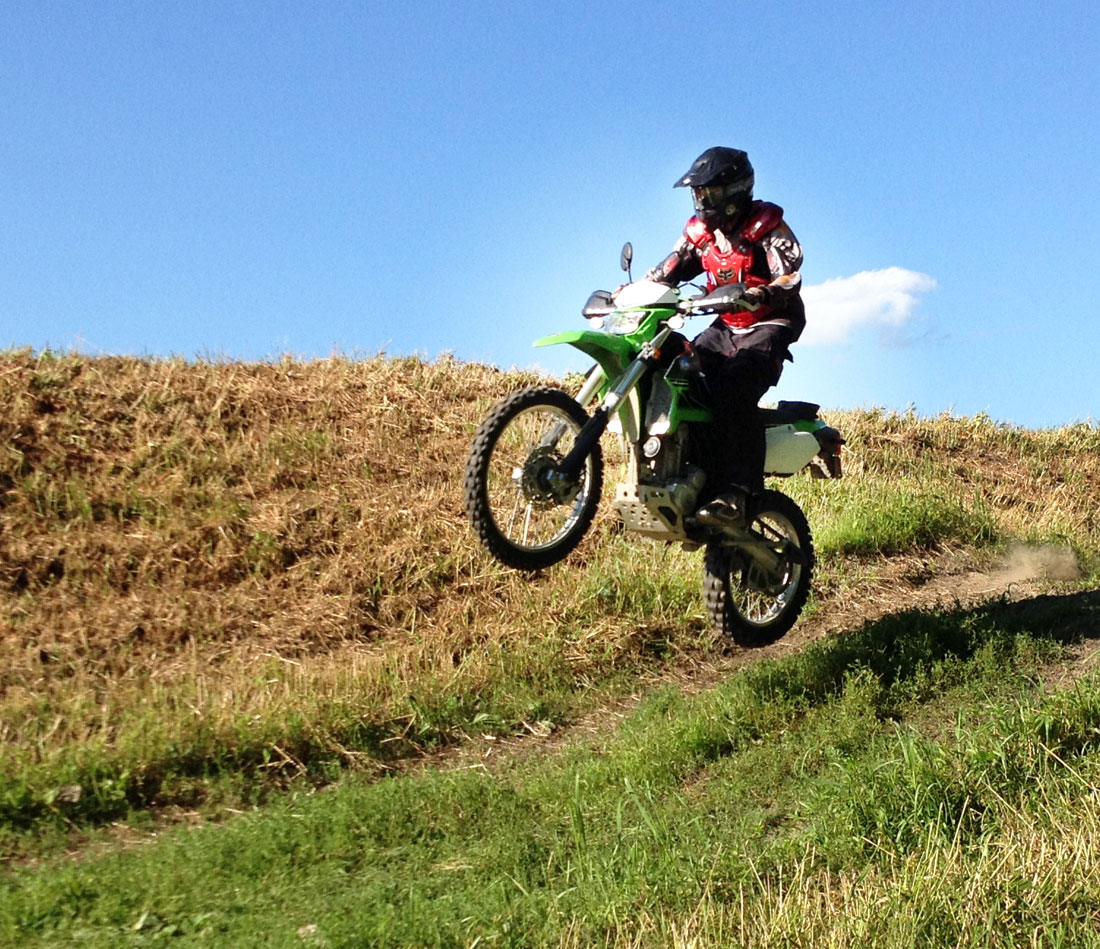
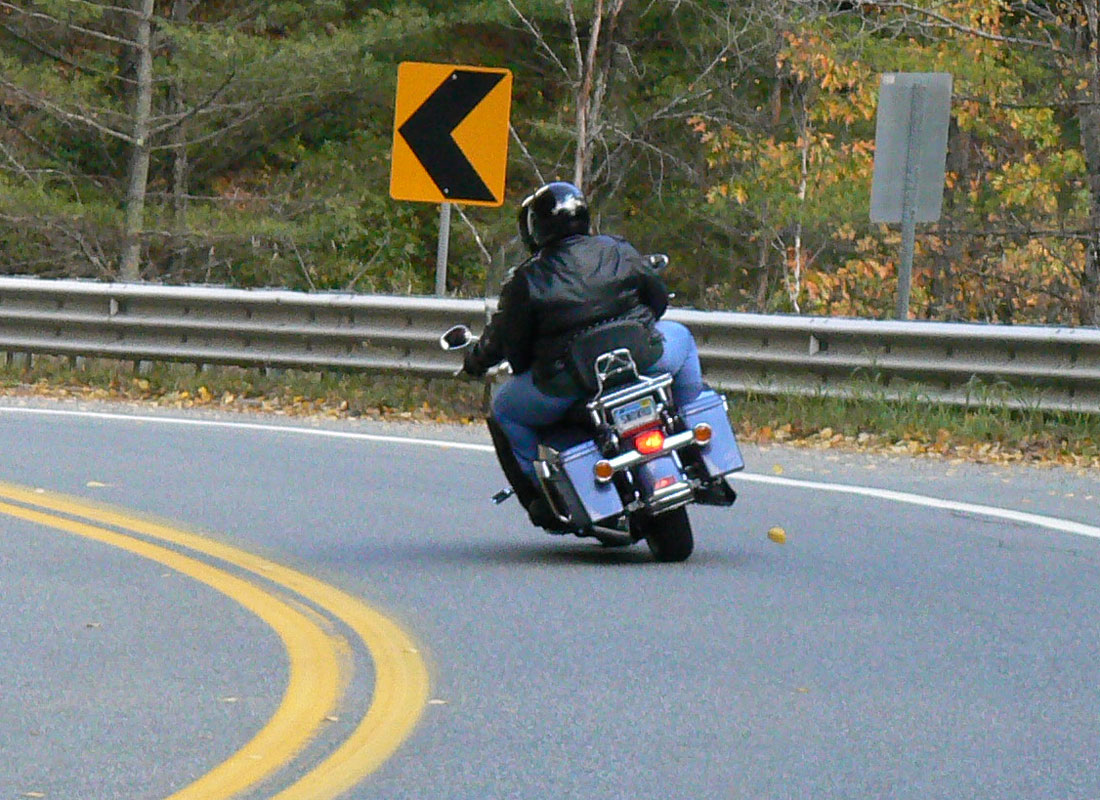
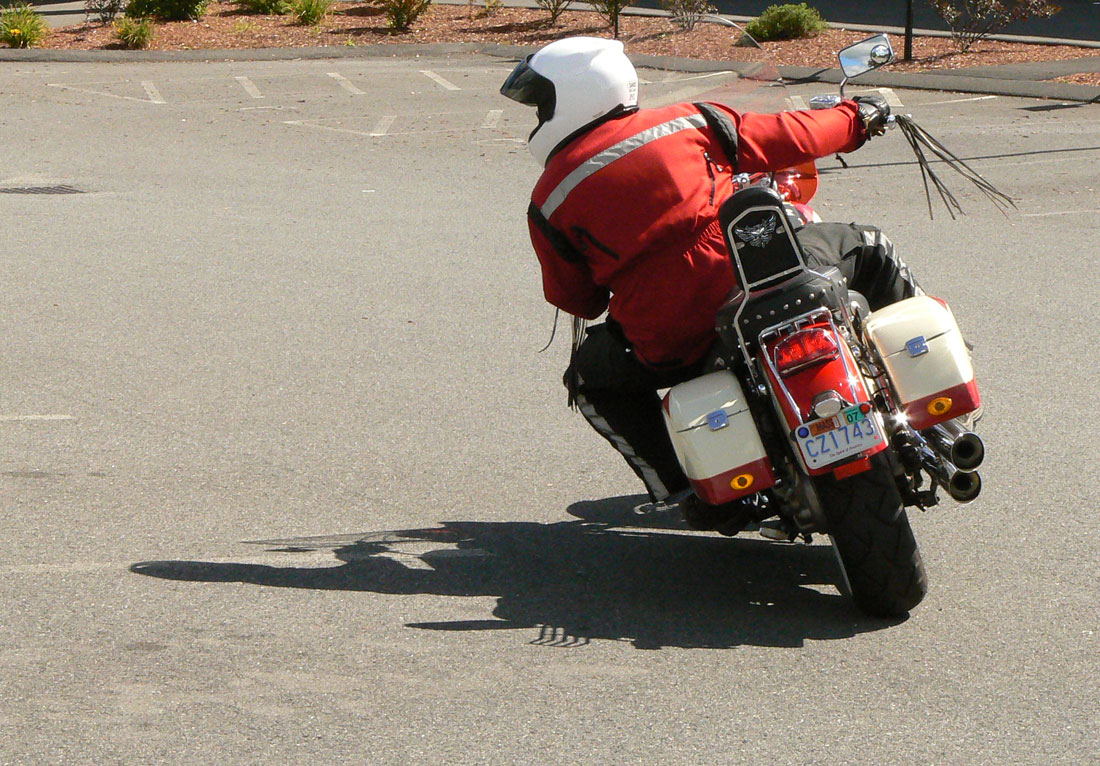
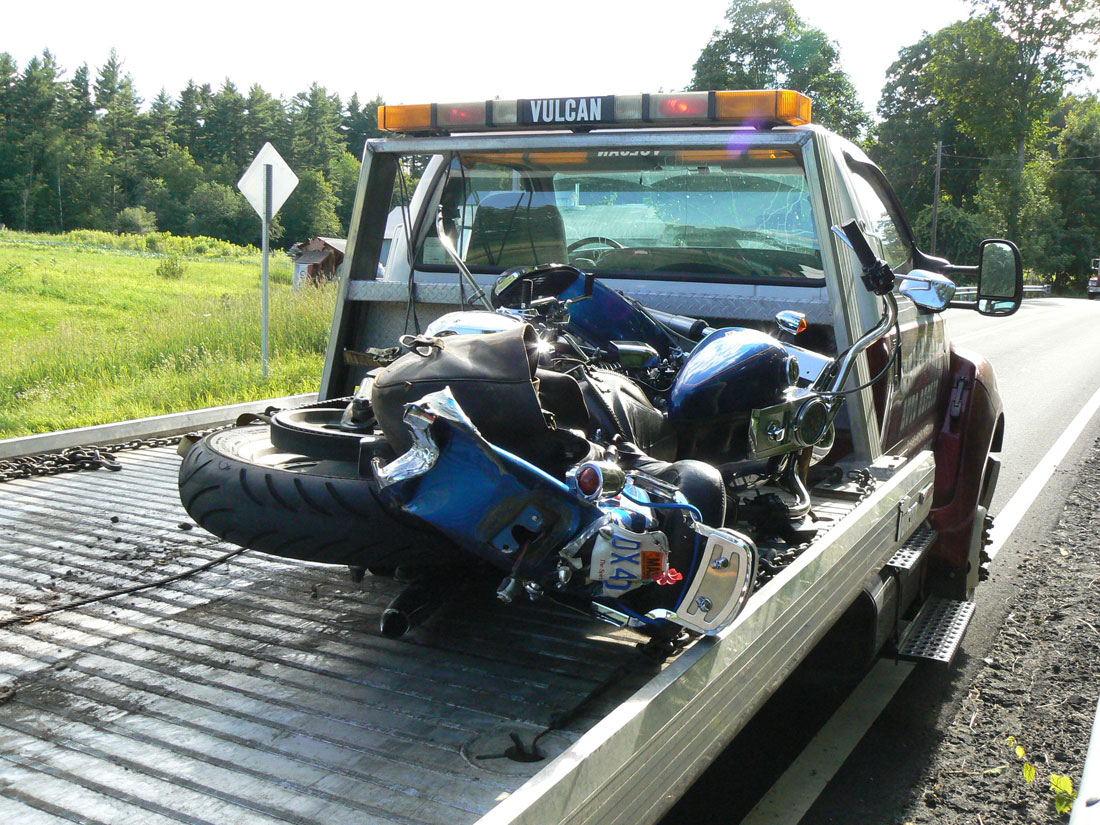
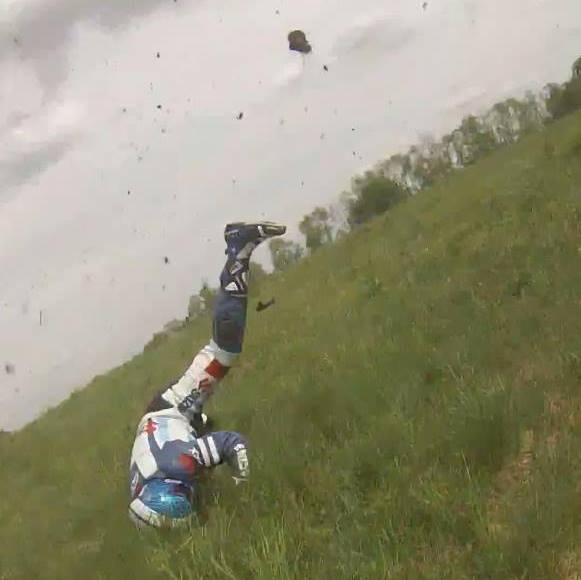
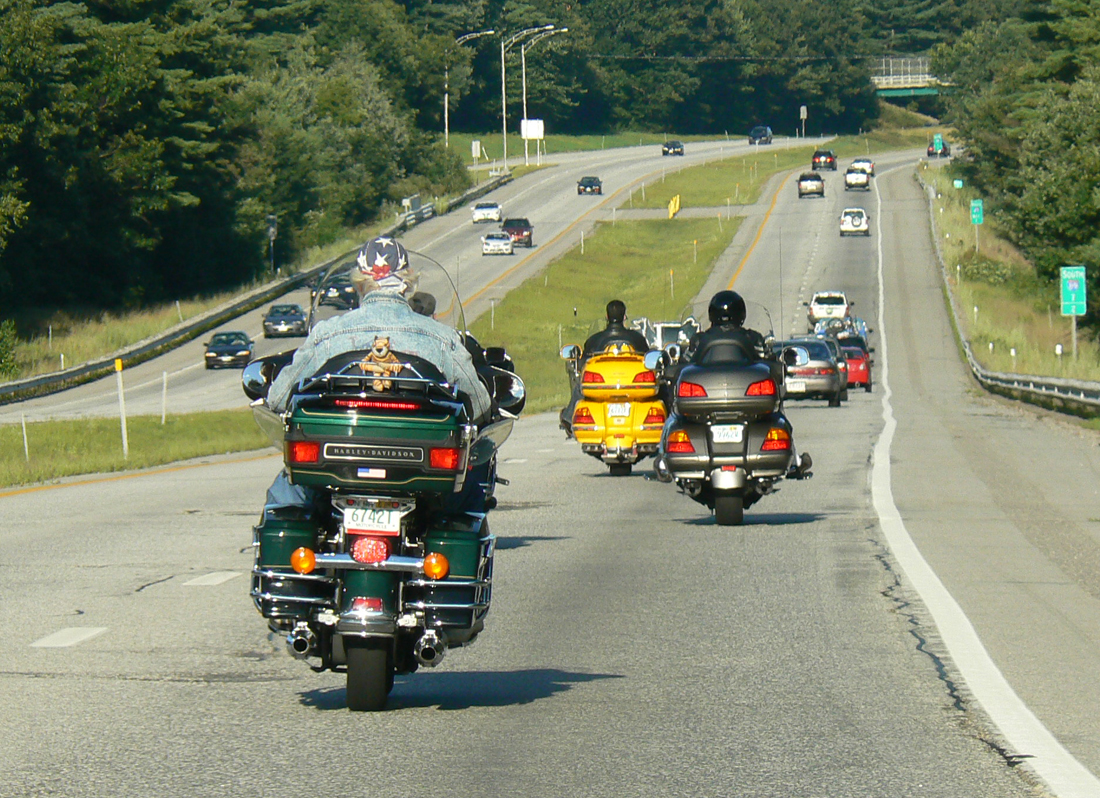
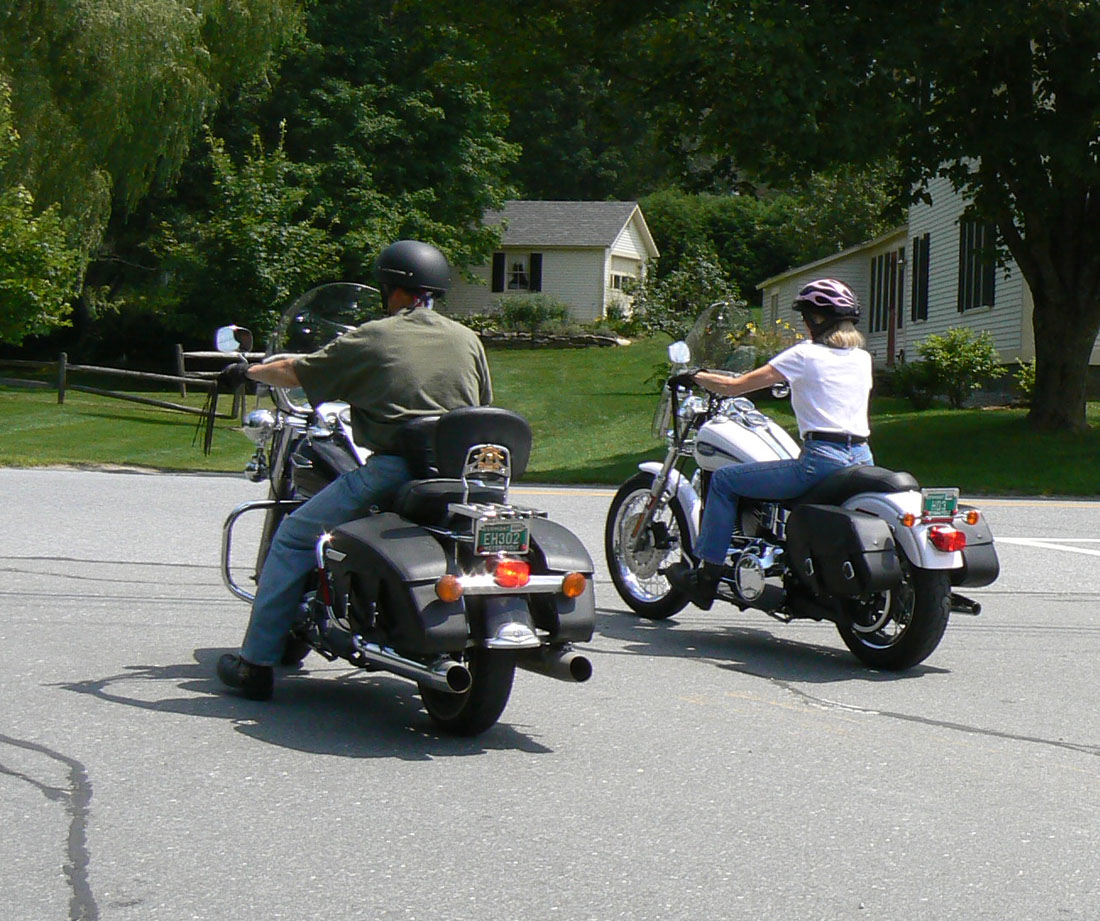
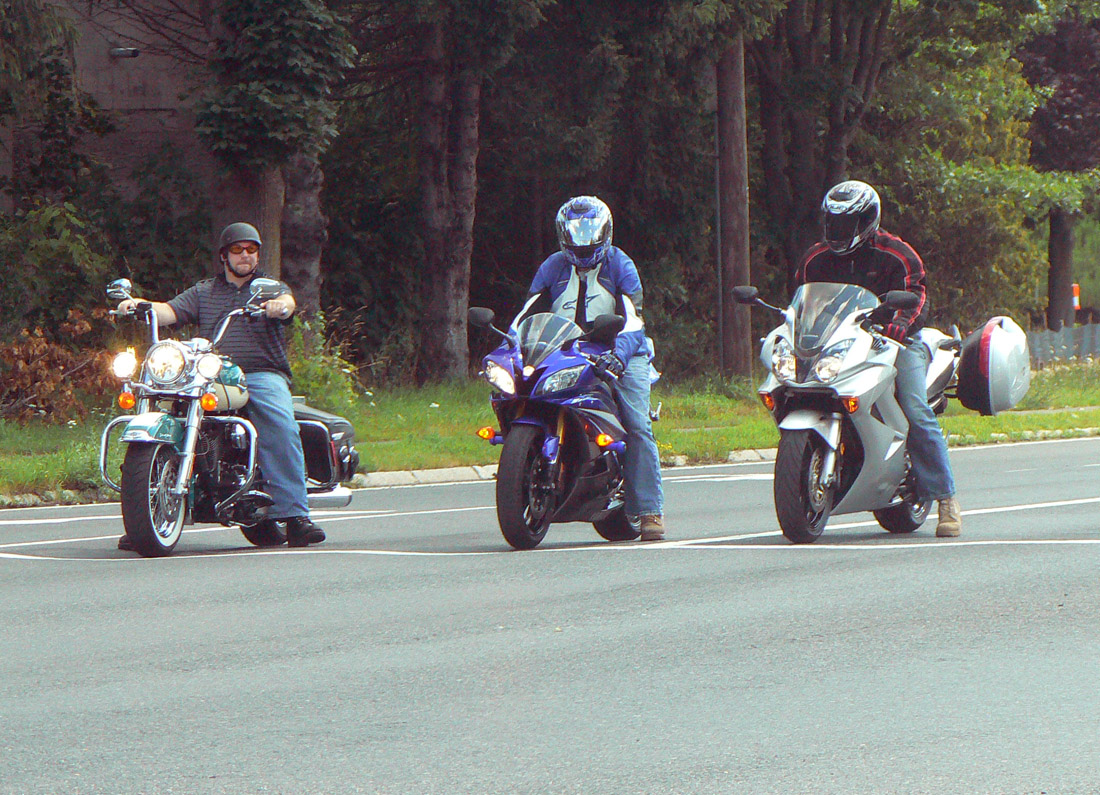
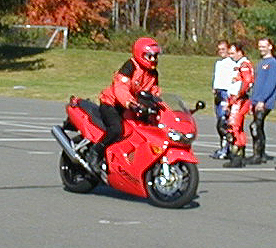
Putting a Homo sapien on a motorcycle is just asking for trouble. You simply can’t escape the fact that we are all prone to doing really dumb things. Don’t bother denying it. You’re human and humans are fallible.

I believe that well-developed physical skills and sharp mental skills allow you to ride with more control and increase safety. But, is it enough to simply know these skills?

Missing Skills

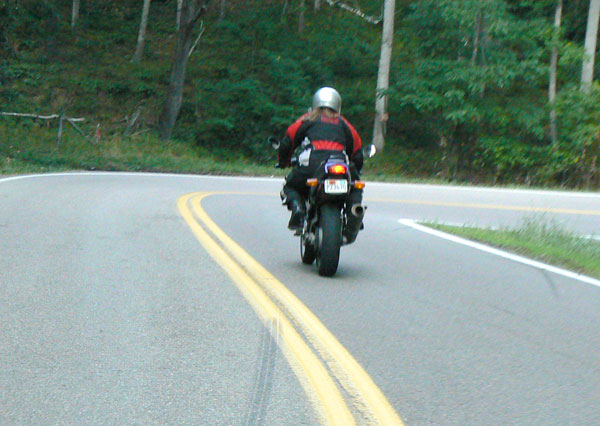
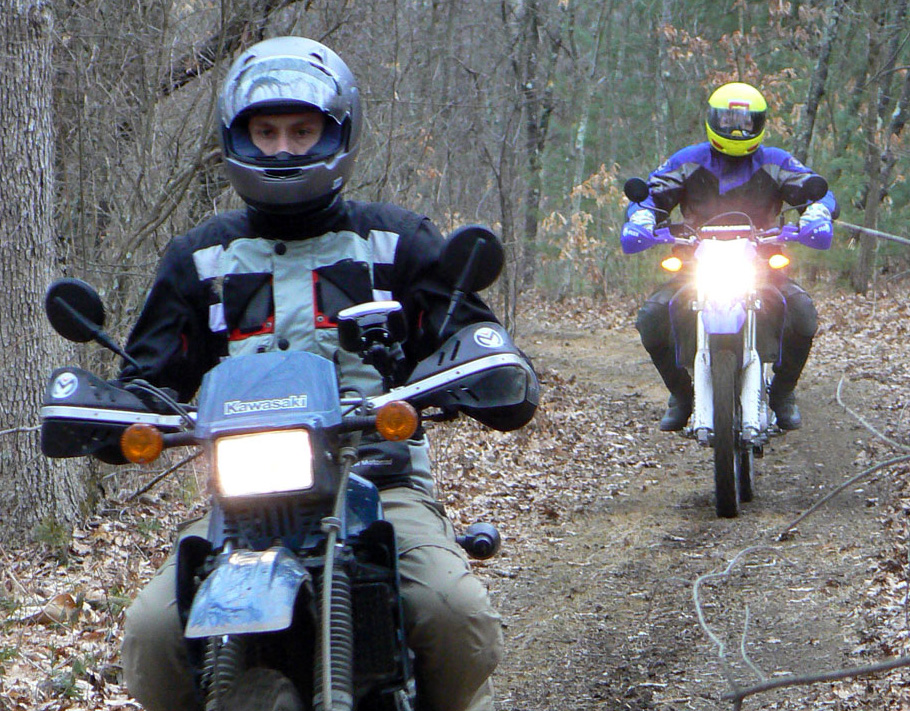
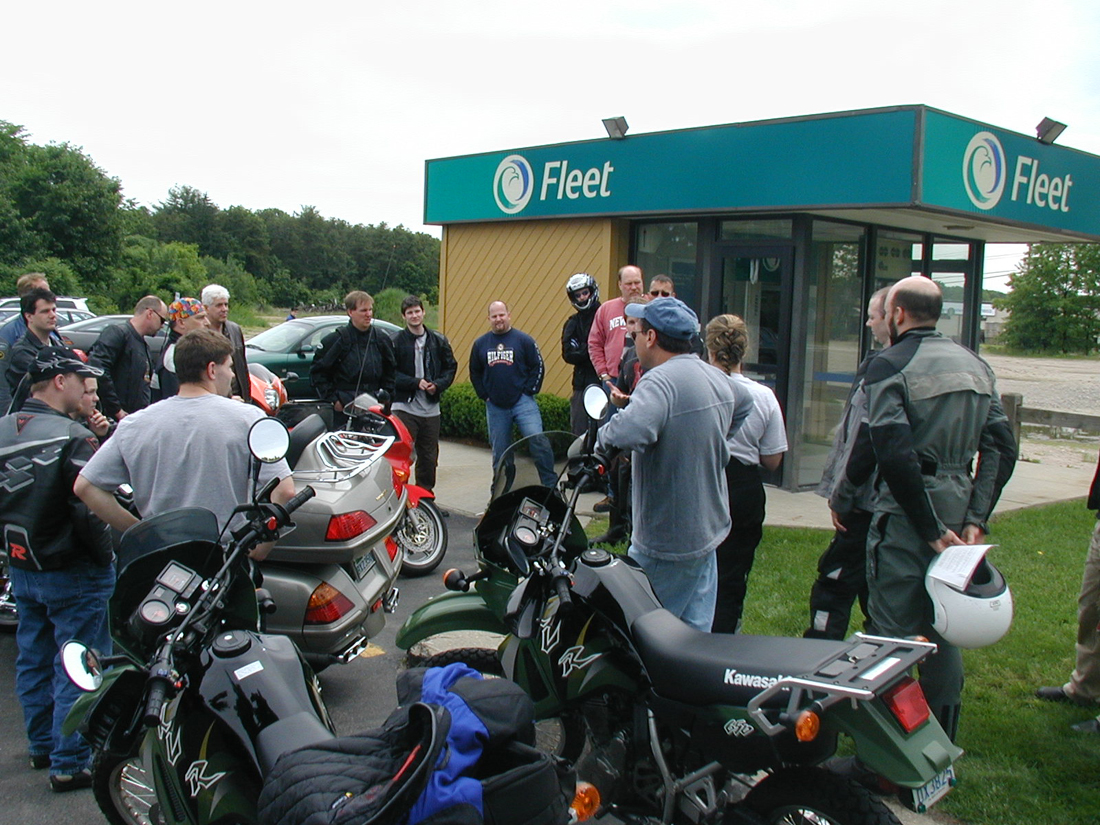
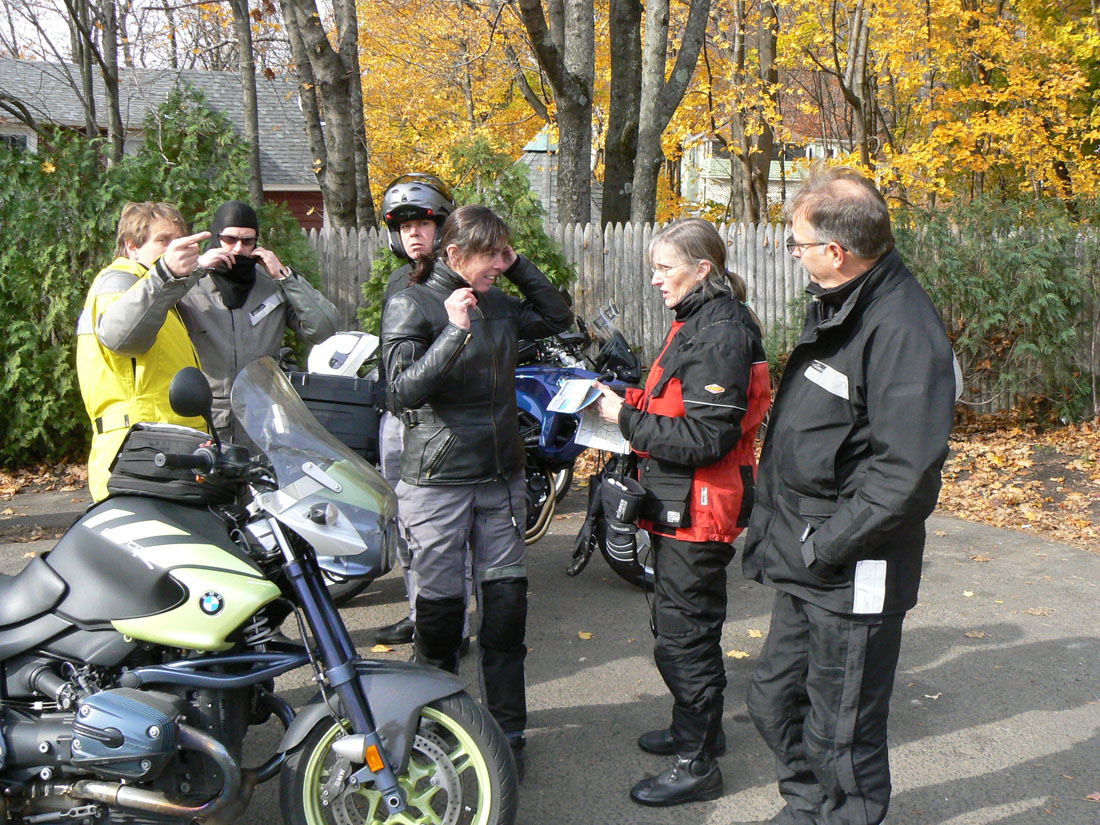
There has been a great expansion of motorcycle training programs in the U.S over the last 20 years. So why has the fatality and injury rates on America’s roadways have actually increased? Whaaaaa?

One problem is that “well trained” riders often fail to execute the very skills they mastered in the parking lot.

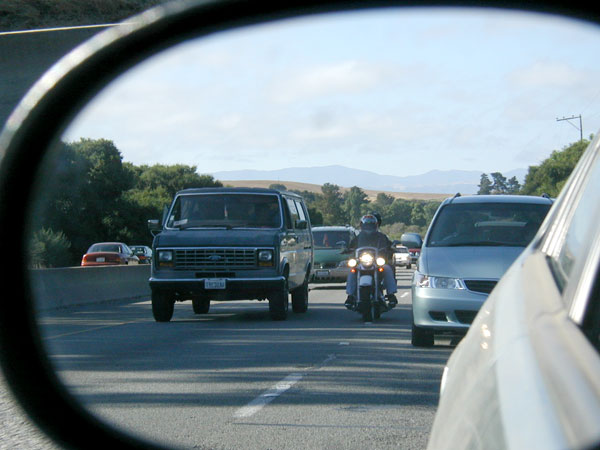
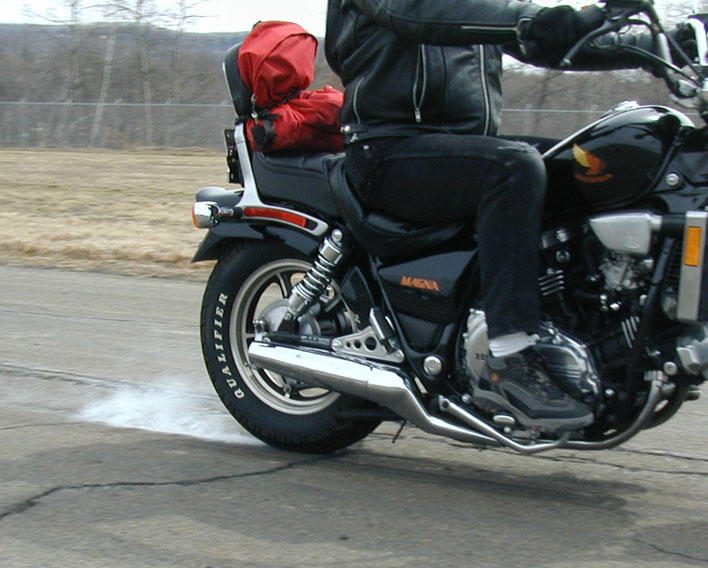
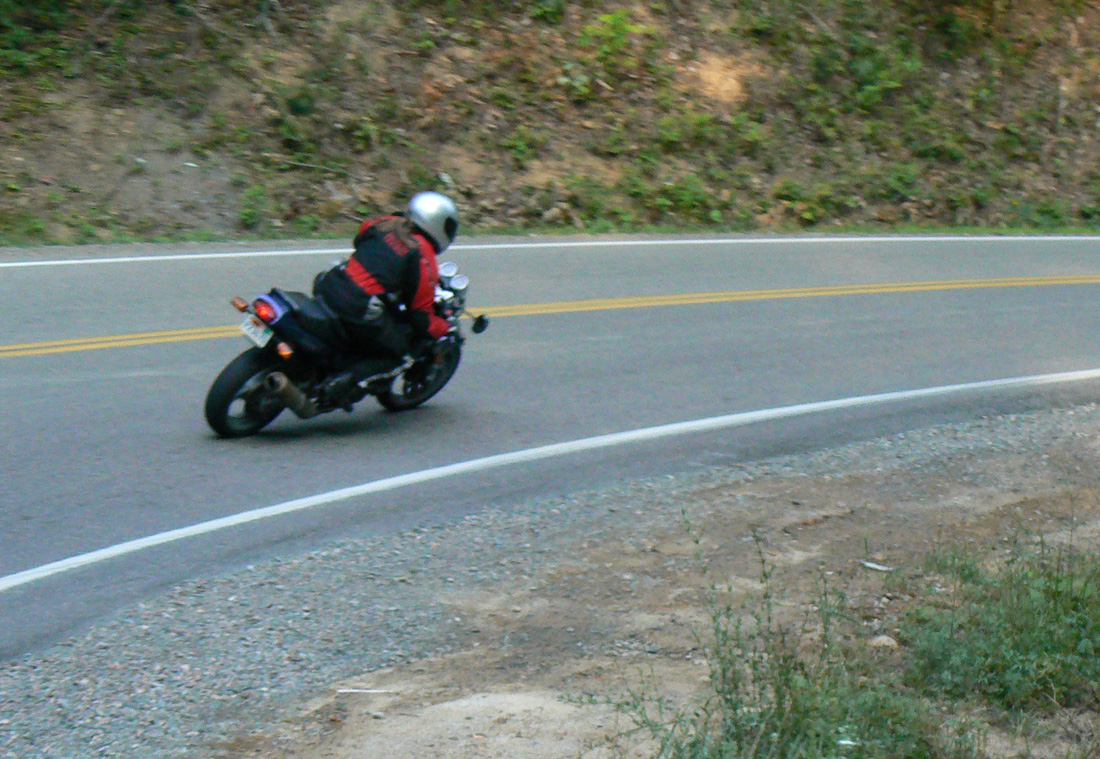
It’s one thing to know how to master swerving or emergency braking, but it turns out that it’s quite another thing to actually apply these skills in the heat of battle, like when a car darts out in front of you at an intersection.

Is this good enough to train for real life?

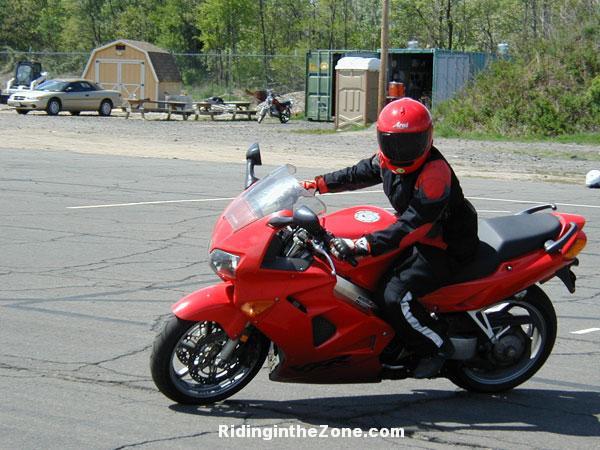
During MSF courses, students are asked to practice emergency stops by applying the brakes when their front tire reaches a set of cones. Once the technique is practiced a bit, instructors step in the path of travel, throwing their arms up to simulate the need for an emergency stop in an attempt to make the drill more realistic. Even though students experience more stress when the instructor is standing in the way, this trigger is not nearly stressful enough to emulate what happens when an actual two-ton vehicle suddenly appears in your path.

Practicing emergency braking is critical. But, is it enough?
Practicing emergency braking is critical. But,so is visualization.

Train for Reality

Soldiers, pilots, police officers, firefighters, and other people exposed to high stress situations are trained using methods that emulate the real-world so they can handle the inevitable first battle, conflict, or emergency situation. Without this part of the training process, the skills are likely to either become too delayed or go unused as the brain wastes valuable time processing what is happening.

The training includes sounds, smells, and sights that shock the ears, nose, and eyes. Explosions, live ammo, alarms, and life threatening scenarios played by actors all prepare these trainees for the worst. That doesn’t happen with motorcycle training.

Nobody dares to suggest that instructors drive a Chevy onto the practice range at random times or walk unpredictably in front of unsuspecting students, or secretly drop sand or diesel fuel on the parking lot. These scenarios would help condition students for real-world situations, but liability means this method just won’t fly.

Are you ready?
Are you ready?

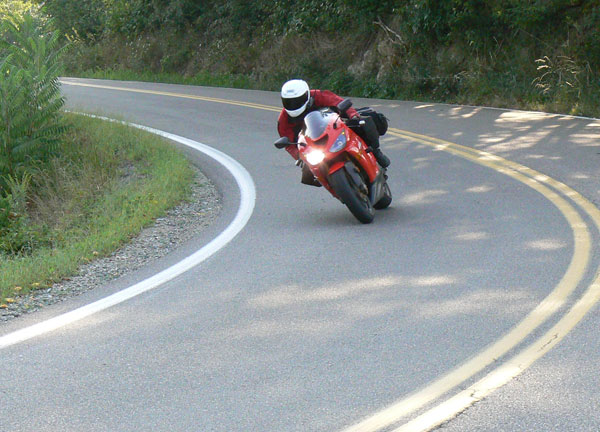
The Visualization Solution

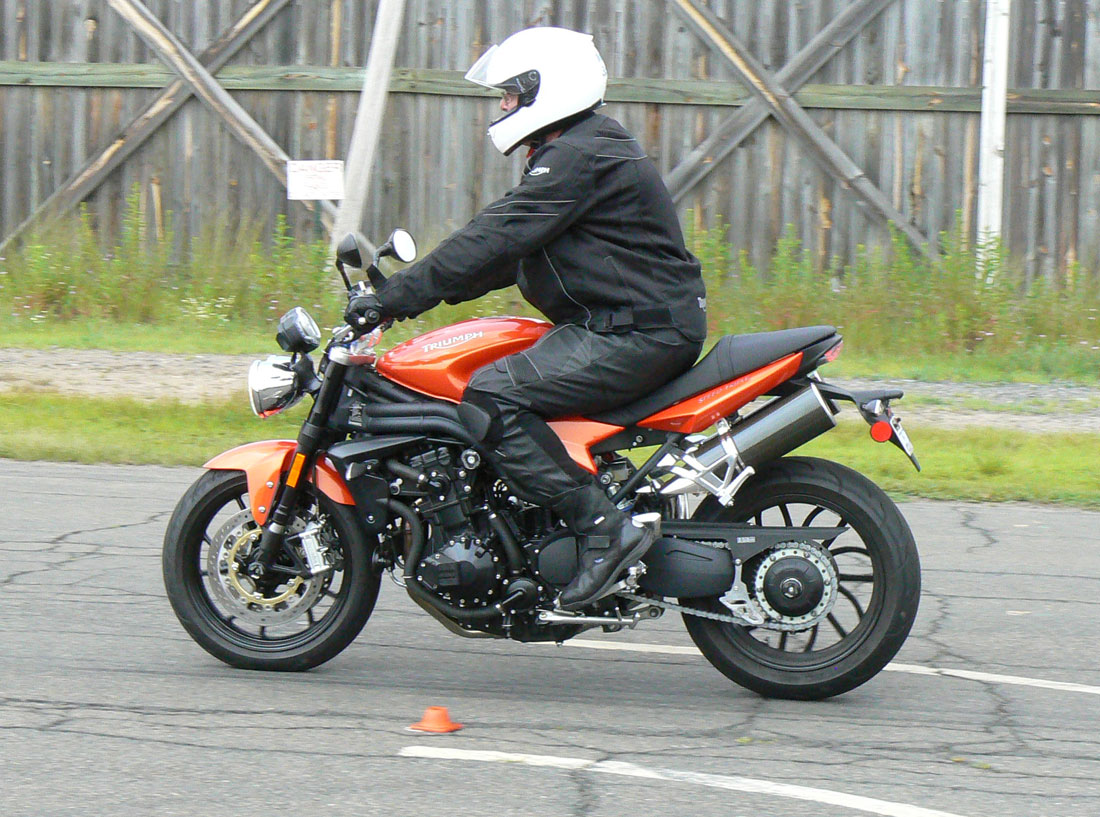
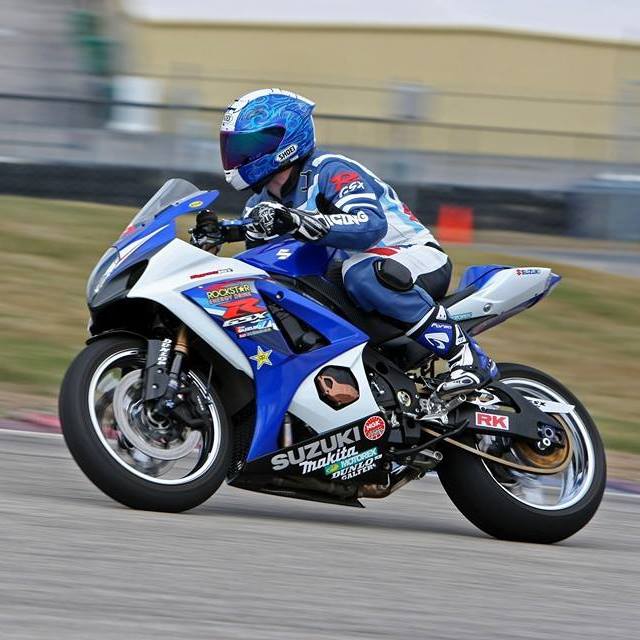
The next best thing to exposing riders to real-word scenarios is visualization. Racers use visualization to run laps in their mind before hitting the track. They can be seen closing their eyes or staring into space as they imagine every nuance of the racetrack and every braking, shifting and cornering action with great precision.

Click a stopwatch as they begin and end a visualized lap and the best racers will be remarkably close to their real lap times. This exercise is known to be almost as effective as actually riding the machine on the track without using tires or fuel, or risking a crash.

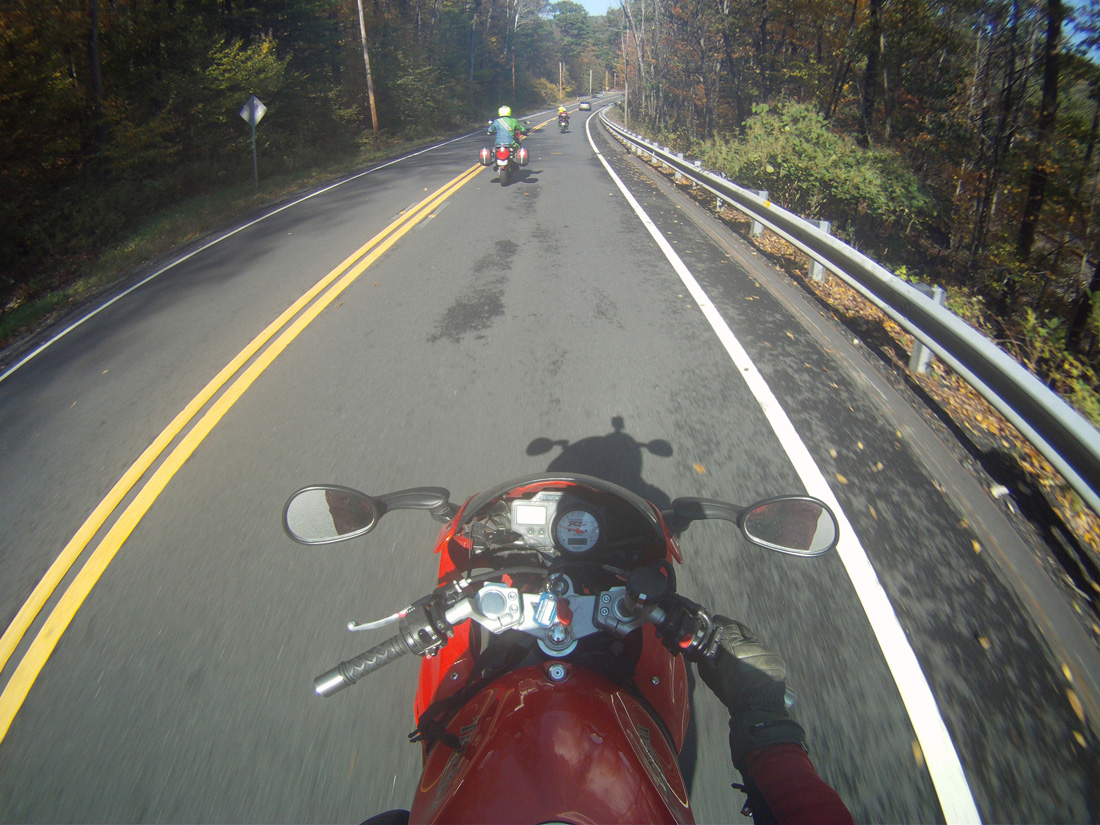
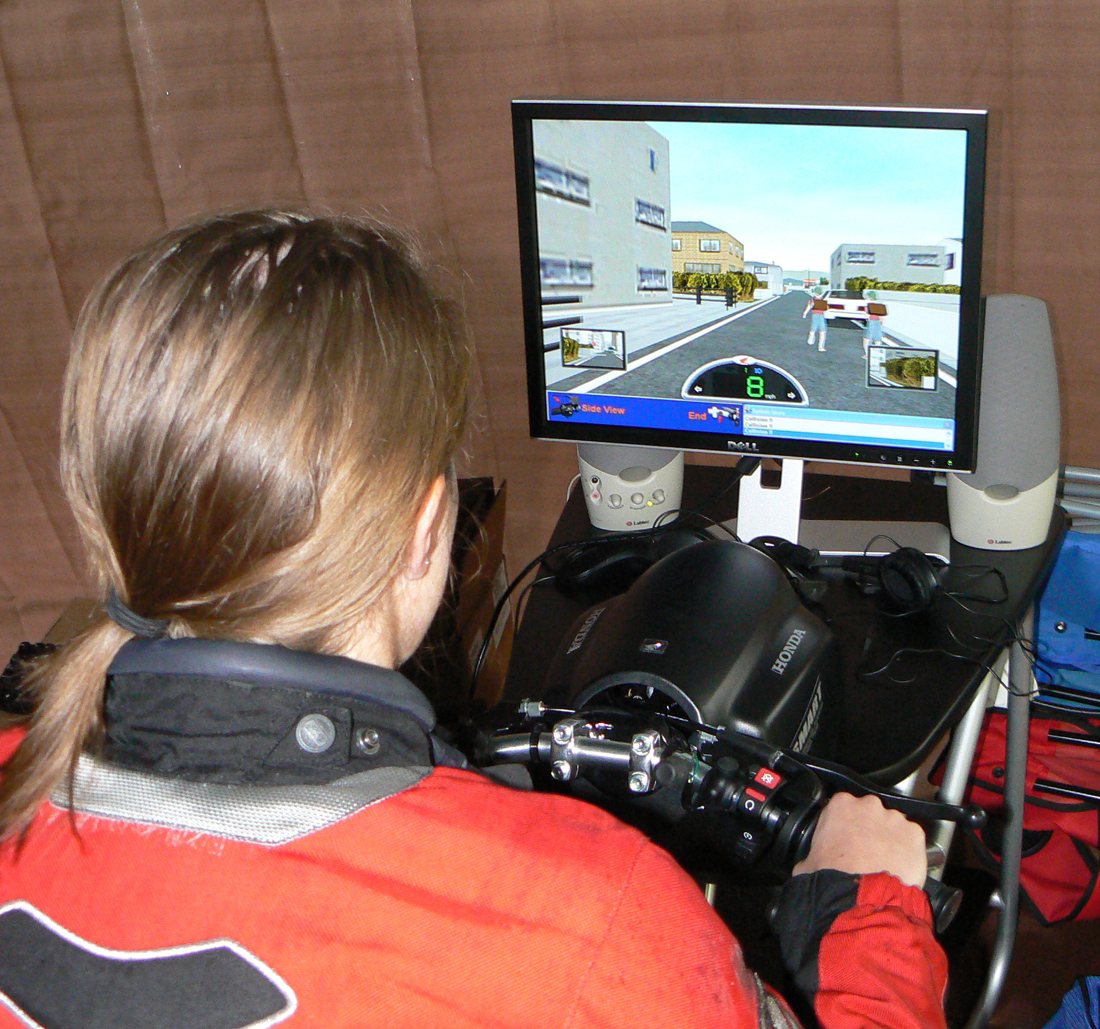
Street riders can also use visualization to train themselves to manage a car pulling out from a side street or a patch of sand appearing suddenly around a blind corner. The MSF attempts to have new riders visualize real life hazards using videos and online simulators. But, I believe visualization can be more effective, if riders are taught how to do it.

Visualization Practice

Close your eyes and visualize yourself riding to work. As you enter a familiar intersection, imagine a car suddenly running the stoplight or stop sign. Feel the panic as your muscles tense and your eyes widen. Now, imagine yourself squeezing the brakes fully, the G-forces pushing you forward to the extreme.

Did you avoid a collision? If not, then try again. And again. You cannot do this too much.

Go back in time and plan better by slowing down and covering your brakes to reduce reaction time. Notice how much more time you gave yourself to respond. To avoid target fixation, imagine looking away from the car and toward an escape route. Good job.

Replay different outcomes and solutions. Imagine yourself swerving instead of stopping.

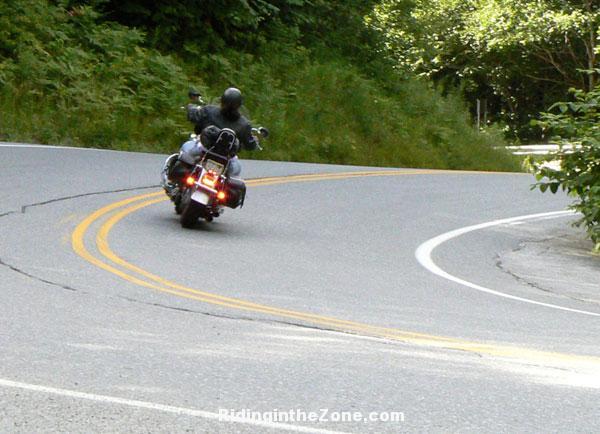
Next, visualize other scenarios, like rounding a blind corner and needing to avoid an animal, or realizing the the corner is tightening and your speed is too fast.

This training is not the same as having a car pull out in front of you, but it can be remarkably effective if done well…and it’s safe.

Do it!

Learning advanced braking and cornering skills and strategies for surviving will most assuredly increase your chances of making it home in one piece. But, it has now become apparent that this is simply not enough. Sit down and visualize yourself successfully managing some very scary hazards so you are better prepared for the inevitable conflict. It could happen tomorrow, so don’t delay.


LIKE Riding in the Zone on Facebook


Please Donate to Keep the Articles Coming

If you liked this article and the many other articles on this site, please toss a buck or five into the hat. It’s greatly appreciated!

    • Click the PayPal “Pay Now” button.
    • Then indicate quantity in $2.00 increments. Example: put “2” in “QUANTITY” field to donate $4.00, “3” for a $6.00 donation, etc.

Why $2.00? Due to the PayPal fee structure, a $2.00 donation is significantly more beneficial compared to a $1.00 donation.

Thank You!


Check out these posts:


Stay Informed: Subscribe NOW!
Trianing-Tours_LandingBe a Better Rider: Sign Up for Personal Training with Ken
Support Riding in the Zone: Buy a book
Support Riding in the Zone: Buy products from Twisted Throttle & Amazon
Twisted_Affiliate-Interphone-widget


Stay Informed: Subscribe NOW!
Be a Better Rider: Sign Up for Personal Training with Ken
Support Riding in the Zone: Buy a book
Support Riding in the Zone: Buy products from Twisted Throttle & Amazon

The Lane Splitting Debate

Lane-Split-introA recent study by the California Office of Traffic Safety reports what many motorcyclists already know; that lane splitting is (or, can be) “safer” than sitting in stopped traffic. This means being less prone to serious injury.

To enjoy the safer status, riders must only split lanes when traffic is moving at 30mph or less and when the rider travels no faster than 10 mph more than surrounding traffic.

The study also confirms another suspicion that lane splitting benefits all road users by reducing the number of vehicles adding to traffic congestion. Yeah, us!

What is Lane Splitting?

For those of you who aren’t motorcycle riders or who live in one of the 49 states that don’t allow lane splitting, you may not know what lane splitting is. As the moniker suggests, lane splitting is when a motorcycle rider rides between two lines of cars heading in the same direction, like when riding on a multi-lane highway.

Legal?

As of March 2022

  • California is the only state in America to make lane splitting legal officially.
  • Representative Noel Campbell of Arizona introduced House Bill 2285 that aims to restart talks about legalizing lane splitting in Arizona. Discussions are still underway, but people expect this motion to pass this time.
  • Though lane splitting is technically not legal because Hawaii, “shoulder surfing is allowed when there is traffic congestion.
  • Senate Bill 629 was recently introduced in Connecticut, and lawmakers are currently discussing legalizing lane splitting and filtering.
  • In Oregon, a proposition to make lane splitting legal, has been introduced to the Speaker’s desk and is currently in discussion.
  • Senate Bill was reintroduced and is still pending approval in Washington.
  • A bill has been referred to the Virginia Committee on Transportation and awaiting approval.

Filtering

Riders split lanes on the highway when traffic slows. But, they also split lanes as they filter to the front of stopped traffic at a stop light. This is common practice in many parts of the world, but will get you a ticket in most of the US.

Lane splitting will more likely be tolerated if it is done with respect.

The Good

Filtering through traffic, whether on a multi-lane highway or local arterial means there are fewer vehicles clogging up the works and if done at low speed, is relatively safe for the motorcycle rider if done correctly.

The primary reason for motorcyclists to consider lane splitting is that it puts the rider in a less vulnerable position. Being rear-ended by a four-wheeler is a sure-fire way to end up in a hospital bed and that’s not even talking about the possibility of being sandwiched between two cars!

The Bad

However, lane splitting has a totally bad rap because some riders do it wrong. Proper lane splitting is done at a speed no faster than 10mph beyond the travel speed of surrounding traffic. Unfortunately, some riders zip between cars in a way that is dangerous and scares the hell of those they pass.

This unwelcome behavior can incite resentment from drivers and further reflect badly on all motorcycle riders, even those who split lanes safely. Some irate drivers have been known to close the gap as the rider attempts to squeeze past.

Patience.
Exercise patience.

Safe? Really?

Here is the rub. Even though the study confirms (through statistics) that lane splitting reduces instances of cars colliding with a motorcycle, it also says that there is an increase of motorcycle riders rear-ending other vehicles.

This is where the speed factor comes in. It doesn’t take a government study to know that ripping between slow moving cars is a bad idea.  The study clearly states that the safety benefit applies only to riders who lane split at 10mph or lower.

The study confirms another seemingly obvious assumption; that it’s not safe to split lanes when traffic is traveling above 30mph, so ride slowly as you filter, please!

Even with the study, a lot of riders I know still do not think it is a good idea. I suspect it’s because they have never done it and they can’t imagine drivers in their state tolerating a maneuver that has always been considered illegal and irresponsible. Just for reference, lane splitting in other parts of the world is not only tolerated, but expected.

Check out this PSA from Australia in favor of lane splitting.


Check out a video from Ride Apart about Lane Splitting:


Lane Splitting Tips

Make sure your luggage can fit between vehicles.
Make sure your luggage and mirrors can fit between vehicles.

What follows are tips from my perspective. I may be a reasonably intelligent motorcyclist, but I have little experience splitting lanes. Last year, the CHP put out a guideline for motorcyclists, but it was taken down after someone complained, so that resource is not available. Which means I could use some help from my Cali-friends. Use the comments section below to add your thoughts.

For those of you not riding in California, you may want to keep these tips filed away for the day when lane splitting is made legal in your state (don’t hold your breath, though). In the meantime, consider writing your lawmakers to encourage pro lane splitting legislation.

  1. Lane split only when traffic is moving at 30mph or less.
  2. Set your speed at or under 10mph faster than traffic.
  3. Be patient! Lane splitting should be thought of as a privilege and be respectful.
  4. Resist frightening drivers by keeping your speed down. You wouldn’t want to trigger road rage. You’ll lose.
  5. Know your bike’s limits. Those wide hard bags and mirrors you love so much will cause a serious problem if you try to squeeze into a too narrow gap between two vehicles. If in doubt, wait until there is enough room to proceed.
  6. Avoid blind spots. Lane splitting means you will be riding close to vehicles’ fenders and in drivers’ blind spots. By filtering forward at 10mph faster than surrounding cars, you will ride THROUGH blind spots, which is good, but be aware of the danger of lingering in a blind spots when you have to slow.
  7. Be extra careful when riding near large trucks and RVs.
  8. Keep an eye out for cars changing lanes. Seeing an opening in traffic should put you on full alert for cars moving across your path. Also, be aware of approaching exits where drivers may suddenly change lanes.
  9. Cover your brakes.
  10. Watch your mirrors for other lane splitting riders. Move over for riders splitting faster than you.
  11. Be courteous to slower lane splitting riders. Don’t tailgate your fellow riders.
  12. Move back into a lane once traffic begins to match your filtering speed. Remaining in between lanes with other vehicles moving at the same speed is asking for trouble. Rejoin traffic when possible.
  13. Keep your eyes scanning well ahead.

Okay. It’s your turn. Please use the comments area below to share your thoughts on lane splitting.

submit to reddit

Become a patron to support the website. Thanks

Top 16 Off-Road Riding Tips

Become a patron to support the website. Thanks

I recently returned from an epic dirt riding trip. But, instead of boring you with details about where I went and what I ate, I’m going to share some tips about how I survived the slimy, rocky, ascents and descents of the Rock House section of the Hatfield McCoy trail system in West Virginia.

smallrockhouse copy
Ken, Tony and the guys at Hatfield McCoy

It all started when a group of us from Tony’s Track Days arrived at the small town of Gilbert, WV to ride up and down some of the slimiest and rockiest terrain I’ve encountered.

Check out the video:

You’ll hear me talking while I slip, slide and bounce along the trails, because I am using Interphone brand Bluetooth communicators with my friend, Tony. I can’t recommend using communicators enough…it makes off road riding even more enjoyable and allows the person in the lead to warn about particularly gnarly hazards. I’m on a Kawasaki KLX250s.


Some hills are tough.

Why Do That?

To understand some reasons why I ride off-road (and why you should, too), you may want to read the blog article “10 Reasons Why Street Riders Should Ride in the Dirt” . Sure, riding off-road makes anyone a better street rider, but I also do it because it is challenging and fun, fun, fun.

I talk about “riding in the zone” as it pertains to street riding and even track riding, but off-road riding brings the zone experience to a whole new level of alertness.  Any significant lapse in focus could mean careening down a steep slope with the only thing stopping me from a long descent are stands of trees.

Slippery, Slimy Mud on hard packed rock.

Tips for Surviving Mud, Rocks, Hills and Other Off-road Encounters

I’m no off-road riding expert. But, I know enough to share some tips that can help you survive your next off-road riding experience. If you want to try an off-roading adventure but with a UTV, you may visit a local utv dealer to chose your new ride.

  1. Manage Your Speed: Nothing increases risk more than a too fast speed for your ability and/or the conditions. Keeping your throttle hand in check is fairly easy to do, but managing speed on a steep, muddy downhill trail is tough. The trick is to see the problem well before you get to it and slow down to a crawl so you aren’t trying to scrub off speed where gravity and almost zero traction create the equivalent of a slip and slide
  2. . Keep Your Eyes Up: We look down when we are scared or tired. The problem is that as soon as you look down, you’re unable to deal with the terrain that is suddenly under your front wheel. This problem compounds until you are so far behind what’s going on underneath you that you get more scared, look down more and eventually crash. This pertains to most athletic activities, including street riding.
  3. Use Momentum: When traction is limited, you must rely more on momentum. This means keeping your eyes up to see what’s coming and getting on the gas before you are on a surface that has little grip.
  4. Believe You Can Do it: If you hesitate, you will likely not make it up that steep incline. So, go for it! That said, avoid terrain that is over your head.
  5. Stand Up, Sit Down: It’s nearly impossible to ride an off-road bike well if you aren’t good at riding while standing. It’s also important to know when it’s best to stand and when to sit. In general, stand for any significant bumps so your legs absorb the impacts and sit for corners, especially corners with berms so you can load the rear tire for the drive out.
  6. Find the Center: Whether sitting or standing, you must find the spot where your body’s mass is located for optimum maneuverability and fluid control. This means sitting forward on the seat and standing so your belly is over the steering stem.
  7. Bent Arms: The bike is going to move up, down, left and right at great frequency. Yet, you must hold onto the handlebars and operate the controls while the bike is jerking around. Bent arms allow the bike to move as necessary and for your hands to still control the throttle and brake with precision.
  8. Counter-lean: This is something street riders have a hard time with when they first start dirt-riding. If you lean with the bike (or low and inside) then the bike will slip out from under you. The bike must lean to turn, but if you stay on top of the bike, your weight keeps the load pressing vertically to allow the tires to grip the terrain.
  9. Forget the Clutch: Forget using the clutch for upshifts. There is usually no time to go for the clutch lever when you’re accelerating out of one rocky, muddy mess into another one.
  10. Use the Clutch: On the other hand, you want to use the clutch to control drive as much as possible. By slipping the clutch you can stay in a taller gear to avoid excessive shifting and control your speed with greater precision.
  11. Use the Rear Brake: On muddy terrain, you’ll rely heavily on the rear brake. Skidding the rear tire is not usually a big deal, but skidding the front will quickly toss you on your head.
  12. Use the Front Brake: Yeah, I know what I just said, but when there is traction, you can (and should) use both the front and rear brakes when descending hills. This may sound tricky, and it is. But, sometimes you need all the slowing power available, just learn to apply the front brake carefully.
  13. Learn to Wheelie and Jump: Not so you can be a squid, but so you can get over fallen trees, big rocks. If you can’t wheelie, then at least learn to loft or bunny-hop over obstacles.
  14. Steer with the Rear: When you don’t have a lot of grip, trying to steer with the front tire is a bad idea. Instead, get the bike turned in the general direction, but get on the gas to prevent a front tire washout.
  15. Make sure Your Bike is Ready: It sucks to be stranded in the woods.
  16. Take Breaks: Off-road riding uses a lot of physical and mental energy. If you get tired, you will start looking down and your timing will become imprecise. Before you know it, you’re on the ground.
Fun and challenging!

Okay. It’s your turn. Please use the comments area below to share your favorite tips for riding rugged and muddy off-road terrain.

Become a patron to support the website. Thanks

How to Survive Downhill Curves

Cornering errors are responsible for at least half of all fatalities. And of those corners, downhill curves are the most challenging. But, with some knowledge and practice you can master these tricky turns.

Look, Slow, Lean and Accelerate. Note the lower guardrail installed to make the guardrail less lethal to crashing riders.

Before I describe how to deal with downhill turns, let’s revisit the basic cornering process.

  1. Look Well Ahead: This is obvious, but not instinctual for many. Riders who are nervous tend to look in the near distance. Discipline yourself to look well ahead so you can get a handle on what’s coming up.
  2. Slow: This doesn’t necessarily mean you have to use your brakes and/or downshift to reduce speed, but you MUST consciously evaluate whether you need to adjust speed so you can negotiate the corner with plenty of traction and skill to spare. If in doubt, slow down! You can always get on the gas if you slow too much.
  3. Lean: You initiate lean by countersteering. The amount you must lean is determined by your speed and the radius of the turn (your body position also affects the amount of necessary lean). If you enter a turn at a speed that requires you to lean to the limit of your comfort level, then you’re risking a crash. The solution is to learn to lean, dammit. If you’ve never explored near-maximum lean on your bike (in a safe place, please) then you are poised to be a victim.
  4. Accelerate: Once leaned, you need to crack the throttle and continue to accelerate gradually through to the corner exit. The basic explanation for why you need to do this is that it stabilizes the suspension and chassis. Gradual acceleration also loads both tires for maximum grip.

The line (path) you choose around the turn is also important. The “outside-inside-outside” path is the gold standard, but should not be cast in stone. The delayed apex line is one that every rider should know about and use in many cases. This is when you allow the bike to orbit around the corner before bringing it in tight to the apex. An article explaining cornering lines is in the works.

Slow to a speed that allows you to accelerate.
Slow to a speed that allows you to accelerate. Notice how the centerline and edge of the road visually converge to indicate a tightening curve and downhill slope.

Downhill Curve How-To

Okay, with the basic cornering technique in mind, let’s discuss how it applies to downhill curves.

  1. Look Ahead: No difference here, except that what you should see are the telltale signs of a downhill curve: pavement sloping away from you, indicated by how the centerline and edge of the pavement visually converge in the distance. If these visual clues come together in the near distance, then the hill is steeper than if they converge farther away. Also, look for roadside objects to help you determine how tight the curve is and how steep the hill is (read more here).
  2. Slow: The main difference between a flat curve and a descending curve is how gravity pulls you and your bike’s mass down the hill. This means that you need to scrub more speed before the curve, otherwise you will find yourself going too fast mid-corner.You also need to begin braking earlier so you have more time and space to slow. Waiting too long will cause the bike to pitch forward, causing the rear tire to get light which can lead to instability. Trailbraking is useful for downhill turns as a way to smoothly slow the bike as you tip into the curve.

    Trailbraking not only gives you more time and distance to get the bike slowed, it also helps direct the bike around the curve. That’s becasue the bike will turn more easily when the brakes are lightly applied (too much brake force can have the opposite effect). The chassis geometry shortens as the suspension compresses and the front tire contact patch gains more of the available traction.

    Also, consider that gravity is pushing the bike downhill and releasing the brakes fully will cause the bike to accelerate in the direction the front wheel is pointed. Waiting to release the brakes until the bike is pointing around the corner helps the bike get pointed toward the corner exit. Usually trailbraking is done with the front or both brakes, but in this situation, dragging the rear brake only is another way to scrub off speed without overstressing the front tire to prevent the front tire from washing out.

  3. Lean: Initiate lean using contersteering, so no real difference here. However, a quicker turn-in is often needed to avoid running wide. I often coach riders to “let the bike drop” into the curve when entering a downhill curve.
    Will your ability and experience with lean angles allow you to do this? Or will you ride off the road?
  4. Accelerate: Accelerate? You want me to accelerate, even when gravity is already pulling the bike down the hill? Yep. Even though gravity is going to cause your bike to speed up, you still need to stabilize the bike and manage traction. The trick is to slow down enough before the curve so you can crack the throttle ever so slightly and hold that throttle setting or accelerate as you round the bend. This will get some of the weight off the front tire so the bike will track easily around the corner.Note that the steeper the curve, the later you will brake and the less you will accelerate, but you still need to accelerate. If you enter the curve very slowly, then you may need to keep the clutch in and then ease it out as you tip into the curve. But, get the clutch out immediately after tipping in to avoid freewheeling down the hill, which causes most bikes to feel unstable and track unpredictably. It’s better to introduce some measure of drive force ASAP.

The line you choose around a downhill curve should have you entering wide to the outside. As you tip in, you let the bike drop inside to a delayed apex (farther around the curve), then let the bike exit toward the outside of the corner.  This straightens the radius for better traction and the need for less lean angle.

Remember to continue to look where you WANT to go, not where you are afraid to go!

Body position helps drop the bike into the turn while requiring less lean angle.

What about body position? When cornering at normal speeds, you want to drop your inside shoulder to engage with the bike. This helps you lean with confidence, but also allows the bike to remain a bit more upright.

 Practice!

Do not hesitate in acquiring these skills, because one day you too may find yourself facing a curve that you cannot handle. The best place to begin is in a parking lot where you will learn to lean your motorcycle with authority (parking lot drills are a feature of the RITZ Book). This means mastering countersteering and learning to turn quickly.  Once you feel pretty good about your progress, I suggest you attend a track day where you will explore the limits of cornering and braking in a safer environment. Many racetracks I’ve ridden have at least one downhill corner where you can practice all day long. Sign up for personal instruction if you want to fine-tune your cornering skills, including downhill curves.

What tips can you offer for downhill curves?


Please Donate to Keep the Articles Coming

If you liked this article and the many other articles on this site, please toss a buck or five into the hat. It’s greatly appreciated!

    • Click the PayPal “Pay Now” button.
    • Then indicate quantity in $2.00 increments. Example: put “2” in “QUANTITY” field to donate $4.00, “3” for a $6.00 donation, etc.

Why $2.00? Due to the PayPal fee structure, a $2.00 donation is significantly more beneficial compared to a $1.00 donation.

Thank You!


Check out these related posts:


How Can I help You? Online Coaching NOW AVAILABLE
Stay Informed: Subscribe NOW!
Trianing-Tours_LandingBe a Better Rider: Sign Up for Personal Training with Ken
Support Riding in the Zone: Buy a book
Support Riding in the Zone: Buy products from Twisted Throttle & Amazon
Twisted_Affiliate-Interphone-widget


How to Not Suck at Cornering

Become a patron to support the website. Thanks
This is a rider who sucks at cornering.

Hot on the heels of the The Power of the Quick Turn article is this followup post about what happens after you tip into a corner. Too many riders struggle with cornering, not necessarily because they are afraid to lean, but becasue they do not understand how to properly complete a turn.

Cornering Basics

By now you know that motorcycles must lean to change direction and that leaning is done by countersteering. Read about countersteering HERE.

Once the bike begins to lean, countersteering pressure is reduced and other dynamics take over that cause the motorcycle to arc around the curve, including front end rake and trail geometry, as well as something called camber thrust. Camber thrust is the term that describes how a tapered object (a motorcycle tire leaned over) orbits around its axis when rolling along a surface (the pavement).

In other words, the rounded profile of a motorcycle tire acts like a tapered styrofoam cup when it’s rolled on its side. Give it a push and it rolls in a circle.

Here is how author and  fellow USCRA racer Tony Foale describes camber thrust:

“As the inside edge of the tyre is forced to adopt a smaller radius than the outer edge, then for a given wheel rotational speed, the inner edge would prefer to travel at a smaller road speed, this happens if the wheel is allowed to turn about a vertical axis through the point of the cone. Just as a solid cone on a table if given a push.”

For our purposes, all you really need to understand is that your motorcycle is designed to track around a curve with minimal effort once the bike is in a lean. Front end geometry (caster effect, rake,  trail, etc.) all make this possible. If you want to read more, go to Tony Foale’s website and learn all about it.

If your bike is properly maintained and has relatively new tires with nearly the original profile intact, you should be able to initiate lean and then maintain that lean angle without introducing any significant handlebar inputs. Problems occur when the rider messes this process up. Most bikes will track predictably and with little effort as long as the rider doesn’t interfere with the process or introduce counterproductive inputs.

Variations in Machine Design

Some riders insist that they cannot round a corner without using significant handlebar pressure to keep their machine on the desired path. Instead of being able to relax and let the bike carve the path, they fight the bars all the way around the curve. It is possible that the machine is to blame, but these days this is rarely true.

While I have ridden bikes with really bad cornering dynamics, the vast majority of modern machines offer balanced, neutral handling that requires little-to-no mid-corner intervention. The only reason for handlebar adjustments are because of mid-corner changes in turn radius, camber or surface condition. A smooth constant radius curve, ridden well, requires almost no additional handlebar pressure.

It’s important to note that different types of bikes handle differently. Sportbikes are responsive to steering inputs, while cruisers tend to be slower steering, but more stable. Still, if the rider does all the right things, then the differences in machine does not make that much of a difference. The trick is to have the knowledge and skill to complete a corner proficiently.

Basically, it’s usually much more productive to evaluate the user instead of blaming the machine.

User Error

To repeat…once the necessary lean angle is established, most bikes are happy to track around a corner with little effort. So, why do some riders struggle with this part of the cornering process? The answer lies in a few areas.

  1. Tension at the handlebars. The front of the bike needs to be free to move up, down, and side -to-side in response to both large and small changes in the road surface. Being stiff on the handlebars interferes with this motion and causes the motorcycle to feel reluctant to turn. It also asks the tires to work harder to stay in contact with the surface. Another problem with stiff arms is that you are inhibiting the slight countersteering corrections that may need to occur to deal with changes in camber or other variations in corner surface. Loose arms allow fluid reactions.
  2. Poor body position. Think of your bike as your dance partner who wants you to lead. In the case of the cornering dance, a slight dip of the shoulder to the inside of the curve will encourage smoother cornering. In contrast, a rider who stays upright or leans outside is stepping on the bike’s toes, causing it resist fluid cornering.
  3. Not using the Throttle Correctly. For the motorcycle to track around the corner predictably and smoothly, the suspension must be stable and in the middle of its travel. Smooth, gradual acceleration throughout the curve produces the best results. Be sure to slow enough at the beginning of turns so that you can comfortably roll on the gas all the way to the exit. Unfortunately, a lot of riders fail to use steady throttle in corners. This is a problem, because changes in speed and drive force alter the arcing path the motorcycle takes. Abruptly chopping on or off the throttle upsets this stability and causes the bike to lift and fall in and out of the established angle of lean and introduces forces that result in a wobbly or weaving line around the corner. Note that acceleration typically makes the bike drift wide and deceleration can either cause the bike to drop into the corner more or cause it to stand up, depending on how abruptly the throttle is chopped and how the machine /tire combo responds to this input.
  4. Not Looking through the Turn. You tend to go where you look, so look where you want to go! By keeping your visual attention through the turn and toward the corner exit, your mind is able to better manage the corner. The other advantage is that the landscape slows down when you look ahead. This reduces anxiety and helps complete the concerning process. Looking ahead will not suddenly make you a cornering master, but without habitually looking ahead, you will never become one. Keep your eyes up.
Practicing cornering technique. Look where you want to go!

Cornering Technique

Okay, so let’s break it down.

  1. Look well ahead.
  2. Countersteer to initiate lean for the corner.
  3. Crack the throttle as soon as the bike is leaned. Use gentle drive at first and then progressively feed in more drive force. Roll on with more authority as lean angle is reduced near the corner exit. Steady drive creates steady cornering.
  4. Relax! If you established the correct angle of lean for the turn, the bike should require only slight adjustments in handlebar pressure. Corners that tighten will require you to press more on the inside bar to lean the bike more, but keep the throttle as steady as possible.
  5. Finish the turn. You’re not done yet. Keep looking toward the corner exit and roll on the throttle a bit more to let the bike drift toward the outside of the curve. This facilitates the “outside-inside-outside” cornering line, which I will discuss in a future post.
  6. Rinse and repeat for the next corner.

There is so much more to learn about the cornering process, but this is a good start. Implement these steps and you’re well on your way to becoming a cornering master.

What tips can you share that help you to corner with more confidence?

Become a patron to support the website. Thanks

The Power of the Quick Turn

Most motorcycle riders initiate lean in a somewhat lazy manner. In most cornering situations and at normal street speeds it is perfectly fine to gradually ease into a corner with light pressure on the handlebars.

But, when the pace picks up and the corners become less predictable, a sluggish, indecisive turn-in will cause you to run wide at corner exits. The ability to turn quickly gives you a survival tool for managing misjudged corners while also increasing an overall sense of control and confidence. Booya!

Cornering 101

Before we get into quick turning technique, you must understand the basics of how a motorcycle changes direction. Motorcycles must lean to turn. Leaning is done primarily by introducing countersteering pressure on the handlebar: press forward/down on the handlebar on the side in which you want to turn.

A delayed apex requires a delayed, quick turn-in.
A quicker turn allows early direction change and less risk of an on-throttle highside.

Not sure you understand countersteering? Read This Article NOW. FYI, you can quicken steering by pushing on the inside handlebar while also pulling on the opposite bar.

Practice the quick turn technique in a parking lot. And then apply it on your next ride.

How Quicker Turns Help

Turning the motorcycle within a shorter distance and period of time gets the bike to change direction early.

The quicker the bike is leaned, the earlier the direction change is completed, which affords you a greater margin of error to handle a misjudged turn radius or a slightly overspeed entry. Look at the diagram and you’ll also see that a quicker turn-in means you are not leaned over as long.

Another benefit of a quick turn is that it allows the bike to reach maximum necessary lean angle before or at the turn apex (the innermost part of the corner), which means that you can get on the gas sooner for both greater corner stability (bikes like being under drive when cornering) and greater exit speed (for you performance riders): Tip-in and then crack the throttle.

Quick Turns and Cornering Lines

The quick turn technique can be used for most, but not all corners. Some corners are laid out so that a gentle, sweeping entry is best. But, most other corners benefit from a quick turn, especially turns we call “exit” turns that require a slower entry and an early drive out of the corner.

A quick turn is also useful as a way to achieve a delayed apex cornering line. Delaying turn-in by a half-second or so keeps you outside a bit longer at the turn entry for a wider angle of view and points the motorcycle toward the turn exit, rather than toward the outside edge of the lane. Novice riders often dive for the inside of a corner as they react to anxiety about not being able to make the turn. This can easily result in an early apex and a blown exit. Ouch!

Instead, wait for it, wait for it…okay, turn, NOW.

Quick Turning and Traction

As you might imagine, giving the handlebar a good shove introduces an abrupt force to the front tire. That’s why you want to limit using the quick turning technique when traction is limited, such as on wet or contaminated pavement. A quick turn uses more traction at the beginning of the turn, but uses less at the apex and exit. Even though more traction is used when turning quickly, good tires in dry conditions have more than enough grip to handle the extra force.

To minimize the risk of tucking the front tire, you must get most of your braking done and start easing off the brakes before you introduce forceful handlebar inputs. However, it is beneficial to maintain some front brake force as you countersteer, which compresses the front suspension and loads the front tire for more rapid turning response. Ideally, you would release the brakes a split-moment after you press on the handlebars.

I’m talking about releasing the brakes almost immediately after initiating lean. If you want to maintain braking pressure longer (trailbraking), then you’re better off not turning in quickly. To manage traction while trailbraking your turn-in must be gradual, because you’re combining both turning forces and brake forces.

Timing & Intensity

A well-timed quick turn should result in a single handlebar input that establishes necessary lean angle and allows immediate throttle application (very gradual at first).

Turning in too hard and/or too early could result in the motorcycle hitting the inside of the curve. To prevent this, you will need to delay turn-in from where you would begin to turn for a slow turn-in. To fine-tune how rapidly the bike turns in, you can also reduce how hard you press on the handlebars. The harder you press, the more rapidly the bike will fall into the lean.

NOW is the Time!

I don’t care if you ride a GSXR on the racetrack or a Harley on the street, you must master the quick turn technique NOW. Being able to use immediate, authoritative handlebar pressure gives you a MUCH better chance of surviving a too fast corner entry. Learning the quick turning technique will allow you to get the bike turned early and efficiently and minimize the chance that you will panic and grab the brakes or run wide into the oncoming lane or off the pavement. Don’t delay! This just might happen on your very next ride!

Learning to turn quickly isn’t difficult, but it does require excellent countersteering skills and precise timing. Turning quicker also requires more forceful handlebar pressure and the trust that the tires will stick under the stress of more forceful handlebar inputs. Practice is what will convince your mind and muscles of the power of the quick turn. Do it!

  •  

Check out these related posts:


Stay Informed: Subscribe NOW!
Be a Better Rider: Sign Up for Personal Training with Ken
Support Riding in the Zone: Buy a book
Support Riding in the Zone: Buy products from Twisted Throttle & Amazon


Please Donate to Keep the Articles Coming

If you liked this article and the many other articles on this site, please toss a buck or five into the hat. It’s greatly appreciated!

Become a patron to support the website. Thanks

Get your Shift Together

Shifting is a significant part of the riding experience. It is satisfying to smoothly click through the gears with a barely detectable interruption in forward drive as your hands and foot perform seamlessly with perfect timing and minimal effort.

Shifting gears is a skill that, once learned, becomes part of a rider’s muscle memory and is then pretty much forgotten about.

But, there is much more to shifting than simply selecting the next higher or lower gear. A truly proficient rider understands the benefits of perfectly timed shifts and knows how to use the clutch as a tool for refining control.

New riders often struggle to coordinate the clutch and shift lever, but most get past the difficulties fairly quickly. MSF Basic RideCourse students often fail because of more critical issues, such as braking or cornering problems.

Still, poor shifting skill can be a problem. Lousy coordination and timing leads to abrupt gear transitions and lurching that can compromise control and traction. Not only does this cause control problems, but it also really pisses off passengers. To become proficient, you must pay attention to refining shifting skill.Quick

Upshifting

Quick shifting allows the revs to drop only slightly between the time you squeeze the clutch, shift and then release the clutch. These rapid upshifts provide seamless power delivery.

Precise timing of the clutch and throttle allows smooth clutchless upshifts and throttle-blipping downshifts.To upshift quickly, roll off the throttle only slightly and squeeze the lever only enough to disengage the clutch while shifting the transmission into the higher gear with a quick flick. Preload the shift lever for speedy lever action. As soon as the transmission is in the higher gear, immediately release the clutch and roll on the throttle. Done correctly, the quick shift technique should take about one second and forward drive should remain steady.

Clutchless Upshifts

For the most rapid upshifts (not counting electronic shifters) you can eliminate the clutch from the upshifting process altogether. Yes, you can upshift without using the clutch! A well-timed, rapid throttle closing, in combination with a ready left foot can upshift most modern transmissions with buttery smoothness that maintains forward drive with virtually no chassis pitch.

Clutchless upshifting is done by closing the throttle as you instantaneously shift to the next higher gear and then immediately open the throttle. Each step is done simultaneously, with the entire technique taking less than a second. Done correctly, the machine will experience no added wear and tear. Try it.

Shifting Down

This is what can happen if you miss a shift and then downshift instead of upshift.
This is what can happen if you release the clutch too quickly after a downshift.

Good downshifting is arguably more important than upshifting for maintaining control, because poor timing and abrupt clutch release can cause excessive engine braking that may lead to a dangerous rear tire skid. Read this post warning what can happen if you select a gear that is too low.

The trick is to eeeeaaaaase out the clutch after you downshift to allow the engine to “catch up” to the road speed.

Just be sure to time your downshifts. Clicking into the next lowest gear too early, before the bike has slowed can result in a skid. To prevent this, reduce speed before downshifting.

Manufacturers understand that miscued downshifts are a hazard and install slipper clutches on many high performance motorcycles to reduce the danger of locking the rear wheel during a high rpm downshift.

Blipping the Throttle

Those of us who don’t have slipper clutches just need to learn to ease the clutch out gradually…or blip the throttle. Throttle blipping helps you to match the engine RPM with the road speed during the downshift.

I already wrote a whole blog post on throttle blipping. Please read it so I don’t have to repeat myself.

What tricks or techniques do you use to become a proficient shifter?


MRW-cover
Buy Ken’s new book, “Motorcycling the Right Way”.

Read about strategies and techniques that increase safety, confidence and enjoyment.

Click Here for details.

Please Donate to Keep the Articles Coming

If you liked this article and the many other articles on this site, please toss a buck or five into the hat. It’s greatly appreciated!

    • Click the PayPal “Pay Now” button.
    • Then indicate quantity in $2.00 increments. Example: put “2” in “QUANTITY” field to donate $4.00, “3” for a $6.00 donation, etc.

Why $2.00? Due to the PayPal fee structure, a $2.00 donation is significantly more beneficial compared to a $1.00 donation.

Thank You!


Check out these related posts:


Stay Informed: Subscribe NOW!
Be a Better Rider: Sign Up for Personal Training with Ken
Support Riding in the Zone: Buy a book
Support Riding in the Zone: Buy recommended products from Twisted Throttle & Amazon

Guest Writer: If in doubt, UPshift

Chuck Boucher ripping around turn 9 at NHMS.

Chuck Boucher is the latest RITZ guest blog contributor. Chuck is an expert level roadracer with the Loudon Roadracing Series and is an instructor for Tony’s Track Days.
You can read Chuck’s biography here.

Chuck recently had a racing mishap that landed him in the hospital with a fractured pelvis and a few other less serious, yet painful injuries. Chuck knows exactly what he did wrong and wanted to share his cautionary tale with you to hopefully prevent you from experiencing the same agony.  Let’s see what Chuck has to say.


If in doubt, UPshift!

by Chuck Boucher

As I sit here, recovering from a recent racing incident, I reflect on the reason I’m in need of crutches and pain killers. My little mishap occurred on the first lap of the first practice session during a Loudon Road Race Series (LRRS) event at New Hampshire Motor Speedway.

The lap was typical of any other I had run during the past six years as an LRRS roadracer. Unfortunately, this time around, I found a false neutral and the absence of any engine braking.

This is what can happen if you miss a shift and then downshift instead of upshift.

A False What?

In case you don’t know, a false neutral is when the motorcycle fails to completely engage a gear. This results in zero engine braking and an unexpected sense of coasting that actually feels more like acceleration, just when you want to be slowing down. Yikes!

Downshifting at this time is usually a bad idea, because you risk momentarily skidding the rear tire if the gear is too low for the bike’s speed when the gears finally do engage. Instead, the best way to handle this situation is to shift UP into the next higher gear so you don’t end up in too low a gear for the speed you are traveling. A too low gear can easily cause the rear tire to lose traction. Do this while leaned and you have a bad result.

Mistakes Made, Lessons Learned.

My Downfall

Unfortunately, with the turn one apex fast approaching, my mind said click the shifter up (my race bike is GP shift, which means clicking the lever upward causes a downshift). I knew my mistake the moment I let the clutch lever out. The rear wheel skipped a few times then locked, sliding the rear end of the bike sideways. Then the tires regained grip and catapulted me over the high-side.

Understand that there are times on the street or track when you have fractions of a second to make decisions that could cost you dearly. These decisions can go well, or not, based on previous experience. My false neutral took me completely by surprise and I acted wrong. You can be sure it won’t happen again.

If you’ve never experienced a missed downshift and a false neutral, count yourself lucky. However, if it does happen to you, take my advise and always shift UP! You may not have the engine braking you desire and you’ll be in too high of a gear, but at least you won’t likely high side.

More Good Advise

Stuff can happen to anyone, at any time. Whether it is a car at an intersection, a missed downshift or a too fast corner entry. How you react and what you do in that brief moment can be the difference between a close call and taking a ride in an ambulance strapped to a back board. My message to you is to always keep your skills sharp to avoid a worst-case scenario.

Consider taking the Motorcycle Safety Foundation Experienced Rider Course (BRC 2) and participating in a track day to acquire advanced braking and cornering skills.


Thanks for sharing what you learned, Chuck. Heal up fast!

Editor: Someone asked about whether a slipper clutch would have saved the day. I do believe a slipper would have re-engaged the power gradually enough to perhaps prevent the severe loss of grip. While a slipper clutch can do wonders, the actual clutch design and how sensitive it’s adjusted will affect whether or not the slipper re-engages the power slowly enough. This will still cause the rear to slide, just not nearly as much.

Do you have a similar experience to share? Make a comment below.


Please Donate to Keep the Articles Coming

If you liked this article and the many other articles on this site, please toss a buck or five into the hat. It’s greatly appreciated!

    • Click the PayPal “Pay Now” button.
    • Then indicate quantity in $2.00 increments. Example: put “2” in “QUANTITY” field to donate $4.00, “3” for a $6.00 donation, etc.

Why $2.00? Due to the PayPal fee structure, a $2.00 donation is significantly more beneficial compared to a $1.00 donation.

Thank You!


Check out these related posts:


Stay Informed: Subscribe NOW!
Be a Better Rider: Sign Up for Personal Training with Ken
Support Riding in the Zone: Buy a book
Support Riding in the Zone: Buy recommended products from Twisted Throttle & Amazon

How to Not Suck at Braking

Become a patron to support the website. Thanks
If this is what happens when you brake hard, you need practice.

This is the first installment of the “How Not to Suck” Series. I wanted to start the series with braking, because people seem to really suck at this important skill.

The Scenario:

You are riding along “minding your own business” when a car suddenly pulls out in front of you. You grab a handful of front brake and stomp on the rear brake. What results is a fishtailing motorcycle followed by a cacophony of squealing rubber and grinding metal and plastic on asphalt.

The typical response from the rider after such a mishap is:

  1. “There was nothing I could do! He came out of no where”
  2. “I slammed on the brakes and laid ‘er down”
Ruh, Roh. This rider crashed because he did not use good strategies for predicting hazards and then couldn't brake properly when he needed to.
This rider crashed because he did not predict that a car might turn left in front of him and then couldn’t brake properly when he needed to.

Where You Went Wrong

You applied too much brake pressure for the conditions. This caused you to skid out of control. The best riders know how much brake force they can apply without skidding. They do this by recognizing the quality of the road surface and determine the quantity of available traction. They still stop quickly, but they do so without skidding and losing control.

Prevention is Key

The trick to minimizing the likelihood of a crash caused by poor braking skills is to not put yourself in an emergency position in the first place. I know crap happens and some things just cannot be avoided. But, guess what? MOST close calls and crashes can be avoided. How do you do this, you ask?

First, you must have really strong strategies for anticipating hazards before they become a close call or crash. This takes developing a sixth sense about your surroundings and having excellent situational awareness.

Next is to recognize when traction is limited and know how much brake pressure you can introduce without skidding. To do this, you must develop a keen traction sense that tells you how much brake (or turning) force is available. This comes from experience and practice (Like riding in dirt, for instance).

Now is the best time to mention ABS. None of my current bikes have ABS, but I’m a big fan. Why not have a backup system in place to kick in if you don’t evaluate the conditions perfectly? Seems like a good idea to me.

Even with great strategies and skills things still happen even to the best riders. So what if you do panic and  overbrake?

OK, I Screwed Up, Now What?

The Motorcycle Safety Foundation (MSF) has taught students for years to “keep a rear skid locked” to prevent a possible high side crash.This can occur if you release the rear brake while the rear tire is out of line with the front tire. When the rear tire regains grip, it can snap immediately in line with the front tire. If this happens abruptly, you could get launched into the weeds over the high side of the bike. Ouch!

I just learned that the newest MSF curriculum mentions being able to release the rear brake “if the rear wheel is nearly in line with the front”. I’m glad they include this in the Student Workbook because it is more practical advice, but requires good judgment and timing (or luck).

Squeeze the front brake progressively, but fully while at the same time easing off the rear brake to prevent a rear tire skid.

How to Stop Correctly

For normal stops, use both brakes with the correct amount of pressure for your immediate needs. Oftentimes, people rely solely on engine braking for slowing. This is fine for many situations, but engine braking is not a great tool for reducing speed when precision matters, like when managing speed on a sharp, downhill hairpin turn where trailbraking is the technique to use.

And to rely on engine braking exclusively will lead to weak braking skills that often contribute to unnecessary braking-related mishaps when emergency braking is required.

Emergency Stops

When you are faced with a hazard and must brake hard, you are at the greatest risk of doing it wrong. Not only will you be using maximum brake force and all available traction (which can be difficult to modulate), but your muscles will be supercharged by panic, which can easily lead to overbraking.

The key to emergency braking while staying in control is to manage available traction and to anticipate the change in available traction between front and rear tires as load shifts forward when brake force is introduced…Squeeeeeze the front brake while Easing off the rear brake. This takes practice.

Practice, dammit! You'll thank me someday for insisting that you do.
Practice, dammit! You’ll thank me someday for insisting that you do.

How to Stop Sucking at Stopping

You will be remiss if you do not practice maximum braking techniques. Too many riders I’ve worked with have never braked hard enough to experience threshold braking. When asked to brake as hard as they can most recoil with anxiety, afraid to apply the brakes that hard (even if they have the safety of ABS).

But, what do you think you must do to avoid a deer or a Buick’s bumper? Training yourself to use your bike’s brakes fully BEFORE you need to will increase your chances of surviving.

Practice maximum emergency braking on your next ride…before you need to use it in the heat of battle. Practice in a clean parking lot (with ATGATT, please).

Brake practice is an important and responsible thing to do to make sure you’re ready for the next time you need it (which could be today).  I always start the day during Personal Instruction with parking lot maneuvers that include both normal and threshold emergency braking practice. I have several braking drills described in the Riding in the Zone Book and demonstrated in the DVD.

What are your experiences with braking? Any scary moments you’d like to share? Comment below.


Thank You!

Check out these related posts:


Stay Informed: Subscribe NOW!
Be a Better Rider: Sign Up for Personal Training with Ken
Support Riding in the Zone: Buy a book
Support Riding in the Zone: Buy recommended products from Twisted Throttle
Become a patron to support the website. Thanks

10 Reasons Why Street Riders Should Ride in the Dirt

Become a patron to support the website. Thanks
A fun way to become a better rider.

You’ve probably heard people say that dirt riding can help improve a road rider’s skill, but can it really make you a safer and more competent street rider? The answer is yes.

1. Improved Traction Sense

One thing you'll learn is traction management.
One thing you’ll learn is traction management.

Managing traction is one of the highest priorities for any motorcycle rider, whether on street or off-road. Dirt riding provides ample opportunities to learn about traction management as the tires hunt for grip on unpredictable surfaces.

Having your motorcycle move around beneath you is disconcerting for street riders who are new to this sensation, but it helps you learn about traction management, including which inputs help and which hurt traction.

And this experience translates to street riding. Imagine yourself suddenly feeling your tires sliding as you roll over a wet surface or a bit of sand in a corner. Imagine your bike feeling like it is falling out from underneath you. Most street riders will panic, flinch and tense on the handlebars. This often makes matters worse.

With dirt riding experience, you are more likely to recover from a relatively minor slip instead of panicking and gripping the bars in fear. Previous experience can allow you to stay composed and relaxed so your inputs remain fluid, allowing the tires a chance to regain grip.

2. Clutch and Throttle Control

You're going to get dirty.
You’re going to get dirty.

Throttle, clutch and brake control become very important when your tires are skipping over tree roots and wet rocks or through deep sand and gravel. But, you may not realize just how important fine clutch and throttle control affects a street rider’s confidence.

By perfectly timing clutch release and throttle application, you manage lean angle, traction and direction control. This is especially noticeable when downshifting as you enter a slow turn. If you downshift as you begin to tip into a turn, you must feed the clutch out smoothly to avoid abrupt driveline lash that can disrupt traction and direction control.

3. Slow Speed Skills

Off-road riding typically includes a lot of slow speed maneuvering, which means that your sense of balance at slow speeds will increase greatly. Maneuvering slowly over rough or loose terrain requires steady, smooth power delivery. This often means slipping the clutch to control the power and prevent instability and unwanted direction changes. Yet another reason why masterful use of the clutch is so important for precise control of forward drive, both on and off road.

You learn slow speed maneuvers and balance.

4. Balance and Body Position

Because a lot of off-road riding is done at slow speeds over uneven surfaces, maintaining balance is a constant issue. The technique for maneuvering any motorcycle at slow speeds is to counterweight so that the motorcycle leans independently of your upper body. Counterweighting keeps the center of gravity over the tire contact area to maintain grip when traction is low.

Riding a lightweight dirt bike means that much more of the steering is done with the footpegs and body. By positioning your body forward, rearward and side to side, you influence direction control.

You’ll need to learn to ride while standing on the footpegs to allow your legs to act as shock absorbers. This can be tiring at first, until you learn the proper “neutral” position that keeps your bodyweight over the balance point of the bike, usually over the front of the fuel tank, knees slightly bent and elbows out.

On the street, you use many of these techniques as you cross speed bumps, railroad tracks or when ascending or descending steep hills at slow speeds.

5. Throttle and Brake Steering

Another important thing to learn when dirt riding is how to use the throttle and rear brake to change direction by breaking the rear tire loose under acceleration or when braking. It’s scary at first, but once you learn these techniques, your confidence will grow quickly.

On the street, you will have a better sense of how the throttle can help “finish” a turn or how deceleration and brake force can alter your cornering line. Motorcycle dynamics are similar enough between lightweight, off-road bikes and heavy street bikes for this skill to transfer.

6. Improved Brake Control

The front brake offers the most braking power whether riding on or off road, however the rear brake becomes more important when riding in the dirt. When traction is low, the amount of brake force is minimized and load transfer that pitches the bike forward is reduced, which means that the rear of the bike remains more planted for more effective rear brake power.

Another reason to favor the rear brake is to avoid a front tire skid, which must be avoided if you want to remain on two wheels. Loose surfaces are unpredictable, so it’s best to apply more rear brake pressure and modulate the front brake to avoid a skid.

On the street, you learn that there are times when you favor the rear brake a bit more. Riding with a passenger and descending a gravel road are two instances that come to mind.

7. Improved Visual Skills

Off-road riding requires keen vision. One of the keys to a successful off-road outing is the ability to identify the best line through a rocky or sandy trail or fire road so that you find the best available traction. A common problem that new riders have is their inability to keep their eyes well ahead, scanning for the ideal line.

This translates directly to street riding. Nervous riders look down, which leads to higher perceived speeds, and more panic as hazards seem to appear “out of nowhere”. Eyes Up!

Fitness is a must.
Fitness is a must.

8. Better Fitness

Riding on the street can be tiring and can make you sore. But, that doesn’t mean you’re getting into shape. If you want to increase muscle tone and strength, get yourself off-road. The act of balancing a motorcycle over rough terrain is one of the best workouts you’ll experience. Bring a hydration system…you’ll need it.

9. Learn to Fall Down

You won’t likely become a texting teenager’s hood ornament when riding off-road, but there is still significant risk.

Even though crashes are usually less serious, the frequency of tip overs tends to be higher when off-road riding. Typical injuries usually consist of bumps, bruises and perhaps a torn ligament or broken bone if you’re unlucky. Because of these challenges, you should not ride alone without the help of someone to come to the rescue if necessary.

Learning to fall is not usually something I emphasize. Instead, I prefer to teach people how NOT to fall. But, there is something beneficial about being familiar with hitting the deck that can potentially help you if you were to crash on the street, such as trying to relax (yeah, right) or keeping arms tucked in if you tumble. Think of sports players who learn to fall without injury; that’s the theory. However, if you need professional information , consult with an attorney after a truck accident

 10. Gain a New Respect for Riding Gear

Whether riding on the street or off-road, it’s important to reduce the likelihood of injury and this means wearing protection. No sane person I know would hit the trails without full protection because prevention is better than calling Augusts car accident lawyers to help compensate your injury and treatment.  I’ve seen too many riders fall down and get a rock in the ribs or a stick in the chest to not wear full gear. Not to mention bruised ankles and nasty rash. And that is falling at under 20 mph. You know what happens if you were to hit pavement at 40 mph with inadequate clothing…not pretty. ATGATT, people.

There's nothing like being in nature while learning to be a better rider at the same time.
There’s nothing like being in nature while learning to be a better rider at the same time.

Get Dirty, Skillfully

With good skills, falling can be minimized. But for many, tipovers are a reality when riding off-road, which means you must manage the risks. Don’t take your safety for granted. Learn to ride well! Prepare your mind with an attitude toward reducing risk and protect your body with proper riding gear.

There is a lot more to learn about off road riding. Understand that just because you can ride a street bike does not mean that you can swing a leg over a dual-purpose bike and safely hit the trails. But, it is well worth the effort.

What are your experiences with how off-road riding helps your street riding?


Please Donate to Keep the Articles Coming

If you liked this article and the many other articles on this site, please toss a buck or five into the hat. It’s greatly appreciated!

    • Click the PayPal “Pay Now” button.
    • Then indicate quantity in $2.00 increments. Example: put “2” in “QUANTITY” field to donate $4.00, “3” for a $6.00 donation, etc.

Why $2.00? Due to the PayPal fee structure, a $2.00 donation is significantly more beneficial compared to a $1.00 donation.

Thank You!


Check out these related posts:


Stay Informed: Subscribe NOW!
Be a Better Rider: Sign Up for Personal Training with Ken
Support Riding in the Zone: Buy a book
Support Riding in the Zone: Buy recommended products from Twisted Throttle & Amazon


Become a patron to support the website. Thanks

Ground Clearance & Grip

Cornering on a big cruiser requires a respect for clearance limits.

I just received another letter from a Motorcycle Consumer News reader, this time about a situation he encountered when riding on a twisty back road in Cali on his Street Glide. Here’s his story, followed by my response.


“Ken, your recent article (in Motorcycle Consumer News) on cornering traction was excellent.  I just returned to Las Vegas after traveling up the coastal hwy to Oregon then back down to Las Vegas. While on that trip I had an incident involving cornering that left me very puzzled.

While heading to the coast from the 101 on hwy 128 north of San Francisco I was enjoying the curves of the coastal range. I ride a Harley Street Glide and ride fairly aggressively but not what I consider unsafe. As I was entering one turn (posted at 20mph) I leaned the bike into the turn and suddenly heard metal screeching on asphalt and almost simultaneously was aware that I had lost traction and was heading for the outside of the corner and a steep drop off.

Automatically I jammed my left foot down to the asphalt, but with my speed around 30-40mph sprained my ankle pretty badly. Much to my surprise I regained traction on the outside of the corner and was able to hold it there through the last 1/2 of the corner. My conundrum is that I’m not sure what happened! I felt comfortable with the speed I had entered the corner and I had entered from wide to just inside the center lane when the incident occurred. Normally, if I’m leaning the bike too much I’ll be aware of the foot board dragging. In this case there was no warning, just metal screeching and loss of traction simultaneously. Also, the road was great, with fairly new asphalt and no noticeable asphalt compaction or debris. Your thoughts would be greatly appreciated as this incident has made me extremely apprehensive whenever entering a corner with thoughts of this incident constantly in the back of my mind.”


Fairly aggressive cornering on a cruiser can be done, if you respect the bike's limits.
Fairly aggressive cornering on a cruiser can be done, if you respect the bike’s limits.

My Response

Without having seen or experienced the actual incident, I can only speculate on the cause based on knowledge of typical scenarios like yours. The fact is that ground clearance just doesn’t go from sufficient to nonexistent without a reason. It could be that you were leaning far enough that you were about to touch your floorboard when the mysterious factor occurred and your bike was suddenly grinding hard parts. This levered your tires off the ground and reduced traction.

Most times, when a bike suddenly goes from adequate ground clearance to zero ground clearance, it is a sign of traction loss caused by undetected surface contamination or debris, or abrupt throttle, brake or handlebar inputs, all of which are rider error. Sudden traction loss while the bike is leaned will cause the bike to drop quickly. This usually results in the rider tensing on the handlebars and chopping off the throttle, which exacerbates the problem.

If neither surface debris nor rider error existed, then you have to look at the possibility of a sudden and undetected change in surface camber that reduces ground clearance, or perhaps a depression in the road that would cause the suspension to compress.

Predicting that conditions can change quickly is a key survival strategy and applies to seemingly perfect pavement. New pavement can actually make ground clearance-robbing features such as undulations and dips difficult to see.

Knowing that your bike is a low slung machine means that you must be particularly sensitive and aware of these clearance hazards so that they don’t cause problems. One way to help manage limited ground clearance is to slow down.

Hanging off the inside of the bike helps increase clearance.

You can also learn to use body positioning to help increase ground clearance. By simply dropping your head and shoulder to the inside, you shift the combined center of gravity of bike and rider so that your machine doesn’t have to lean quite as much. Practice this in a parking lot and notice that your floorboards don’t drag as readily. My book has drills that can help.

If you are riding briskly on your Street Glide and continue to have clearance problems, perhaps you are exceeding the limits of the bike and need to consider trading in for a model that is more suited to your cornering exuberance.

Now that we’ve discussed the possible cause, let’s look at your reaction. The sudden loss of ground clearance, for whatever reason, triggered a panic response that not only had no significant effect on allowing your big Harley to recover traction, but also caused you to injure your ankle. This panic response is part human nature and is how most riders react when faced with a potentially life threatening situation.

Off-road riding helps train for minor traction loss events.

To minimize these survival instincts from causing more harm, you would need to re-train your mind and body to feel okay with minor traction loss. This is not easy to do when you ride a road-going cruiser, but is easily achieved with some off-road riding experience. Off-road riders routinely experience wide variations in traction and become accustomed to traction loss so that they do not overreact and make matters worse.

But, please understand that training yourself to react correctly is not a substitute for being aware of hazards and preventing them from causing an incident from happening in the first place.

The results of overriding a bike's capabilities can be disastrous.
The results of overriding a bike’s capabilities can be disastrous.

I hope this helps.
Ken


Do you have anything to add? Have you encountered a similar situation? How did it turn out? Please comment below.

submit to reddit


Please Donate to Keep the Articles Coming

If you liked this article and the many other articles on this site, please toss a buck or five into the hat. It’s greatly appreciated!

    • Click the PayPal “Pay Now” button.
    • Then indicate quantity in $2.00 increments. Example: put “2” in “QUANTITY” field to donate $4.00, “3” for a $6.00 donation, etc.

Why $2.00? Due to the PayPal fee structure, a $2.00 donation is significantly more beneficial compared to a $1.00 donation.

Thank You!


Check out these related posts:


Stay Informed: Subscribe NOW!
Be a Better Rider: Sign Up for Personal Training with Ken
Support Riding in the Zone: Buy a book
Support Riding in the Zone: Buy recommended products from Twisted Throttle & Amazon

The “No Countersteering” Myth

Become a patron to support the website. Thanks

A MCN reader recently wrote telling about his enthusiasm for Reg Pridmore’s “body steering” method of initiating lean for cornering. What follows is my response.


“I have 44 years experience riding and currently ride six days a week commuting and sport riding. Three years ago I read Smooth Riding the Pridmore Way by Reg Pridmore. This book completely changed my knowledge of corning a bike. For years I subscribed to countersteering as noted in this article. The Pridmore way is to body steer the bike and keep your upper body relaxed and smoothly controlling throttle, clutch, and brake. It took me a few months to re-learn corning, but now I am much more proficient and safe on the bike. His book goes into the details why this is better and how to master these skills.  It is my opinion that there is an alternative to countersteering and I feel it is much safer to use the geometry of the bike versus fighting the physics of corning with the handlebars. “


Countersteering is not negotiable.My response:

This discussion has been going on for over a decade and has even sparked an Internet rivalry between Pridmore and Keith Code, who advocates and emphasizes countersteering as part of the California Superbike School as the best way to initiate lean. Having ridden the CSS No BS bike (which has handlebars mounted rigidly to the frame with a working throttle), I can confidently tell you that body “steering” alone will not allow a rider to corner in any meaningful or effective way on a 400 to 800 pound machine. See the video of Code riding the No BS bike to see how little body position has on direction control.

Yes, body “english” can enhance many aspects of cornering process. I am a very big proponent of body positioning for both street and track riders to aid quicker turning, refine cornering lines, increase ground clearance, preserve traction, and allow the rider to interact more with the bike and the road. But, body positioning alone cannot cause the average street bike to initiate a corner efficiently or quickly enough. That is done by countersteering.

Countersteering uses the geometry of the bike to essentially unbalance the machine, causing it to drop into a lean. There are many other aspects of the process, but that’s all most riders need to know. You mention the other important aspect of masterful cornering, which is relaxing the arms as much as possible once the lean is initiated and using smooth control inputs to maintain control.

I have no doubt that your revelation and enthusiasm for Reg Pridmore’s fine book and teachings are genuine, but I can guarantee that you are using countersteering (in combination with body positioning) to lean your bike into a corner. What is happening is you have replaced some of the “handlebar only” countersteering inputs you have used routinely for many years with a body position technique that is “pre-loading” the bike for the corner.

This shift in the center of gravity causes the bike to fall into the turn easier, making it feel as if you are not putting any pressure on the handlebars. This is a technique taught by Lee Parks in his Total Control curriculum and which I teach to track day students. Next time you go for a ride, pay very close attention to the amount of pressure you are putting on the handlebars as you initiate lean. If you concentrate enough, you will surely notice that you are introducing handlebar pressure. Because there really is no alternative to countersteering, only reducing the amount of pressure needed.

Additionally, the act of moving your body in the direction of the turn causes handlebar inputs. You would have to consciously resist pulling the outside bar or pressing on the inside bar to eliminate any countersteering force, which would be very difficult to do.

I’m glad you feel more proficient. Keep doing what you’re doing, but you’ll be better off if you know what is really happening. Good luck.
Ken Condon

I received a reply from the reader. He is sticking with his belief that he is not countersteering.

Please share your thoughts below.

Listen to the Countersteering PODCAST

See the video segment about countersteering from the RITZ DVD:


Become a patron to support the website. Thanks

#1 Reason Why Motorcycles Crash in Corners

Josh, looking good on his Gixxer1000 at Loudon. owenstrackdayphotos.com

Motorcycles crash, which may be mentioned on sites like Beach Injury Lawyers, for many different reasons, including in no particular order:

  1. They are not very stable when ridden slow, so tip overs are common
  2. They are hard to see in traffic, so collisions with cars is far too frequent
  3. They only have two small tire contact patches, so seemingly small things can cause traction loss
  4. They require fairly precise rider decisions and inputs when traction is near its limit
  5. Most single-vehicle crashes are the result of a too-fast corner entry speed.

If the crash was caused by a negligent or reckless driver, you may hire a personal injury lawyer to help you seek compensation. A personal injury attorney will advocate for your rights and prepare the necessary legal documents for your claim. Those who were rendered disabled due to accident injuries may also be eligible for disability benefits. Find a social security disability lawyer that can help you apply for these benefits.

Case Study

My friend and track day student, Joshua had a problem with numbers 3, 4 and especially 5.

Josh had a great day at the awesome New York Safety Track until he didn’t. Check out his VIDEOS BELOW to see how his day ended. He walked away unscathed, thanks in no small part to his quality riding gear. ATGATT, baby. The same can’t be said for his beautiful GSXR1000. It slid off the track without much fanfare until it hit some protruding piece of Earth and flipped a few times. Oh well. It’s just a machine, remember.

Below, you can read Josh’s account of the situation and what he learned.

Sky, Ground, Sky, Ground. :(
Sky, Ground, Sky, Ground. 🙁

The Fundamental Reason Why He Crashed

Riding a motorcycle is more of a mental exercise than physical. Yes, it takes physical coordination and a certain amount of strength to operate a motorcycle. But, riding a motorcycle well is much more than simply operating the machine. It also includes using excellent judgement and having deep knowledge about how to manage all sorts of situations.

Mark Brown from MotoMark1 uses the term “driving” to emphasize that you must not passively “ride” a motorcycle, but rather “drive” it with purposefulness, authority and competence.

Josh was doing great all day and, as was the case with another rider at the track that day, got over confident and pushed just a little bit harder than he should have. This mental lapse is essentially THE reason Josh crashed. A too-fast corner entry is the #1 reason for single-vehicle motorcycle crashes.

Josh and I had worked together during a Personal Instruction Day last week at the NH track on strengthening his “skill foundation” to allow him to safely “drive” his bike at the pace he is eager to achieve.

We made good progress, but the eagerness and drive Josh has for rapid improvement seems to cause him to push harder than he should. This is common with highly motivated people. I can name two other very good riders who are motivated to ride at a top level, but have not yet learned and applied all the information necessary to be able to ride at that level…yet.

All motorcyclists who are eagerly developing their physical skills must also develop their ability to monitor their attitude, self-evaluate their real progress, and use judgement that is in line with their true capabilities.

It coulda been worse.

The Physical Solution

Now that we understand that the crash could have been avoided with a bit of “judgment double-check”, let’s talk about what went wrong and the mechanics of how the crash could have been avoided. Remember: A too-fast corner entry is the #1 reason for single-vehicle motorcycle crashes.

Because Josh had decided to “let it rip” down the straight (probably faster than he had done before), he entered the turn 1 braking zone at a higher speed than he had previously. That’s fine, BUT he did not adjust his braking behavior to match the increased approach speed. With an increase in speed comes the need to:

  1. brake earlier using the same or similar amount of brake force as when approaching at a slower speed, or
  2. use the same brake marker as when approaching the turn at the slower speed, but brake harder, or
  3. a combination of #1 and #2

Either method will work to achieve the goal of slowing to a comfortable entry speed. Braking earlier is generally the best solution where you have more time and space to modulate your brake force to slow without anxiety.


Josh did not alter his “begin braking” mark, so he found himself flying past his usual brake marker and therefore reached his turn-in point at a higher speed than he was familiar (or comfortable). You can clearly see in the forward-facing camera angle that he was missing the apex and then used greater handlebar pressure (countersteering) as he attempted to stay on the track, which overtaxed the front tire and it tucked.

An Expert’s Solution

Could the crash have been avoided in the hands of a seasoned expert? With the bike at that speed and in that position in the corner, I would say maybe, but probably not. HOWEVER,  the expert would have identified that he or she was traveling faster than before and because of this, would have adjusted the “begin braking” location to be earlier and increased the amount of brake force as needed to slow down sufficiently. Expert-level track day riders are comfortable braking very hard, because they have practiced this skill.

He or she would have also used trailbraking to further scrub off speed if necessary as the bike was eased into the corner. However, I want to emphasize that trailbraking is not really “meant” to be a technique used to salvage a blown corner. Done correctly, trailbraking is a planned method for stabilizing the motorcycle when entering corners. That said, if you have trained yourself to trailbrake as it is meant to be used, then it is at your disposal when you need a longer duration of braking force if you inadvertently enter a turn too fast. Read all about trailbraking HERE.

The Lesson

Remember that if you change one thing (faster straightaway speed), you must adjust other things (brake marker and/or brake pressure) to reach the entry speed you are able to handle. Please learn from Josh’s unfortunate mistake and keep your enthusiasm and eagerness in check and resist introducing significantly faster speeds until you understand the concept of cause and effect as it pertains to adjusting entry speed.

Crash Videos

Front view:

Rider Face View:

A message from Josh himself about what he learned:

Staying within limits is a lesson I strive to drive home to my students every weekend as an MSF RiderCoach. The motorcycle, the rider, and the time & space limits around them. My hope is that every rider I come in contact with has takeaway points and thinks about actions and decisions made while riding.

My overall goal as a rider is to learn, fine-tune, and practice as many new and advanced skills as I can. I feel the biggest joy of riding is that there is always something new to work on or perfect. Each year I try and take on something new I can use as a rider and coach. A few years ago I had an opportunity to take a course on dirt bike techniques and later on I was able to become a certified MSF Dirt bike Coach. Last year my new goal was to learn to become proficient in riding on the racetrack at speed.

I went out and bought every book and DVD I could find on the subject, and also a shiny GSXR 1000 that I thought at the time would be a perfect bike to go out and lay down some hot laps. Books and video’s are great tools, however to really be able to learn and apply the skills takes tons of coaching, practice and fine tuning.

My biggest obstacle is always trying to rush and accelerate my learning. I want so bad to be the best and smoothest that I do not take the advice I give to my students. I try and go from step A all the way to step Z in one day. Learning should be in stages and is a building block process. Learn the gross skill 1st and stay within your limits. Ken gave me the best advice of all when he said “Slow down and get smooth 1st”.

I was doing pretty good and learning the New Track. Taking my time and finding reference points and determining where I should look, brake, tip, and accelerate. It was near the end of the day with only 2 sessions left. I was a little tired and sore from working hard on my body position and riding. I started the 2nd to last session and started letting my mind drift away a little bit. I was thinking about the ride home and my fatigue level and on the video footage I had been recording all day; what I would be showing my friends and family and how cool I would look.

I decided to try one more lap and call it a day. I said to myself. “You can push a little harder and get one awesome lap to end the day.” I got to the start of the straight. I did a head check to see if I was holding up any riders. The coast was clear and I gave it all I got. I pinned the gas and tucked my head. Glancing at the speedometer I saw the numbers climbing 130,140,150. I looked up and saw the end of the straight fast approaching. I got on the brakes with a force that seemed very heavy. I was squeezing in on the tank with all my might to hold myself from pushing forward. I saw the turning point approaching fast and thought “Oh No I just blew it” I had lots of speed and not much track left.

I thought in the back of my head. You can do this, usually riders have less skills than the machine they are on. I tried as hard as I could to get into a hang off position and turn the bike. I gave it a flick into the corner and felt the front dropping out. I saw the ground rushing up to my shoulder and I lifted my head up and away from the turn. Boom, I was on the ground and tumbling, I could see the bike flipping as I was tumbling and sliding into the grass. Every second was in slow motion as I could hear the plastic cracking and breaking off the bike.

It seemed like I was going to slide forever and I was saying to myself. OK, please stop now. Once stopped I stayed still, counted to 10 and started to assess if anything was hurt or broken. Not even a scratch. All the gear I had invested in paid off big-time! I looked at the bike and wanted to cry. I knew as I started to scream down the straight I was pushing too hard. I had not taken the advice I want to instill in every single student. I got up and started looking the bike over. Seeing everything all smashed is a feeling I could do without. The session still had 15 minuets to go and all I could do was stand there and wave as my friends and fellow riders went by making smooth turns and having a blast. Sometimes we do not take our own advice and need a hard lesson to set us straight.

Josh


Please Donate to Keep the Articles Coming

If you liked this article and the many other articles on this site, please toss a buck or five into the hat. It’s greatly appreciated!

    • Click the PayPal “Pay Now” button.
    • Then indicate quantity in $2.00 increments. Example: put “2” in “QUANTITY” field to donate $4.00, “3” for a $6.00 donation, etc.

Why $2.00? Due to the PayPal fee structure, a $2.00 donation is significantly more beneficial compared to a $1.00 donation.

Thank You!


Add your comments, below.

submit to reddit

Stay Informed: Subscribe NOW!
Be a Better Rider: Sign Up for Personal Training with Ken
Support Riding in the Zone: Buy a book
Support Riding in the Zone: Buy products from Twisted Throttle & Amazon
Twisted_Affiliate-Interphone-widget

Countersteering Will Save Your Life!

Become a patron to support the website. Thanks
Getting a big (or small) motorcycle to turn requires more than just body weight.

It’s hard to imagine that so many so called “experienced” riders either fail to understand the importance of countersteering or fail to recognize that countersteering is how motorcycle really turns.

Let’s Get This Straight

A motorcycle turns by leaning. Once the bike is banked over, the geometry of the chassis, as well as the rounded profile of the tires and hard-to-describe forces cause the machine to arc around the curve. So, to turn a bike you must get the motorcycle to go from upright to leaned…precisely and efficiently.

I Don’t Need No Stinking Countersteering

A lot of riders believe that they are able to maneuver their motorcycle by simply leaning their body or by looking into the turn. While these are helpful techniques for assisting the bike to turn, they alone cannot effectively cause a 500+ pound machine to change direction.

“Yeah, but I can turn my bike without countersteering.” Um, not really.  Sure, you can cause the bike to drift into a turn, but that’s not what can be called “turning”. Also, consider that most people who don’t think they are countersteering really are, they just don’t know it. Pay close attention the next time you are making any sort of turn and notice how you put a slight amount of pressure on the inside handlebar.

Read The “No Countersteering ” Myth

What Really Happens

In case you don’t already know, THE most effective way to get a motorcycle to go from upright to leaned is to introduce handlebar inputs. By pressing forward (and to a lesser degree, down) on the handlebar on the side that you want to turn, you essentially unbalance the bike so that it “falls” into a lean. Press on the right handlebar to initiate a lean to the right and press on the left handlebar to turn left. Got it?

You can enhance this effect by also simultaneously pulling on the other handlebar. This is how racers achieve quick changes in direction in chicanes on the racetrack.

Once the bike is leaned, then the front tire will steer slightly into the direction of the turn. You must relax your arms to let this natural balancing effect occur otherwise it will feel as if the motorcycle is not able to maintain the cornering path. Press, and then relax.

Why You NEED to Know How to Countersteer

Countersteering is used whenever you need to change direction. This applies to basic cornering maneuvers, as well as evasive maneuvers, such as swerving. It’s also important to be able to countersteer with authority when a corner suddenly tightens more than you expected, or when you approach a tight corner at a too-fast speed.

Not being able to get your motorcycle turned quickly will eventually result in an off-road excursion or collision with an oncoming car or a guardrail. Seriously!

Prove It To Yourself

If this makes no sense to you, then it’s time to practice. Take a look at the video clip below from the RITZ DVD for more information on countersteering and to see some drills that will help you master countersteering.

Read this article that Ken wrote for Motorcyclist Magazine about countersteering.

Listen to the Countersteering PODCAST

Add to the list in the comment section below.

Become a patron to support the website. Thanks

Check out these related posts:

Guest Writer: The Art of Group Riding

Marc Robidas is the newest RITZ guest blog contributor. Marc is an experienced road and track day rider who pilots a Ducati 798 on the track and a Hypermotard SP on the street.

Let’s see what Marc has to say about group riding.


Group rides can be a great way to meet like-minded riders.

The Art of Group Riding

I enjoy group rides. Each ride brings an opportunity to meet like-minded people and to discover new roads. Any group of people will vary in their range of skills. You know you’ve found a good group to ride with when no one feels they need to pick up the pace, and any reckless display of awesomeness is discouraged.

Ride My Own Ride

Not long into the ride, I have a sense of the other riders’ skills. It might be easy to keep up. Or maybe the rider ahead is slightly more skilled; they become my carrot.

Sometimes, I notice the gap growing between myself and the rider in front of me. There is mild guilt about creating a gap in the group of riders and the temptation to twist the throttle is strong. So off I go to close the gap.

Wait, wait, wait! What’s going on here? Am I really “riding my own ride”?

On twisty roads in particular, I savor the relationship between myself and the road with little or no influence from the other riders. When the road gets challenging, I let the gap grow sufficiently so the next rider is not an influence on my choice of corner speed.

Don't let pack mentality ruin your ride.
Don’t let pack mentality ruin your ride.

Sometimes this means the next motorcycle is out of sight. Allowing the group to stretched out allows each person to ride in a way that feels comfortable.

Comfort

Speaking of comfort, an all day group ride can add 300+ miles on the odometer. From a cold morning start, hot afternoon and wet finish to the day, bringing the right riding gear will make every minute a treat, and minimizes dangerous distraction.

The ride will undoubtedly be a mix of smooth twisties with pavement that has seen its better days. Although my bike’s suspension is on the firm side, it is adjustable. Softening the settings allows me to ride a full day in relative comfort.

A pre-ride meeting makes sure everyone is on the same page.

Group Etiquette

Communication among each group member is essential. A pre-ride meeting is important to describe the route and the expectations of the group leaders. Any use of hand signals during the ride need to be explained.

Arrive at least 15 minutes early with a full tank of gas and an empty bladder. And, don’t be that guy (or girl) who is late for the rider’s meeting and is then clueless about the day’s plan. Group riding essentials are covered in the MSF’s guide: click here for the group ride PDF, and below is a video from the MSF about group riding. Take a look.


From Ken:

Group riding can be a blast, but it can also be quite dangerous if riders do not understand the idiosyncrasies of riding in a group. It’s also risky to ride with people who are not skilled. Be discerning about who you ride with and don’t be afraid to bow out if a particular group does not share your values of risk management.

Here is an article that talks about the dangers of Peer Pressure.


Please Donate to Keep the Articles Coming

If you liked this article and the many other articles on this site, please toss a buck or five into the hat. It’s greatly appreciated!

    • Click the PayPal “Pay Now” button.
    • Then indicate quantity in $2.00 increments. Example: put “2” in “QUANTITY” field to donate $4.00, “3” for a $6.00 donation, etc.

Why $2.00? Due to the PayPal fee structure, a $2.00 donation is significantly more beneficial compared to a $1.00 donation.

Thank You!


How Can I help You? Online Coaching NOW AVAILABLE
Stay Informed: Subscribe NOW!
Trianing-Tours_LandingBe a Better Rider: Sign Up for Personal Training with Ken
Support Riding in the Zone: Buy a book
Support Riding in the Zone: Buy products from Twisted Throttle & Amazon
Twisted_Affiliate-Interphone-widget


Top 5 Ways That Motorcycle Riders Screw Up

Being average isn't good enough.
Being average isn’t good enough.

1.Thinking You Are Better Than You Are

Overconfidence and an inaccurate, overinflated self-image is responsible for a lot of motorcycle crashes. This is certainly true with young men (the majority of crashes in MA involve young sportbike riders). But, you old guys (and gals) aren’t immune. So, listen up.

Most motorcycle riders are average, at best. On the surface, they look competent enough, but when the going gets rough, their weaknesses become apparent. Everyone should occasionally look in the mirror to try and identify their weaknesses and then act to turn those weaknesses into strengths.

Group riding can bring out the worst behavior.

2. Succumbing to Pack Mentality

Group Riding can make the most level-headed rider do really stupid things. It’s something about the energy of a group, in combination with the need to prove that you’re a good rider that often fuels bad behavior. I’m not immune. Knowing that I can get sucked into riding too fast (for the street environment) causes me to be very selective about who I ride with.

Busted!
Busted!

3. Speeding in All the Wrong Places

Riding too fast for the street environment is one of the stupidest things you can do on a motorcycle. Yes, it sucks to get pulled over, but it sucks more to crash because you simply didn’t respect the reality of street riding. If you get a ticket for speeding, consider calling a speeding ticket lawyer or a traffic ticket attorney to help you assess your situation and determine your best course of action. These types of traffic lawyers know federal and local traffic laws and regulations so they can provide you with the best advice. Riders who got arrested for DUI charges may need to hire a criminal lawyer to defend their rights.

Errant cars, animals and pedestrians can jump out from anywhere and sand, gravel and fallen branches often lurk around corners undetected. I like riding fast, but not too fast. I reserve the really fast stuff for the racetrack.

An all too common sight.

4. Mixing Alcohol with Riding

Are you kidding me? As if being an average rider isn’t dangerous enough,  are you willing to add impairment to the equation? Talk about stacking the deck against you. Listen, I like  drinking a beer or two just like the next guy (or gal), and there was a time long ago when I would even jump on the bike after having a few. Thankfully, I survived those days.

You may think you’re fine to ride with one or two cold ones having passed your gullet, but combining drinking or other impairments with riding is totally counter to managing risk. I’m not your father, so do what you want. But, I ask you to please refrain.

See it coming before it happens.

5. Failing to Predict Danger

Close calls are a warning. Crashes are the result of you not heeding those warnings. The best riders develop a sixth sense about their surroundings. They scan the roadway looking for anomalies and evaluate if anything is “wrong with the picture”. They are actively searching for problems and are way ahead of the situation, because they are prepared. By “preloading” hazard scenarios into their mind, they are already halfway toward managing any hazard. Try it. Not only does it make riding safer, it’s also fun, like a video game. Don’t let them get you!

Add to the list in the comment section, below.


Please Donate to Keep the Articles Coming

If you liked this article and the many other articles on this site, please toss a buck or five into the hat. It’s greatly appreciated!

    • Click the PayPal “Pay Now” button.
    • Then indicate quantity in $2.00 increments. Example: put “2” in “QUANTITY” field to donate $4.00, “3” for a $6.00 donation, etc.

Why $2.00? Due to the PayPal fee structure, a $2.00 donation is significantly more beneficial compared to a $1.00 donation.

Thank You!


Check out these related posts:


Stay Informed: Subscribe NOW!
Be a Better Rider: Sign Up for Personal Training with Ken
Support Riding in the Zone: Buy a book
Support Riding in the Zone: Buy recommended products from Twisted Throttle & Amazon
Twisted_Affiliate-Interphone-widget

Rider Behavior and Peer Pressure

Same, Same
There is comfort in conformity.

It may seem that peer pressure is something that we outgrow once we reach adulthood. But, even as grownups we continue to be influenced by people we associate and identify with.

As motorcycle riders, peer pressure can affect our behavior and influence our attitude toward risk. This can be very beneficial, or it can be detrimental, depending on the attitude and values of the group you ride or identify with.

I’ve seen otherwise really smart people do really stupid things on a bike because they do not think for themselves, and instead conform with the norms of the group. On the other hand, I’ve also seen reckless rookies become really smart and skilled riders through association with riders who value skill development and risk management.

Positive Behavior Change

The group mentality drives behavior.
Group mentality drives behavior, both good and bad.

Peer pressure and positive comparisons are one of the most effective ways to change behavior. A smoker who wants to quit is more successful if he or she doesn’t hang out with other smokers. The same goes for alcoholics. Alcohol rehab programs offer a comprehensive approach to address and overcome addiction.

A motorcycle rider who wants to increase the chances of surviving is smart to identify with riders who value risk management. This doesn’t mean riding without taking risks, but it does mean carefully considering the consequences of how you ride (and the protection you wear). Associating with risk-conscious riders is one on the best ways to manage risk.

The attitude of a group does not have to be overt. It can be sensed by how they act. For instance, riding with a group that values excellent control skill will challenge the others in the group to ride better. Good judgement is another skill that thoughtful riding groups value. By associating with these riders, your knowledge and skills will improve.

Style or Protection?

Is your choice of protective gear driven by your level of risk acceptance?
Is your choice of protective gear driven by your level of risk acceptance or someone else’s?

Protective gear is often dictated by style. This means that one rider will choose to wear a high-viz Aerostitch suit and full faced helmet, while another rider will choose a beanie helmet and black leather vest depending on the type of bike and riding he or she identifies with.

Style will inevitably influence riding gear choices, but should style really be the deciding factor in protection?

I’m reminded of a woman in a beginner motorcycle class I was teaching about ten years ago. We had just finished the segment on the importance of protective gear. This woman came up to me during the break looking upset. She preceded to tell me that what she had just learned scared her. It turns out her husband did not wear good protective gear and that she was sure she would be pressured into wearing a beanie helmet, jeans and t-shirt.

I’m not a therapist specializing in marital problems, but I did offer her a strategy that I thought may have helped her with an obviously overbearing biker husband. I suggested that she tell him that what she learned made her realize the importance of a good helmet and that she insist on wearing a helmet that helped reduce the risk of injury. I figured he couldn’t argue with that.

Fun at the Expense of Survival

If you choose to ride in groups, ride with people who respect the risks.

The type of riding gear people choose is influenced by identity. But, even more concerning is how peer pressure and group identity can lead to some really ugly outcomes. This is often caused by group behavior that values “fun” at the expense of basic safety.

I’m the first to admit that riding fast is fun. But, I resist the pressure to ride fast on the street. Squidly sport bike riders who race and stunt on the street are highly represented in death statistics.

When it comes to the “biker” crowd, alcohol is a deadly combination that has been around for decades. Even though statistics suggest that there is less going on, drinking and riding it are still prevalent.

Pack mentality is tough to resist when you’re riding in a group. The most common result for sport riders is a steady increase in speed during group rides. For the cruiser riders, it seems to be an increase in raucous behavior.

Even when you ride alone, you are influenced by peers.

But, I ride Alone

Riding solo is one way to “ride your own ride”. But, the fact is that group identity influences your behavior even if you strictly ride solo. For example, the type of bike you ride will likely define your choice of riding gear. Look around and you will be hard-pressed to find many cruiser riders wearing a full-faced helmet. You’ll also find it tough to spot a racerboy sportbike rider sporting a high-viz vest.

Yes, these are stereotypes, but am I wrong? Sure, there are those people who challenge norms by combining different styles of riding gear and bikes, but they are the exception.

It doesn’t matter if you ride alone. You are part of a larger group whether you like it or not. Your choice of riding style is an identification with the biker crowd, the touring crowd, the sportbike crowd, adventure crowd, or some other group. Accept it, but be sure you make decisions that are in line with your beliefs, not the beliefs of others.

I challenge you to look at your personal values and make choices based on your level of risk acceptance and go against the perceived norms of your riding genre if they don’t match.

Share your thoughts below.


Please Donate to Keep the Articles Coming

If you liked this article and the many other articles on this site, please toss a buck or five into the hat. It’s greatly appreciated!

    • Click the PayPal “Pay Now” button.
    • Then indicate quantity in $2.00 increments. Example: put “2” in “QUANTITY” field to donate $4.00, “3” for a $6.00 donation, etc.

Why $2.00? Due to the PayPal fee structure, a $2.00 donation is significantly more beneficial compared to a $1.00 donation.

Thank You!


Check out these posts:


Stay Informed: Subscribe NOW!
Trianing-Tours_LandingBe a Better Rider: Sign Up for Personal Training with Ken
Support Riding in the Zone: Buy a book
Support Riding in the Zone: Buy products from Twisted Throttle & Amazon
Twisted_Affiliate-Interphone-widget

Traction Seminar: Motorcycle Tires

Ken and Tony from www.tonystrackdays.com speak about tires at the Traction Management Seminar at the Thompson Speedway Motorsports Park.

More video of the seminar to come. Thanks Eric R. for filming.

Share your thoughts about tires and ask any questions below.

Subscribe to the mailing list!

Buy the Book!


Please Donate to Keep the Articles Coming

If you liked this article and the many other articles on this site, please toss a buck or five into the hat. It’s greatly appreciated!

    • Click the PayPal “Pay Now” button.
    • Then indicate quantity in $2.00 increments. Example: put “2” in “QUANTITY” field to donate $4.00, “3” for a $6.00 donation, etc.

Why $2.00? Due to the PayPal fee structure, a $2.00 donation is significantly more beneficial compared to a $1.00 donation.

Thank You!


How Can I help You? Online Coaching NOW AVAILABLE
Stay Informed: Subscribe NOW!
Trianing-Tours_LandingBe a Better Rider: Sign Up for Personal Training with Ken
Support Riding in the Zone: Buy a book
Support Riding in the Zone: Buy products from Twisted Throttle & Amazon
Twisted_Affiliate-Interphone-widget


Valuing Motorcycling Skill Development

Become a patron to support the website. Thanks
Tell this guy that learning ain't fun.
Tell this guy that learning ain’t fun.

As a motorcycle skills and safety professional, I am often frustrated and even saddened by the seemingly complacent attitude toward real skill development. It pains me to see riders who ignore the importance and benefit of learning to ride their motorcycle with more skill. Not only do sharp, well-developed skills make motorcycle riding safer, it also makes riding more engaging and way more fun.

Shut Up and Ride

I get that motorcyclists don’t ride to be safe. We ride to have fun, which means that focusing on “learning” can risk turning an enjoyable pastime into something that starts to feel like work. I’ve seen many, many motorcycle riders run away when I mention “Training” or the dreaded “S” word…Dare I say it…SAFETY.

“I just want to enjoy the wind in my face and the feeling of freedom, dude. Besides, I ride just fine.” Maybe, but could it be that riding can be MORE FUN if you learn how to ride better? Hmmmm?

Skill development benefits all types of riders.

Don’t Kill My Buzz With the Truth, Man

The repulsion toward safety and skills development is one reason why it’s nearly impossible to get experienced riders to attend an advanced riding course. The other reason is that most riders don’t see the value in developing their skill. And it’s certainly not as fun as simply going for a ride. Why “waste” a Saturday or Sunday riding around a parking lot when there are open roads to explore…and for some people, bars to hop. Did I say that out loud?

I was at a motorcycle expo earlier this year, helping to man a booth for the Massachusetts Rider Education Program (MREP). They had a riding simulator set up for people to try their hand at dealing with challenging riding situations.

Jeannine on the Smart Trainer simulator.

One guy (and I’m sure he wasn’t the only one) exclaimed proudly that he didn’t need to use the simulator because he’d been riding for 30 years. OK, said my colleague, show us what you know. The look on his face showed sudden anxiety. He kinda laughed as though we couldn’t be serious and then walked away. He was clearly afraid that he might be exposed as a mediocre rider.

This happens all the time. New track day riders are afraid that they won’t be as fast as they think they are (they’re not), and this scares them. Egos are sensitive, I get it. But, if they can man up (sorry ladies) and take the plunge, they soon discover that it doesn’t matter how fast they are, rather it’s how skilled they are at controlling their bike that counts.

What’s My Point?

You probably aren’t as good at riding a motorcycle as you think you are. “So what”, you say? Well, the last time I looked, riding a motorcycle is dangerous, even deadly. If that’s not enough to motivate you to spend a bit of cash and an afternoon brushing up on your skills, then maybe the fact that better skills means more fun will motivate you.

The vast majority of people I’ve trained over the last 20 years experience MORE ENJOYMENT after a training session. That’s because they are now more confident in their ability to manage their bike, corners and traffic. Seriously. It’s worth the effort.

Training Opportunities that are Fun

Track Days are fun and increase cornering and braking confidence.

I can’t say that the MSF courses offered around the country are exactly fun. You ride around a parking lot at 25mph as you go through specific drills that are designed to efficiently deliver vital information. Although there is a lot of laughing when groups of friends attend these parking lot courses, it’s usually all business.

When it comes to combining “fun” and “training” together, there are two venues to consider. A track day and on-street training tours.

Sport bike riders are the likely people to take advantage of track day training, but some organizations cater to all types of bikes and riders. Tony’s Track Days regularly sees sport tourers and adventure bikes at their days. But, to encourage cruiser riders and tourers to attend, Tony is offering a “non-sport bike” track day for 2014. Now, even cruiser-types can ride around a curvy ribbon of pavement without the risk of hitting a car or sliding on sand, or getting a speeding ticket.

Another fun training opportunity is on-street training tours. Stayin’ Safe has been providing training tours and I am offering tours as well. This combines scenic rides with experienced people who can offer tips for learning how to be safer and in more control.

Start the Season with Training

The snow is finally melting and now is the time to plan your season. Do yourself and your loved ones a favor and get your skills sharpened. You won’t regret it.

Share your thoughts below on your most valuable training experience.


Become a patron to support the website. Thanks

How to Preserve Traction by Managing Load

Become a patron to support the website. Thanks
The amount of traction depends on tires, pavement and load.

Last weekend I conducted a seminar at the Thompson Speedway (in CT) and I thought I’d share a particular concept that came up during the presentation… the concept of “load management”.

When I first verbalized the term, I thought it sounded like the material for a crass poop joke. But, it is a concept I believe every motorcycle rider should adopt as a way to ensure that you have a sufficient amount of traction.

Traction Theory

Before I talk about specifics of load management, it makes sense to lay some theory on you. In its most basic form, traction is the friction between your tires and the road or track surface. This friction can vary greatly depending on several factors, including tire compound, condition and temperature, as well as the quality of the pavement surface (or dirt for you dualies out there).

Pavement texture affects the amount of traction available.

But wait. The quality of your tires and the surface is only part of the traction equation. The other part is the amount of load that is placed on the tire’s contact patch. The more weight or load that each tire is supporting directly relates to the amount of grip each tire has. Additionally, using High Friction Surfacing on the road can enhance traction further, offering improved grip and safety, especially in challenging conditions.

Practical Application

When you brake, the front suspension compresses as the weight of rider and bike pitches forward. This increases front tire traction. But, at the same time, the rear suspension extends and the load (and traction) at the rear tire decreases. More traction on the front means you can use the front brakes harder. But, it also means that there is less load at the rear and therefore less rear tire grip for hard use of the rear brake. Load shifts constantly with every maneuver you make…braking, cornering, swerving, accelerating etc.

Loads also shift with the terrain. Riding uphill shifts weight rearward. Riding downhill moves the load to the front. Riding over bumps also causes momentary shifts in load and changes in traction. Road camber also affects load.

Managing Your Load

If you grab the front brake, you'll skid the front tire.
If you grab the front brake, you’ll skid the front tire.

So, managing traction requires you to manage the location and amount of load. This means making sure your front tire is sufficiently loaded before you introduce maximum front brake force. Squeeeeeze the front brake lever. It also means easing off the rear brake as load pitches forward when you brake. The key is to apply the brakes only as much as the tire can handle, which means paying attention to the amount of load there is on each tire.

Now, too much of a good thing is too much of a good thing. In this case, you can overwhelm the front tire while braking and skid. However, if you squeeze the front brake progressively then you should not have this problem. If you grab the brake, then you risk locking the front wheel.

Managing traction while cornering downhill requires balance between speed control and acceleration.

You can also overwhelm and push the front tire into a lowside skid when cornering hard. To avoid this, you need to get on the throttle just after you initiate lean to balance load between the front and rear. If you coast through the turn, you’re asking the front tire to not only manage the cornering forces, but also the engine braking forces caused by not getting on the gas.

The amount of throttle used should be just enough to transfer load to the rear tire. Do this by gradually rolling on the throttle. DO NOT twist the throttle to the stop or you’ll overwhelm the rear tire and spin it out of control.

The best riders are keenly aware of the amount of traction they have available at any given time. They also use advanced techniques that minimize abrupt spikes in load and allow the tires to maintain grip.Some of these techniques include brake and throttle overlap, trailbraking, and advanced body positions that allow the suspension to work fluidly.

Start by paying attention to how load affects traction, then move on to developing these advanced techniques for load and traction management. I’ll write about these techniques in future blog posts, but you can read about them now by ordering your copy of Riding in the Zone.

In the meantime, click here to read more about traction and How to Develop a Traction Sense.

Share your thoughts below on how you manage traction and load.

Subscribe to the mailing list!

Buy the Book!


Become a patron to support the website. Thanks