Long-Term Review: 2016 Triumph Tiger 800 XRx

Become a patron to support the website. Thanks
2016 Triumph Tiger 800XRx

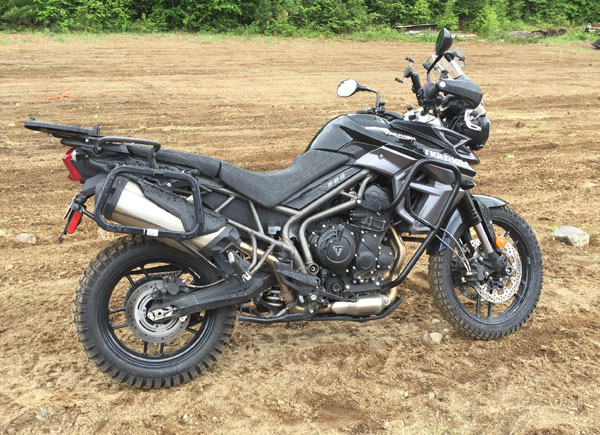
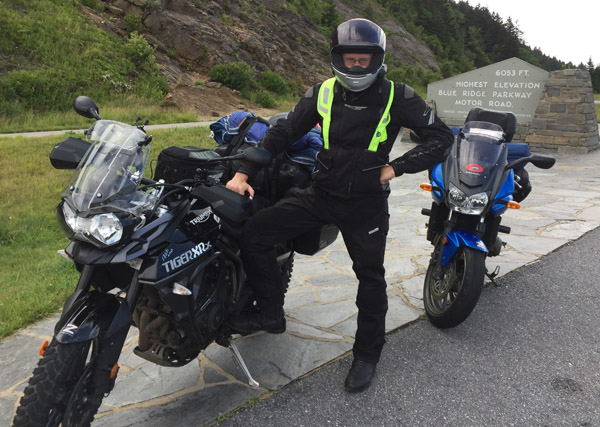
The 2016 Triumph Tiger 800 XRx has spent this past summer as my instructor bike (both on-street and off-road), sport tourer and general go-to machine. After putting almost 9,000 miles on the ODO since March, I can now offer an in-depth review of this bike.

As a contributor to Motorcyclist Magazine and lead instructor at Tony’s Track Days, I have the opportunity to ride lots of different motorcycles. However, I get only a short amount of time in the saddle of these bikes.

During a on-day press launch or track session I get immediate impressions of power delivery, suspension compliance, fit and finish and ergonomics, but that’s about it. After putting 9k on the Tiger in all sorts of conditions I can share a comprehensive review.

Why the Tiger?

dual-sport-static 
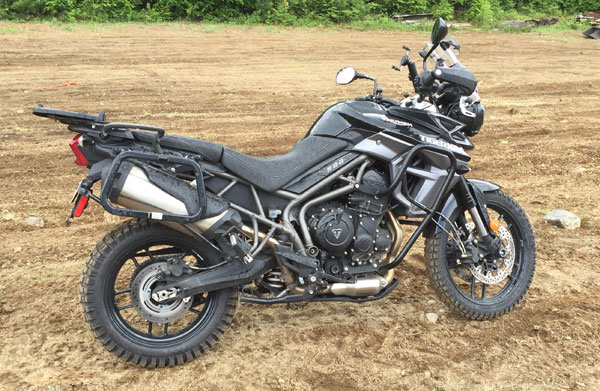
The Tiger is versatile! It is capable of crossing the country, commuting, scratching around at a track day and riding on some pretty gnarly dirt roads and trails. While the 800 is a Swiss army knife, it is a compromise. The Tiger is a fun street bike that can keep up with most supersport bikes in the hands of a good rider at reasonable speeds. It is also a comfortable traveler that can handle a decent load of luggage and even a passenger.

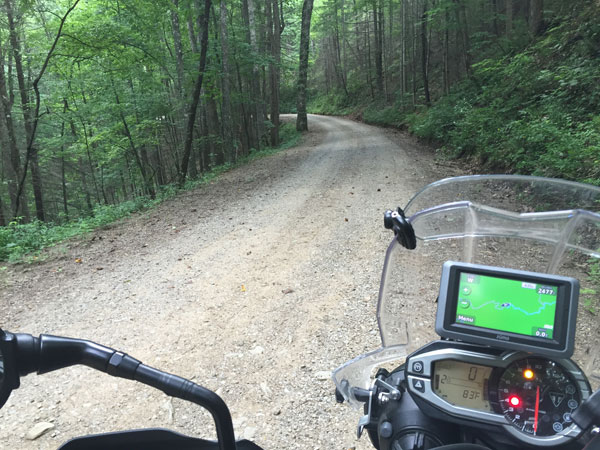
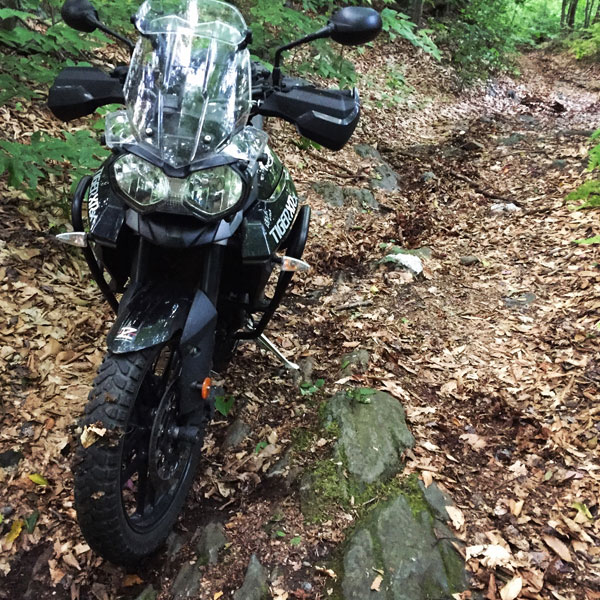
As an off-road mount, it is best suited to mostly graded fire roads, but is surprisingly capable managing rocky trails. As with all heavy ADV bikes, you’ve got to be smart about what you’re getting into. I tackled a rather steep and rocky bit of single track trail that I handle easily with my KLX250s, but was a handful on the Tiger. I made it, but it coulda been ugly if I had fallen, since I was alone with no cell service.

The Tiger encourages discovery. The Tiger expands the number of places I can ride, by a huge margin. The 800 is totally at home navigating the many unimproved roads and tight paved byways that snake through Western Massachusetts where I live. I can ride 100 miles of mostly dirt roads and stay within one hour of my house! Lucky me.

There are other machines that also fit the bill; the BMW F800GS, Kawasaki KLR, the super-sized BMW R1200 GS or the new and awesome 2016 Tiger 1200 Explorer.  I chose the Tiger 800 for it’s features, lighter weight and reasonable.

Why the Roadie Version and not the XCx?

Mitas-poseI debated getting the more off-road worthy, spoke wheeled and taller XCx. But, I opted for the Road version (XRx) because I thought the bike would be spending 90% of its time on pavement. I also knew that the XR would be more than capable of the dirty riding I planned to tackle.

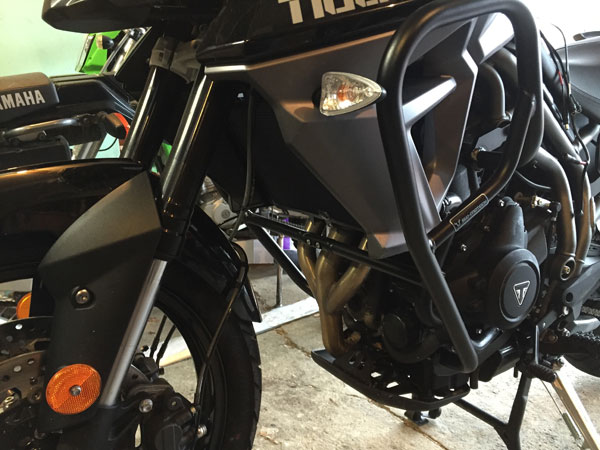
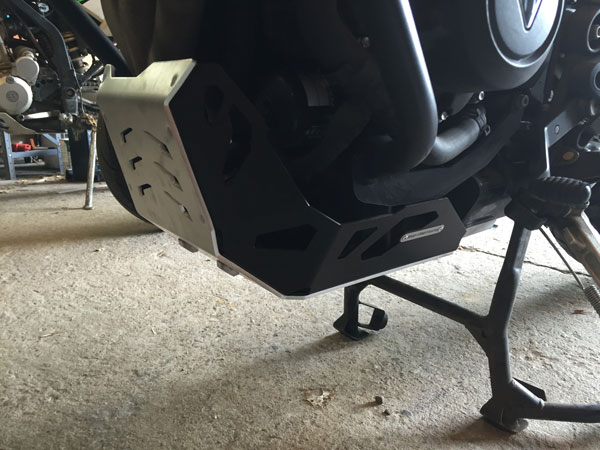
Since I am spending more time off-road than I expected, I probably should have gone with the XC. The XC is perfectly capable of long street miles and more importantly, it comes with adjustable WP suspension. Also, the XC comes with many of the things I’m ending up buying for the XR anyway, including engine, sump and radiator guards. Also, the spoked wheels and the 21 inch front wheel are more off-road friendly and more durable. Although, I’m happy to not have tube tires.

Here’s a long video review of the Tiger.


Let’s break down the review into components.

Engine

I love the power characteristics of the three-cylinder motor (based on the Street Triple motor). It has a nice combination of spunk and character with just the right kind and amount of vibration that tells you you’re straddling a machine. The vibes are never annoying. As a matter of fact, the bike is surprisingly smooth…smoother than my 2012 Street Triple R.

The whistling/snarling sound of the motor is unique. While an aftermarket exhaust will decrease weight and make for a nice sonic impression, I am perfectly happy with the way the stocker looks and sounds. Besides, I’m a proponent of quiet exhausts and I have better things to spend my money on. Read about all the accessories I put on the Tiger.

The triple is a terrific street engine, but it’s not so well suited as an off-road motor. It’s a bit too RPM-needy compared to a twin, like a F800GS. While the motor is easily controllable, it doesn’t exactly plod along the way you need an off-road motor to do from time to time. I found the Explorer 1200 to be better at slow speed plodding than the 800, partly because the ample torque was always on tap, whereas the 800 needs some revs. I’ve gotten used to it, but it is the one area where a BMW might be a better choice.

The engine has given me zero trouble, and if my Striple is any indicator, it will be reliable as a stone.

Power Delivery

As far as power delivery goes, the ride-by-wire throttle is super-light and takes some getting used to. When I first got the bike, I struggled to calibrate my right hand to keep the throttle steady. I’ve since learned to manage the sensitive throttle just fine, but I wish there was a simple way to increase throttle tube resistance.

Part of the reason the light throttle isn’t a big problem is because the fueling is very good. One of my pet peeves is snatchy fueling and this is a big reason why I rejected the FJ-09 as a contender. One area where the Tiger’s fueling falls short is when descending long hills, the fueling “hunts” while decelerating under engine braking. It’s not that bad, but it annoys me.

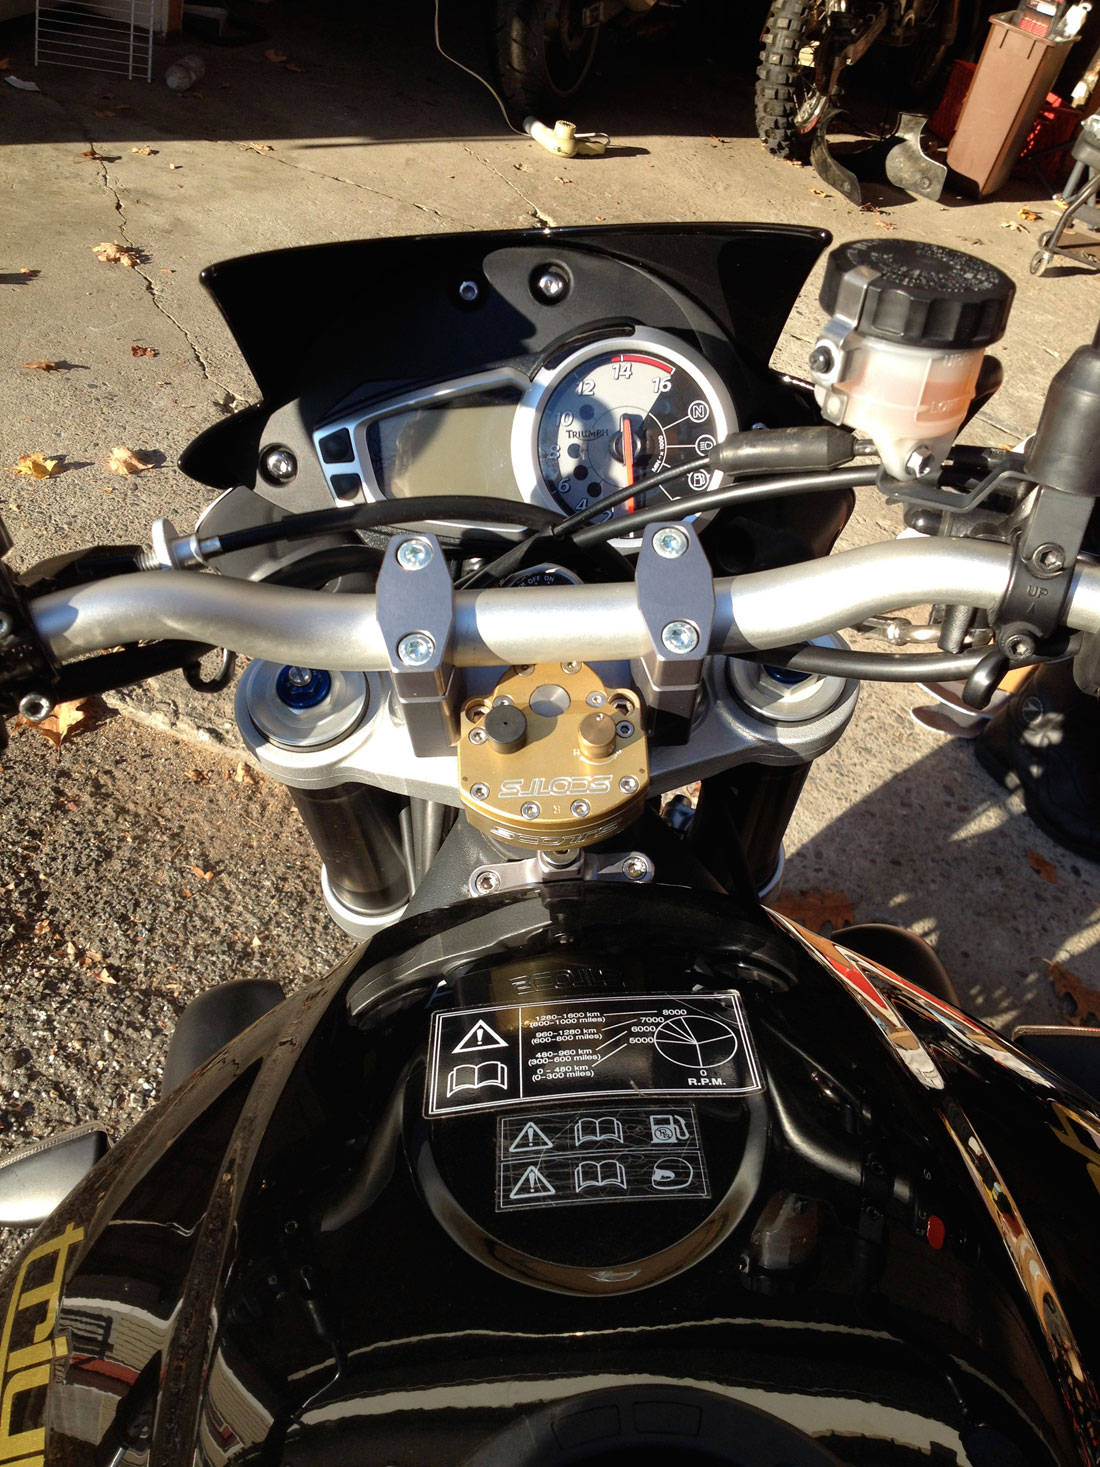
The Tiger comes with Traction Control (TTC) that can be set to either “Road”, “Off-Road” or “Off”. Road mode enables full TTC, whereas Off-Road mode allows more wheel slip. Sometimes even the Off-Road TC can intervene too much when climbing rocky or washboard surfaces. Thankfully you can turn it off. See more about Rider Modes below.

Clutch and Transmission

The clutch is light and progressive for easy launches and the transmission is flawless (it is sourced from the Daytona). I can launch smoothly from a stop and perform clutchless upshifts with ease. The ratios are just fine for street riding with the engine spinning around 5k in top gear at highway speeds, allowing plenty of zip when accelerating. The clutch lever is adjustable and neutral is easy to find. Not much more to say.

Brakes

The twin piston Nissin brakes are nothing special. They aren’t radial mount 4 piston units found on higher end machines like the Street Triple R, so they don’t provide exceptional feel and aren’t terribly powerful, but they don’t need to be. Instead, they are well-suited for the mission of slowing a 500 pound ADV bike with predictability and control.

The Tiger comes with ABS that can be set to either “Road”, “Off-Road” or “Off”. Road mode enables full front and rear ABS, whereas Off-Road mode disables ABS at the rear wheel and allows more wheel slip in the front. I don’t fully disable ABS. I like ABS.

The front brake lever is adjustable for reach and of course you can rotate the perch on the tubular handlebar to get the right angle for your primary use. I position my lever slightly low for street riding (sitting), but it ends up being a bit too high when standing off-road.

The rear brake has decent power and control and the pedal has a step up on the inner edge to allow easy use when standing up. Just rotate your right foot inward (pigeon toe) to use the tab.

Foot Pegs

The Metzeler Tourance Next tires did okay on the track.
The Tiger did great on the track, especially after I took off the peg feelers.

The foot pegs are positioned perfectly for sitting and standing. The peg size is broad enough for reasonable comfort and stability when standing. The rubber inserts can be removed by simply pulling them off. This helps for off-road conditions where you need the metal serrated teeth to grip into your boot soles. Getting them back on takes some fussing.

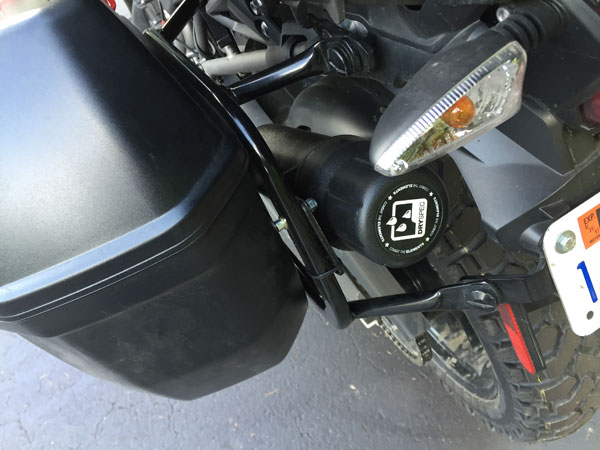
The Tiger has one strange design flaw. Surprisingly, the passenger pegs are mounted to frame brackets that are welded to the non-removable subframe. This means that a tipover or crash could break the bracket and ruin the whole frame. The Explorer 1200 has bolt-on passenger peg brackets.

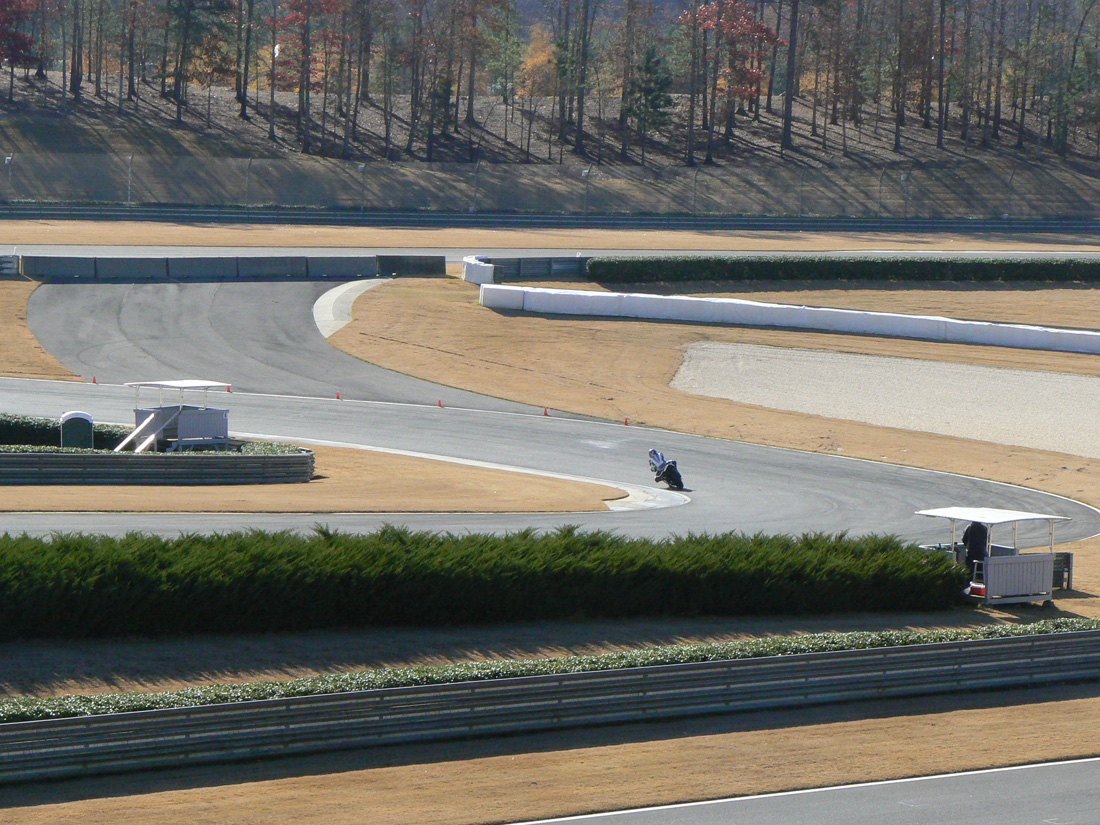
The pegs are located low enough for all sensible street riding, but are a bit low for more extreme cornering. I rode the Tiger at a track day at Loudon and after a few sessions of grinding the peg feelers, I removed them.

Suspension

The forks are the weak link in this bike. As I mentioned earlier, I really wish I had the adjustable WP suspension. It’s not that the non-adjustable upside down Showa forks are lousy, it’s just that I’m a bit of a suspension princess and non-compliant suspension really annoys me.

Yankee Beemers grass Moto-Gymkhana

The bike manages bumpy roads and off-road surfaces just fine and is always stable, in control, and handles nicely in corners. So, what’s the problem? Well, the forks tend to jackhammer over ripples and small bumps on smooth pavement. Either the forks have a lot of static friction (Stiction) or the compression damping is too high to allow the forks to respond to these small irregularities.

Off-road, the suspension is great. It manages sharp rocks fine at a moderate pace and handles front wheel lofting, but expect serious bottoming if you plan to do any sweet jumps. At the Yankee Beemers Rally, I participated in the grass Moto-Gymkhana where the fast perimeter course included a jump and the inevitible landing. Also, the landing off the teeter totter resulted in significant seismic activity.

Rider Modes

screen-shot-2016-11-17-at-9-49-41-am
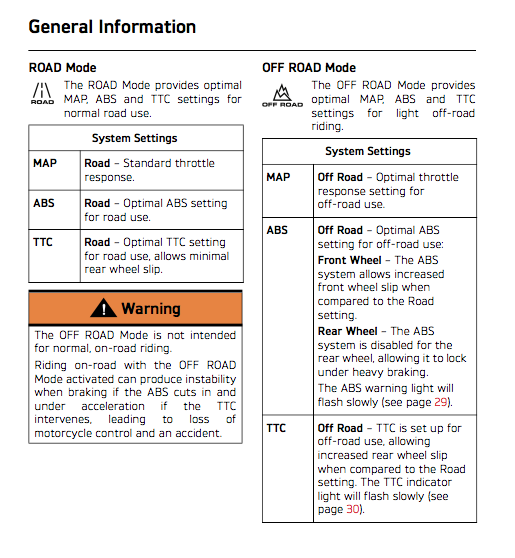
I mentioned ABS and TC settings above, but there are also Power Delivery (MAP) Modes to discuss. The Tiger has 4 MAP Modes: Rain, Road, Sport and Off-Road. See the pages from the Owner’s Manual on the right for details about how they differ.

To change various modes you have to reach to press the “M” button on the dash and then close the throttle and squeeze the clutch for it to take. FYI, the off-road mode will revert back to the last road mode if you turn off the key, which is why I often shut off the bike using the kill switch if I’m going to stop for a minute to, say, take a photo.

screen-shot-2016-11-17-at-9-49-51-amFrankly, I could do without the MAP modes. Sure, there is a slight difference between each mode, but it’s subtle. I tend to keep the bike in Road Mode most of the time, even in the rain, and the Off-road MAP seems no different than the Road MAP. The fueling on the Tiger is so well sorted that I find it unnecessary to switch to a “softer” setting.

And the “Sport” MAP is not really that much sharper than the road mode. I would not consider the base XR, because I couldn’t do without adjustable/switchable TC for off-road riding.

Comfort

The Tiger features the ideal comfort package; high tubular handlebars that are adjustable for angle and height; a “Comfort” seat that is one of the best I’ve used; great legroom. Yet, I’ve never had more trouble being comfortable on a motorcycle.The thing is that I get a nasty cramp between my shoulder blades almost immediately.

I added Rox risers, rotated the bars in every conceivable way, with no improvement. It was only recently that I determined that it is my personal anatomy to blame. Not only is my hunchback posture a likely problem, but also I broke my collarbone last year which seems to have messed up my symmetry enough to cause this cramping. The cure is to stretch the pecs to regain the symmetry and strengthen my upper back. Stay tuned.

When standing, the side panels at the rear/bottom of the tank cause my knees to splay out more than I like. This causes a slight imbalance that I have to make up for with my arms and back, which is tiring after about 6 or 8 miles of rough off-road terrain. The Explorer 1200 is better because the area where the seat meets the tank is narrower.

The Tiger 800 is a tall bike. Its adjustable seat height is 33″ at its low setting and 33.8 ” at the higher setting. (a Low seat version is available with a range of 31.1″ and 31.9″). I am 5′ 9″ with a 32″ inseam and am able to touch with both feet touching.

Miscellaneous

Electronic cruise control is cool. It’s useful on highway trips and when I want to zip a vent with my right hand without stopping. However, I don’t use it as much as I thought I would. It’s very easy to use and works perfectly, though. Pro Tip: use the rear brake to disengage the cruise control to avoid the abrupt deceleration that occurs if you twist the throttle off to shut it off.

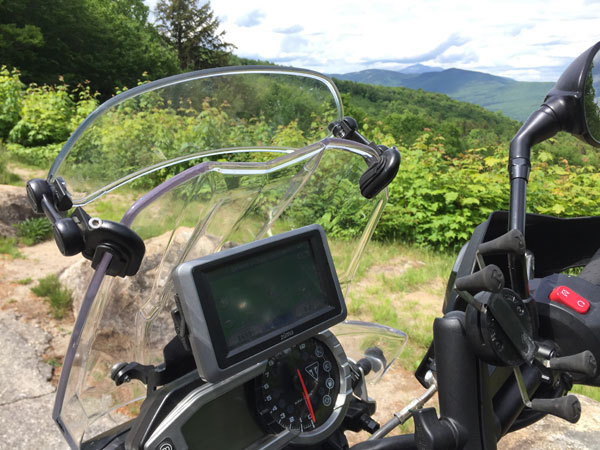
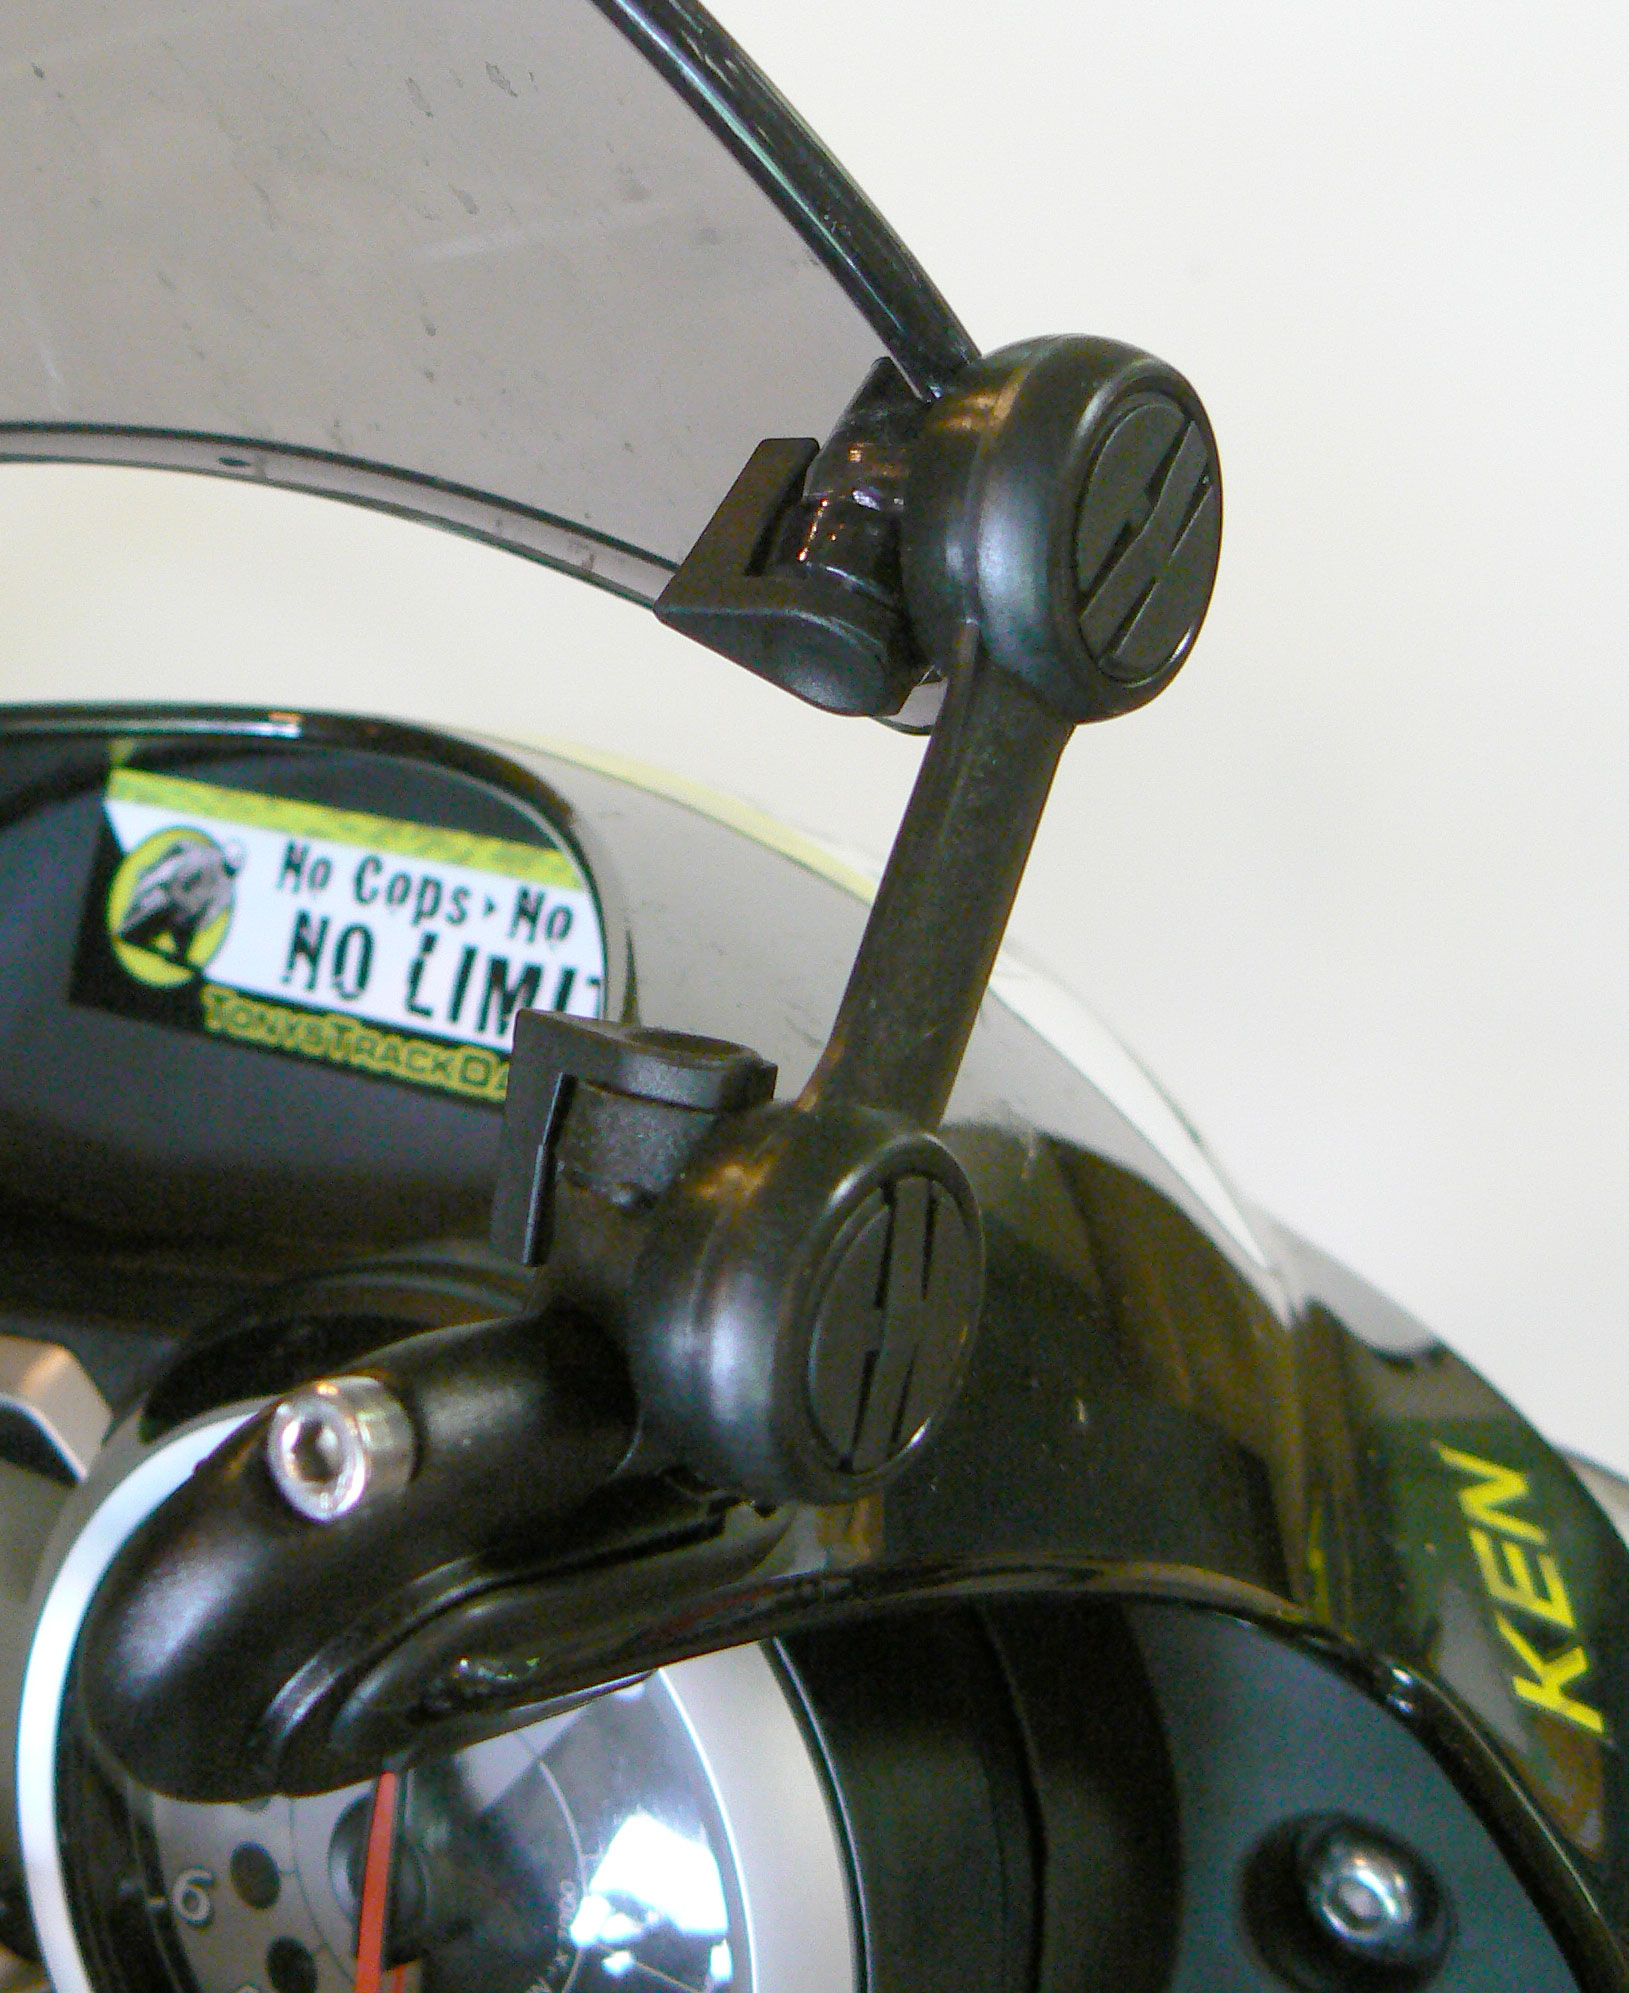
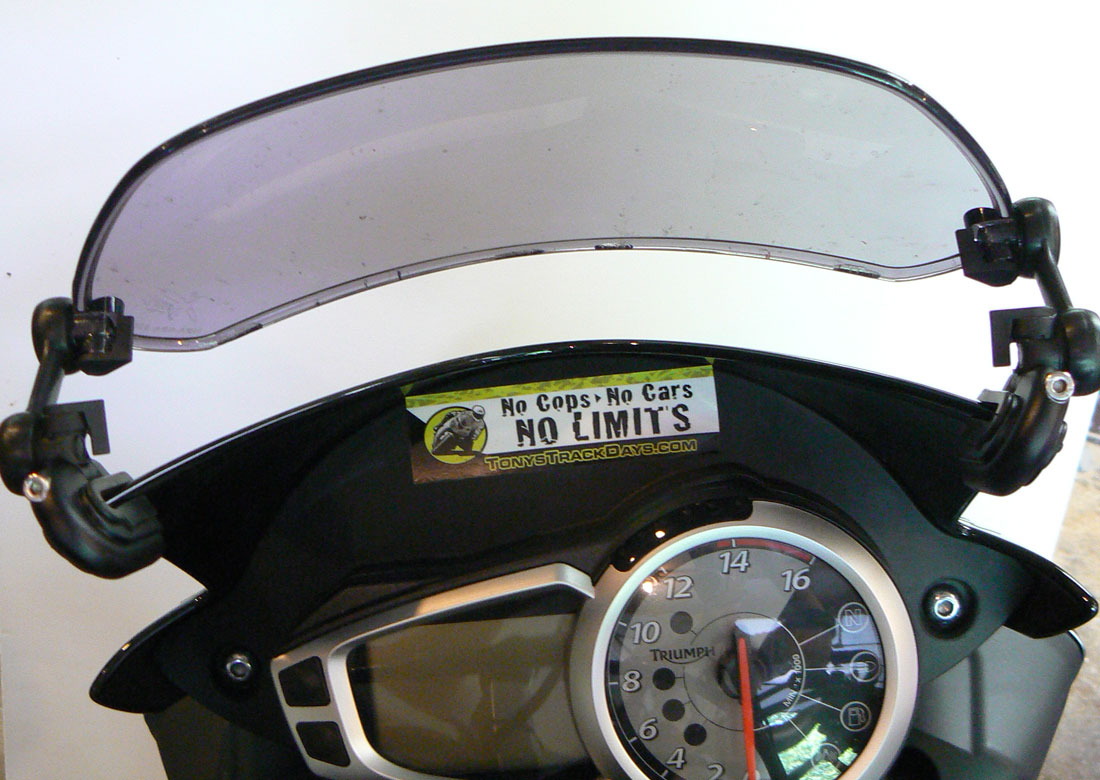
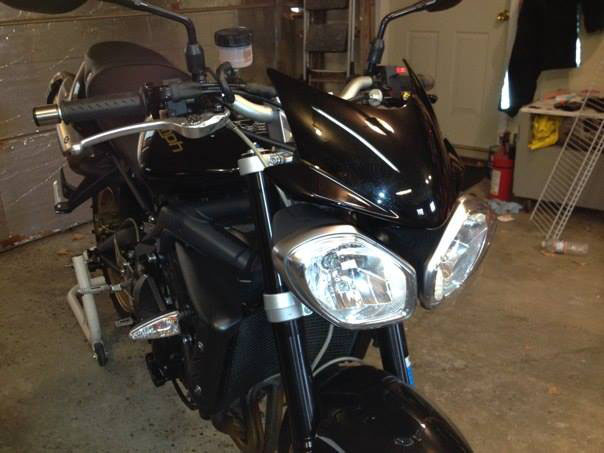
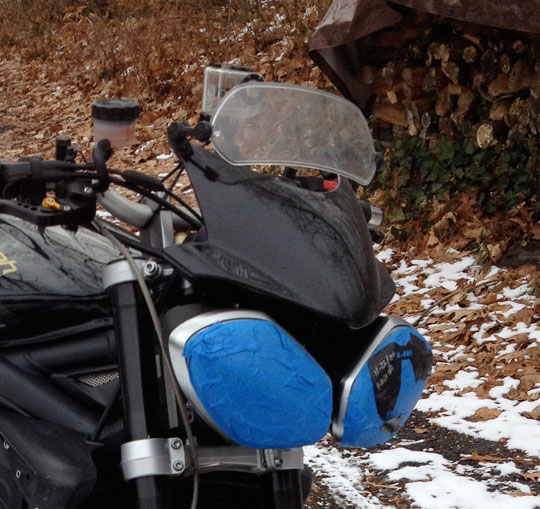
The Adjustable Windscreen works really well for me. Some people complain that it wobbles a lot and doesn’t manage wind as well as they’d like. I have no problems at all with the stocker. The screen is moderately adjustable, but not too much, so I added an adjustable MRA Spoiler blade, which makes the stock shield more versatile.

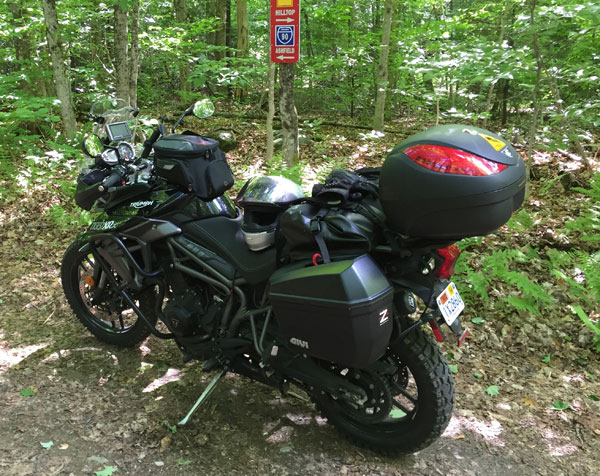
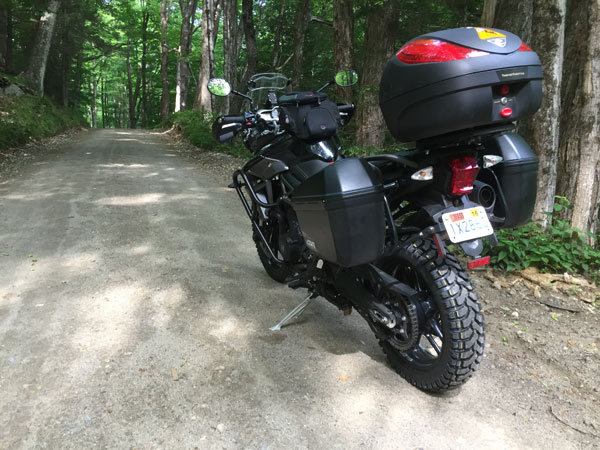
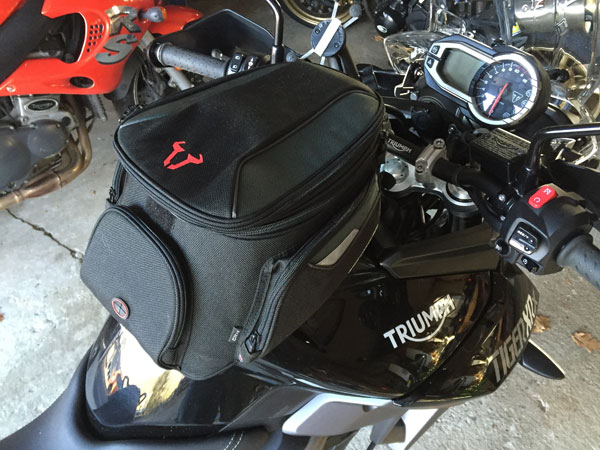
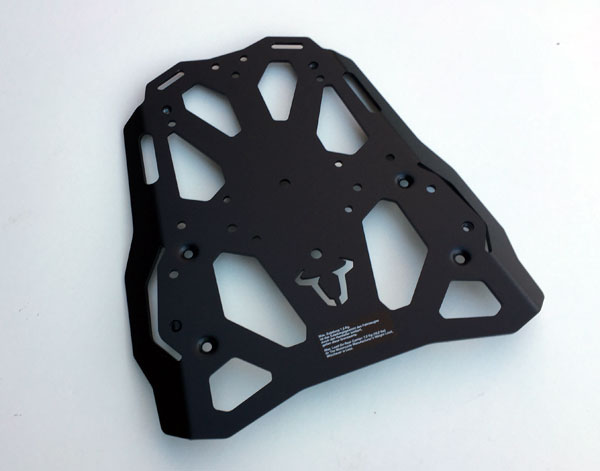
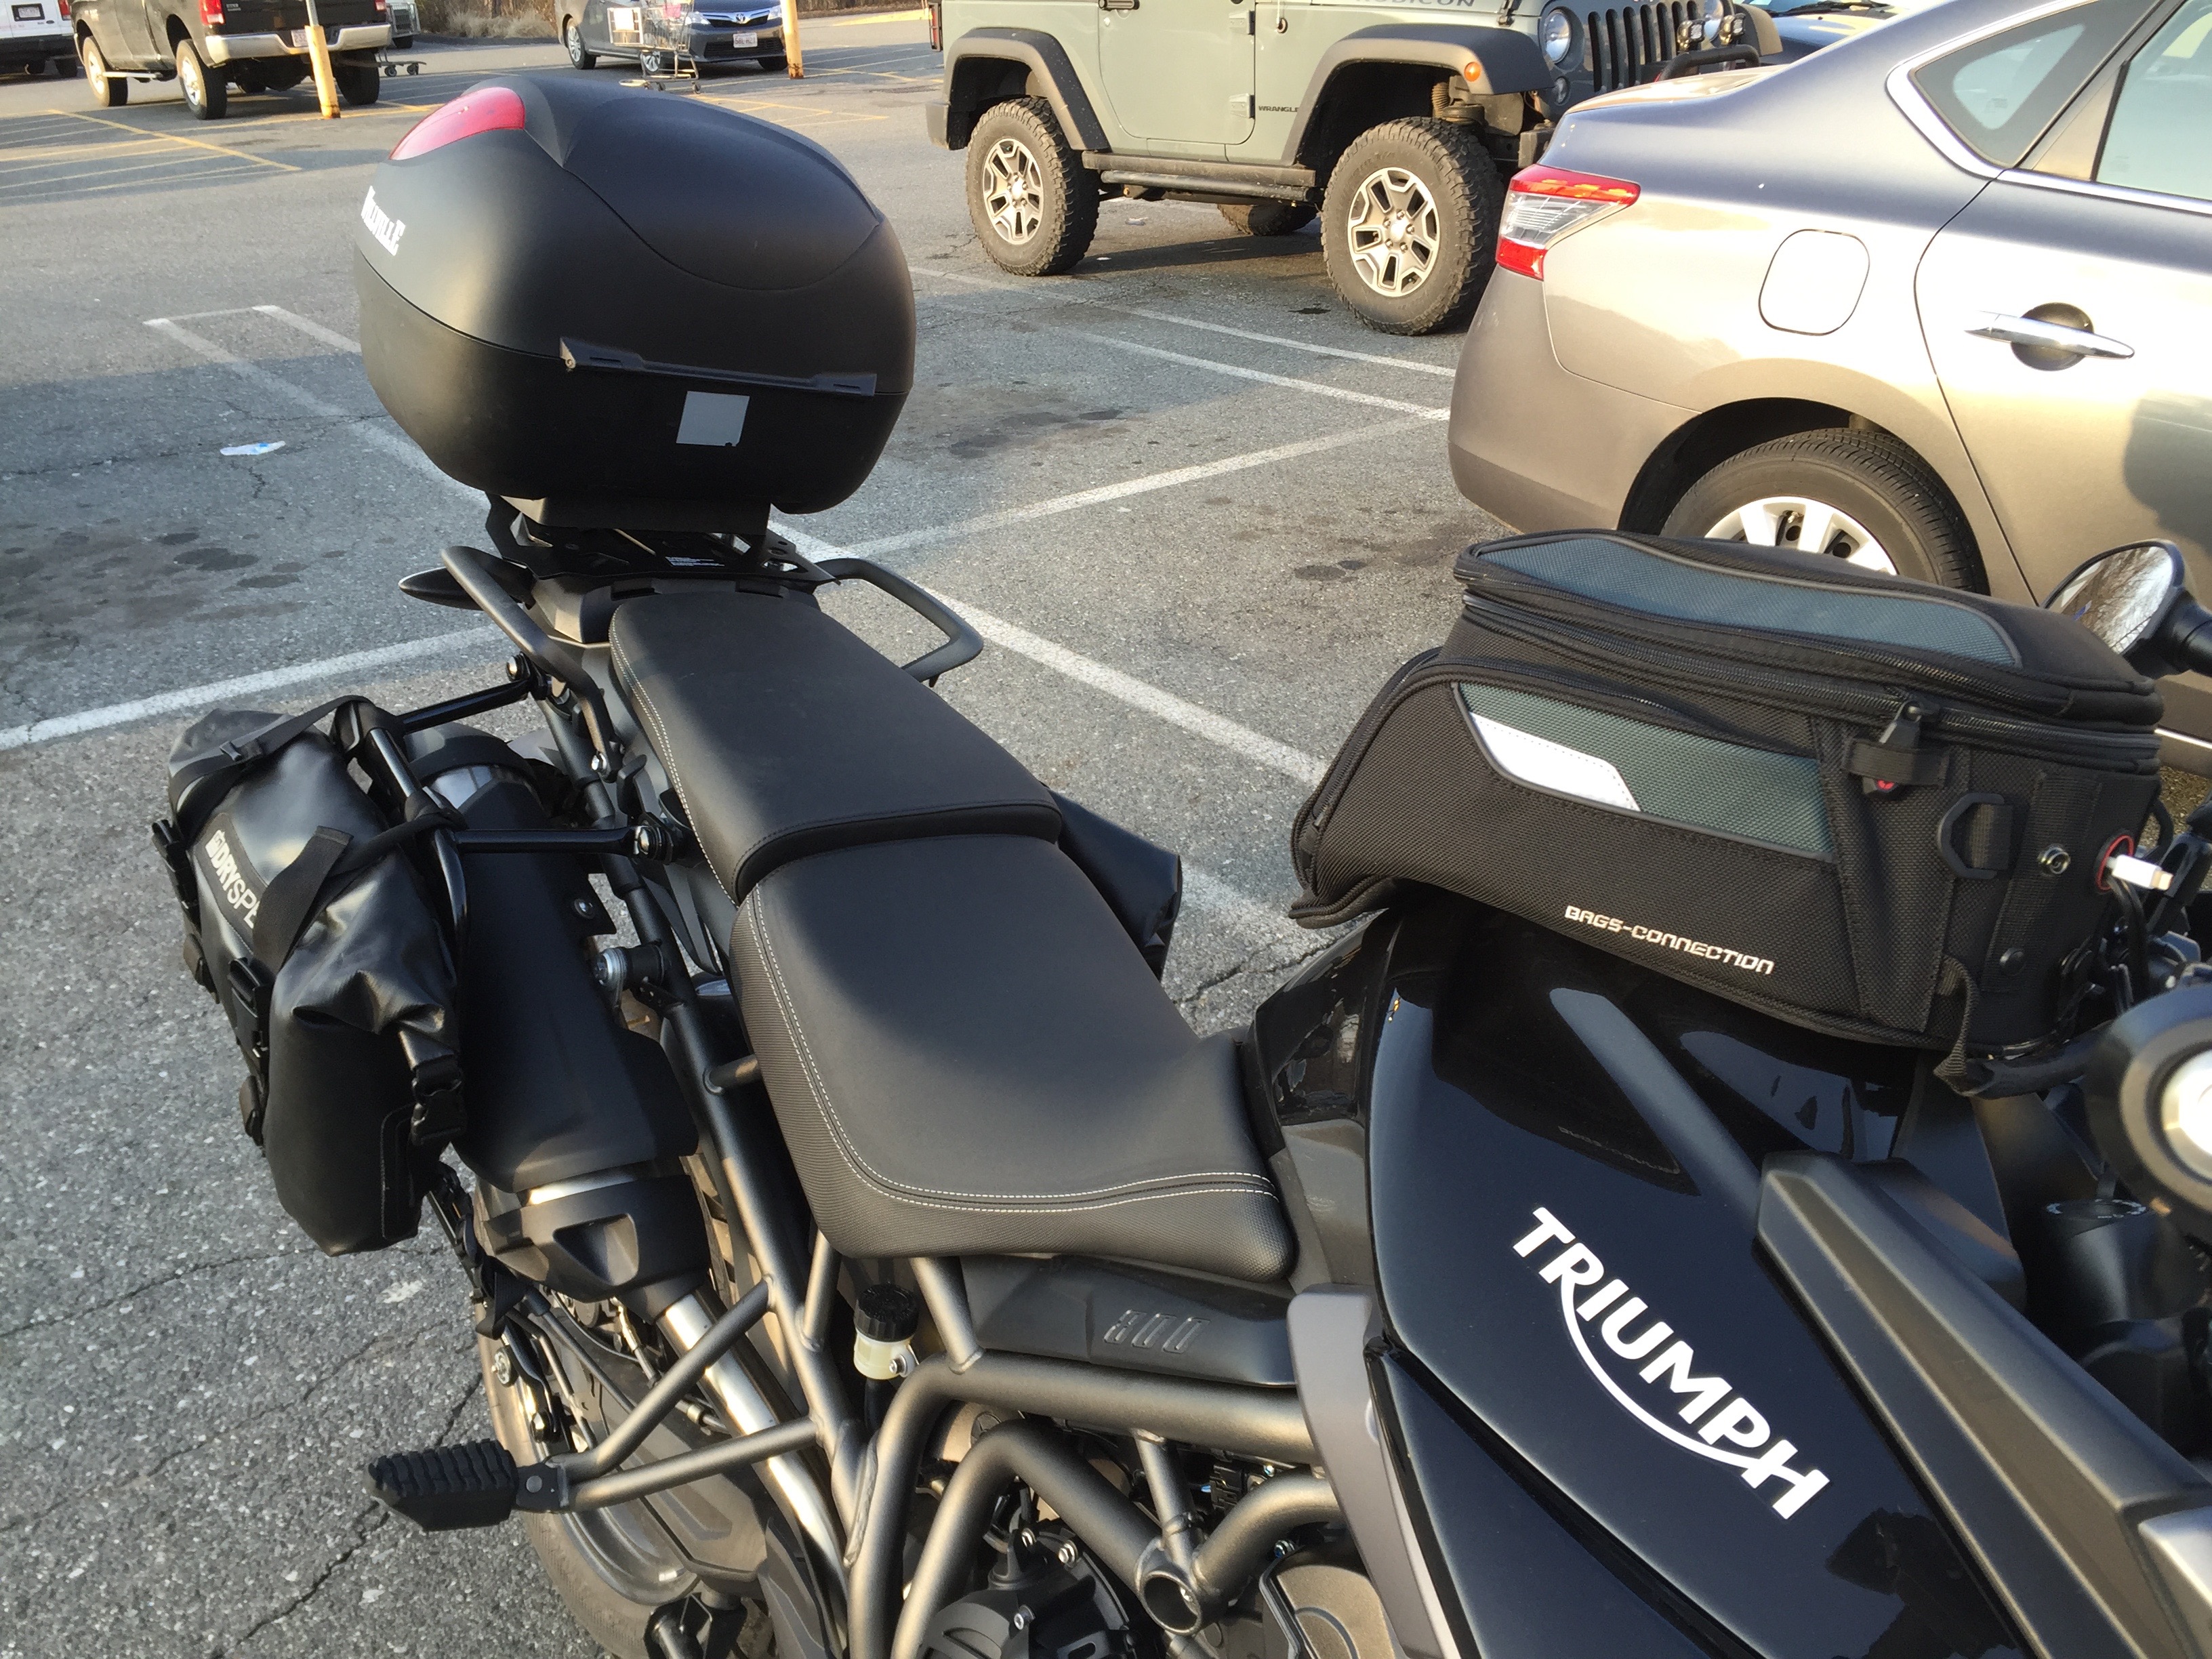
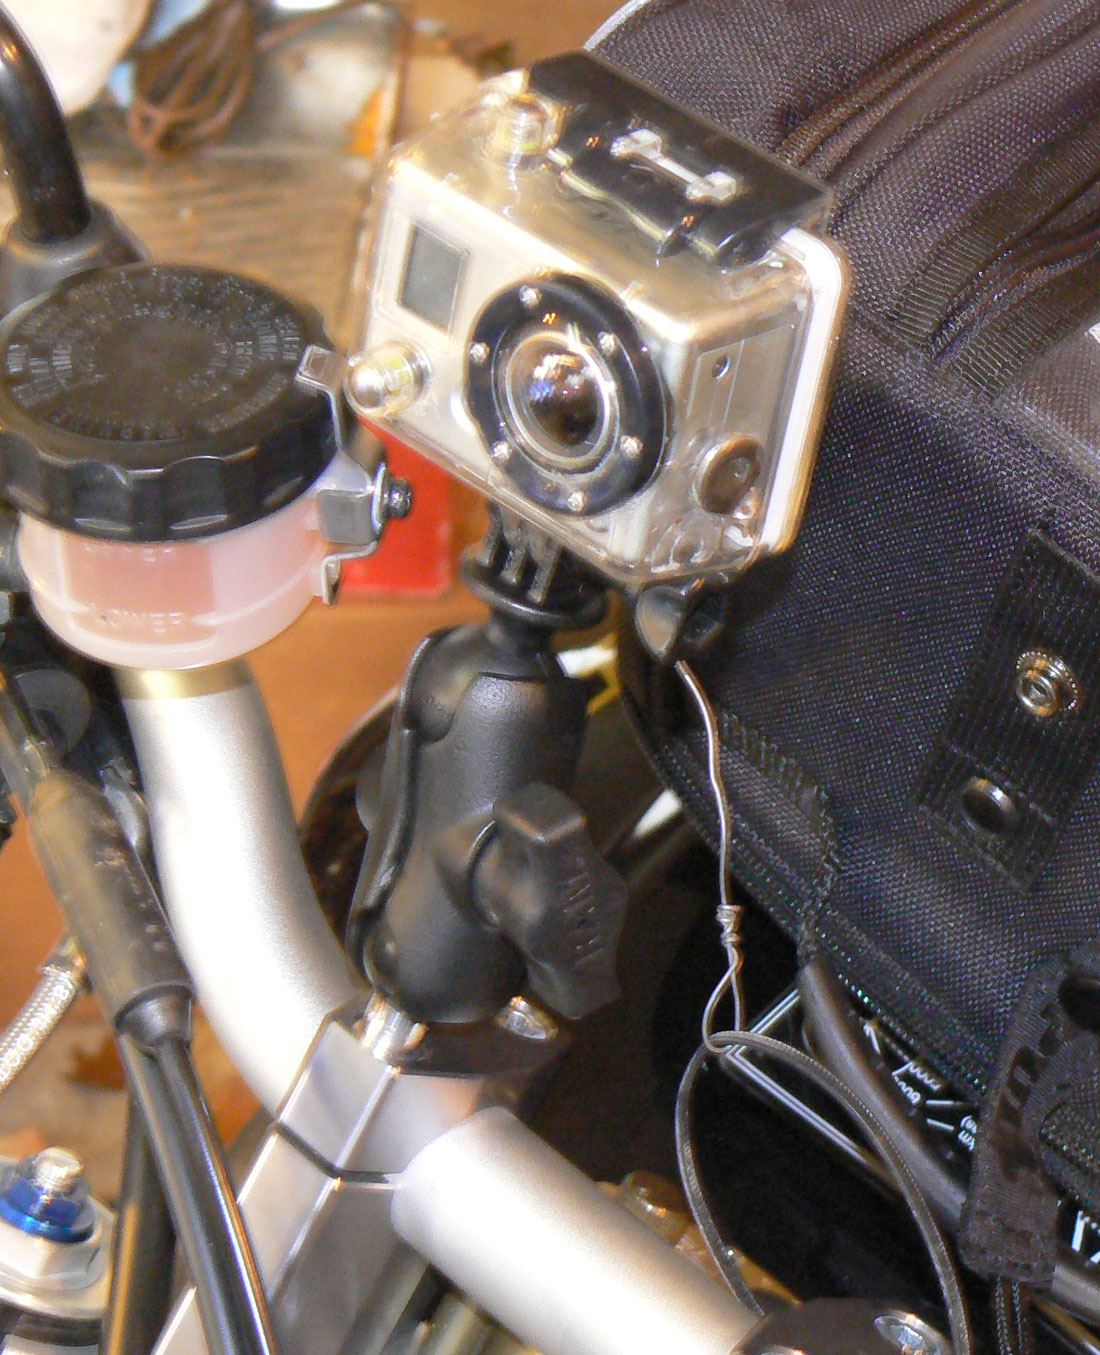
Accessories and Luggage

I wrote an article on accessorizing the Tiger. Read it Here.

Tires

tiger-mitas-oem
Mitas 50/50 tire on top. Metzeler 90/10 tire on bottom.

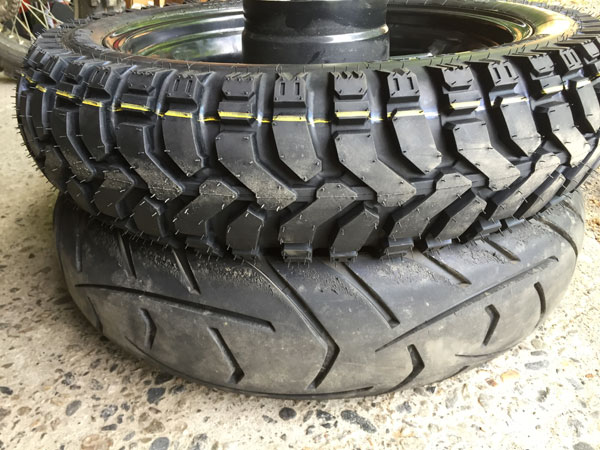
The stock Metzeler Tourance Next tires are fine for most people. I did a track day on them and they stuck, but delivered very little feel. This is expected because a 90/10 tire is designed to handle the rigors of rocks and such and is typically stiff with less emphasis on pavement performance.

For the last 6,000 miles, I’ve been rocking the 50/50 Mitas E-07. I wrote a review of the Mitas E-07 50/50 tires. In a nutshell, these tires are great and allow me to go places I never thought I could. For the Tiger Roadie, order the 110 front tire to avoid the ridiculous oversteer. Order the standard (not Dakar) version for the 800.

How is it to Ride?

Slow speed Maneuvers

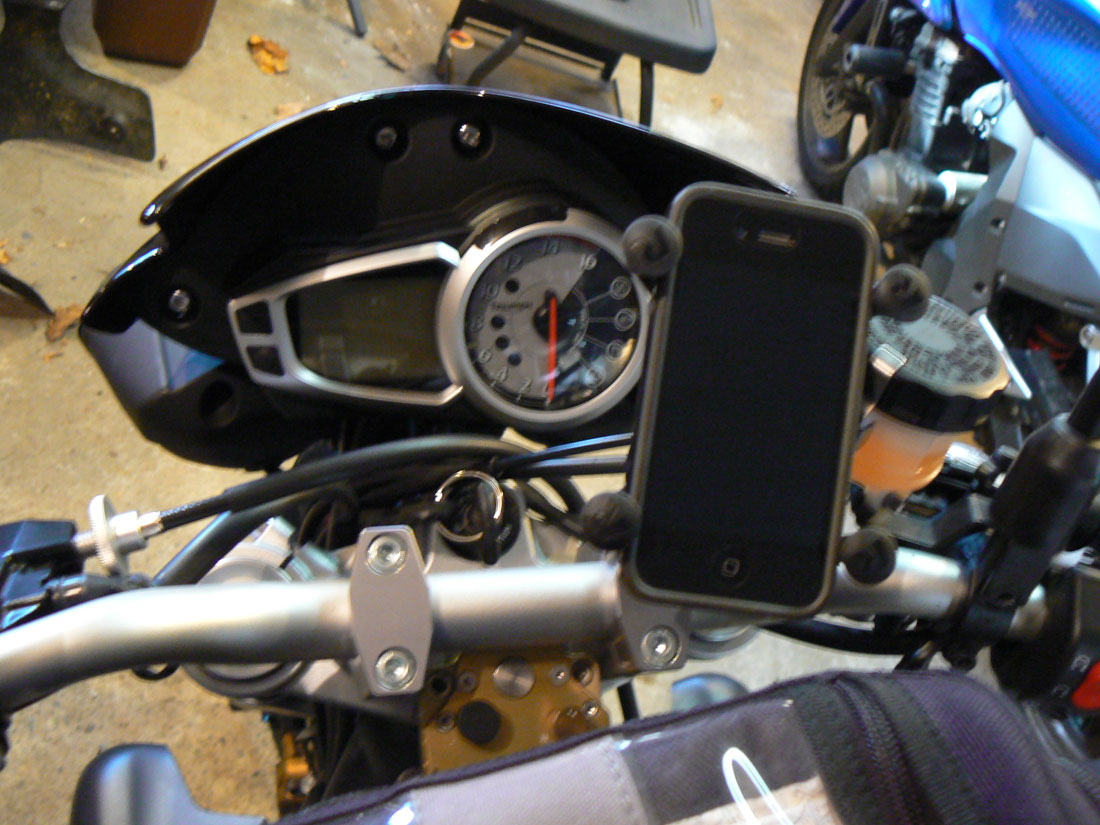
The Tiger is mostly easy to ride but is cumbersome at a standstill. Once you get the bike rolling at about 5 mph, then all is well, but as soon as you go below that speed, the bike turns into an awkward, top heavy beast. Unlike ADV bikes with a lower center of gravity, the Tiger carries it’s weight up high. The engine is mounted high to give ground clearance. Mounting the 5.3 gallon fuel tank on top of that doesn’t help. This all makes for a bike that wants to topple over at standstill. It doesn’t help that I have a top box and tankbag.

That doesn’t mean the bike can’t do tight U-turns. It absolutely can. You just have to get up to at least 3- 5 mph and keep it there. 7 mph is better. The higher speed means you have to lean the bike over more to tighten your arc without slowing down. Learn how to ride slowly by reading this article.

Steep, slippery and rocky...a bit difficult for the Tiger.
Steep, slippery and rocky…a bit difficult for the Tiger.

Off-road

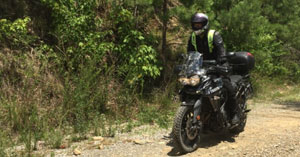
The Tiger is an absolute hoot on dirt roads and dual-track trails. I’ve done some bony hill climbs and rocky descents and tackled terrain I didn’t think possible on a 500+ pound motorcycle. But, the sheer size of the bike makes me a chicken when riding in sand, slimy muck and deep loose gravel. The fact is that the high weight causes the front tire to plow into the soft surface. The solution is to be on the gas. That’s why big ADV bikes tend to struggle when descending and are better at ascending where you’re on the gas.

The problem is that all that weight has inertia that will get you into trouble real quick if it starts heading in the wrong direction. A mistake on a 250 pound dirt bike can go almost unnoticed, but not with these ADV beasts.

Stay away from really mucky, loose terrain and you’ll have a blast. Oh, and be sure to ride with friends in case you get horizontal. And learn how to pick up your bike by yourself, as well. I strongly recommend you get some off-road training before venturing off road on your ADV machine.
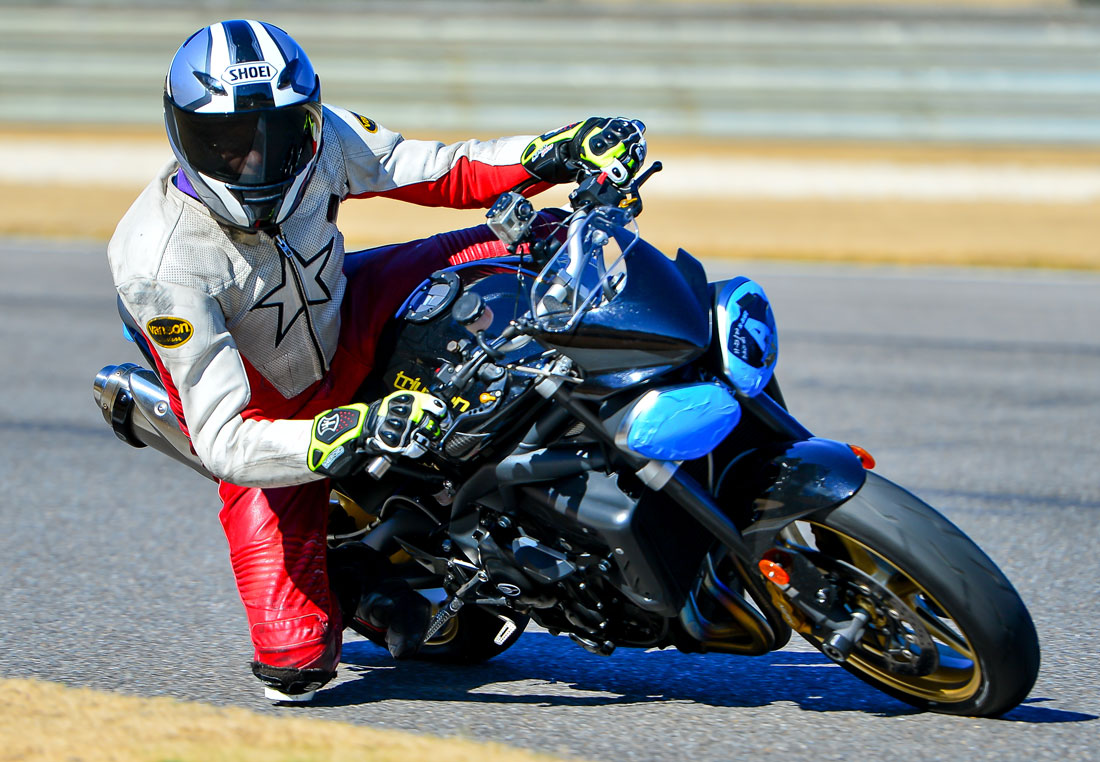
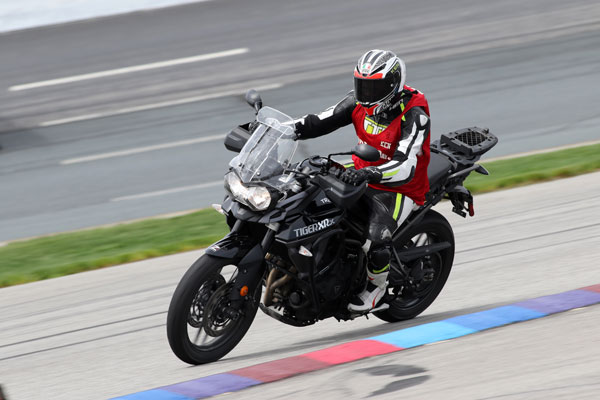
Corner Scratching

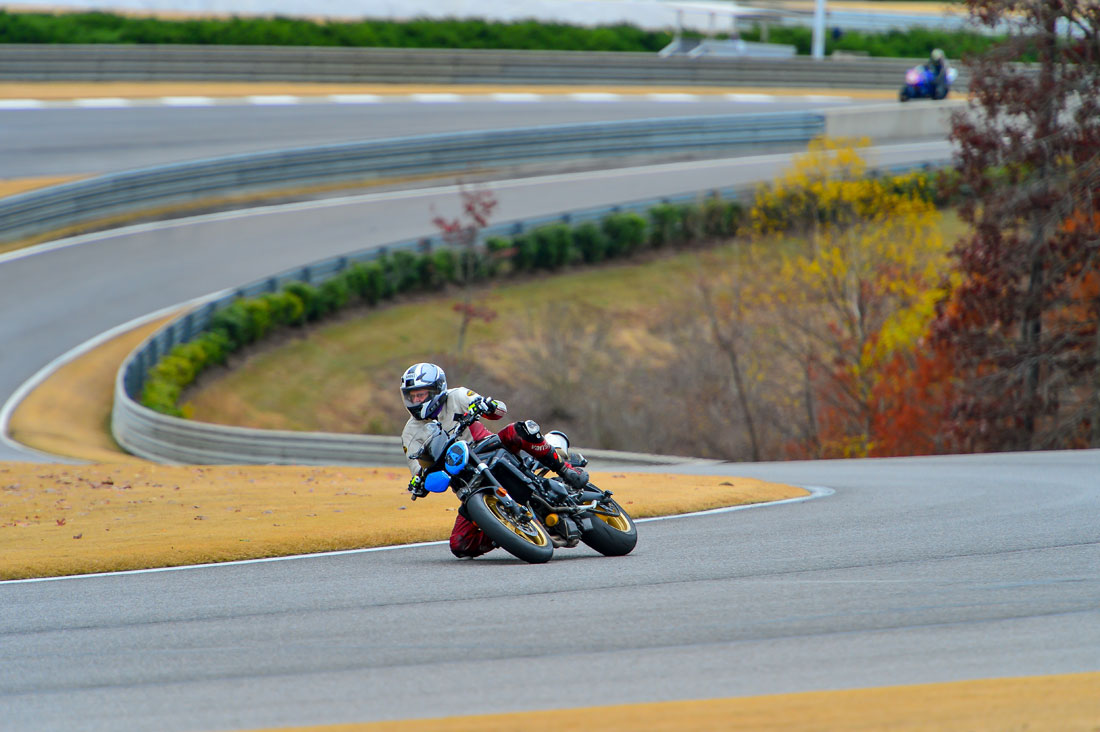
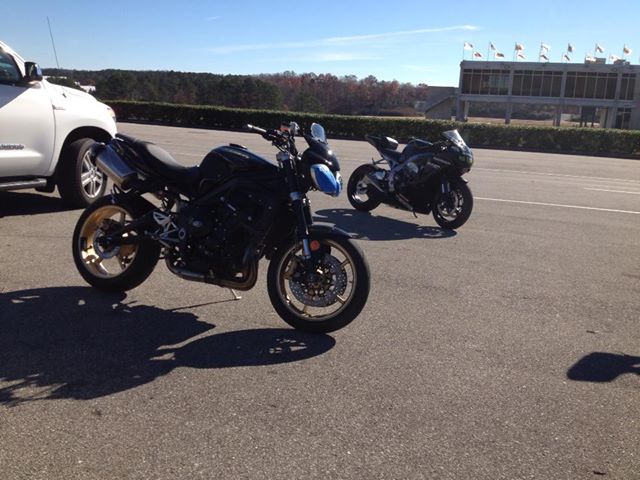
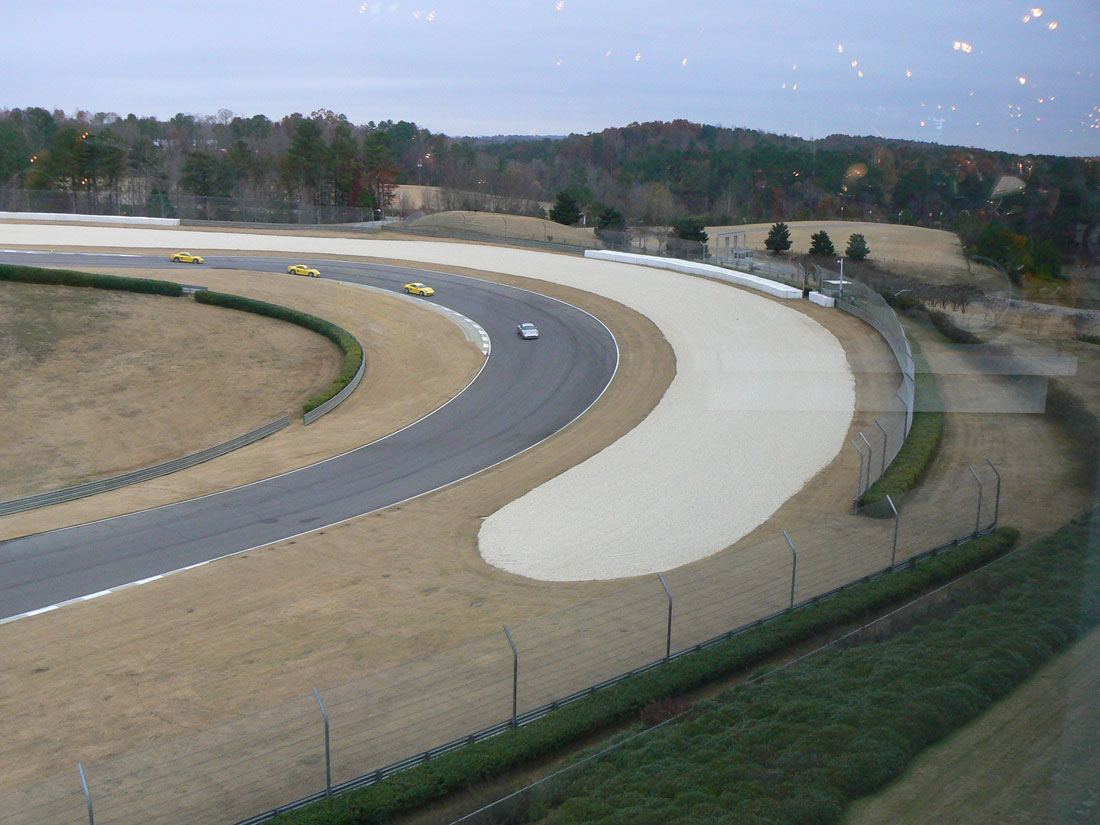
The Tiger is a little bit dirt bike and a little bit sport bike. Even with the 50/50 tires, I can pretty much keep with any sportbike ridden by an average rider. I had a great time on Deal’s Gap and at a track day. While it has it’s limits, the bike railed through the turns with good stability and decent precision. The 19″ front wheel helps with high speed pavement stability compared with the 21″ front wheel on the XC.

Traveling

The Tiger is a champ on the highway. I rode the lower half of the Blue Ridge Parkway and put on several highway miles. Mount a tankbag, sidecases and a windscreen spoiler blade and off you go.

The Tiger 800XRx has proven to be a terrific motorcycle that has expanded my riding immensely. I hunt for roads that I’ve always wondered where they went; roads I never would have ventured on with the Sprint.  I’m happy that I own the Tiger and will always have an Adventure bike in my garage.

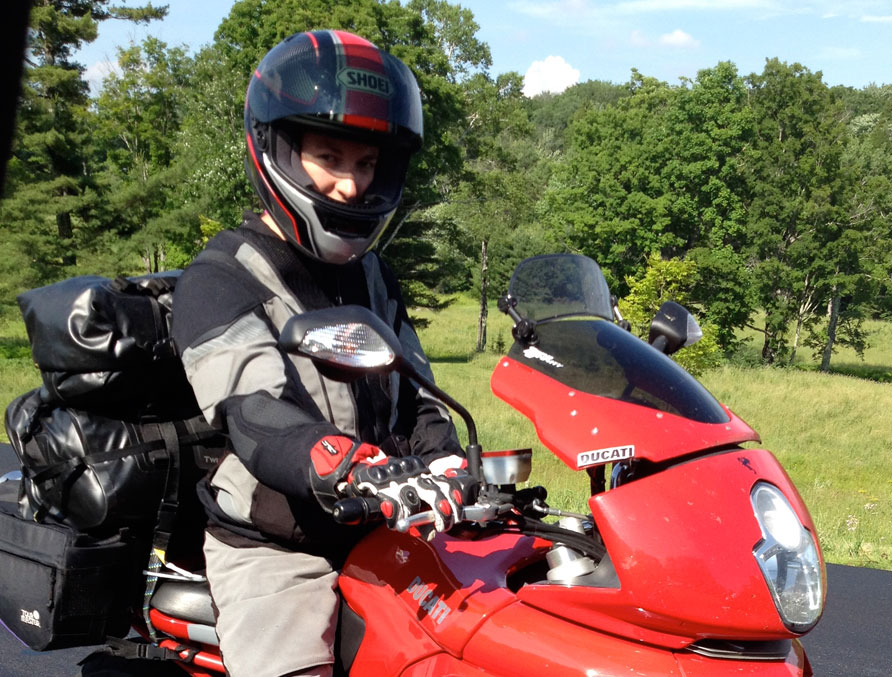
I did a bit of two-up riding with my wife, Caroline while in NC. We decided to spend a day doing the “Gravelhala” that mostly parallels the Cherohala Skyway. Since her z750s wasn’t a great off road bike, she jumped on the back and we took off. Overall, Caroline liked the flat, wide seat and the large grab rails. The rubber footpegs we nice, too. She really enjoyed having the top box to lean against for the bit of road riding we did together. Overall, it’s a good mount for a passenger.


Become a patron to support the website. Thanks

Adventure Accessories for the Triumph Tiger 800

Become a patron to support the website. Thanks

Mitas-bike-2The arrival of the newest addition to the RITZ garage is a Phantom Black 2016 Tiger 800 XRx. The Tiger has proven to be a true all-arounder. I have toured on it, done a track day, conquered Deal’s Gap and navigated some pretty gnarly roads and single track on the Tiger.

See my LONG-TERM review of the Tiger 800 XRx

I bolted on some accessories (“farkles” to you ADV guys) to help increase the Tiger’s versatility. My friends at Twisted Throttle took care of getting me all the best accessories I needed. They have some of the best Adventure bike accessories. Here is what I installed.

Bike Protection

SW-MOTECH Crash Bars

SW-MOTECH Crash Bars

SW Motech is a German company specializing in top-shelf bike protection. Their crash bars are seriously beefy compared with others I’ve seen, including the Triumph branded bars. The trade off is weight. The SW bars add some pounds to the bike, with much of it held high where the upper loop is located at tank level.

The advantage of the high loop is the protection offered to the fuel tank. But, realistically, a low bar that protects just the engine is a fine option, partly because if the tank makes contact with the ground, it is the plastic side panels that get nailed, and those are only about $60.00 to replace. An good engine guard alternative are the R&G Engine Guards.

Another problem I found with the high SW bars is vibration. It seems as though the setup acts a bit like a tuning fork. Although I noticed the vibes on my first ride with them installed, I no longer notice it at all so this should not be a deal breaker. If you want maximum protection, the SW-M bars are the way to go.

Skid Plate/Sump Guard
SW-MOTECH Skid Plate/Sump Guard

SW-Motech Skid Plate (Sump Guard)

The Tiger comes with a decent plastic skid plate, but it is not beefy enough for the type of abuse the bottom of the engine and frame will be exposed to so I ordered the SW-Motech skid plate. It mounts easily and covers much more of the vulnerable underparts not protected by the OEM plate, including the oil filter, lower exhaust canister and frame rails. It’s quite satisfying to hear the sound of rocks pinging off it’s surface. Money well spent.

R&G Radiator Guard

Putting a hole in a radiator from an errant stone  will end your day real fast and is an expensive repair so I installed the R&G rad guard. R&G makes a heavier duty stainless steel guard, but I went with the lightweight aluminum unit. It installs easily and looks great.

I need a Hugger
R&G Hugger

R&G Rear Hugger

A Hugger is a rear fender that mounts close to the rear tire to help keep your rear shock clean. The R&G hugger bolted on perfectly and gives a custom look to the Tiger’s rear end.

Pyramid Fenda Extenda

The Fenda Extenda mounts to the bottom of the front fender to help keep crap from flying onto the front of your engine and radiator. It requires some drilling, but is easy enough to install.

Luggage

Side carriers and crash bars

SW-Motech Hard Bag Sidecarriers

I already owned a set of DrySpec D20 drybag saddlebags and wasn’t planning to buy hard cases until I realized that the soft saddlebags needed to be supported by a side carrier to avoid drooping under the rear fender and seat. I went ahead and bought the SW-Motech side carriers for use with the D20s but then decided to go for some side cases after all (see below). These carriers are awesome. They quickly release from the bike with just a twist of 4 Zeus fasteners. And the quality is top-notch. They carry all brands of side cases with the proper adapter kit.

The Givi E-22 side cases look good and are narrow and light.

Givi E-22 Side Cases

There are a lot of side cases to choose from, including the Trax Boxes and cases from Givi and other manufacturers. But, I chose the most lightweight and inexpensive hard case option; the Givi E-22. The 22 is an updated version of the basic E-20 that has been around for years. The new shape looks great and it is just big enough for my needs. Their small size means that the width of the bike when they are installed is fairly narrow.

The cases open at the top so my contents don’t go spilling onto the pavement when I open them. At the low price of less than $250.00 for the SET, you don’t get premium construction, but they have held together just fine and I expect them to perform well for many seasons. FYI, I mount mine backwards from what is intended because I like the way the rearward slop looks on the Tiger.

Bags Connection City tank bag with Quick release ring.

Bags-Connection City Tank Bag

The BC tank bags are pricey, but are also well made and highly functional. The quick-connect tank ring is really easy to use and is totally secure. I ride the roughest roads with the small City bag and it has never flown the coop. For Tiger 800 riders, you want to mount the top ring as far back as possible on the bag so it doesn’t interfere with your man (or woman) junk when standing, especially on uphill climbs.

You can opt for the electrified tank ring version that gets power inside the bag just by mounting it to the special tank ring. I chose the non-e setup and feed a Euro plug-to-SAE cord a SAE-to-Cigarette socket through the front cord port to get power from the Triumph power socket to the tank bag. I charge my phone, Interphone Bluetooth Comms and whatever else needs juicing up during a ride.

tiger-steelrack
The SW-MOTECH Steel rack mounts over the stock luggage plate.

SW-Motech Topcase Steel Rack

I already had a Coocase topcase from my last bike, but I needed a way to mount it to the Tiger. I could have drilled the OEM luggage plate and rigged up the Coocase to it, but I decided to do it right by buying a SW-M Steel rack. The rack is super-strong and mounts over the plastic Triumph plate for a rugged mounting solution. You can opt for the slightly lighter Alu-Rack, but I like the look of the Steel rack and the lower price.

BDry Spec Drybag saddle bags with SW-MOTECH side carriers and City tank Bag.
Dry Spec drybag saddle bags with SW-MOTECH side carriers and City tank Bag. The Coocase top box is mounted to a SW-MOTECH Steel Rack.

DrySpec Saddlebags & DrySpec Duffle

A lot of ADV riders opt for Hard Cases, like the SW-MOTECH Trax Boxes or the GIVI Trekker Cases. I went with more street-oriented Givi E-22 Side Cases for road and touring. But for real off-road trips, I opt for soft side luggage for two reasons. One, the DrySpec Saddlebags will not get damaged in a fall, and two there is no risk of getting a leg crushed underneath the boxes in a fall or having my calf come in contact with the front of a box when I have to dab my foot while in motion.

The DrySpec Saddlebags & DrySpec Duffle are both totally immersible and sturdy enough to over-pack. They are small, but that just forces me to pack light. The integrated mounting straps are really secure and easy to install.

Tool Tube
Tool Tube

Tool Tube

The space between the side carrier and the right side of the Tiger is occupied by the exhaust, but there is lots of space on the left side for something. That something I chose was a Tool Tube. I put extra tools, a small can of chain lube and a few other items in their for safe keeping.

Comfort

MRA Spoiler Blade and GPS Mount.

MRA X-creen Sport Clamp-on Air Spoiler

I get a ton of questions about the spoiler blade I have mounted on the Tiger’s stock windscreen. A lot of people have replaced the stocker screen with MRA or Givi screens, but I like the look of the stock screen, and with the addition of the adjustable MRA X-creen spolier blade, I am perfectly happy with the way it manages wind. I wrote a complete review of the MRA X-Creen earlier when I first mounted one on my Sprint RS. A great option.

roxROX Bar Risers

Standing is a big part of off-road riding. The stock bar mounts were okay, but the reach when standing was a bit far and I was also hoping to find a better bar position that alleviated the cramp I get in my upper back. The ROX risers are nicely made and offer a wide range of adjustability with two points of rotational movement. Now, I can stand naturally when riding off road, but the back cramp is still there. I just can’t seem to find a position that helps this problem. I will continue to work with the ROX risers to find that solution.

Electronics

RAM Mounts and X-Grip Phone Holder

RAM Mounts and arms reliably hold my GoPro, iPhone and GPS. There are so many options that it forces you to get creative about where to mount the RAM ball and then which RAM arms to use for your particular needs.

The X-Grip has proven to be a secure and easy mount for my iPhone 5 and 6, even when riding single-track trails on my KLX. Just be sure to use the RAM Tether on rough terrain.

GPS Holder with RAM ball.

SW-Motech GPS Mount

This Mount positions your GPS (or other device) right smack dab in the middle of the windscreen, just above the instruments using custom bracket and a RAM ball and arm. It’s a perfect solution to prevent having a GPS cluttering your handlebars. It is high quality and mounts easily.

Tank Bag Power

Click the title link to see various electrified tank bag options. I mentioned the tank bag system I have that uses a Euro plug-to-SAE cord a SAE-to-Cigarette socket to power the tank bag. Either option is a good one. Having power in your tank bag is a necessity in today’s e-world.

Tires

tiger-mitas-oem
Mitas 50/50 tire on top. Metzeler 90/10 tire on bottom.

Mitas E-07

I wrote a complete review of the Mitas E-07 50/50 tires. In a nutshell, these tires are great and will allow you to go places you never thought you would. For the Tiger Roadie, order the 110 front tire to avoid the ridiculous oversteer. Order the standard (not Dakar) version for the 800.

Mitas Terra Force

I have not mounted these 90/10 dual sport tires yet, so keep an eye out next year for a full review.


Become a patron to support the website. Thanks

2016 Triumph Speed Triple R Review

Become a patron to support the website. Thanks

Ken-Speed Triple-road-sm

I recently returned from Spain after testing the 2016 Triumph Speed Triple R. Take a look at the short video to hear some of my thoughts.

But, first, some history:

Way back in 1994, Triumph introduced the Speed Triple. This bike was the first real mashup of sportbike performance with the naked styling and practicality of a universal “standard” motorcycle. This new Streetfighter genre helped redefine the Hinckley based company as a serious player.

Over the years, the Speed T went through an evolution that saw increases in motor displacement, as well as upgraded suspension and brakes. In 2011 Triumph jettisoned the classic round “bug-eye” dual headlight arrangement for the current love ‘em or hate ‘em oblong-shaped beams. That year, ABS was first offered as an option.

Ken-Speed Triple-track-sq-smIn 2012 Triumph introduced the uprated “R” model that included Öhlins suspension, Brembo brakes, lightweight forged aluminum hoops and bits of carbon fiber trim. To this day the Speed Triple has remained one of the most well-rounded and exciting bikes on the market, earning Motorcyclist’s “Best Naked Bike” award in 2011 and 2012. A lot has happened in the naked bike segment since then and Triumph knew the Speed Triple was in need of some serious love if it is to rise to the top once again.

To get a feel for the new Speed Triple, we rode in the coastal hills an hour south of Barcelona and ended the day riding on the tight and technical Carafat Circuit.

So, how was the bike?

The standard “S” model is priced at $13,200. Add $1,700 to get the “R” version’s top-shelf Öhlins suspenders and carbon bits for a total of $14,900.

More video


Turn 4, Calafat Circuit, Spain

Catalan hills

Read my review at MotorcyclistOnline.com

Please Donate to Keep the Articles Coming

If you liked this article and the many other articles on this site, please toss a buck or five into the hat. It’s greatly appreciated!

    • Click the PayPal “Pay Now” button.
    • Then indicate quantity in $2.00 increments. Example: put “2” in “QUANTITY” field to donate $4.00, “3” for a $6.00 donation, etc.

Why $2.00? Due to the PayPal fee structure, a $2.00 donation is significantly more beneficial compared to a $1.00 donation.

Thank You!


Check out these posts:


Stay Informed: Subscribe NOW!
Be a Better Rider: Sign Up for Personal Training with Ken
Support Riding in the Zone: Buy a book
Support Riding in the Zone: Buy products from Twisted Throttle


Become a patron to support the website. Thanks

Product Review: MRA X-creen Add-on Spoiler Blade

Become a patron to support the website. Thanks

Featured-Product-Photo-MRAI get a lot of questions about which products I use, so I’m adding a new blog category where I can share some product reviews. Many of the products I am writing about are ones I actually use and can recommend. If I have reservations about a product, rest assured I will tell you.

First, a Word About Twisted Throttle

Many of the products are available through Twisted Throttle. This is because I have a special relationship with the company, so I get an nice discount (No, I can’t get YOU that discount, yeesh). Understand that I don’t use crappy products, even if they are discounted! Thankfully Twisted Throttle sells some of the best, highest quality motorcycle products around. 

Master-pProduct_Widget-HorizontalIf you choose to buy any product from Twisted (not just ones I feature), please buy from their site through the links in this post, from the ads in the sidebar, or by clicking on the product images at the bottom of this post. That way you help support Riding in the Zone. You don’t have to do anything more; just click and shop as you normally would. Much Appreciated!


Product Review: MRA X-creen Add-on Spoiler Blade

The MRA X-creen (yep, it’s spelled without an “s”) is a spoiler blade that either clamps or bolts onto your existing windscreen. I bought the MRA for additional wind protection on my Sprint RS street bike, but soon figured out that it works great clamped to the flyscreen of my Triumph Street Triple track bike. I can adjust it upward for colder days and when my neck gets tired from windblast. I can also move it downward for maximum airflow on warm days.

MRA X-creen TOUR clamp-on
MRA X-creen SPORT clamp-on

The X-creen comes in two sizes, the smaller Sport version and the taller and wider Tour version. The larger Tour model comes specifically with either clamps or bolt-on hardware. Both models are available in clear or smoke. I have the clear version for my Sprint RS and smoke for my Street Triple.


Installing the X-creen

Option 1: Clamp-on, Clamp-off

Assembling the adjustment mechanism to the spoiler blade is pretty easy. You have to first decide whether you want to use the clamps (this is what I use) or use the bolt-on hardware for a permanent installation. The clamp-on version allows you to move the blade from one bike to another. The clamp hardware is really nicely made and utilizes rubber inserts that will not scratch your windscreen (or paint in the case of my Street Triple’s flyscreen).

Assembling the clamps involves placing the pivoting locking mechanism in the ends of the adjustment arms. This takes only a few minutes.

No, the clamp-on version will not go flying off as soon as you hit highway speeds. As a matter of fact, I’ve done 130 mph (on the racetrack of course) and the blade stayed securely in place. See the video below for proof!

General Installation Instructions can be found HERE.

Option 2: Drill Baby, Drill!

If you choose to bolt the blade on permanently, you’ve got more work to do. Specifically, you’ll have to drill two holes in your existing windscreen. The kit comes with a template for locating the holes. If this makes you queasy, Twisted Throttle sells MRA replacement windscreens with the X-creen already bolted on for specific bikes. Even though replacement screens cost a bit more, some people may feel better having MRA do the drilling and installing at the factory.

Installation instructions for drilling can be found HERE.

If you decide later to use the X-creen on a different bike, but don’t want to drill any holes, you can convert a bolt-on screen to a clamp on screen using a special conversion hardware kit. Note that this is for the TOUR version only. The SPORT version comes with both clamp-on and bolt-on hardware.

Four videos on how to install the X-creen can be found on the Twisted Throttle Product Page.


How Does it Look?

The X-creen is unobtrusive, and dare I say, I think it’s even attractive, especially on the Sprint RS where it fits nicely on the stock screen and isn’t out of place on this sport touring bike.

On the Street Triple, it is a bit less graceful looking, but I think it looks as good or even better than many other windscreen options, including the Triumph factory flyscreen visor kit, which requires you to drill the flyscreen (Yuck), almost completely covers it over (why did I buy a flyscreen to begin with?), and doesn’t add very much wind protection. Oh, and it’s kinda spendy.

But, judge for yourself. Here are some photos of the MRA X-creen on a Ducati Multistrada, my Triumph Sprint RS, and my Triumph Street Triple R.

The X-creen mounted on a 2007 Ducati Multistrada. Model: Jeannine Condon
The X-creen mounted on a 2007 Ducati Multistrada.
The X-creen mounted on my Sprint RS
The X-creen mounted on my 2000 Sprint RS
The X-creen mounted on my Street Triple R track bike.

Adjusting the X-creen

Adjusting the screen when it’s new requires some rough handling…sort of like when you replace face shields on Arai helmets: you feel like you’re going to break the ratcheting mechanism, but it’s okay…that’s just the way it is. Thankfully, after a bit of use, the mechanism loosens up and I can now adjust the screens while sitting on the bike (not while moving of course). All you do is turn the teardrop-shaped locks until they are pointed sideways and grab both sides of the screen and rotate into the position you want. The adjustability is almost infinite.

The X-creen in the upper position. (it can go higher, still)
The X-creen in the upper position.
The X-creen in the lower position.
The X-creen clamp-on mounts.
A view from the saddle.
The X-creen from the saddle.

How Does It Work?

Once positioned, rotate the locks and the screen won’t move. Trust me! I’ve been using the X-creen on the racetrack all season and it doesn’t move even at 130mph! See the X-creen in action in the video below.

As far as wind noise goes, The Sport version seems to be perfect for the Sprint. I do notice a bit more wind noise with the blade set vertically, but simply tipping it back a bit makes any wind noise go away. I’ve never felt any buffeting, at all. The fact is that the X-creen is so easy to adjust and has almost infinite positions that if I ever had excessive noise or buffeting, I’d simply try a slightly different position. I love having that versatility.


So, there you have it. The MRA Sport X-creen is a great accessory that offers a tone of versatility to you touring, sport touring, adventure or sport bike. It retails for $114.99 from Twisted Throttle.

Let me know what your opinion is of this product. And ask me any questions you have about the X-creen by posting in the comment section below. I’ll reply so everyone can benefit.


Please Donate to Keep the Articles Coming

If you liked this article and the many other articles on this site, please toss a buck or five into the hat. It’s greatly appreciated!

    • Click the PayPal “Pay Now” button.
    • Then indicate quantity in $2.00 increments. Example: put “2” in “QUANTITY” field to donate $4.00, “3” for a $6.00 donation, etc.

Why $2.00? Due to the PayPal fee structure, a $2.00 donation is significantly more beneficial compared to a $1.00 donation.

Thank You!


Click on the SHOP NOW Image to go to the Twisted Throttle Product and buy. Buy from here and support Riding in the Zone. Master-pProduct_Widget-HorizontalCheck out the other Recommended Products from Twisted Throttle and Amazon
 

Stay Informed: Subscribe NOW!
Be a Better Rider: Sign Up for Personal Training with Ken
Support Riding in the Zone: Buy a book
Support Riding in the Zone: Buy products from Twisted Throttle

New Bike, New Track

It’s hard enough to get accustomed to a new-to-you bike, but throw in a new-to-you racetrack, and things can get interesting. It’s kinda like patting your head while rubbing your tummy in a circular manner (I’m pretty good at that, BTW). Normally, I get up to speed fairly quickly when I ride a new track, evaluating each corner for its character: radius, camber, and whether it is an “entry” turn or an “exit” turn. But, it took me longer than normal to sort out the Barber track, mostly because the track consists of blind corners and a layout that is somewhat complex.

This means that it took a few sessions to not feel lost. I would be asking myself, “Wait, is this that tight turn or is it that turn that opens up?”.

Add to that the need to acclimate to a new-to-me motorcycle and the first day at Barber had me not exactly feeling Stig-like. The second day was much better.

Which way do I go?
Which way do I go? Notice the fogging face shield.
Copyright Raul Jerez / Highside Photo

Learning the Barber Motorsports Rollercoaster

I could tell you all the super-secrets I use to learn new tricks, but I would be repeating myself, because I already wrote a lengthy article on tips for learning new tracks on the Tony’s Track Days website. Read it HERE. Share any other tips you have in the comments below.

Even with my book of tricks in mind, I had a harder than normal time figuring out Barber. Now, to be fair to myself and to put things into perspective (lest you thought for one minute that I wasn’t awesome from the start), I was going respectably fast in the Advanced group after the first session. However, my standards for pacing with the fast guys made me rather discouraged. I know many of you slowpokes are used to being passed by half of whatever group you ride in, but I am not (just kidding). But, even after the third session, I was feeling a bit too much like I should be in the Intermediate group.

This would not do, so I consulted with Tony and my faster peers from New England and discovered that I was slowing too much for a few corners and not getting on the gas nearly early or hard enough. The last two sessions were better, as I started identifying the problem corners and applying some of the reference points Tony and the others were using.

Mother Nature's Tire Warmers
Mother Nature’s Tire Warmers

Sunday morning was 25 degrees F, so we substituted the frozen on-track festivities for a walk around and some bench racing around the tire warmers. Tony and I didn’t bring tire warmers, so we opted for Mother Nature’s warmers, which worked surprisingly well (at least on one side of the tires). After lunch, the temps got up to a whopping 35 degrees, so we pulled on our leathers and hit the track.

Nippy fingers and a fogging face shield told me to take it slow, but after a few laps, it became apparent that the track itself had some grip. Since it was 70 degrees only a few days before we arrived, the ground wasn’t nearly as cold as the air and the asphalt was well over 50 degrees…not great but acceptable.

Let the fun begin. The rest of Sunday was a blast. I started getting up to speed hooking up with Keith, Woody, and Rich. Tony, Adam and Aaron were too fast for me.  See the videos HERE.

But, wait! There is more to this story, so read on.

The ZX6R owenstrackdayphotos.com
The ZX6R
owenstrackdayphotos.com

A New Bike

If you’ve been reading the RITZ blog at all you probably know that I sold my most-awesome ZX6R for a Triumph Street Triple R. I really didn’t want to sell the ZX, but a medical issue required me to make the switch from a crouched racer posture to an upright naked posture (oh, grow up).

The differences between the ZX6 and the Street Triple’s spanned only a few areas: handling, gearing, power characteristics, body position, throttle response, drive timing, front tire grip, footpeg feel, shifting ease, wind noise, and color (I wonder how the Striple would look painted Kawi Green).

With all these things to adjust to, it took me most of the first day to get a good session in.

Is this bike twerking? Copyright Raul Jerez / Highside Photo
The new bike.
Copyright Raul Jerez / Highside Photo

Where’s the Power?

In a nutshell, I wished the 675 had more power. I know, I know power just masks poor riding. But, it also is very useful when trying to pace with the big boys.

The Triple doesn’t drive nearly as hard as the ZX636, so I needed to learn to ride the bike more like a small displacement bike, like a SV. To get the bike out of corners and reach acceptable speed on the straights, I needed to go from cracking the throttle to Wide Open Throttle (WOT) immediately to get the drive I wanted. I found myself using full throttle a lot. The 1050 throttle tube helped make full throttle a bit quicker compared to the stock tube, but a MotinPro unit may find its way onto the Triple’s handlebar end fairly soon.

Why is my Bike Twerking?

OK, so power was down, but that is something I found to be rather fun to manage. Full throttle is never boring. I even think I could have kept with Tony if the bike had better manners in the handling department. Don’t get me wrong, for most riders, the Street Triple R’s fully adjustable fork and shock would be awesome, especially for street duty. The bike never scared me, but I was pushing the bike fairly hard and found the bike wanting to wiggle like Miley Cyrus when cresting the turn 3 hill at full honk. I never felt as if I could drag a knee over that hill with the way the Striple was Twerking beneath me.

Perhaps there was some more adjustments that could have tamed the beast, but the temperatures were so low and the oil so thick that any adjustments would probably not net any real benefit, so I left the adjusters at the Loudon settings and dealt with it. Peter at Computrack Boston will be receiving my forks and order for a new shock by the end of the year so I can have more range of adjustment to suit my style.


In a future post, I will talk about my experience as a track day customer, as opposed to an administrator/instructor. I made note of several areas that helped me better relate to track day customers I work with. Stay Tuned.

Subscribe to my Newsletter Mailing List to receive update notices in your email inbox.


Please Donate to Keep the Articles Coming

If you liked this article and the many other articles on this site, please toss a buck or five into the hat. It’s greatly appreciated!

    • Click the PayPal “Pay Now” button.
    • Then indicate quantity in $2.00 increments. Example: put “2” in “QUANTITY” field to donate $4.00, “3” for a $6.00 donation, etc.

Why $2.00? Due to the PayPal fee structure, a $2.00 donation is significantly more beneficial compared to a $1.00 donation.

Thank You!


Check out these posts:


How Can I help You? Online Coaching NOW AVAILABLE
Stay Informed: Subscribe NOW!
Trianing-Tours_LandingBe a Better Rider: Sign Up for Personal Training with Ken
Support Riding in the Zone: Buy a book
Support Riding in the Zone: Buy products from Twisted Throttle & Amazon
Twisted_Affiliate-Interphone-widget


Barber Track Day Videos – Street Triple R

Sometimes, video is worth a thousand words, so here I present three videos from the recent trip down to Barber Motorsports Park in Alabama.

Below is a video that Aaron (Aprilia RSV4) shot of my first few warm up laps during that last session. The video does not show just how much of a roller coaster this track is. The elevation changes are significant. The Museum turn where we ride over the curbing is a less extreme version of the corkscrew at Laguna Seca.

Here’s one where I follow Tony onto the track and then he takes off. Tony got a hang of the track pretty quickly. It was about 45 degrees but sunny, so after a few slow laps, the tires were able to get warm enough for us to lay down some fairly quick laps. I was still learning the track and I can see several areas where I could maintain higher entry speeds and get on the gas earlier. Can you spot these places?

Ken follows Keith on his new-to-him 1100 Monster EVO racebike:

Below is a video posted by Keith (Ducati 1100 EVO Monster). I appear after 4 laps or so. Thanks Keith!

Barber motorsports part X-Act Nov 24 from GYRO BOX on Vimeo.


Subscribe to my Newsletter Mailing List to receive update notices in your email inbox.


Please Donate to Keep the Articles Coming

If you liked this article and the many other articles on this site, please toss a buck or five into the hat. It’s greatly appreciated!

    • Click the PayPal “Pay Now” button.
    • Then indicate quantity in $2.00 increments. Example: put “2” in “QUANTITY” field to donate $4.00, “3” for a $6.00 donation, etc.

Why $2.00? Due to the PayPal fee structure, a $2.00 donation is significantly more beneficial compared to a $1.00 donation.

Thank You!


Triumph Street Triple R gets accessorized

The Street Triple is serving duty as both a track bike and a street bike. It's great on gas.
The Street Triple is serving duty as both a track bike and a street bike. It’s great on gas.

The Street Triple R has been getting the track day treatment with protection, top shelf suspension, and race tires. You can read about the track makeover HERE.

But, since I’ll be riding the Striple both on the track and the street, I’m also adding some street goodies to help make it a bit more street-able. It’s a great street bike to begin with, but a few select accessories make the Street Triple R a nice road companion.


R&G Tail Tidy keeps the turn signals out of the way and save a ton of weight.

R&G Tail Tidy Fender Eliminator

The R&G Tail Tidy allows my bike to be ready for both track or street. The fender eliminator save a lot of weight and keeps the turn signals tucked in in case of a fall.

Click the link below to view the Twisted Throttle product page for the Tail Tidy.


Seattime

Here she is with all her track protection and street goodies.

The Triple R came with a Sargent seat as well as the stock seat. The Sargent is very firm, like I know Corbins to be. The shape is much flatter than the stock two-toned seat, which unlike the stocker, keeps my gentlemen from getting “tanked” when braking. The Sargent isn’t perfect. The forward edges are a bit sharp and it kinda keeps me on a single position. The Sargent makes most sense on the highway where I am angled forward into the wind, which scoots my butt back into the “pocket”of the seat’s shape.

On the track, I found the Sargent to be too restrictive when hanging off the bike all the way.

This is where the stock seat is superior with a crowned shape that allows for easy side-to-side movements. It’s really easy to change the seats, so I’ll use both for their respective purposes.


Lord of the Tankring

I’ve used the SW-MOTECH/Bags-Connection Quick-lock tankbags for a while now. The bags are very nice, but the real advantage of these bags is the tankring mounting system. The bag clicks on and off the tank so easily that I will never go back to straps or magnet tankbags.

The heart of the system is the tankring that mounts tot he gas filler ring around the gas cap and the mating ring screwed on the bottom of the tankbag. With this tankring, I can switch my Bags-Connection Sport tankbag on both of my bikes; the Sprint RS and the Striple within only a few seconds.


Lord of the Flyscreen

Naked bikes are, well, naked. As as such, expose the rider to a wall of wind. This isn’t bad for most street riding situation, but once it gets chilly and you hit the highway, that wind blast becomes a bit much.

I knew the Triumph OEM flyscreen would not give a heck of a lot of protection, and it doesn’t. But, I hope that it will give me a place to tuck when I’m flying down the racetrack at over 100 mph. We shall see when I head to Barber at the end of November.

Update: I added the Sport version of the  MRA X-creen from my street bike (Sprint RS) just before leaving for Barberrrrr…it worked great. From twistedthrottle.com


Phone Mount

I’m installed a RAM ball to the Triple’s handlebar mount so I can have my phone within sight distance for those times I use my iPhone’s GPS function. The phone itself will be attached using the spring-loaded RAM X-Grip device. It’s proven to be a secure mount during off road adventures with the guys and gals at Twisted Throttle.  I mounted the RAM ball on the forward right handlebar mount so that the phone would not block the more pertinent information on the LCD screen (speedo, time, etc.) As it sits, it is tucked close to the master cylinder and only blocks the tach past 14,000 rpm. Not a problem on the street.

The RAM GoPro ball makes mounting the camera a breeze. No need for sticking mounts on the bodywork. Just be sure to tether the camera housing to the handlebars in case things get loose.

I can listen to the GPS navigation through my Interphone Bluetooth Intercom. I also listen to music when I feel like it. This is the system I use when I do one-on-one instruction on the track and on the street when I travel with my family.

Update: The Striple has not seen much street time since track day season has begun. It’s slowly but surely turning into a track day-only bike. Take a look at how it’s become outfitted for the track.

Product Gallery. Buy from here and support RITZ

Twisted_Affiliate-widget-MRATwisted_Affiliate-Interphone-widgetTwisted_Affiliate-widget-GoPro

Twisted_Affiliate-widget-R-G-Exhaust Twisted_Affiliate-widgetR-G-Tank-SLider


Stay Informed: Subscribe NOW!
Be a Better Rider: Sign Up for Personal Training with Ken
Support Riding in the Zone: Buy a book
Support Riding in the Zone: Buy products from Twisted Throttle & Amazon

submit to reddit


Please Donate to Keep the Articles Coming

If you liked this article and the many other articles on this site, please toss a buck or five into the hat. It’s greatly appreciated!

    • Click the PayPal “Pay Now” button.
    • Then indicate quantity in $2.00 increments. Example: put “2” in “QUANTITY” field to donate $4.00, “3” for a $6.00 donation, etc.

Why $2.00? Due to the PayPal fee structure, a $2.00 donation is significantly more beneficial compared to a $1.00 donation.

Thank You!


Stay Informed: Subscribe NOW!
Be a Better Rider: Sign Up for Personal Training with Ken
Support Riding in the Zone: Buy a book
Support Riding in the Zone: Buy products from Twisted Throttle & Amazon
Twisted_Affiliate-Interphone-widget