Ken is author of "Motorcycling the Right Way” and "Riding in the Zone" (book and blog). He is also the "Street Savvy" columnist for Motorcyclist Magazine, and former longtime author of the Proficient Motorcycling and Street Strategies columns for Motorcycle Consumer News. Ken is Lead Instructor for Tony's Track Days, a 20 year Motorcycle Safety Foundation instructor, and owner of Riding in the Zone Motorcyclist Training.
I sometimes get questions from students, readers and other fellow riders asking whether there are ways to minimize injury during a crash. I’ll give you the few tips I know, but realistically you don’t have too many options once you and your motorcycle part ways. In most cases you will not have any control of the situation to do much more than hang on for the ride.
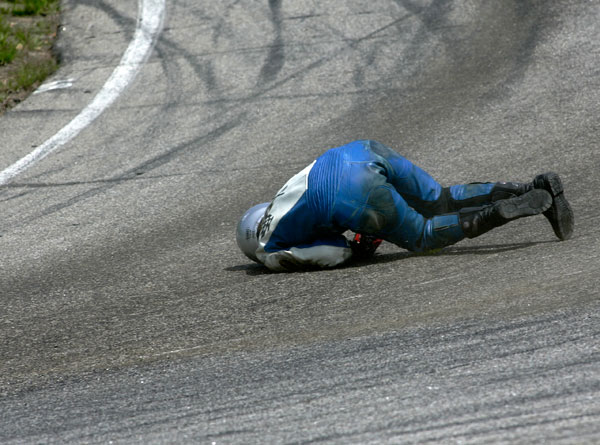
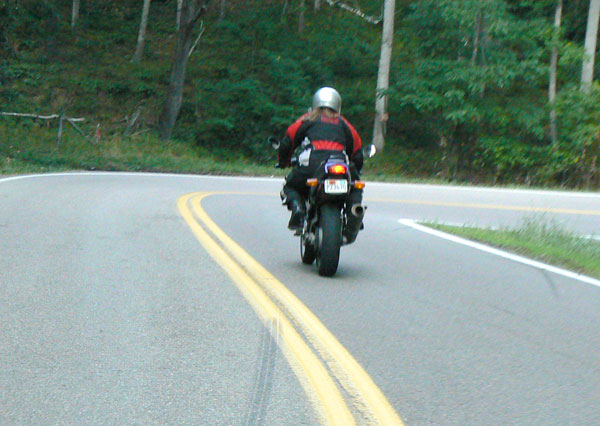
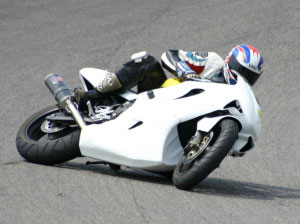
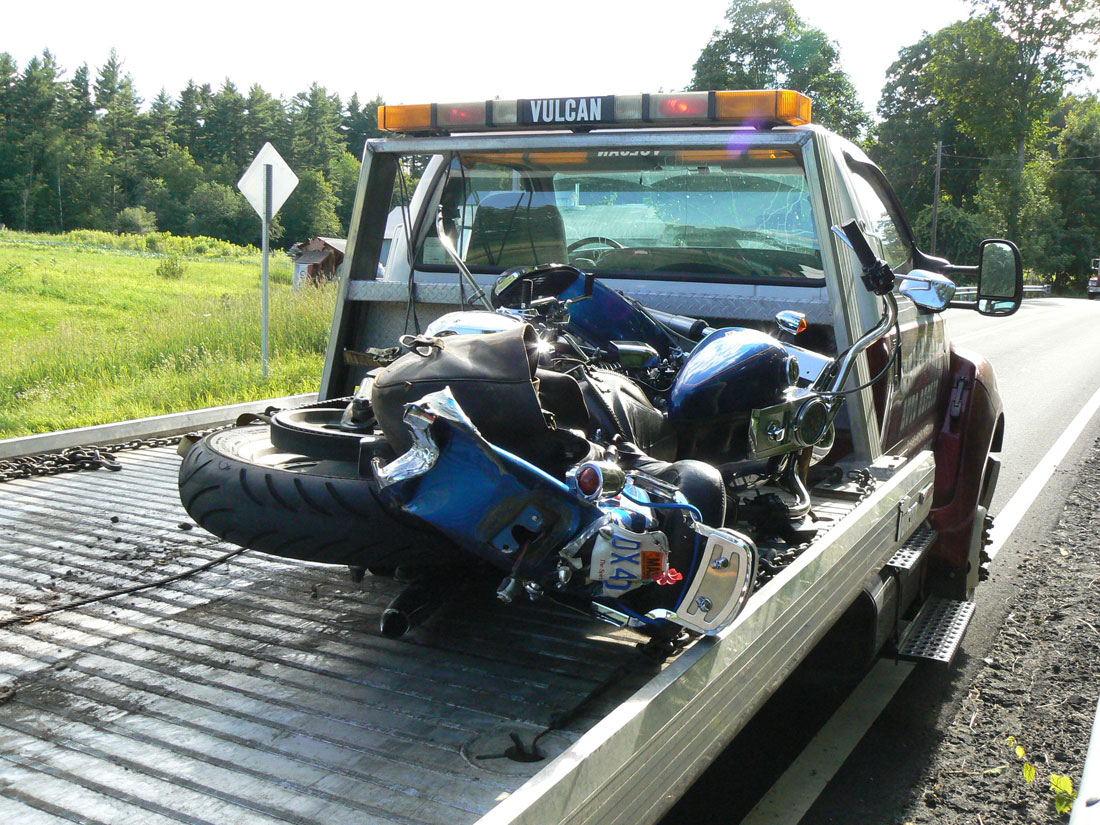
Sky, Ground, Sky, Ground photo: Josh B.
What Are The Options?
It’s not all bad news. Some “easy” crashes (like a low side on smooth pavement with plenty of runoff area) may allow you to exercise a few options.
Try to relax to make your limbs less rigid to minimize the risk of torn ligaments and broken bones (think cooked spaghetti).
If you’re sliding, extend your arms and legs to help slow yourself down and to spread the load so you don’t burn through your riding gear.
If you start to roll and tumble, tuck your limbs against your body…kinda like when you rolled down a hill as a kid.
Try not to extend your arms to break the fall. It’s human nature to extend your arms as you are falling, but this can lead to a broken wrist or collarbone. Even if you don’t extend your arms like Superman, a good whack on the shoulder can still snap a clavicle in two.
Let go of the bike! Hanging onto the handlebars will only make things worse. You want to be as far away from the bike as possible when it starts tumbling.
Don’t stand up right away. More times than not, you are still sliding even though you think you’ve stopped. Next thing you know you are seeing sky, ground, sky ground.
Remain flat on the ground. It’s better to have another bike behind run you over than hit you as you sit or stand up. If you crash on the street and get run over by a car, it doesn’t really matter.
Assess the situation and crawl to safety. You’re pumped with adrenaline and may not make good decisions, so look first and then move.
Remember, these are “shot in the dark” suggestions that may help, but may not.
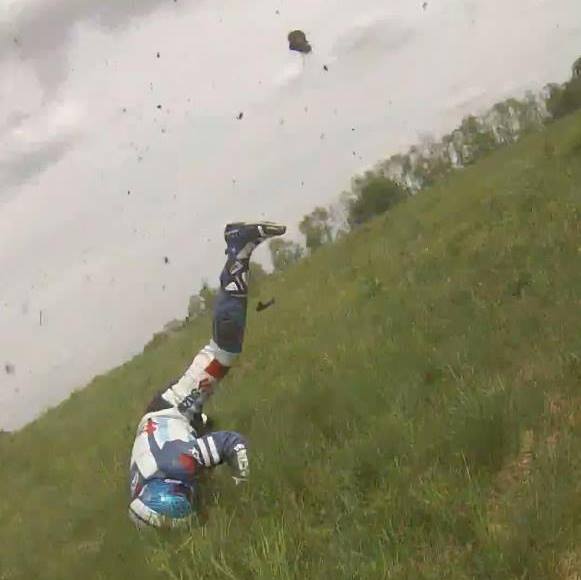
Marc Marquez takes a big hit. We would all wish for his airbag race suit if we were to crash.
To The Moon, Alice!
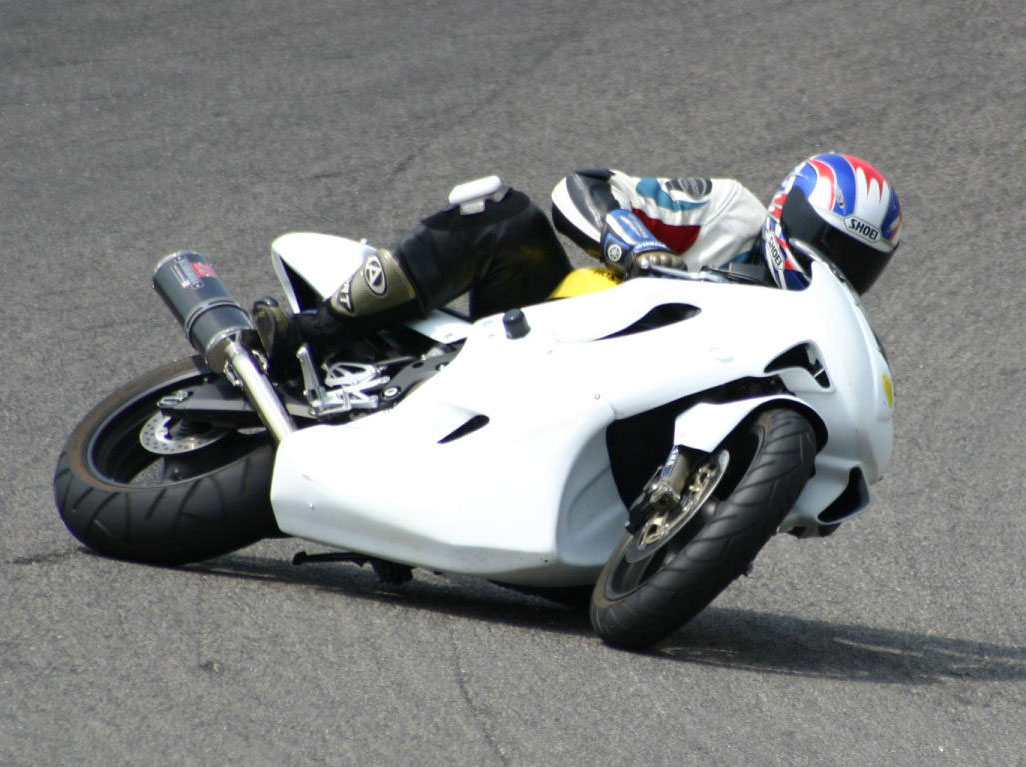
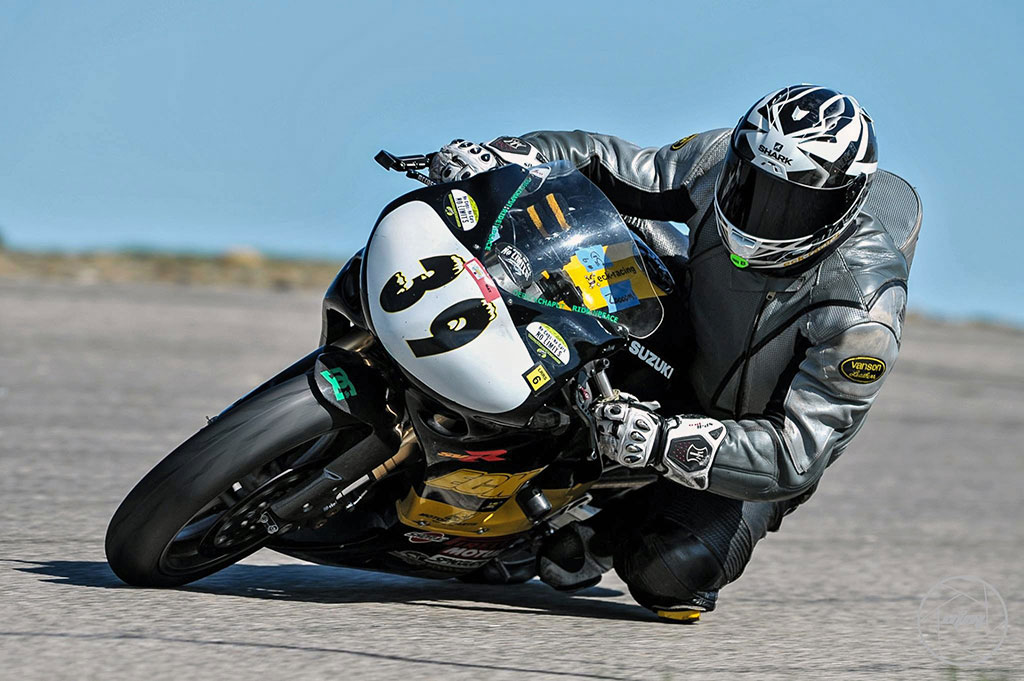
A highside in progress.
If you’re particularly unlucky you’ll get to experience a highside. A highside is when your bike’s rear tire loses traction (usually while you are exiting a corner on the gas) and the rear of the bike swings sideways. Just then, the rear tire regains traction and immediately tries to realign with the front wheel. This turns your bike into a trebouche and you are the catapult’s fodder.
Your landing will be hard and what happens after that is anyone’s guess. I just hope you’re wearing good armor (and back protector) and have decent insurance.
Crash Prevention
Instead of trying to control something that is not controllable, you’re much better off focusing on preventing the mishap from happening in the first place. Don’t drink and ride, don’t ride over your head, don’t ride faster than the environment can support, and become the smartest and most talented rider possible. Now, those are areas where you have some control.
Prepare For the Worst
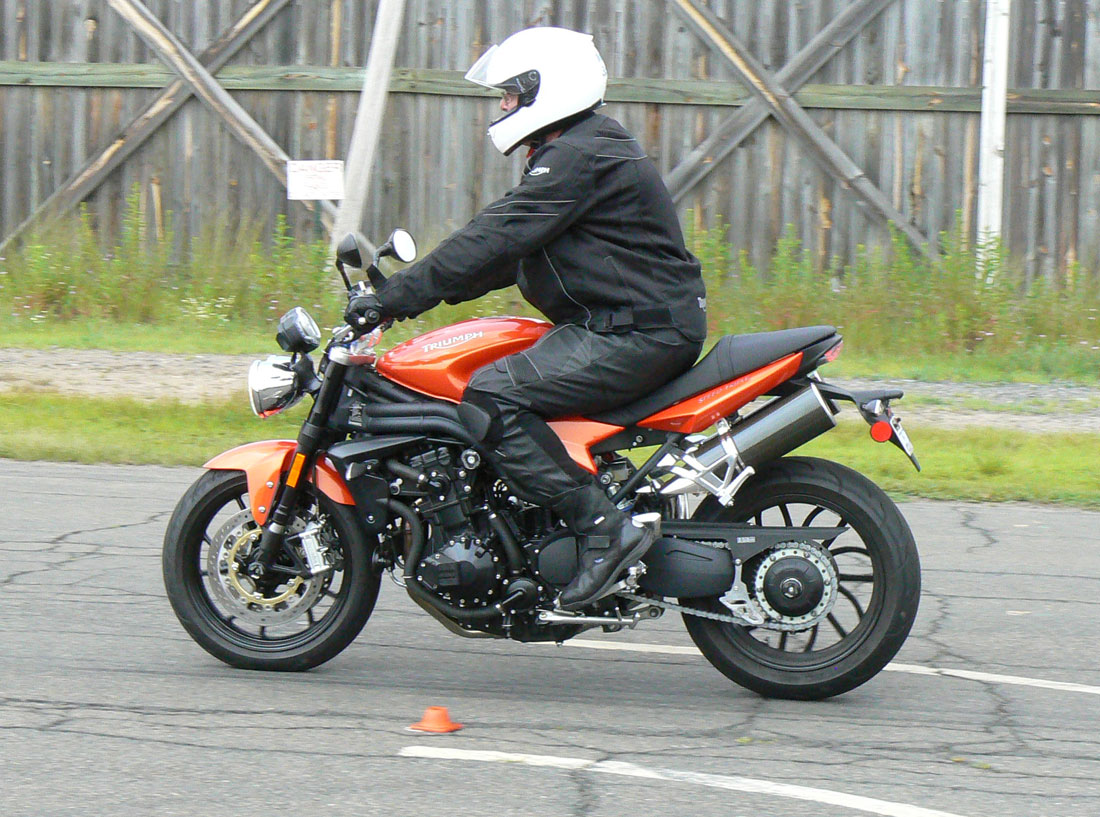
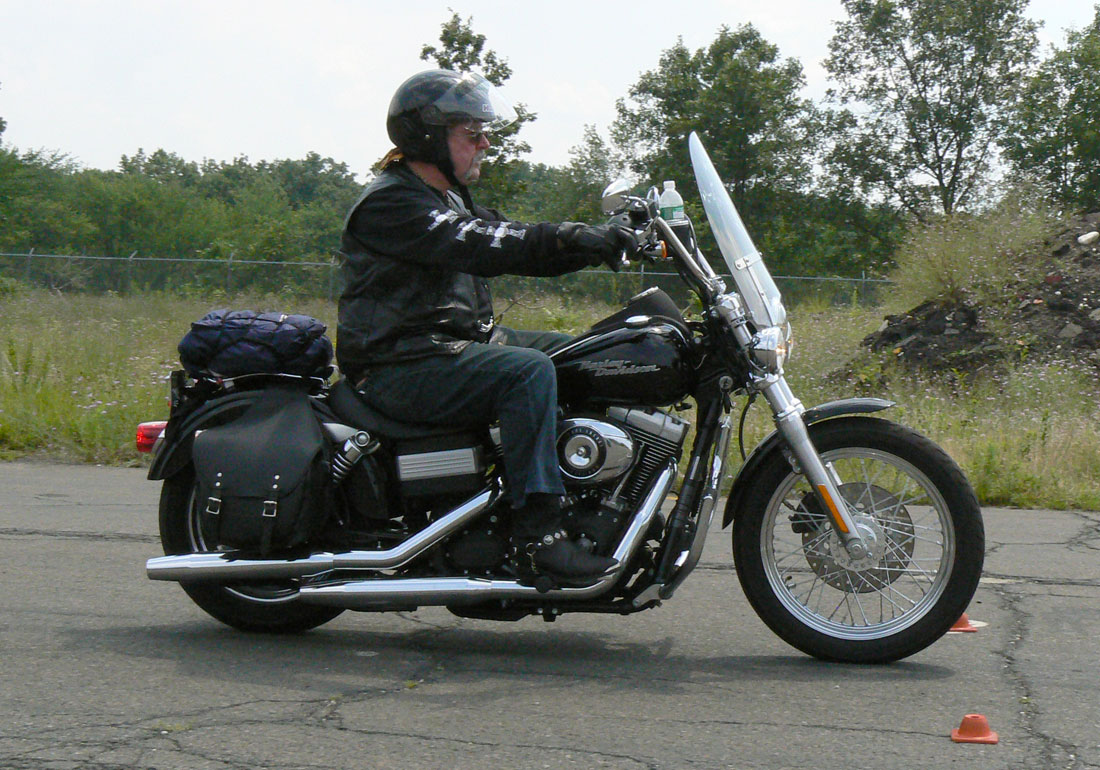
Most crashes are preventable, but some aren’t, which is why it’s smart to be as protected as possible to minimize the damage. That means wearing a full-coverage helmet, sturdy jacket and pants with armor, gauntlet gloves, and boots that provide extra impact protection for your heel and ankles. Don’t leave home without it!
The Racetrack is Safer
Hopefully, any crashes you experience are on a racetrack where you aren’t likely to hit anything lethal (like unprotected guardrails and oncoming vehicles). If you end up hurdling over a car hood, I hope your affairs are in order because that rarely turns out well.
Have you crashed? Please share your thoughts and experiences in the comments section.
Please Donate to Keep the Articles Coming
If you liked this article and the many other articles on this site, please toss a buck or five into the hat. It’s greatly appreciated!
Click the PayPal “Pay Now” button.
Then indicate quantity in $2.00 increments. – Example: put “2” in “QUANTITY” field to donate $4.00, “3” for a $6.00 donation, etc.
Why $2.00? Due to the PayPal fee structure, a $2.00 donation is significantly more beneficial compared to a $1.00 donation.
When the time comes for you to use your awesome skills, will you?
Putting a Homosapien on a motorcycle is just asking for trouble. You simply can’t escape the fact that we are all prone to doing really dumb things. Don’t bother denying it. You’re human and humans are fallible.
I believe that well-developed physical skills and sharp mental skills allow you to ride with more control and increase safety. But, is it enough to simply know these skills?
Missing Skills
There has been a great expansion of motorcycle training programs in the U.S over the last 20 years. So why has the fatality and injury rates on America’s roadways have actually increased? Whaaaaa?
One problem is that “well trained” riders often fail to execute the very skills they mastered in the parking lot.
It’s one thing to know how to master swerving or emergency braking, but it turns out that it’s quite another thing to actually apply these skills in the heat of battle, like when a car darts out in front of you at an intersection.
Is this good enough to train for real life?
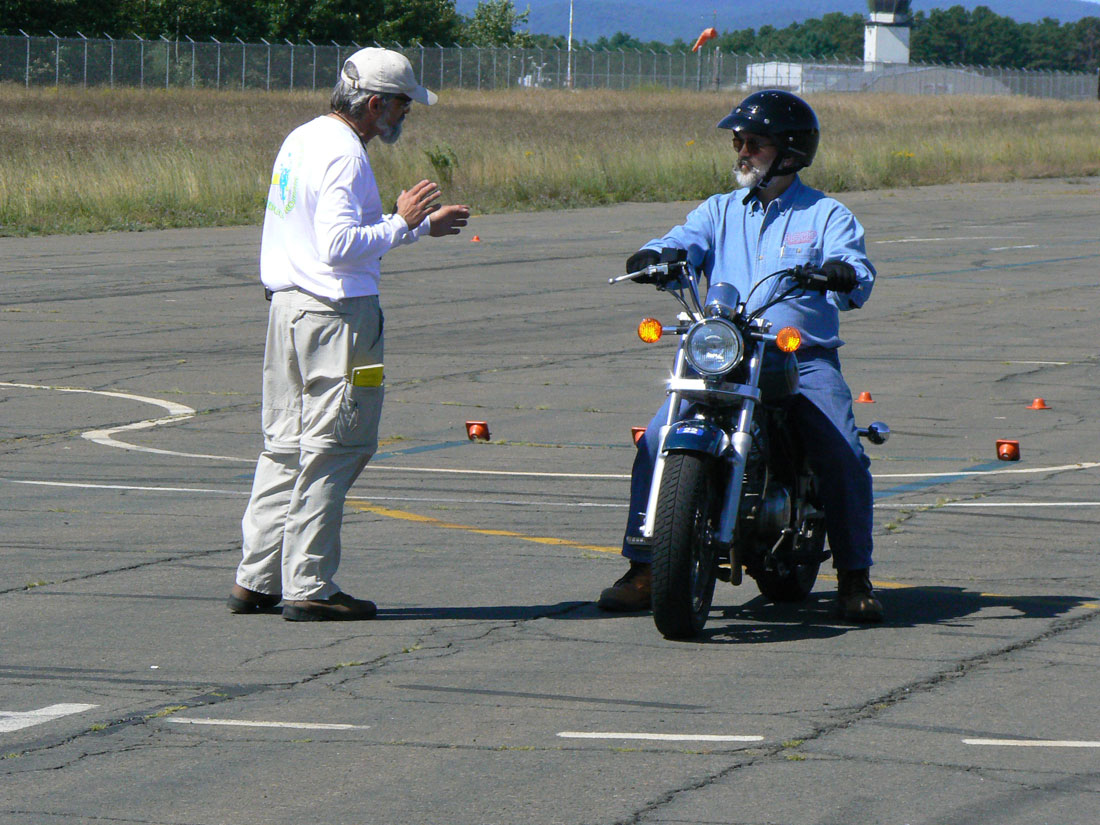
During MSF courses, students are asked to practice emergency stops by applying the brakes when their front tire reaches a set of cones. Once the technique is practiced a bit, instructors step in the path of travel, throwing their arms up to simulate the need for an emergency stop in an attempt to make the drill more realistic. Even though students experience more stress when the instructor is standing in the way, this trigger is not nearly stressful enough to emulate what happens when an actual two-ton vehicle suddenly appears in your path.
Practicing emergency braking is critical. But,so is visualization.
Train for Reality
Soldiers, pilots, police officers, firefighters, and other people exposed to high stress situations are trained using methods that emulate the real-world so they can handle the inevitable first battle, conflict, or emergency situation. Without this part of the training process, the skills are likely to either become too delayed or go unused as the brain wastes valuable time processing what is happening.
The training includes sounds, smells, and sights that shock the ears, nose, and eyes. Explosions, live ammo, alarms, and life threatening scenarios played by actors all prepare these trainees for the worst. That doesn’t happen with motorcycle training.
Nobody dares to suggest that instructors drive a Chevy onto the practice range at random times or walk unpredictably in front of unsuspecting students, or secretly drop sand or diesel fuel on the parking lot. These scenarios would help condition students for real-world situations, but liability means this method just won’t fly.
Are you ready?
The Visualization Solution
The next best thing to exposing riders to real-word scenarios is visualization. Racers use visualization to run laps in their mind before hitting the track. They can be seen closing their eyes or staring into space as they imagine every nuance of the racetrack and every braking, shifting and cornering action with great precision.
Click a stopwatch as they begin and end a visualized lap and the best racers will be remarkably close to their real lap times. This exercise is known to be almost as effective as actually riding the machine on the track without using tires or fuel, or risking a crash.
Street riders can also use visualization to train themselves to manage a car pulling out from a side street or a patch of sand appearing suddenly around a blind corner. The MSF attempts to have new riders visualize real life hazards using videos and online simulators. But, I believe visualization can be more effective, if riders are taught how to do it.
Visualization Practice
Close your eyes and visualize yourself riding to work. As you enter a familiar intersection, imagine a car suddenly running the stoplight or stop sign. Feel the panic as your muscles tense and your eyes widen. Now, imagine yourself squeezing the brakes fully, the G-forces pushing you forward to the extreme.
Did you avoid a collision? If not, then try again. And again. You cannot do this too much.
Go back in time and plan better by slowing down and covering your brakes to reduce reaction time. Notice how much more time you gave yourself to respond. To avoid target fixation, imagine looking away from the car and toward an escape route. Good job.
Replay different outcomes and solutions. Imagine yourself swerving instead of stopping.
Next, visualize other scenarios, like rounding a blind corner and needing to avoid an animal, or realizing the the corner is tightening and your speed is too fast.
This training is not the same as having a car pull out in front of you, but it can be remarkably effective if done well…and it’s safe.
Do it!
Learning advanced braking and cornering skills and strategies for surviving will most assuredly increase your chances of making it home in one piece. But, it has now become apparent that this is simply not enough. Sit down and visualize yourself successfully managing some very scary hazards so you are better prepared for the inevitable conflict. It could happen tomorrow, so don’t delay.
Tony and Ken discuss Track Day FAQs while in Tony’s truck on the way to Barber Motorsports Park.
This is my first attempt at a podcast. It’s unscripted, so it’s as though you are in the truck with us as we chat about the questions we most often hear from new track day riders. Listen in.
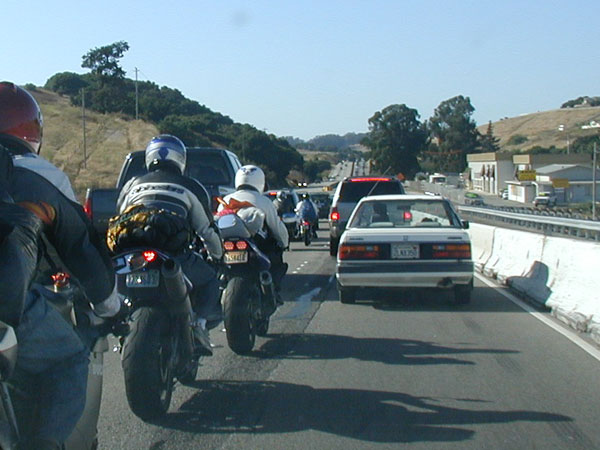
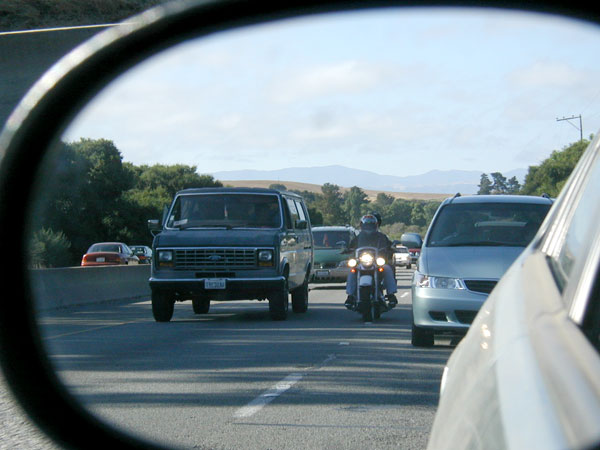
A recent study by the California Office of Traffic Safety reports what many motorcyclists already know; that lane splitting is (or, can be) “safer” than sitting in stopped traffic. This means being less prone to serious injury.
To enjoy the safer status, riders must only split lanes when traffic is moving at 30mph or less and when the rider travels no faster than 10 mph more than surrounding traffic.
The study also confirms another suspicion that lane splitting benefits all road users by reducing the number of vehicles adding to traffic congestion. Yeah, us!
What is Lane Splitting?
For those of you who aren’t motorcycle riders or who live in one of the 49 states that don’t allow lane splitting, you may not know what lane splitting is. As the moniker suggests, lane splitting is when a motorcycle rider rides between two lines of cars heading in the same direction, like when riding on a multi-lane highway.
Legal?
As of March 2022
California is the only state in America to make lane splitting legal officially.
Representative Noel Campbell of Arizona introduced House Bill 2285 that aims to restart talks about legalizing lane splitting in Arizona. Discussions are still underway, but people expect this motion to pass this time.
Though lane splitting is technically not legal because Hawaii, “shoulder surfing is allowed when there is traffic congestion.
Senate Bill 629 was recently introduced in Connecticut, and lawmakers are currently discussing legalizing lane splitting and filtering.
In Oregon, a proposition to make lane splitting legal, has been introduced to the Speaker’s desk and is currently in discussion.
Senate Bill was reintroduced and is still pending approval in Washington.
A bill has been referred to the Virginia Committee on Transportation and awaiting approval.
Filtering
Riders split lanes on the highway when traffic slows. But, they also split lanes as they filter to the front of stopped traffic at a stop light. This is common practice in many parts of the world, but will get you a ticket in most of the US.
Lane splitting will more likely be tolerated if it is done with respect.
The Good
Filtering through traffic, whether on a multi-lane highway or local arterial means there are fewer vehicles clogging up the works and if done at low speed, is relatively safe for the motorcycle rider if done correctly.
The primary reason for motorcyclists to consider lane splitting is that it puts the rider in a less vulnerable position. Being rear-ended by a four-wheeler is a sure-fire way to end up in a hospital bed and that’s not even talking about the possibility of being sandwiched between two cars!
The Bad
However, lane splitting has a totally bad rap because some riders do it wrong. Proper lane splitting is done at a speed no faster than 10mph beyond the travel speed of surrounding traffic. Unfortunately, some riders zip between cars in a way that is dangerous and scares the hell of those they pass.
This unwelcome behavior can incite resentment from drivers and further reflect badly on all motorcycle riders, even those who split lanes safely. Some irate drivers have been known to close the gap as the rider attempts to squeeze past.
Exercise patience.
Safe? Really?
Here is the rub. Even though the study confirms (through statistics) that lane splitting reduces instances of cars colliding with a motorcycle, it also says that there is an increase of motorcycle riders rear-ending other vehicles.
This is where the speed factor comes in. It doesn’t take a government study to know that ripping between slow moving cars is a bad idea. The study clearly states that the safety benefit applies only to riders who lane split at 10mph or lower.
The study confirms another seemingly obvious assumption; that it’s not safe to split lanes when traffic is traveling above 30mph, so ride slowly as you filter, please!
Even with the study, a lot of riders I know still do not think it is a good idea. I suspect it’s because they have never done it and they can’t imagine drivers in their state tolerating a maneuver that has always been considered illegal and irresponsible. Just for reference, lane splitting in other parts of the world is not only tolerated, but expected.
Check out a video from Ride Apart about Lane Splitting:
Lane Splitting Tips
Make sure your luggage and mirrors can fit between vehicles.
What follows are tips from my perspective. I may be a reasonably intelligent motorcyclist, but I have little experience splitting lanes. Last year, the CHP put out a guideline for motorcyclists, but it was taken down after someone complained, so that resource is not available. Which means I could use some help from my Cali-friends. Use the comments section below to add your thoughts.
For those of you not riding in California, you may want to keep these tips filed away for the day when lane splitting is made legal in your state (don’t hold your breath, though). In the meantime, consider writing your lawmakers to encourage pro lane splitting legislation.
Lane split only when traffic is moving at 30mph or less.
Set your speed at or under 10mph faster than traffic.
Be patient! Lane splitting should be thought of as a privilege and be respectful.
Resist frightening drivers by keeping your speed down. You wouldn’t want to trigger road rage. You’ll lose.
Know your bike’s limits. Those wide hard bags and mirrors you love so much will cause a serious problem if you try to squeeze into a too narrow gap between two vehicles. If in doubt, wait until there is enough room to proceed.
Avoid blind spots. Lane splitting means you will be riding close to vehicles’ fenders and in drivers’ blind spots. By filtering forward at 10mph faster than surrounding cars, you will ride THROUGH blind spots, which is good, but be aware of the danger of lingering in a blind spots when you have to slow.
Be extra careful when riding near large trucks and RVs.
Keep an eye out for cars changing lanes. Seeing an opening in traffic should put you on full alert for cars moving across your path. Also, be aware of approaching exits where drivers may suddenly change lanes.
Cover your brakes.
Watch your mirrors for other lane splitting riders. Move over for riders splitting faster than you.
Be courteous to slower lane splitting riders. Don’t tailgate your fellow riders.
Move back into a lane once traffic begins to match your filtering speed. Remaining in between lanes with other vehicles moving at the same speed is asking for trouble. Rejoin traffic when possible.
Keep your eyes scanning well ahead.
Okay. It’s your turn. Please use the comments area below to share your thoughts on lane splitting.
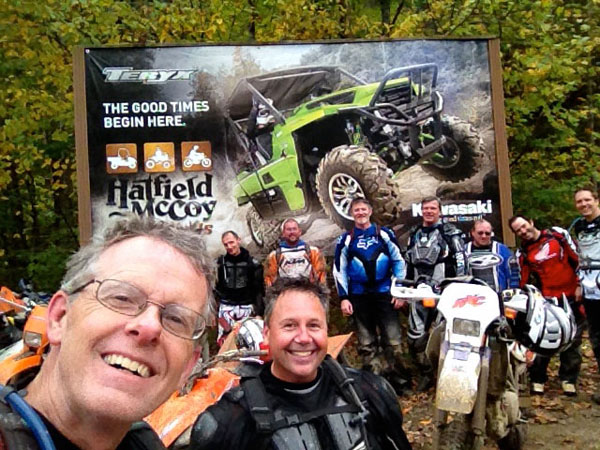
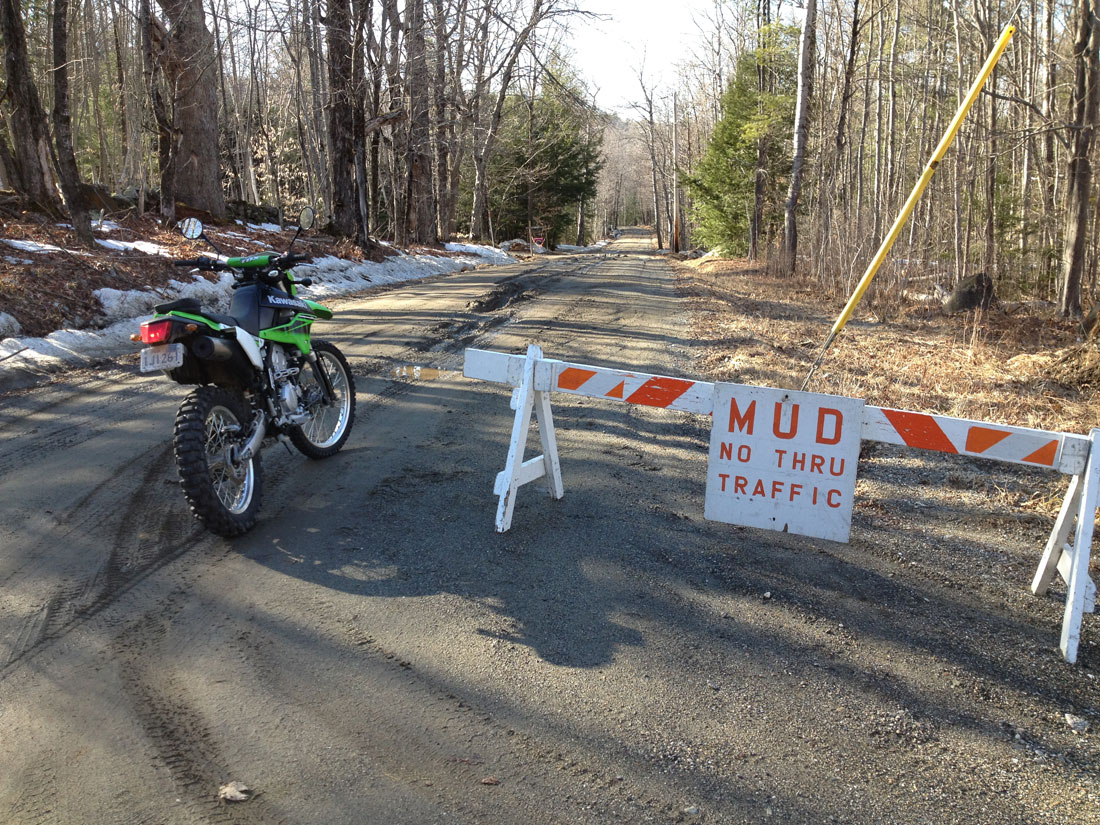
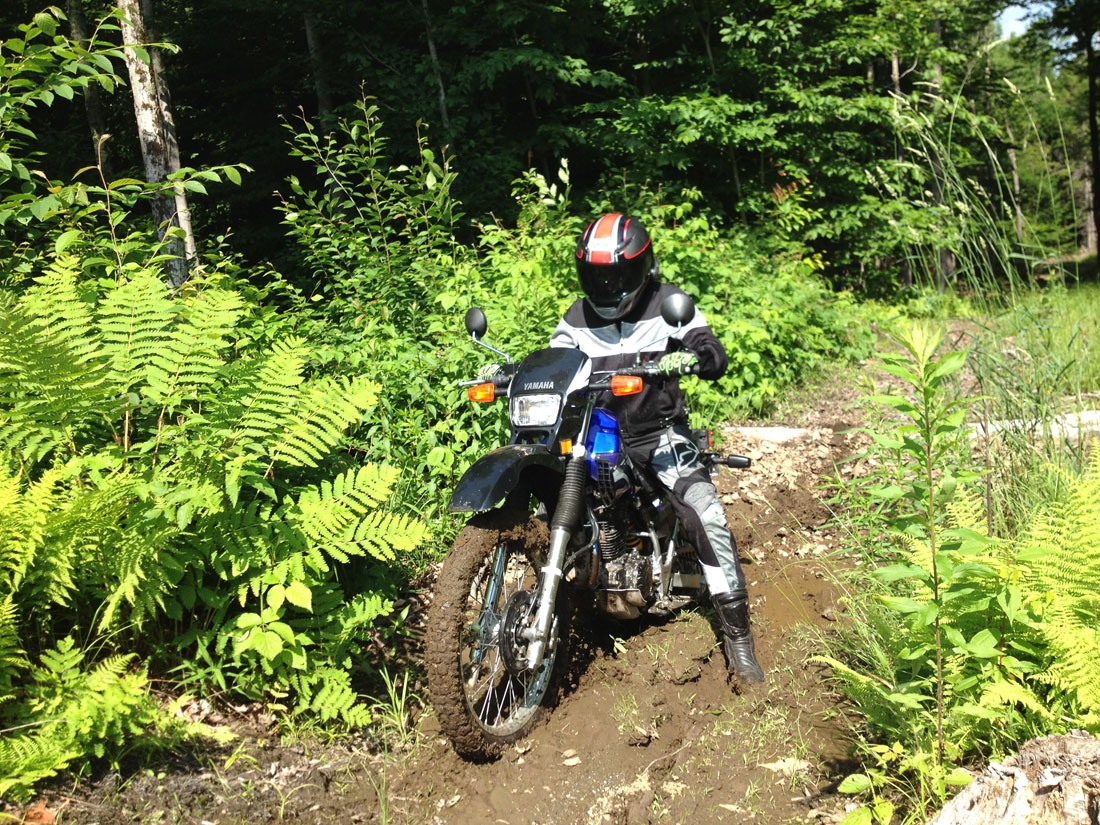
I recently returned from an epic dirt riding trip. But, instead of boring you with details about where I went and what I ate, I’m going to share some tips about how I survived the slimy, rocky, ascents and descents of the Rock House section of the Hatfield McCoy trail system in West Virginia.
Ken, Tony and the guys at Hatfield McCoy
It all started when a group of us from Tony’s Track Days arrived at the small town of Gilbert, WV to ride up and down some of the slimiest and rockiest terrain I’ve encountered.
Check out the video:
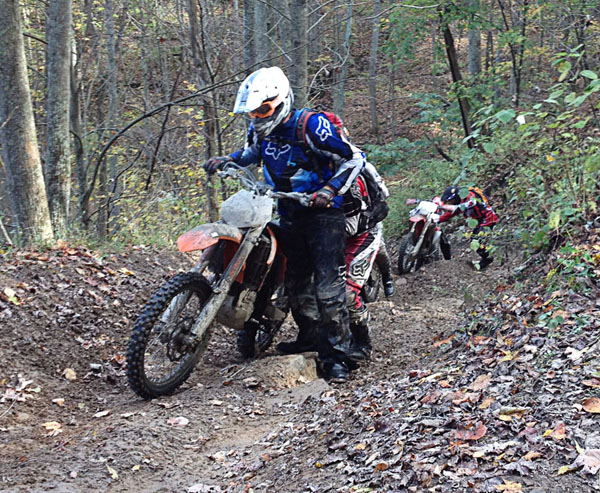
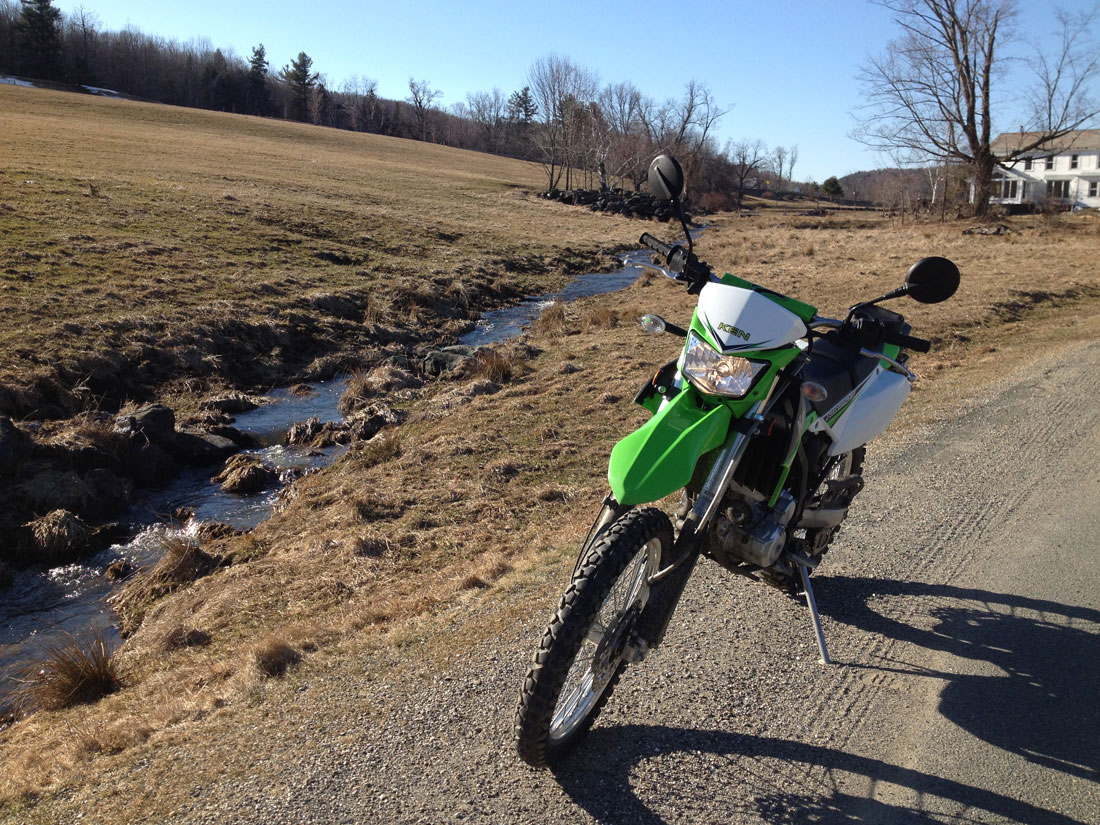
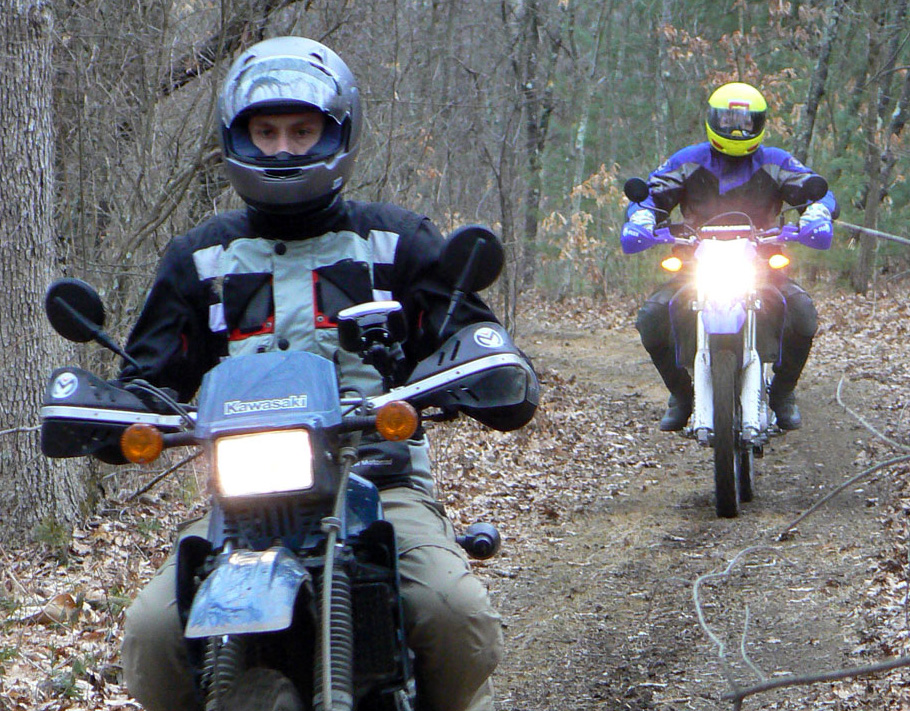
You’ll hear me talking while I slip, slide and bounce along the trails, because I am using Interphone brand Bluetooth communicators with my friend, Tony. I can’t recommend using communicators enough…it makes off road riding even more enjoyable and allows the person in the lead to warn about particularly gnarly hazards. I’m on a Kawasaki KLX250s.
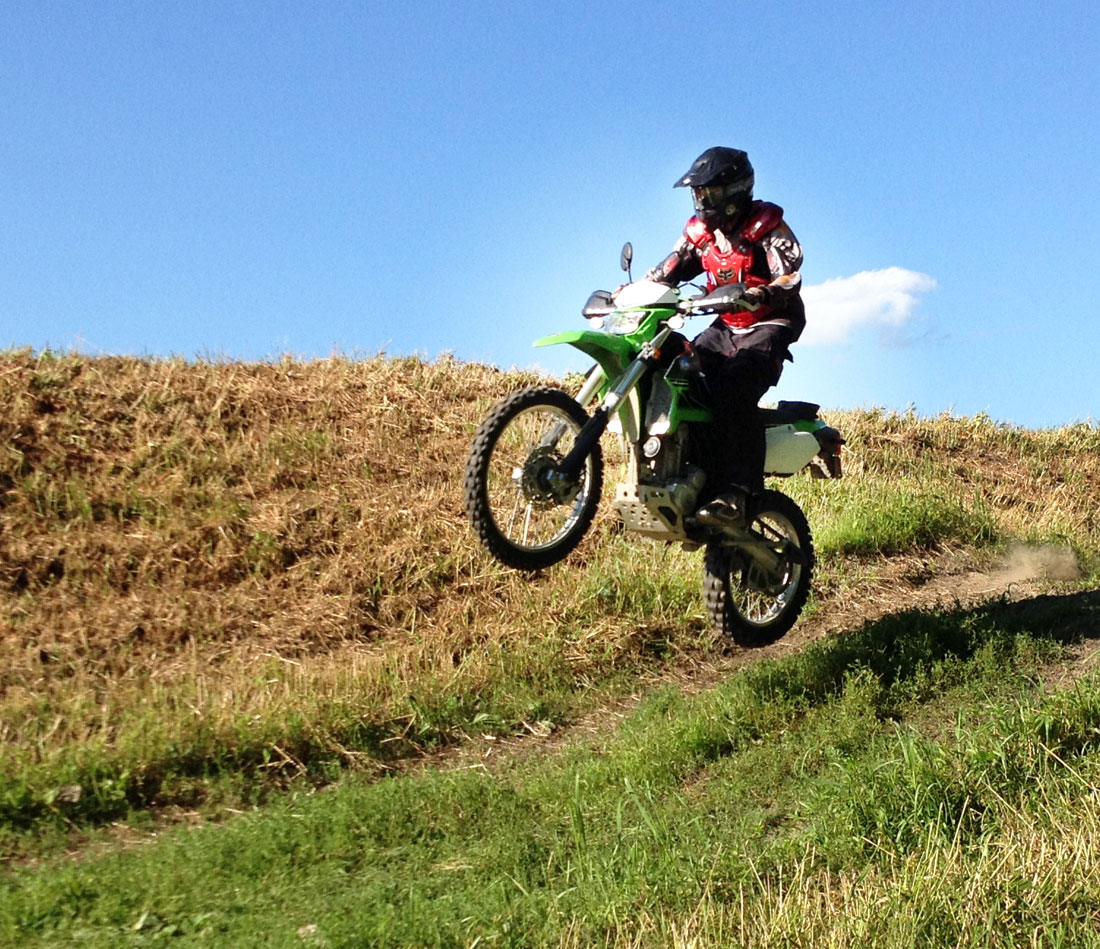
Some hills are tough.
Why Do That?
To understand some reasons why I ride off-road (and why you should, too), you may want to read the blog article “10 Reasons Why Street Riders Should Ride in the Dirt” . Sure, riding off-road makes anyone a better street rider, but I also do it because it is challenging and fun, fun, fun.
I talk about “riding in the zone” as it pertains to street riding and even track riding, but off-road riding brings the zone experience to a whole new level of alertness. Any significant lapse in focus could mean careening down a steep slope with the only thing stopping me from a long descent are stands of trees.
Slippery, Slimy Mud on hard packed rock.
Tips for Surviving Mud, Rocks, Hills and Other Off-road Encounters
I’m no off-road riding expert. But, I know enough to share some tips that can help you survive your next off-road riding experience. If you want to try an off-roading adventure but with a UTV, you may visit a local utv dealer to chose your new ride.
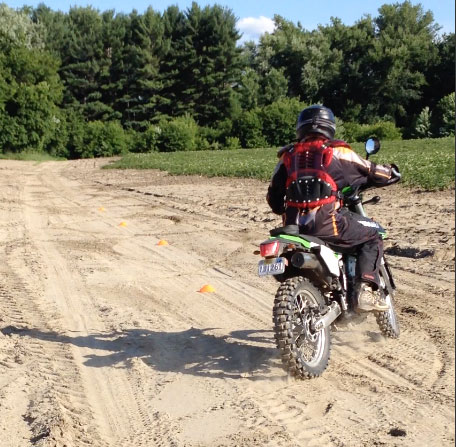
Manage Your Speed: Nothing increases risk more than a too fast speed for your ability and/or the conditions. Keeping your throttle hand in check is fairly easy to do, but managing speed on a steep, muddy downhill trail is tough. The trick is to see the problem well before you get to it and slow down to a crawl so you aren’t trying to scrub off speed where gravity and almost zero traction create the equivalent of a slip and slide
. Keep Your Eyes Up: We look down when we are scared or tired. The problem is that as soon as you look down, you’re unable to deal with the terrain that is suddenly under your front wheel. This problem compounds until you are so far behind what’s going on underneath you that you get more scared, look down more and eventually crash. This pertains to most athletic activities, including street riding.
Use Momentum: When traction is limited, you must rely more on momentum. This means keeping your eyes up to see what’s coming and getting on the gas before you are on a surface that has little grip.
Believe You Can Do it: If you hesitate, you will likely not make it up that steep incline. So, go for it! That said, avoid terrain that is over your head.
Stand Up, Sit Down: It’s nearly impossible to ride an off-road bike well if you aren’t good at riding while standing. It’s also important to know when it’s best to stand and when to sit. In general, stand for any significant bumps so your legs absorb the impacts and sit for corners, especially corners with berms so you can load the rear tire for the drive out.
Find the Center: Whether sitting or standing, you must find the spot where your body’s mass is located for optimum maneuverability and fluid control. This means sitting forward on the seat and standing so your belly is over the steering stem.
Bent Arms: The bike is going to move up, down, left and right at great frequency. Yet, you must hold onto the handlebars and operate the controls while the bike is jerking around. Bent arms allow the bike to move as necessary and for your hands to still control the throttle and brake with precision.
Counter-lean: This is something street riders have a hard time with when they first start dirt-riding. If you lean with the bike (or low and inside) then the bike will slip out from under you. The bike must lean to turn, but if you stay on top of the bike, your weight keeps the load pressing vertically to allow the tires to grip the terrain.
Forget the Clutch: Forget using the clutch for upshifts. There is usually no time to go for the clutch lever when you’re accelerating out of one rocky, muddy mess into another one.
Use the Clutch: On the other hand, you want to use the clutch to control drive as much as possible. By slipping the clutch you can stay in a taller gear to avoid excessive shifting and control your speed with greater precision.
Use the Rear Brake: On muddy terrain, you’ll rely heavily on the rear brake. Skidding the rear tire is not usually a big deal, but skidding the front will quickly toss you on your head.
Use the Front Brake: Yeah, I know what I just said, but when there is traction, you can (and should) use both the front and rear brakes when descending hills. This may sound tricky, and it is. But, sometimes you need all the slowing power available, just learn to apply the front brake carefully.
Learn to Wheelie and Jump: Not so you can be a squid, but so you can get over fallen trees, big rocks. If you can’t wheelie, then at least learn to loft or bunny-hop over obstacles.
Steer with the Rear: When you don’t have a lot of grip, trying to steer with the front tire is a bad idea. Instead, get the bike turned in the general direction, but get on the gas to prevent a front tire washout.
Make sure Your Bike is Ready: It sucks to be stranded in the woods.
Take Breaks: Off-road riding uses a lot of physical and mental energy. If you get tired, you will start looking down and your timing will become imprecise. Before you know it, you’re on the ground.
Fun and challenging!
Okay. It’s your turn. Please use the comments area below to share your favorite tips for riding rugged and muddy off-road terrain.
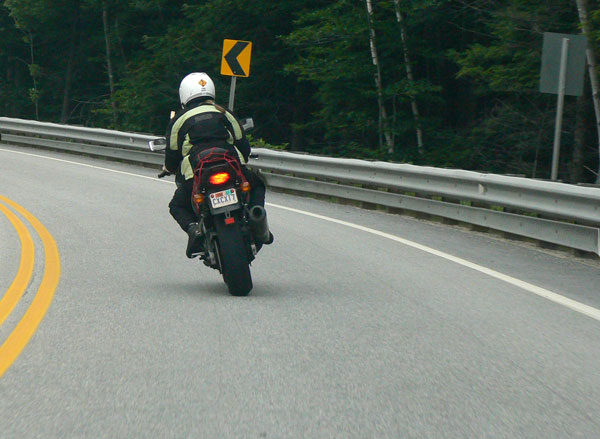
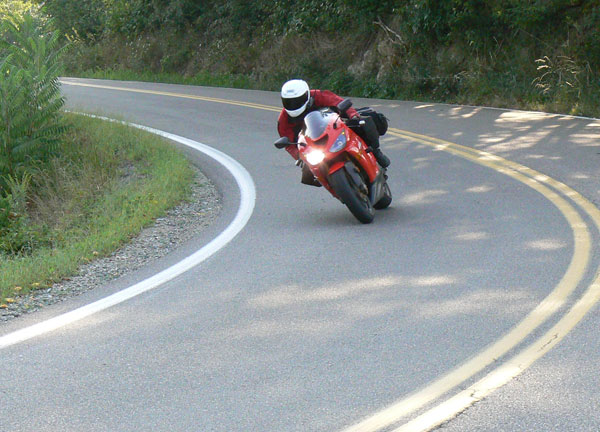
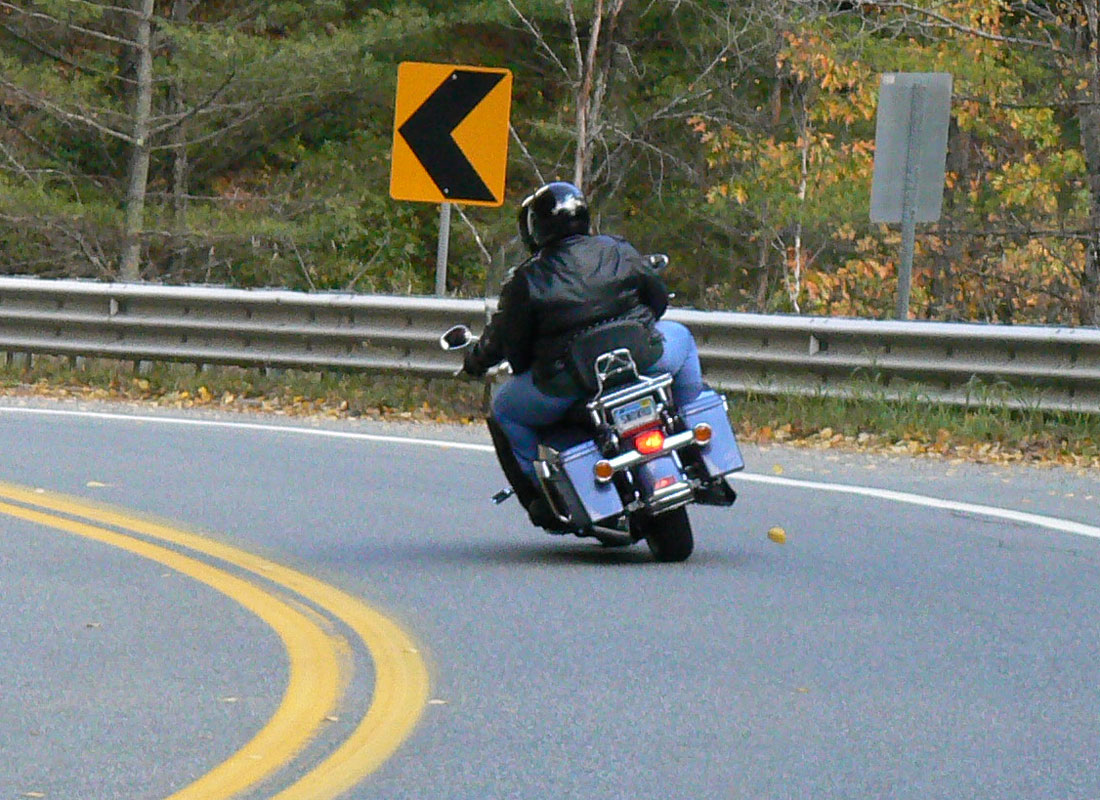
Cornering errors are responsible for at least half of all fatalities. And of those corners, downhill curves are the most challenging. But, with some knowledge and practice you can master these tricky turns.
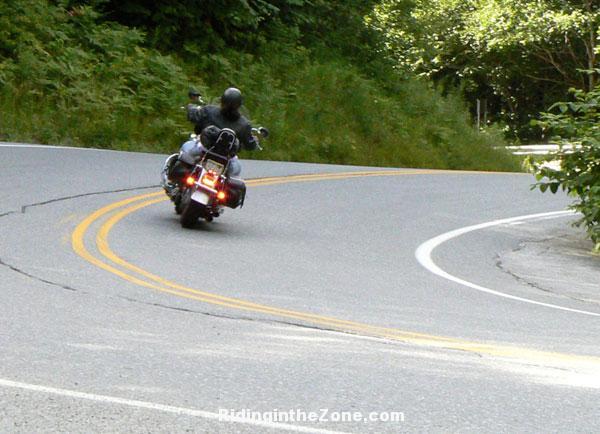
Look, Slow, Lean and Accelerate. Note the lower guardrail installed to make the guardrail less lethal to crashing riders.
Before I describe how to deal with downhill turns, let’s revisit the basic cornering process.
Look Well Ahead: This is obvious, but not instinctual for many. Riders who are nervous tend to look in the near distance. Discipline yourself to look well ahead so you can get a handle on what’s coming up.
Slow: This doesn’t necessarily mean you have to use your brakes and/or downshift to reduce speed, but you MUST consciously evaluate whether you need to adjust speed so you can negotiate the corner with plenty of traction and skill to spare. If in doubt, slow down! You can always get on the gas if you slow too much.
Lean: You initiate lean by countersteering. The amount you must lean is determined by your speed and the radius of the turn (your body position also affects the amount of necessary lean). If you enter a turn at a speed that requires you to lean to the limit of your comfort level, then you’re risking a crash. The solution is to learn to lean, dammit. If you’ve never explored near-maximum lean on your bike (in a safe place, please) then you are poised to be a victim.
Accelerate: Once leaned, you need to crack the throttle and continue to accelerate gradually through to the corner exit. The basic explanation for why you need to do this is that it stabilizes the suspension and chassis. Gradual acceleration also loads both tires for maximum grip.
The line (path) you choose around the turn is also important. The “outside-inside-outside” path is the gold standard, but should not be cast in stone. The delayed apex line is one that every rider should know about and use in many cases. This is when you allow the bike to orbit around the corner before bringing it in tight to the apex. An article explaining cornering lines is in the works.
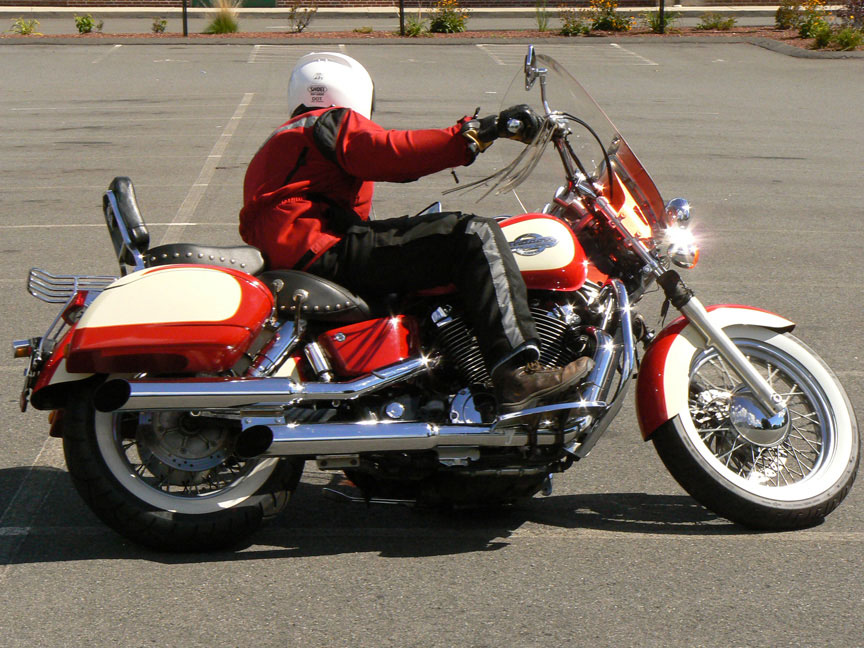
Slow to a speed that allows you to accelerate. Notice how the centerline and edge of the road visually converge to indicate a tightening curve and downhill slope.
Downhill Curve How-To
Okay, with the basic cornering technique in mind, let’s discuss how it applies to downhill curves.
Look Ahead: No difference here, except that what you should see are the telltale signs of a downhill curve: pavement sloping away from you, indicated by how the centerline and edge of the pavement visually converge in the distance. If these visual clues come together in the near distance, then the hill is steeper than if they converge farther away. Also, look for roadside objects to help you determine how tight the curve is and how steep the hill is (read more here).
Slow: The main difference between a flat curve and a descending curve is how gravity pulls you and your bike’s mass down the hill. This means that you need to scrub more speed before the curve, otherwise you will find yourself going too fast mid-corner.You also need to begin braking earlier so you have more time and space to slow. Waiting too long will cause the bike to pitch forward, causing the rear tire to get light which can lead to instability. Trailbraking is useful for downhill turns as a way to smoothly slow the bike as you tip into the curve.
Trailbraking not only gives you more time and distance to get the bike slowed, it also helps direct the bike around the curve. That’s becasue the bike will turn more easily when the brakes are lightly applied (too much brake force can have the opposite effect). The chassis geometry shortens as the suspension compresses and the front tire contact patch gains more of the available traction.
Also, consider that gravity is pushing the bike downhill and releasing the brakes fully will cause the bike to accelerate in the direction the front wheel is pointed. Waiting to release the brakes until the bike is pointing around the corner helps the bike get pointed toward the corner exit. Usually trailbraking is done with the front or both brakes, but in this situation, dragging the rear brake only is another way to scrub off speed without overstressing the front tire to prevent the front tire from washing out.
Lean: Initiate lean using contersteering, so no real difference here. However, a quicker turn-in is often needed to avoid running wide. I often coach riders to “let the bike drop” into the curve when entering a downhill curve. Will your ability and experience with lean angles allow you to do this? Or will you ride off the road?
Accelerate: Accelerate? You want me to accelerate, even when gravity is already pulling the bike down the hill? Yep. Even though gravity is going to cause your bike to speed up, you still need to stabilize the bike and manage traction. The trick is to slow down enough before the curve so you can crack the throttle ever so slightly and hold that throttle setting or accelerate as you round the bend. This will get some of the weight off the front tire so the bike will track easily around the corner.Note that the steeper the curve, the later you will brake and the less you will accelerate, but you still need to accelerate. If you enter the curve very slowly, then you may need to keep the clutch in and then ease it out as you tip into the curve. But, get the clutch out immediately after tipping in to avoid freewheeling down the hill, which causes most bikes to feel unstable and track unpredictably. It’s better to introduce some measure of drive force ASAP.
The line you choose around a downhill curve should have you entering wide to the outside. As you tip in, you let the bike drop inside to a delayed apex (farther around the curve), then let the bike exit toward the outside of the corner. This straightens the radius for better traction and the need for less lean angle.
Remember to continue to look where you WANT to go, not where you are afraid to go!
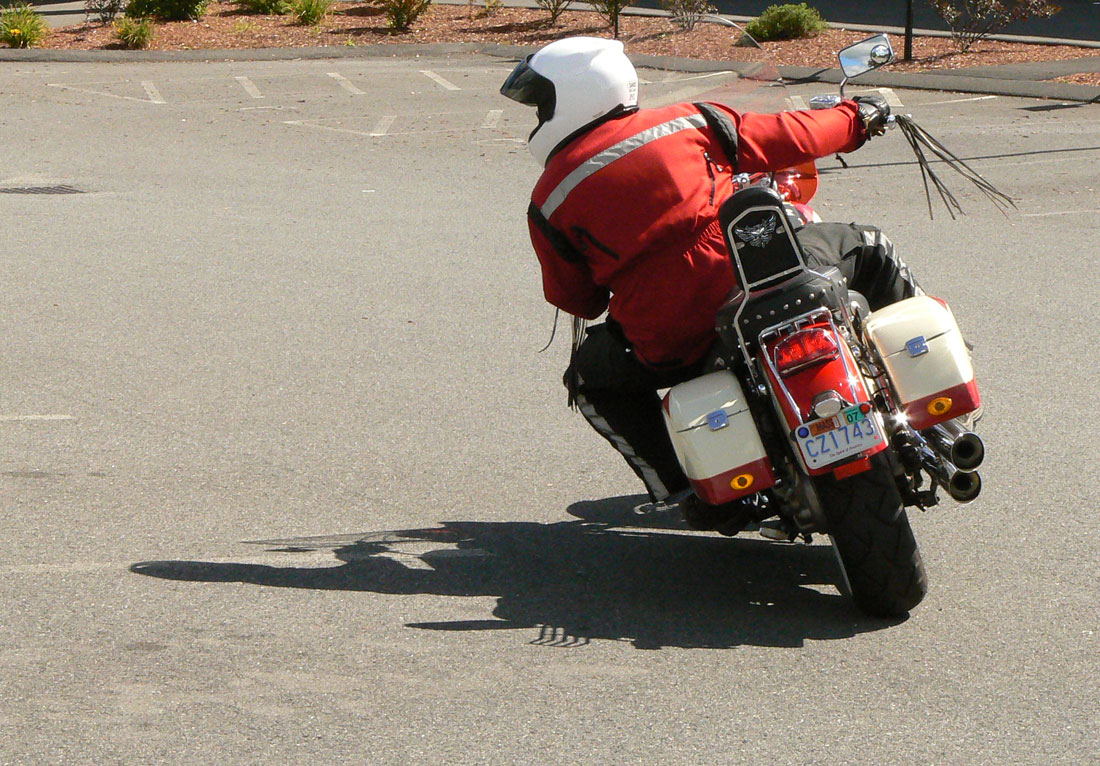
Body position helps drop the bike into the turn while requiring less lean angle.
What about body position? When cornering at normal speeds, you want to drop your inside shoulder to engage with the bike. This helps you lean with confidence, but also allows the bike to remain a bit more upright.
Practice!
Do not hesitate in acquiring these skills, because one day you too may find yourself facing a curve that you cannot handle. The best place to begin is in a parking lot where you will learn to lean your motorcycle with authority (parking lot drills are a feature of the RITZ Book). This means mastering countersteering and learning to turn quickly. Once you feel pretty good about your progress, I suggest you attend a track day where you will explore the limits of cornering and braking in a safer environment. Many racetracks I’ve ridden have at least one downhill corner where you can practice all day long. Sign up for personal instruction if you want to fine-tune your cornering skills, including downhill curves.
What tips can you offer for downhill curves?
Please Donate to Keep the Articles Coming
If you liked this article and the many other articles on this site, please toss a buck or five into the hat. It’s greatly appreciated!
Click the PayPal “Pay Now” button.
Then indicate quantity in $2.00 increments. – Example: put “2” in “QUANTITY” field to donate $4.00, “3” for a $6.00 donation, etc.
Why $2.00? Due to the PayPal fee structure, a $2.00 donation is significantly more beneficial compared to a $1.00 donation.
The seduction of horsepower is tough to resist. After all, who doesn’t like the rush of torque and thrust pulling on their arms when they twist the throttle? And, if more power is good, then even more power must be great, right?
Most motorcycle riders find nothing wrong with an abundance of horsepower, and many strive to buy as much horsepower as they can afford. But, they often do not consider the real cost of maximum acceleration.
The Real Cost
When I mention cost, I’m not talking about the fact that you’ll drop exponentially more jingle on engines with more cubic centimeters (or cubic inches). The real cost I’m referring to is how an increase in power comes with an increase in certain risks.
Sure, more power can get you into trouble faster… and in the wrong hands, can lead to tragedy. That’s the obvious risk. But, too much power can also conspire to erode confidence and enjoyment and stall or even reverse skill development. This risk is greatest with newbies and intermediate riders, but can pertain to so-called experienced riders as well.
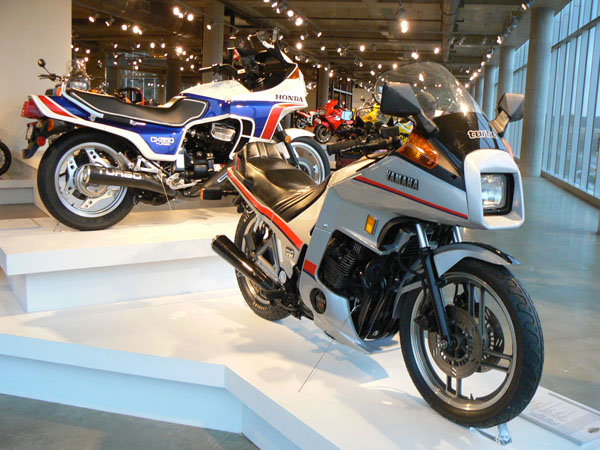
These 1980s turbo charged bikes awarded the rider with an addictive rush of power.
How Much is “Too Much”
You know you have “too much” horsepower if you rely on it to keep up with your faster riding buddies. This applies to both street and racetrack riding.
As a track day and on-street instructor, I have learned to recognize when a rider is doing this by how he or she enters turns slower than necessary and then piles on the gas.
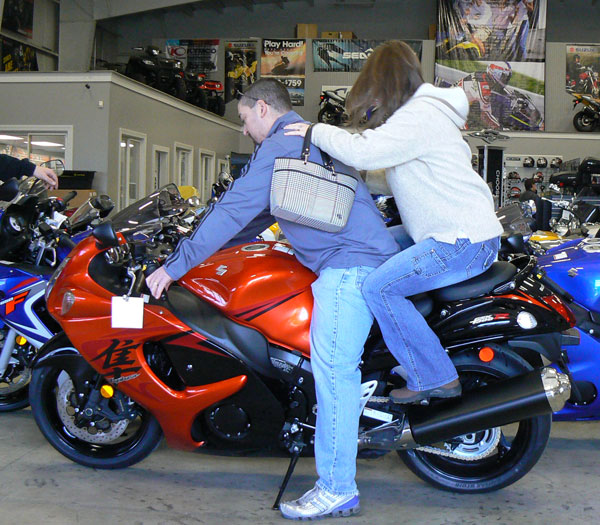
A Hayabusa just may be more bike than you need…Just maybe.
The Horsepower Enabler
The problem is that horsepower can fool you into thinking you’re a better rider than you are. You can feel that your riding ability is adequate, if at the end of a set of twisties, you are within eye shot of riders you know are truly competent.
Without all that power available to make up for cornering shortcomings, a less competent rider would likely be left in the dust. And peer pressure doesn’t tolerate that.
“Keeping up” is a bad idea, but it is regrettably the most used measure of a rider’s ability when comparing their ability with others. This is especially true among the sportbike crowd, although I see it with all types of bikers.
A rider who uses power as a crutch may not even know it. They have unconsciously developed the habit of twisting the throttle to keep up. Unfortunately, it often takes a cornering mishap to help them recognize that there is a serious weakness in their overall level of proficiency.
Break The Throttle Habit
A riding coach is the best way to find out whether you’re on the road to trouble, but you may be able to self-evaluate IF you pay attention to how you use the throttle.
While proper cornering technique includes acceleration out of corners, timid throttle application near the middle (apex) of the curve followed by a handful of acceleration at the very end often indicates weak cornering skills. Weak cornering skills lead to a lack of confidence and future crashes. If this is the case, then it may be time to bone up on your cornering technique.
Voluntary Tiered Licensing
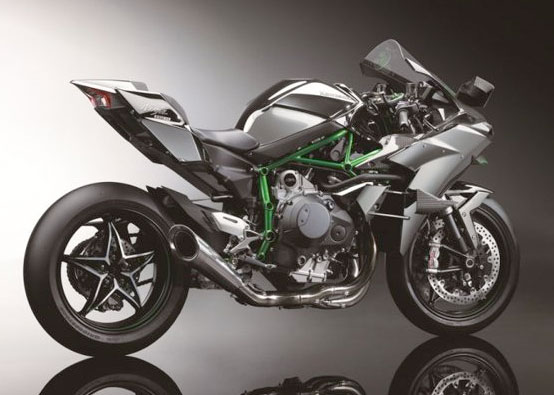
So, perhaps you’re not as good at cornering as you think, and maybe the abundant power your bike creates just may be enabling you to remain a mediocre rider. But, power is indeed attractive and even addictive. Kawasaki’s newly released 300hp H2R is proof that the motorcycle industry has a goal of feeding the horsepower addiction.
In other parts of the world, tiered licensing is the norm. This includes a restriction on how much horsepower your motorcycle can have. The MSF understands the importance of low horsepower when learning to ride. They require any training motorcycle to be 500cc or less and weigh less than 440 pounds full of fuel.
But, in the United States, we are free to buy as much horsepower as our credit will allow even if you don’t have a motorcycle license. Knowing that power is often a crutch, I suggest you do the smart thing and impose a voluntary tiered licensing strategy.
The voluntary tiered strategy is good, but it doesn’t mean you will not rely on power to mask your cornering weaknesses. However, without the addiction of abundant horsepower, you are less likely to use it as a crutch.
So, Which Bike?
I suggest that new riders start off on a 500cc or smaller bike, such as Honda’s CB500 or 300, or the Ninja 500, 250 or 300. After a full season on that bike, (including a track day or two), you can consider moving up to a middleweight class bike, which includes 600cc sport bikes, or 800-1000cc cruisers. A couple seasons on the middleweight just may allow you to move up to whatever bike you want.
Before you think that the tiered strategy does not apply to track day and racing, think again. Whenever a track day rider wants advice about what bike to buy for racetrack riding I usually steer them toward an SV650 or Ninja 650R. Why? These bikes have modest power, so they force riders to develop expert cornering and passing skills. Smaller bikes help riders develop a strong foundation to build upon… and they are cheap and fun.
I often get asked from riders new to track days, what is the best motorcycle for riding on the track? In an effort to answer this FAQ, I decided to list some criteria for what I look for in a great track day bike. I’ll also list a few bikes I think are worth considering. If you want to bet on any racer, then sites like link alternatif sip777 are ideal for you.
Almost Any Bike Will Do
Some people think that they need a dedicated track bike to do a track day. But, this simply isn’t true as long as you have a motorcycle that has a reasonable amount of cornering clearance. This includes most standard, sport, sport touring and adventure bikes.
What this means is that many riders don’t need to buy a new bike to enjoy the benefits of riding on a racetrack. Many track day organizations require minimal preparation, so even that should not deter you from considering signing up for a track day.
FZ-1s, VFRs, Ducati Monsters, ZRXs, all fit nicely at a track day. Even FJRs and Gold Wings show up from time to time.
Non-Sportbike Track Days
Touring machines and cruiser motorcycles are probably the only machines that are not really appropriate for regular, sportbike track days. But, Non-Sportbike days are available. If you’re in the eastern part of the US, consider attending a Riding in the Zone Non-Sportbike Track Training Day.
Non-Sportbike track days are for any bike. photo: Arcy Kusari otmpix.com
Dedicated Track Bikes
That said, there are a lot of good reasons for buying a dedicated track bike. One reason is that you can set it up for track riding by stripping unnecessary lights and street paraphernalia and mounting inexpensive and durable race bodywork. You can also add performance bits that are intended for racetrack use only, such as race tires, low clip-on handlebars and rigid rearset footpegs.
Another reason is that you will feel free to push the limits, because you will be less concerned about potentially scratching your only motorcycle in a fall. See #5 below.
Criteria
What makes a good track day bike? From my perspective, the best track day bikes include the following criteria:
Reliable- A machine that you can always count on to start and run reliably all day long, even at redline. This is why I don’t recommend dirt-bike based motards.
Inexpensive- You don’t need a $10,000 machine to have a great time at a track day. As a matter of fact, if you spend all your money on your bike, then you will not have as much money available for track day registration fees and top-notch riding gear. Another criteria that makes track riding a whole lot less expensive is if you have a bike that is easy on tires. Also, forgo unnecessary bling and wait until you have at least a few track days under your belt before you make any performance modifications. Suspension and brake mods are acceptable at any time, though.
Not very powerful- A moderately powerful bike is one of the most important criteria for novice and intermediate track day riders. Even advanced riders will benefit from a low horsepower machine. I raced a 48hp MZ Scorpion as an expert and had a blast. And it cost me $2500.00. Just sayin’. See the article on the detriment of too much horsepower. See more below.
Not precious- Many new track day riders suffer undue stress over the anxiety of crashing their beautiful, high-dollar, chrome and carbon laden street bike. Thankfully, it’s easy not to crash at a track day if you ride within your ability. So, if all you have is your pride and joy, go ahead and bring it to the track, but at some point when you start pushing harder, you may want a dedicated track bike that has less sentimental value.
Ken racing an old 50hp Kawasaki EX500 Ninja worth less than $2,000. Photo: Jonas Powell Photography
Some Bikes to Consider
Suzuki SV650– Inexpensive with plenty of V-twin power. Put some money into the front suspension and you’re ready to roll. A lot of fast racers choose the SV as a fun and competitive lightweight racing platform.
Kawasaki EX500 Ninja– The venerable 500 Ninja has been a mainstay of lightweight roadracers in the Northeast for years. Really, really cheap. Just be sure you get a model with the 17′ wheels. You’ll need to upgrade the brakes and suspension, for sure. There are better modern choices, but you can get one dirt cheap.
Kawasaki EX650 Ninja– Similar to the SV650, but with a parallel twin motor.
Yamaha MT-07– Same class as the SV650 and EX650, but with a peppy engine and compact size.
250/300 Ninja – These bikes are a hoot, are cheap and plentiful. However, you may outgrow the sub-20 hp and limited tire selection after a season…or you’ll go all in and race in the growing 300 class.
KTM 390– A step up from the baby Ninjas, the 390 offers sharp handling and a fun motor. Upgrade the suspension and brakes for expert level capability.
Ninja 400– A step up even further in horsepower and long term potential. Lots of racers are choosing the 400 as a club racing platform.
CBR600RR, ZX6R, R6, GSXR600, 675 Daytona, 675 Street Triple, and other 600-class bikes– The 600 class of bikes are the most prevalent bikes at a track day. They offer a good balance of power with very good suspension and brakes out of the box. These bikes aren’t the cheapest thing to run. They can eat up tires and crashing them can get expensive. Older CBRs, R6s, GSXRs and ZX6s can be had cheaply. Note, that if you want a track-only bike with race bodywork, premium suspension and bike protection, it’s often cheaper to find a bike that is already prepared and outfitted for track use than to take a street bike and converting it to a track-only machine. Just be aware of their condition. Used motorcycles have been on the market for a longer duration of time. This means that these models from sites like Zecycles.com have been tried and tested, and probably they have been reviewed by plenty of riders online.
Liter SuperBikes: Not The Best Choice for Novices
Testing the 2015 BMW S1000rr photo: BMW
In many ways it’s great when a novice track day rider shows up with a brand new $20,000 rocket. We all love seeing riders who understand that these bikes are designed to be ridden on a closed course and often cause trouble when ridden on the street where their character begs to be ridden hard.
But, these bikes can also be a hindrance to stress free learning. Many new track day riders are better off with a simple, low powered machine that keeps them running a bit slower until they can get a handle on racetrack riding. One reason my friend Josh was having trouble at his first several track days is because he was driven to ride his GSXR1000 faster than he should have. Read about Josh’s mishap.
Of course, it doesn’t take a hundred-fifty horses to get into trouble. A well setup 70 hp bike like an SV650 can corner just as fast as a literbike, but the nature of the Gixxer liter bike often begs riders to unleash all the available horses. However, if what you have is a liter bike, don’t shy away from a track day. Just be extra aware of the temptation you can feel when piloting a hyper-superbike and keep the throttle in check.
Advanced-Level Bikes
The sky’s the limit here. However, I see time and again, riders who go for big horsepower at he expense of investing in skill development. Trust me that smaller is better in advancing your ability to get to expert level proficiency.
That said, here are the liter bikes to consider and why or why not:
Yamaha R1- A beast that begs to be ridden hard. If you can’t run an advanced pace, you’ll struggle to make this bike work the way it is intended.
Honda CBR1000RR- One of the easiest big bikes to ride. The 2017-on model is compact, smooth and fast.
BMW S1000rr (and r)- Love this bike. It’s only second to the Honda as an easy to ride bike. Gobs of power, but with good manners.
Kawasaki ZX10r- I was surprised that I didn’t love this bike. But, it was a bit like the R1 in that you have to ride it fairly aggressively to make it work. Otherwise it feels a bit heavy in the steering department.
Suzuki GSXR1000- Cannot go wrong with a Gixxah. Easy to ride when set up correctly and plenty of aftermarket and used parts out there.
Ducati Panigale 1199- I really like this bike. The handling is terrific, the motor is amazing and the looks… Expensive.
Triumph Speed Triple- more powerful, but less nimble version of the Street Triple. The 2021 model looks to up the performance.
Aprilia RSV4 (Tuono)- This is my current bike. See below. Love, Love, Love it.
Track testing the 2016 Speed Triple r photo: Triumph
My track bikes
Here is a list of track and racing bikes I’ve owned:
2000 Muz660 Scorpion– single cylinder 48hp bundle of awesomeness that helped me I win lots of amateur races.
2005 Kawasaki ZX636- I owned two of these. I whipped these bike over many track day miles and they neve3r let me down.
2012 Triumph Street Triple 675– Simply awesome. I enjoyed this sporty upright bike immensely as a track day machine.
2011 Suzuki GSXR750- This bike was very capable and reliable, but I didn’t gel with it, so I moved on after just one season.
2013 Aprilia Tuono- This is my current (as of 2021) track day bike and I love it. The upright supersports are my thing and with a 160 hp V-4 motor, the Italian machine mov3es my soul. It handles great and has just the right amount of usable and tractable power for a truly enjoyable ride.
Hot on the heels of the The Power of the Quick Turn article is this followup post about what happens after you tip into a corner. Too many riders struggle with cornering, not necessarily because they are afraid to lean, but becasue they do not understand how to properly complete a turn.
Cornering Basics
By now you know that motorcycles must lean to change direction and that leaning is done by countersteering. Read about countersteering HERE.
Once the bike begins to lean, countersteering pressure is reduced and other dynamics take over that cause the motorcycle to arc around the curve, including front end rake and trail geometry, as well as something called camber thrust. Camber thrust is the term that describes how a tapered object (a motorcycle tire leaned over) orbits around its axis when rolling along a surface (the pavement).
In other words, the rounded profile of a motorcycle tire acts like a tapered styrofoam cup when it’s rolled on its side. Give it a push and it rolls in a circle.
“As the inside edge of the tyre is forced to adopt a smaller radius than the outer edge, then for a given wheel rotational speed, the inner edge would prefer to travel at a smaller road speed, this happens if the wheel is allowed to turn about a vertical axis through the point of the cone. Just as a solid cone on a table if given a push.”
For our purposes, all you really need to understand is that your motorcycle is designed to track around a curve with minimal effort once the bike is in a lean. Front end geometry (caster effect, rake, trail, etc.) all make this possible. If you want to read more, go to Tony Foale’s website and learn all about it.
If your bike is properly maintained and has relatively new tires with nearly the original profile intact, you should be able to initiate lean and then maintain that lean angle without introducing any significant handlebar inputs. Problems occur when the rider messes this process up. Most bikes will track predictably and with little effort as long as the rider doesn’t interfere with the process or introduce counterproductive inputs.
Variations in Machine Design
Some riders insist that they cannot round a corner without using significant handlebar pressure to keep their machine on the desired path. Instead of being able to relax and let the bike carve the path, they fight the bars all the way around the curve. It is possible that the machine is to blame, but these days this is rarely true.
While I have ridden bikes with really bad cornering dynamics, the vast majority of modern machines offer balanced, neutral handling that requires little-to-no mid-corner intervention. The only reason for handlebar adjustments are because of mid-corner changes in turn radius, camber or surface condition. A smooth constant radius curve, ridden well, requires almost no additional handlebar pressure.
It’s important to note that different types of bikes handle differently. Sportbikes are responsive to steering inputs, while cruisers tend to be slower steering, but more stable. Still, if the rider does all the right things, then the differences in machine does not make that much of a difference. The trick is to have the knowledge and skill to complete a corner proficiently.
Basically, it’s usually much more productive to evaluate the user instead of blaming the machine.
User Error
To repeat…once the necessary lean angle is established, most bikes are happy to track around a corner with little effort. So, why do some riders struggle with this part of the cornering process? The answer lies in a few areas.
Tension at the handlebars. The front of the bike needs to be free to move up, down, and side -to-side in response to both large and small changes in the road surface. Being stiff on the handlebars interferes with this motion and causes the motorcycle to feel reluctant to turn. It also asks the tires to work harder to stay in contact with the surface. Another problem with stiff arms is that you are inhibiting the slight countersteering corrections that may need to occur to deal with changes in camber or other variations in corner surface. Loose arms allow fluid reactions.
Poor body position. Think of your bike as your dance partner who wants you to lead. In the case of the cornering dance, a slight dip of the shoulder to the inside of the curve will encourage smoother cornering. In contrast, a rider who stays upright or leans outside is stepping on the bike’s toes, causing it resist fluid cornering.
Not using the Throttle Correctly. For the motorcycle to track around the corner predictably and smoothly, the suspension must be stable and in the middle of its travel. Smooth, gradual acceleration throughout the curve produces the best results. Be sure to slow enough at the beginning of turns so that you can comfortably roll on the gas all the way to the exit. Unfortunately, a lot of riders fail to use steady throttle in corners. This is a problem, because changes in speed and drive force alter the arcing path the motorcycle takes. Abruptly chopping on or off the throttle upsets this stability and causes the bike to lift and fall in and out of the established angle of lean and introduces forces that result in a wobbly or weaving line around the corner. Note that acceleration typically makes the bike drift wide and deceleration can either cause the bike to drop into the corner more or cause it to stand up, depending on how abruptly the throttle is chopped and how the machine /tire combo responds to this input.
Not Looking through the Turn. You tend to go where you look, so look where you want to go! By keeping your visual attention through the turn and toward the corner exit, your mind is able to better manage the corner. The other advantage is that the landscape slows down when you look ahead. This reduces anxiety and helps complete the concerning process. Looking ahead will not suddenly make you a cornering master, but without habitually looking ahead, you will never become one. Keep your eyes up.
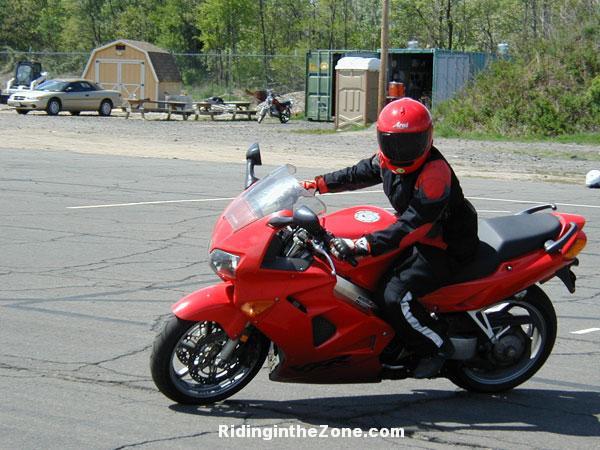
Practicing cornering technique. Look where you want to go!
Cornering Technique
Okay, so let’s break it down.
Look well ahead.
Countersteer to initiate lean for the corner.
Crack the throttle as soon as the bike is leaned. Use gentle drive at first and then progressively feed in more drive force. Roll on with more authority as lean angle is reduced near the corner exit. Steady drive creates steady cornering.
Relax! If you established the correct angle of lean for the turn, the bike should require only slight adjustments in handlebar pressure. Corners that tighten will require you to press more on the inside bar to lean the bike more, but keep the throttle as steady as possible.
Finish the turn. You’re not done yet. Keep looking toward the corner exit and roll on the throttle a bit more to let the bike drift toward the outside of the curve. This facilitates the “outside-inside-outside” cornering line, which I will discuss in a future post.
Rinse and repeat for the next corner.
There is so much more to learn about the cornering process, but this is a good start. Implement these steps and you’re well on your way to becoming a cornering master.
What tips can you share that help you to corner with more confidence?
Most motorcycle riders initiate lean in a somewhat lazy manner. In most cornering situations and at normal street speeds it is perfectly fine to gradually ease into a corner with light pressure on the handlebars.
But, when the pace picks up and the corners become less predictable, a sluggish, indecisive turn-in will cause you to run wide at corner exits. The ability to turn quickly gives you a survival tool for managing misjudged corners while also increasing an overall sense of control and confidence. Booya!
Cornering 101
Before we get into quick turning technique, you must understand the basics of how a motorcycle changes direction. Motorcycles must lean to turn. Leaning is done primarily by introducing countersteering pressure on the handlebar: press forward/down on the handlebar on the side in which you want to turn.
A delayed apex requires a delayed, quick turn-in.A quicker turn allows early direction change and less risk of an on-throttle highside.
Practice the quick turn technique in a parking lot. And then apply it on your next ride.
How Quicker Turns Help
Turning the motorcycle within a shorter distance and period of time gets the bike to change direction early.
The quicker the bike is leaned, the earlier the direction change is completed, which affords you a greater margin of error to handle a misjudged turn radius or a slightly overspeed entry. Look at the diagram and you’ll also see that a quicker turn-in means you are not leaned over as long.
Another benefit of a quick turn is that it allows the bike to reach maximum necessary lean angle before or at the turn apex (the innermost part of the corner), which means that you can get on the gas sooner for both greater corner stability (bikes like being under drive when cornering) and greater exit speed (for you performance riders): Tip-in and then crack the throttle.
Quick Turns and Cornering Lines
The quick turn technique can be used for most, but not all corners. Some corners are laid out so that a gentle, sweeping entry is best. But, most other corners benefit from a quick turn, especially turns we call “exit” turns that require a slower entry and an early drive out of the corner.
A quick turn is also useful as a way to achieve a delayed apex cornering line. Delaying turn-in by a half-second or so keeps you outside a bit longer at the turn entry for a wider angle of view and points the motorcycle toward the turn exit, rather than toward the outside edge of the lane. Novice riders often dive for the inside of a corner as they react to anxiety about not being able to make the turn. This can easily result in an early apex and a blown exit. Ouch!
Instead, wait for it, wait for it…okay, turn, NOW.
Quick Turning and Traction
As you might imagine, giving the handlebar a good shove introduces an abrupt force to the front tire. That’s why you want to limit using the quick turning technique when traction is limited, such as on wet or contaminated pavement. A quick turn uses more traction at the beginning of the turn, but uses less at the apex and exit. Even though more traction is used when turning quickly, good tires in dry conditions have more than enough grip to handle the extra force.
To minimize the risk of tucking the front tire, you must get most of your braking done and start easing off the brakes before you introduce forceful handlebar inputs. However, it is beneficial to maintain some front brake force as you countersteer, which compresses the front suspension and loads the front tire for more rapid turning response. Ideally, you would release the brakes a split-moment after you press on the handlebars.
I’m talking about releasing the brakes almost immediately after initiating lean. If you want to maintain braking pressure longer (trailbraking), then you’re better off not turning in quickly. To manage traction while trailbraking your turn-in must be gradual, because you’re combining both turning forces and brake forces.
Timing & Intensity
A well-timed quick turn should result in a single handlebar input that establishes necessary lean angle and allows immediate throttle application (very gradual at first).
Turning in too hard and/or too early could result in the motorcycle hitting the inside of the curve. To prevent this, you will need to delay turn-in from where you would begin to turn for a slow turn-in. To fine-tune how rapidly the bike turns in, you can also reduce how hard you press on the handlebars. The harder you press, the more rapidly the bike will fall into the lean.
NOW is the Time!
I don’t care if you ride a GSXR on the racetrack or a Harley on the street, you must master the quick turn technique NOW. Being able to use immediate, authoritative handlebar pressure gives you a MUCH better chance of surviving a too fast corner entry. Learning the quick turning technique will allow you to get the bike turned early and efficiently and minimize the chance that you will panic and grab the brakes or run wide into the oncoming lane or off the pavement. Don’t delay! This just might happen on your very next ride!
Learning to turn quickly isn’t difficult, but it does require excellent countersteering skills and precise timing. Turning quicker also requires more forceful handlebar pressure and the trust that the tires will stick under the stress of more forceful handlebar inputs. Practice is what will convince your mind and muscles of the power of the quick turn. Do it!
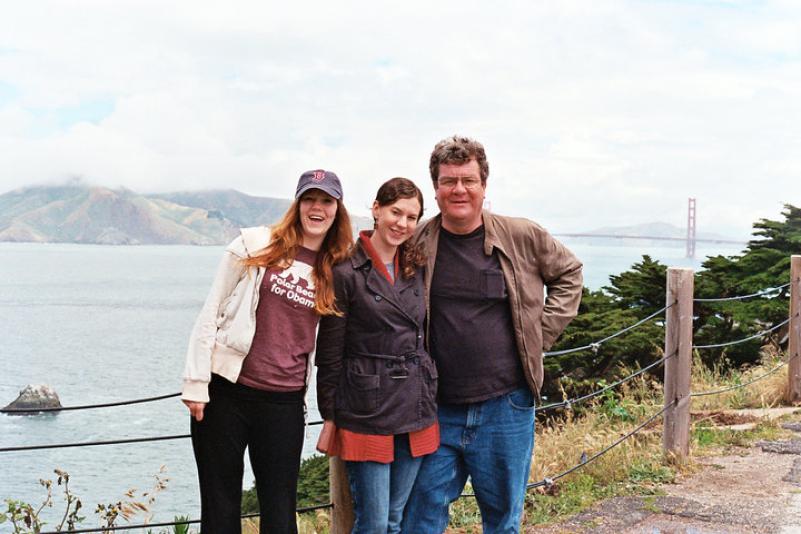
Ed McGrath with his daughters Chelsea and Brittany.
I just got home from attending a memorial service for two lovely people killed by a heroin addict who apparently nodded off and veered into the oncoming lane and struck their motorcycle. This is a tragedy that is made worse by the fact that the two people were father and daughter.
My brother’s deceased friend Ed loved sharing his passion for riding with his daughters…something I have done for many years with Jeannine. The unimaginable happened when something completely out of their control occurred and their lives ended in a flash.
Ed was doing nothing to jeopardize his and his daughter’s safety except the fact that they were on a motorcycle. It was 3:30 on a sunny midweek afternoon with good visibility and little risk of drunk or stoned drivers (unlike midnight on a Saturday night). Yet, Ed and Brittany were at the receiving end of a one-in-a-million chance that a stoner would cross the centerline just as they were in the vicinity. Why it happened simply cannot be explained.
Some would say that putting you and a loved on one a motorcycle is jeopardizing your and their safety. And they would have a good argument. I’ve known too many people who have lost their life while riding and there is nothing telling me that that trend will end anytime soon.
The Takeaway
In reality, there is not a lot I can say about the situation that killed my friend and his daughter. It sounds like it happened instantaneously, so that parking lot practice to improve his braking or swerving skills wouldn’t have likely helped.
So, what does this all mean? To me, it is yet another sobering reminder that riding a motorcycle comes with the real risk of death, or worse. I know we all “know” this as fact, yet I’m not sure we really “know” what it means until it happens to us. So, we keep riding, as we should. Just remind yourself from time to time just how vulnerable you are and to not take your safety for granted…it is not guaranteed.
What we can take away from tragedies like this is a renewed diligence to be the best riders we can be. Not only for ourselves, but for our loved ones. The pain and sorrow I saw at the memorial service today is evidence of just how deeply we are missed.
Sometimes, as is the case of Ed and Brittany there is truly nothing we can do to prevent a crash. So, we must decide…do we stop riding? Or do we ride on, knowing the odds are mostly in our favor? You choose.
There is Hope
Thankfully, the vast majority of incidents are avoidable with excellent mental and physical skills.
Do yourself and the people who care about you a big favor and learn all you can about motorcycle safety and refine your control skills and ability to perform evasive maneuvers so that you at least have a chance of avoiding tragedy.
Share your thoughts below.
Please Donate to Keep the Articles Coming
If you liked this article and the many other articles on this site, please toss a buck or five into the hat. It’s greatly appreciated!
Click the PayPal “Pay Now” button.
Then indicate quantity in $2.00 increments. – Example: put “2” in “QUANTITY” field to donate $4.00, “3” for a $6.00 donation, etc.
Why $2.00? Due to the PayPal fee structure, a $2.00 donation is significantly more beneficial compared to a $1.00 donation.
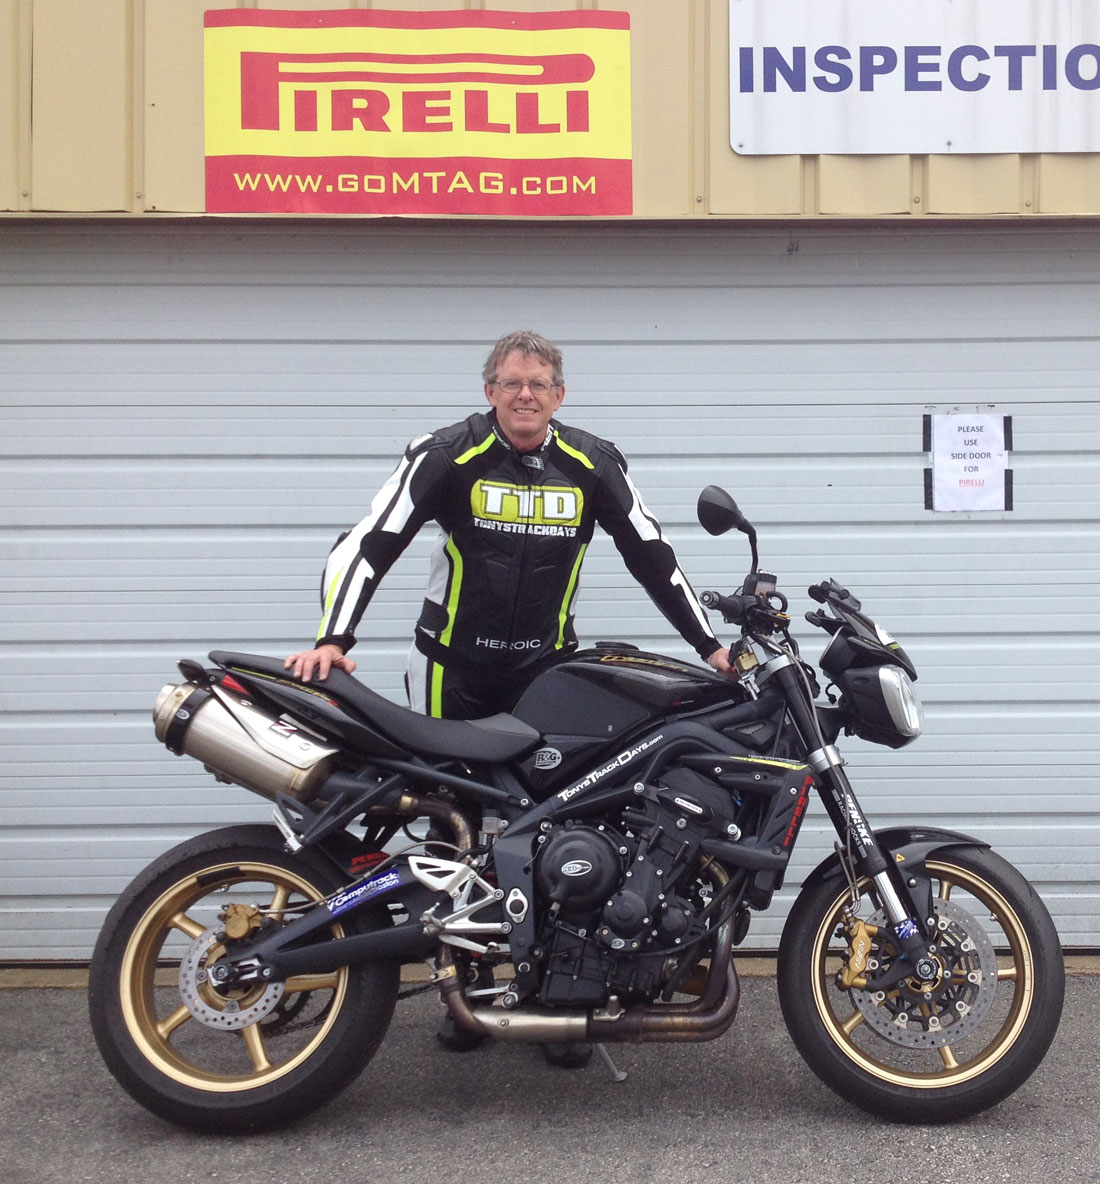
I recently sold my trusty track-only 2005 Kawasaki ZX6R for a more upright track /street bike. I thought I would buy a new Yamaha FZ-09, but I talked with Dave Searle from Motorcycle Consumer News who told me that the FZ needed a lot of work to make it track worthy, so I opted for a slightly used 2012 Triumph Street Triple R. I rode it at a track day the day I picked it up and it performed very well in stock form. But, as a track day junkie and instructor, I needed more precise handling and I need to make sure a tipover will not keep me from continuing with my day.
Besides doing the track day stuff, I also Accessorized the Street Triple with some street-oriented stuff. You might want to check that out later.
First, Some Video
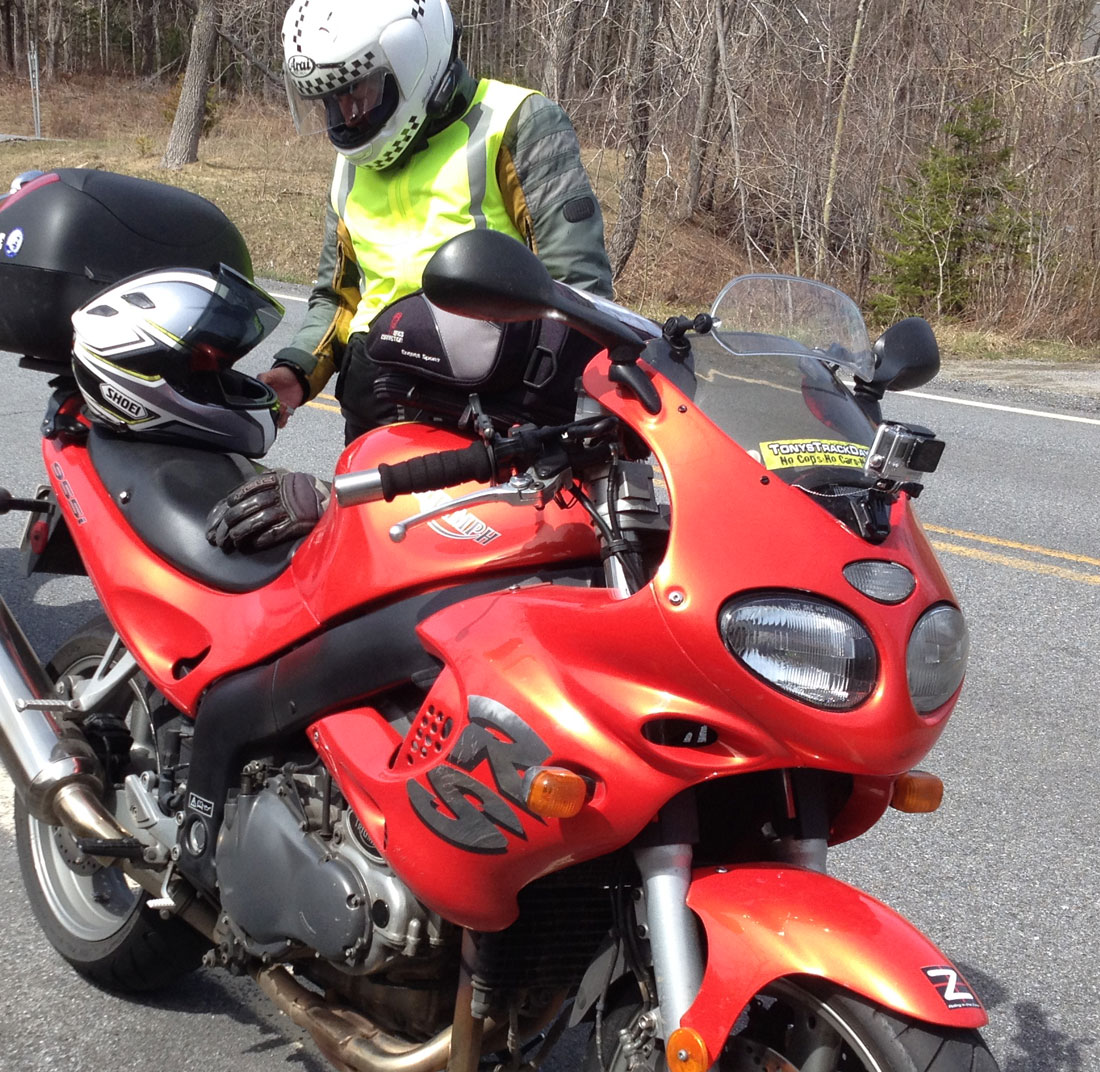
Below is a video showing a couple of laps of me and the Striple at Loudon. I’m in the red vest. The Street Triple fun starts at 7:10.
At Barber
At Thompson, CT
Bolt on Bike Protection
You are not required to have frame sliders or any other type of bike protection at most track day events. But, it is smart to protect your motorcycle in the event that you go down. I ride on the racetrack as one of my jobs, so I do over 2,000 track miles per season. Even though My crash rate is very low, I have been known to make a mistake or two. An investment in bike protection (as well as rider protection) can mean the difference between ending your day early or getting back out on the track to finish your day on two wheels. I also carry some spare levers and foot pegs, just in case.
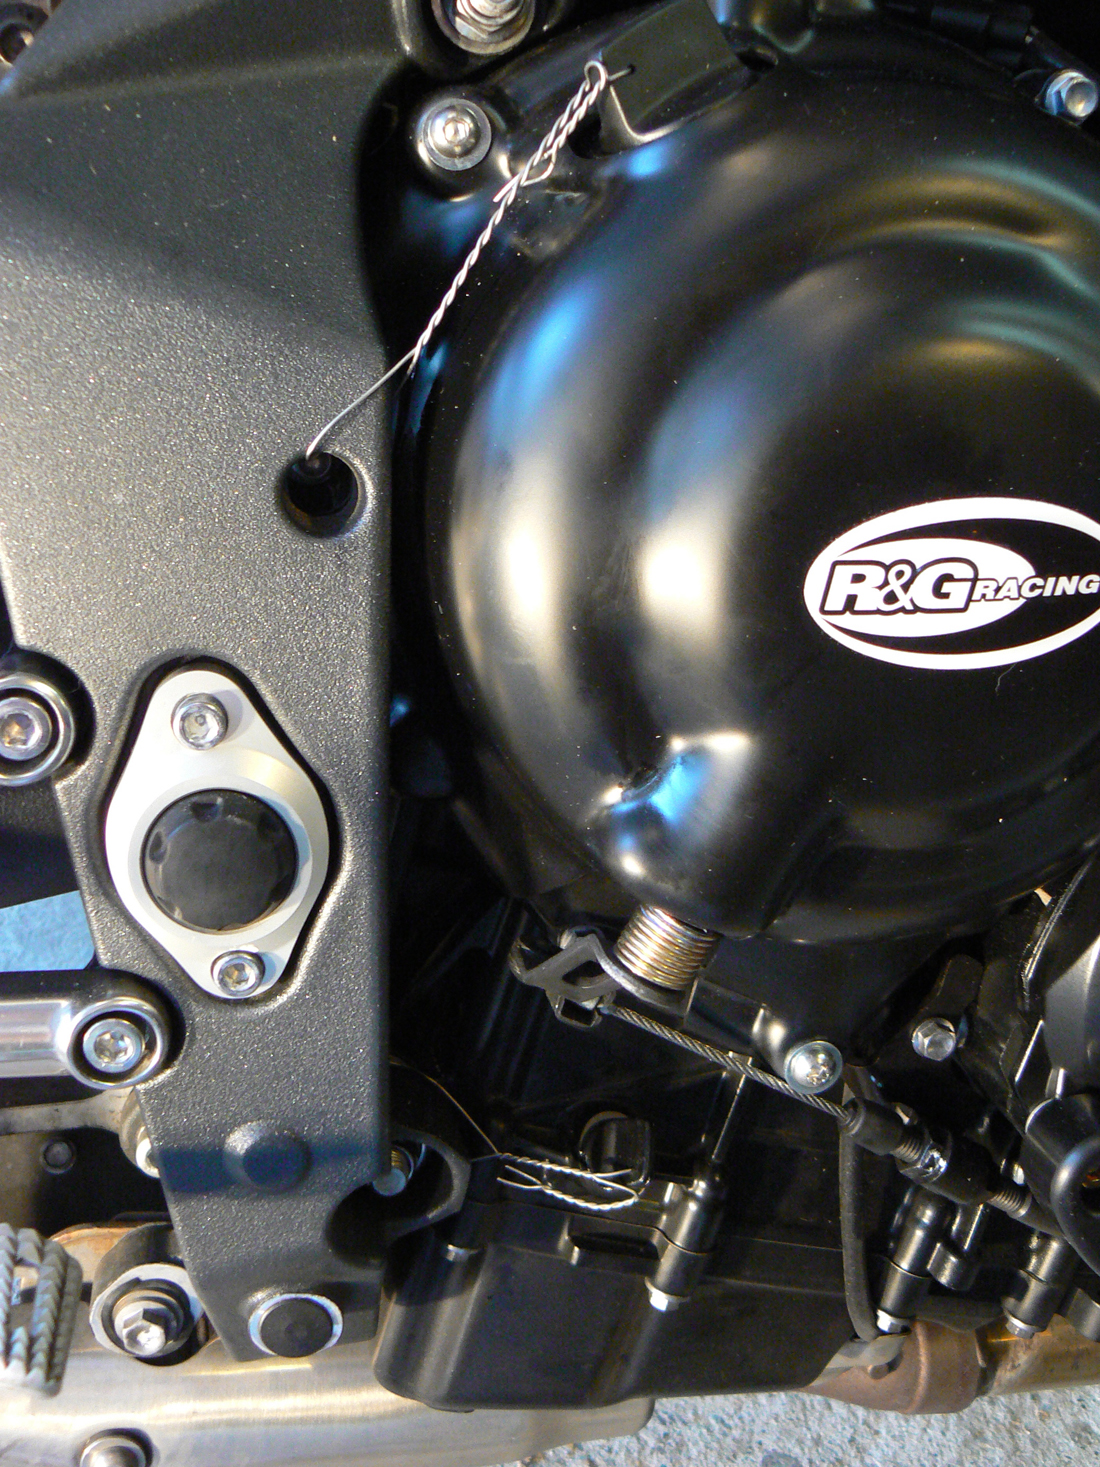
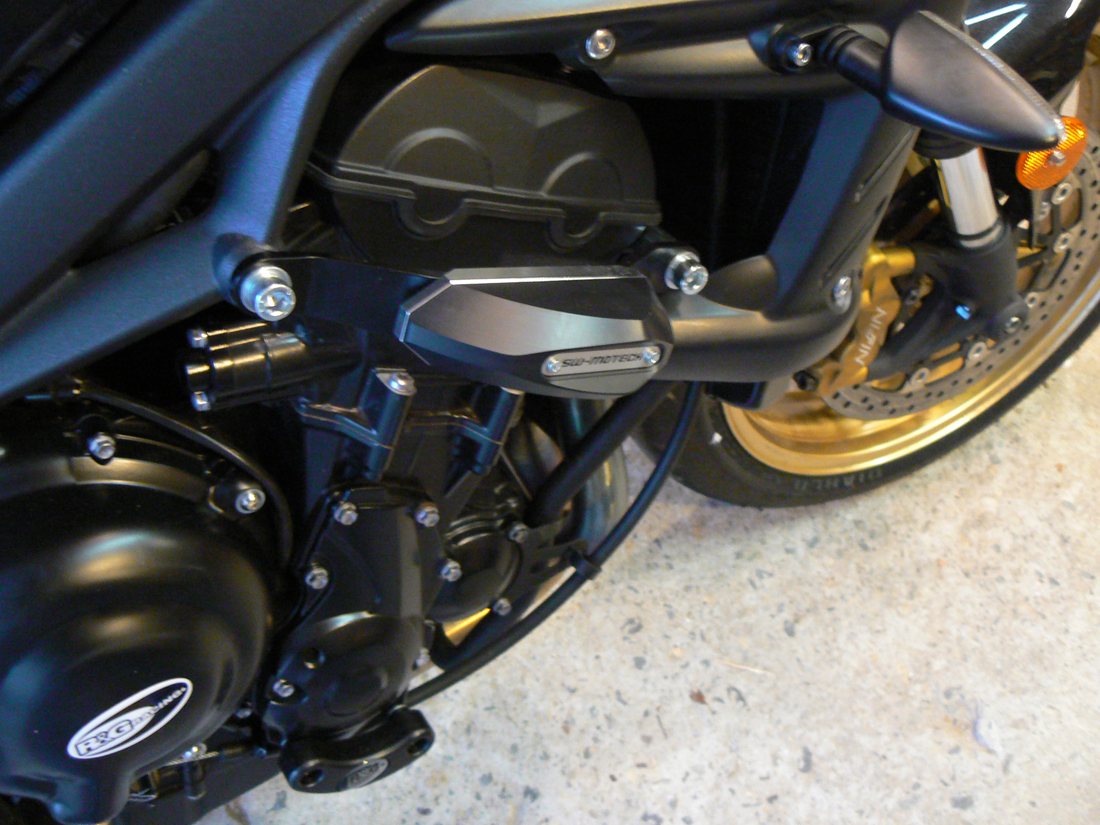
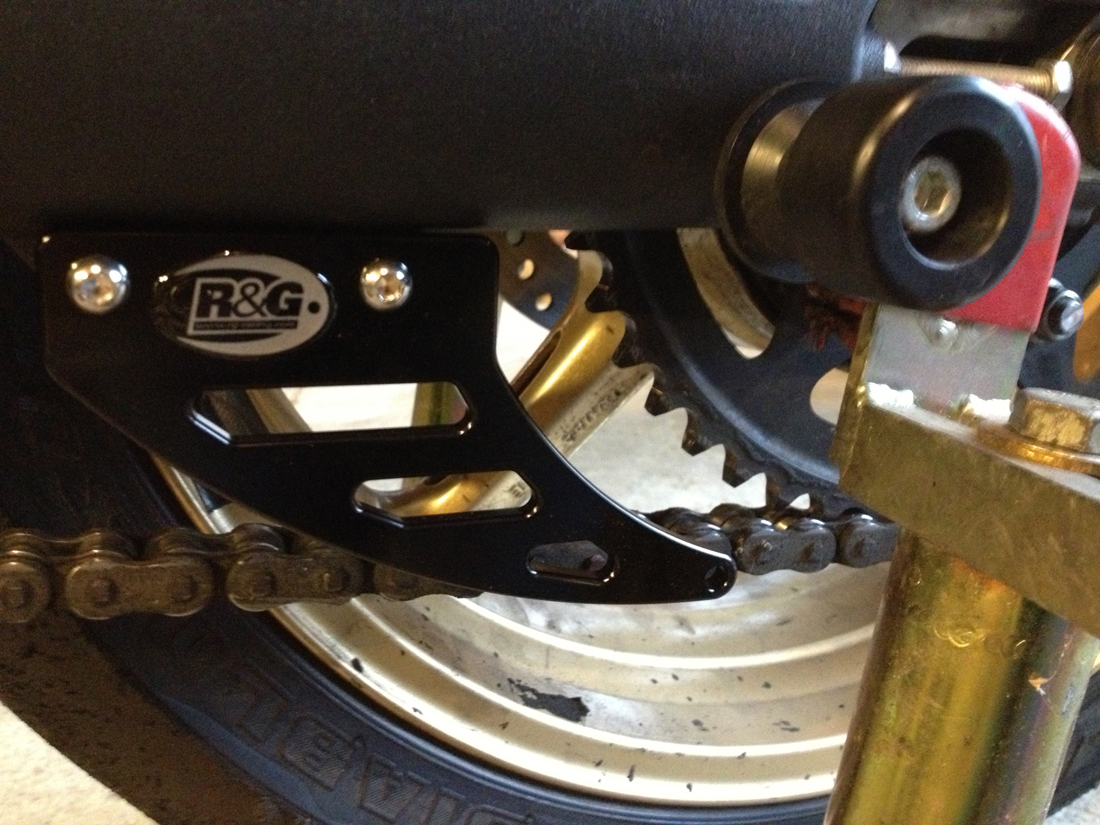
Here are some images of the work I’ve been doing to my 2012 Triumph Street Triple R. It is serving as my track bike and as an occasional street bike. I focused first on bolting on some engine, frame and exhaust protection. I work for Twisted Throttle, so it made the most sense that I use products that they import and sell. The stuff from R&G Racing and SW-MOTECH are top shelf, IMO and I would consider using their products even if I didn’t get the employee discount. Click the links to see all of the Twisted Throttle products for the 2012 Street Triple and 2008-2011 Street Triple.
A few notes (see photos below):
Wired oil filler and dipstick caps: I leave more wire at the ends so I can simply unwind the tail end, pull it through the hole and then reuse the wire after an oil change.
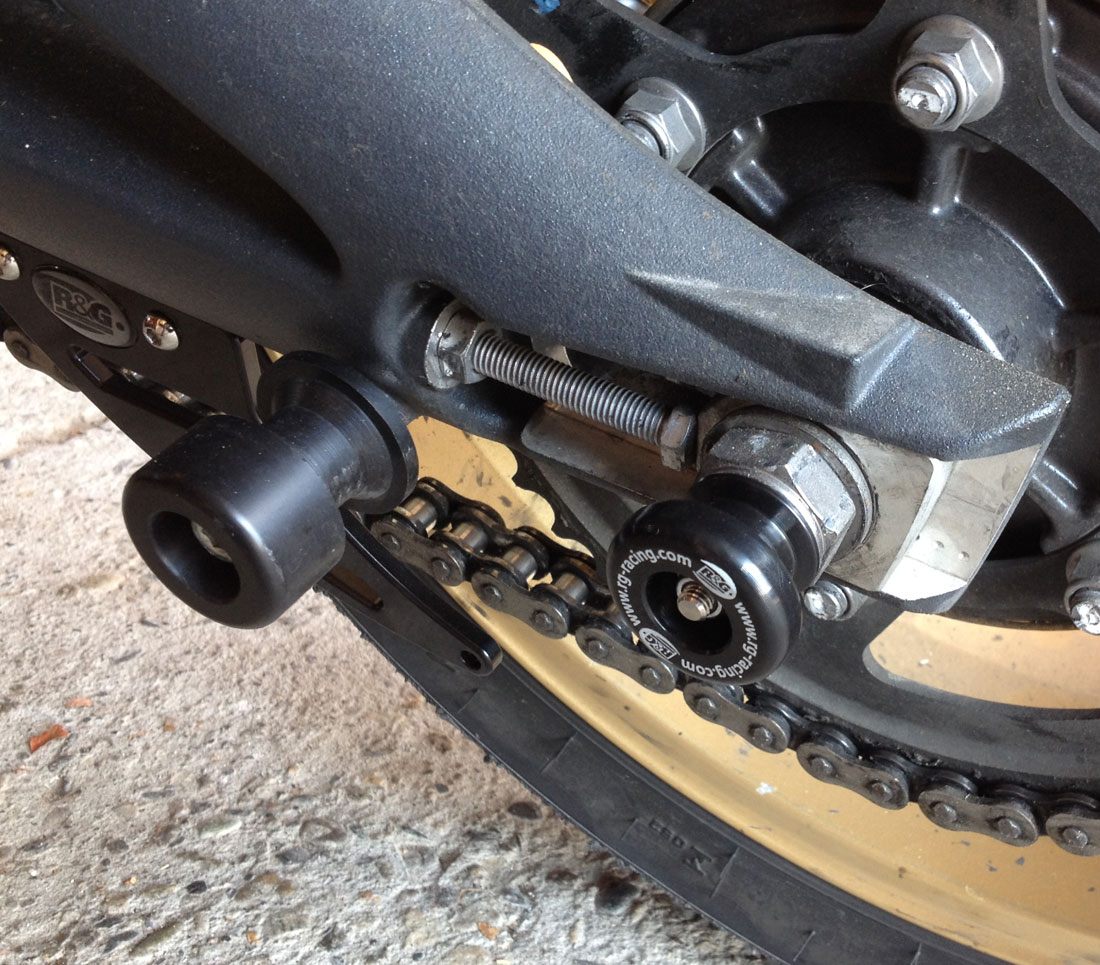
R&G Racing swingarm spool and protector, in combination with the Woodcraft spool and protector: I have both of these swingarm protectors because I have seen too many swingarms get damaged when the threaded swingarm spools break off in a crash. I decided to add the axle spools/protectors to try and give a second point of contact to hopefully prevent the threaded boss in the swingarm from getting damaged. Another reason to have both spools s because you can’t use the rearward R&G spools to support your bike with a race stand for removing the wheel, because they must be removed to take out the axle. So you need the other spools as well.
Wired oil filler and dipstick caps.
SW-MOTECH Frame Sliders have a two-point mounting bracket. I also installed an R&G water pump slider, just in case.
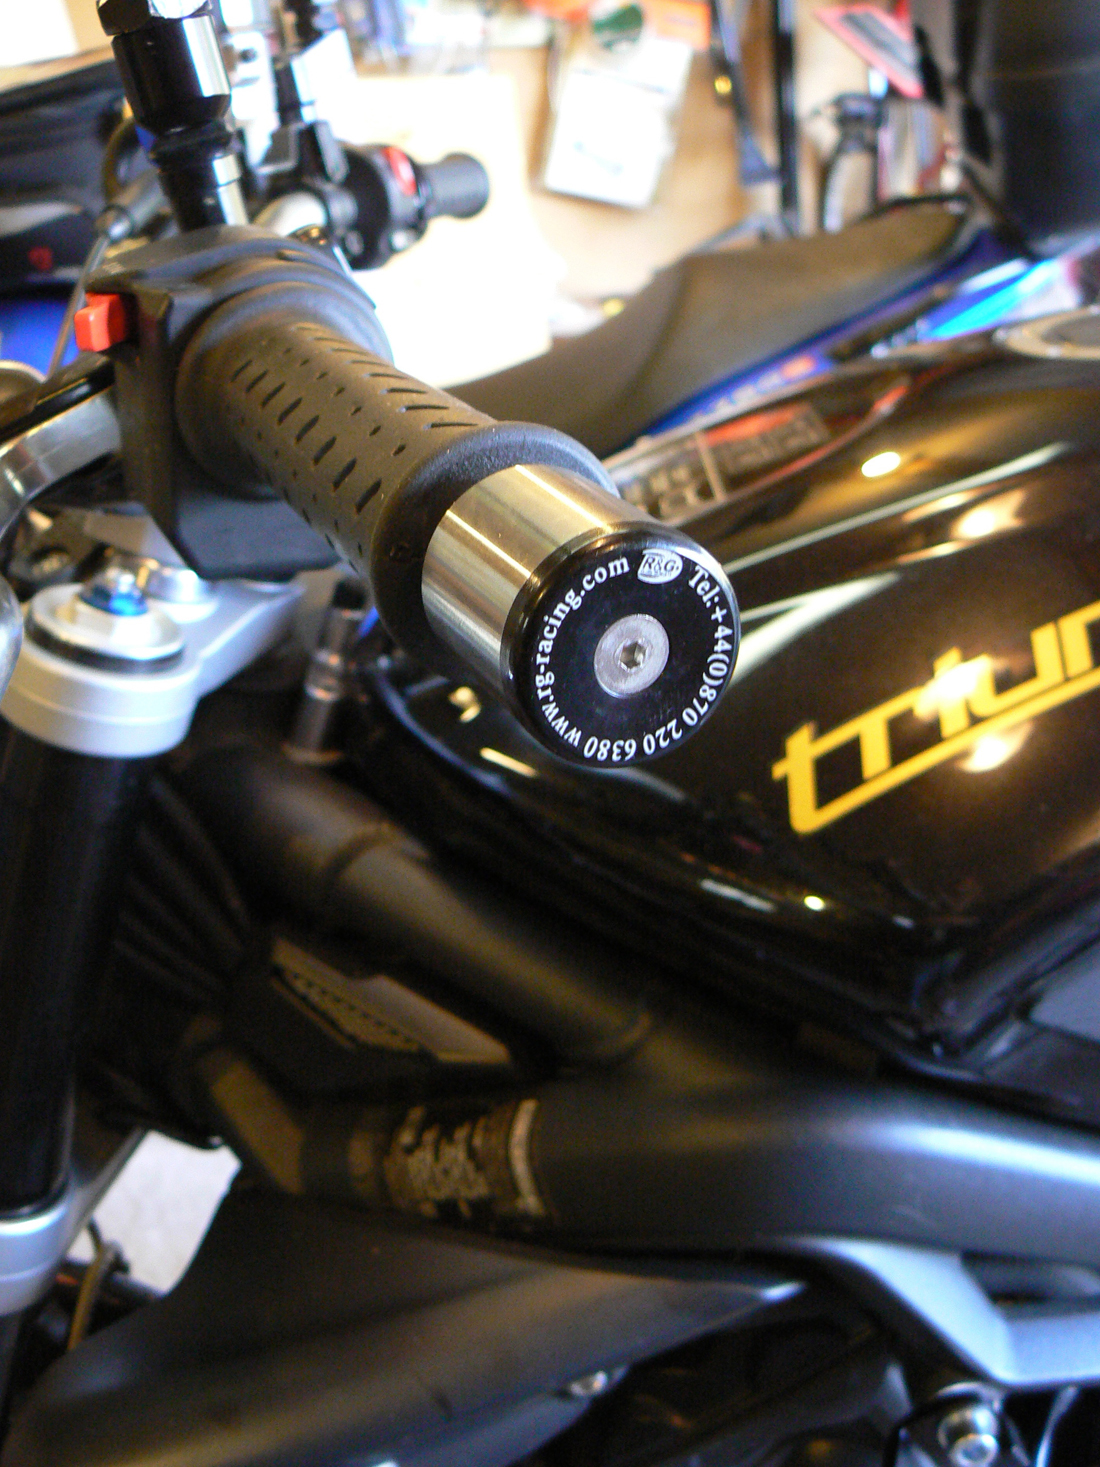
R&G Racing bar end weight and slider.
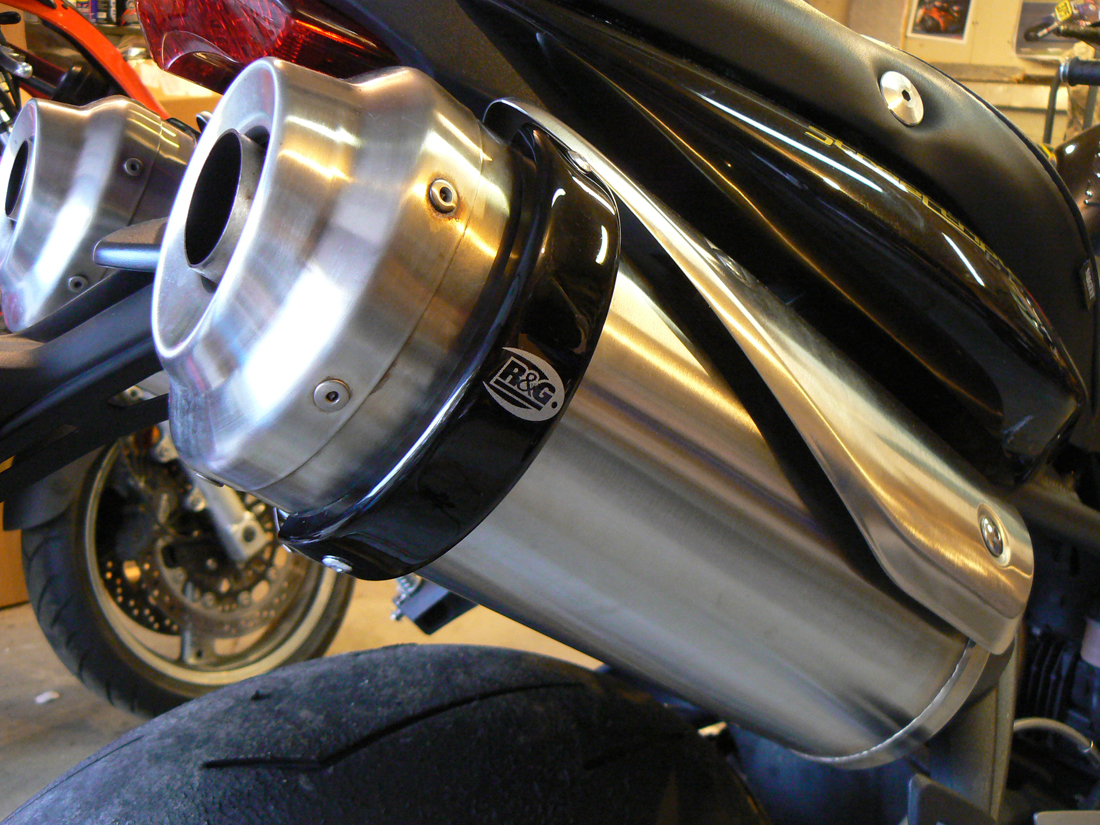
R&G Racing exhaust protectors.
R&G Racing toe chain guard so my toes or other apendages don’t get caught between the chain and sprocket. OUCH!
R&G Racing swingarm spool and protector. Woodcraft spool and protector.
R&G Racing swingarm spool and protector.
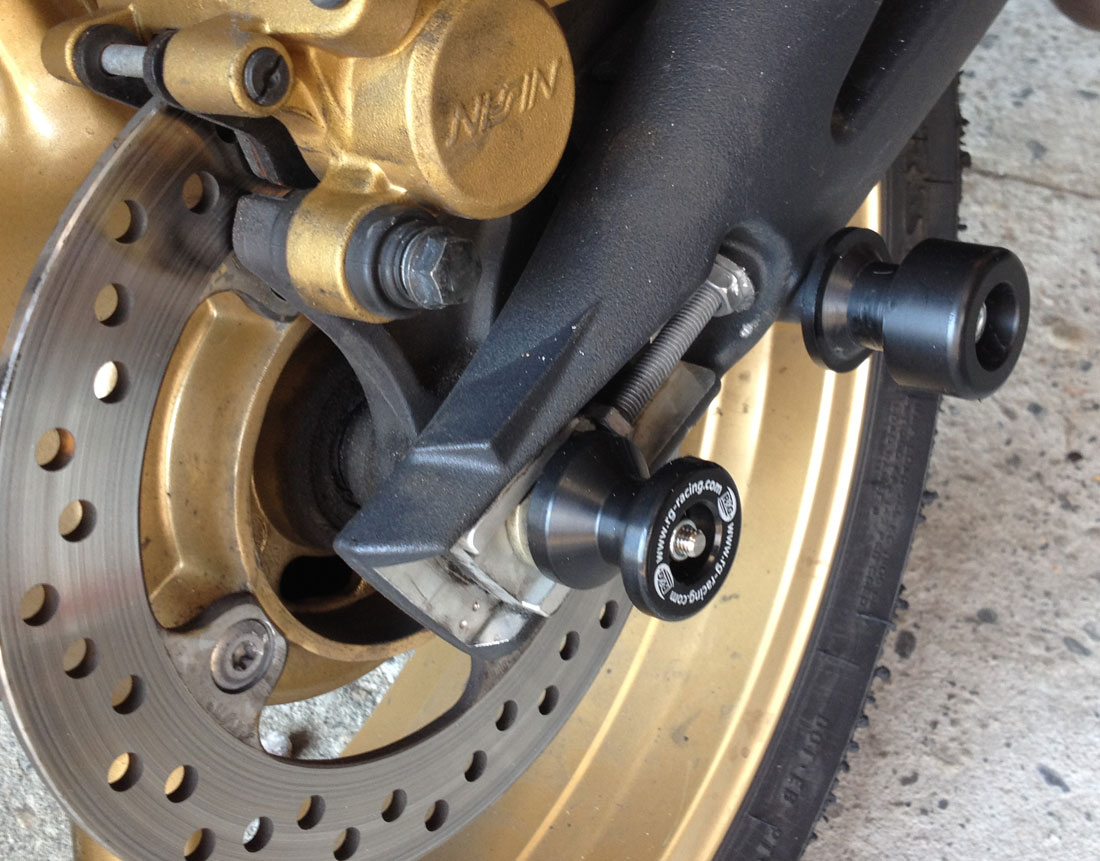
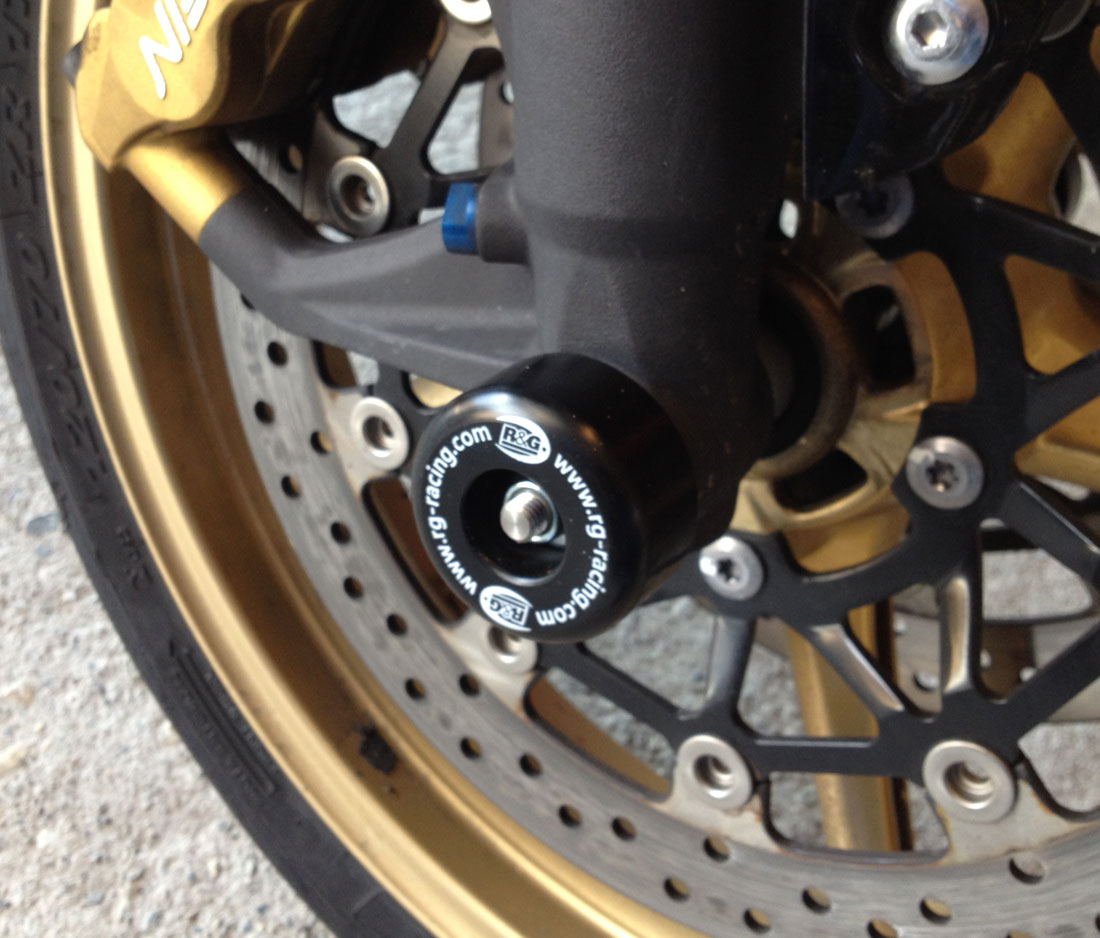
R&G Racing fork protectors
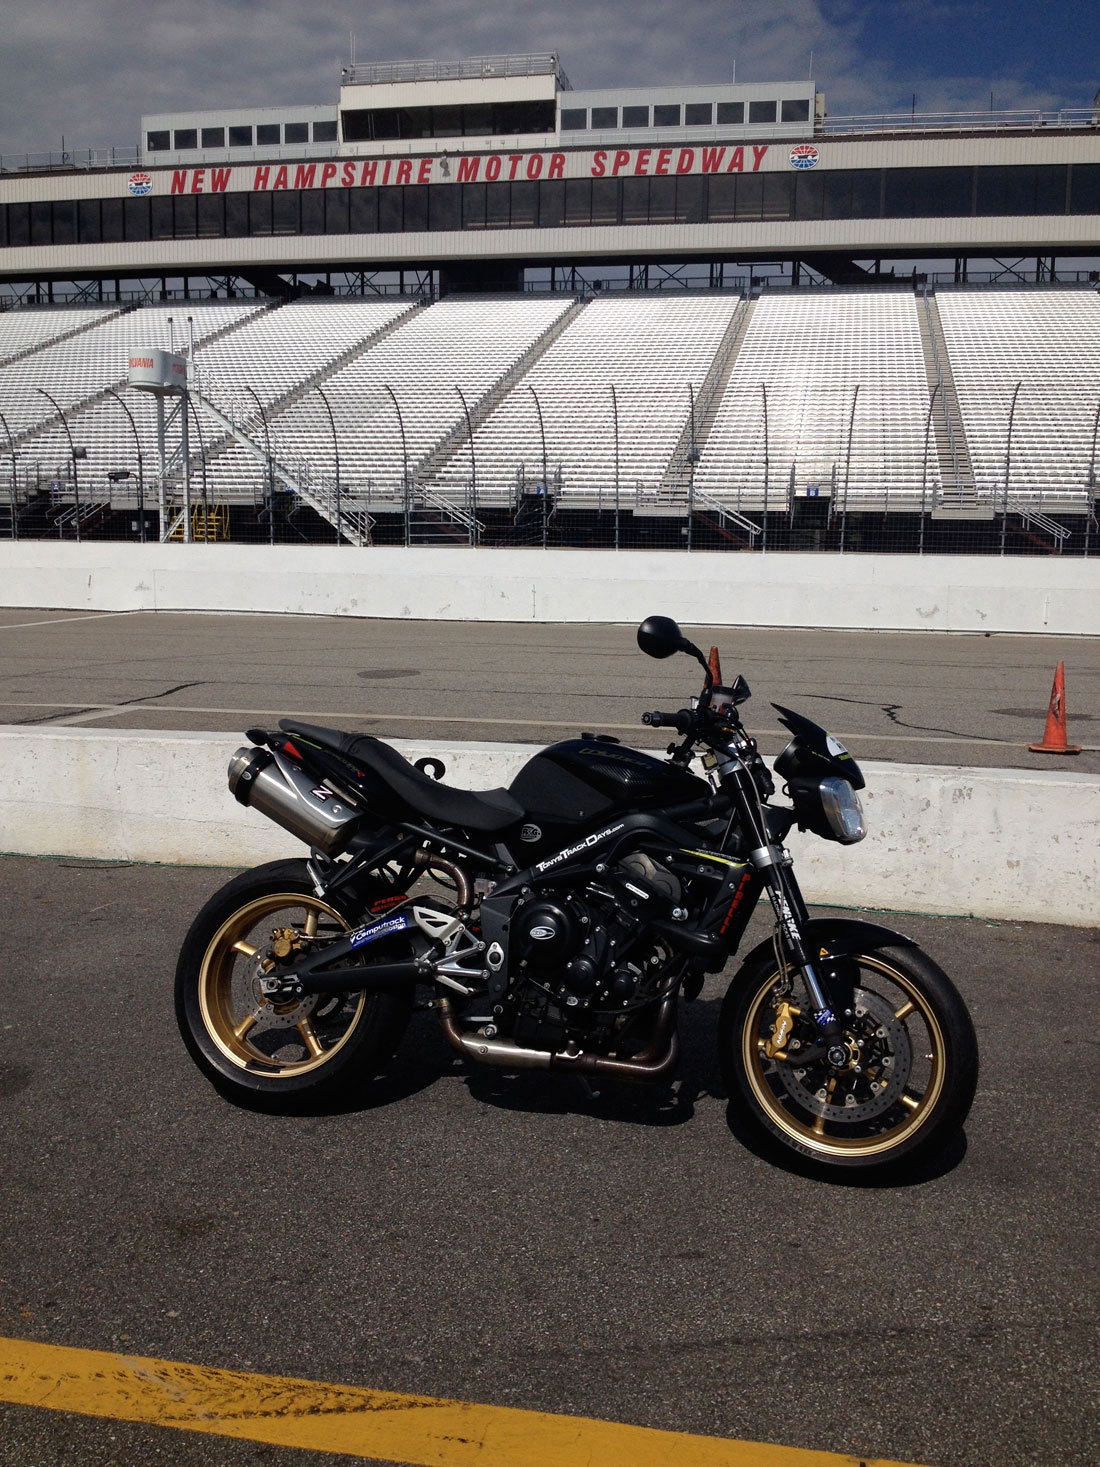
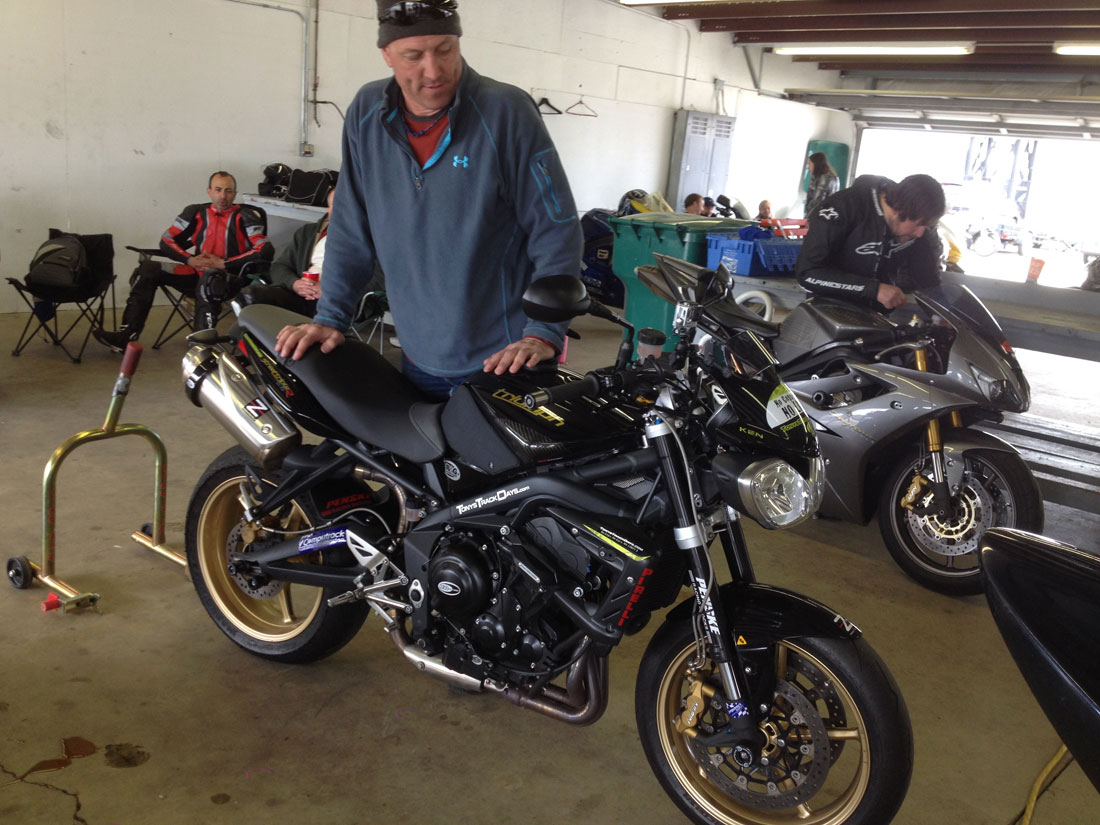
Triumph Street Triple R
Peter Kates from Computrack Boston works his magic.
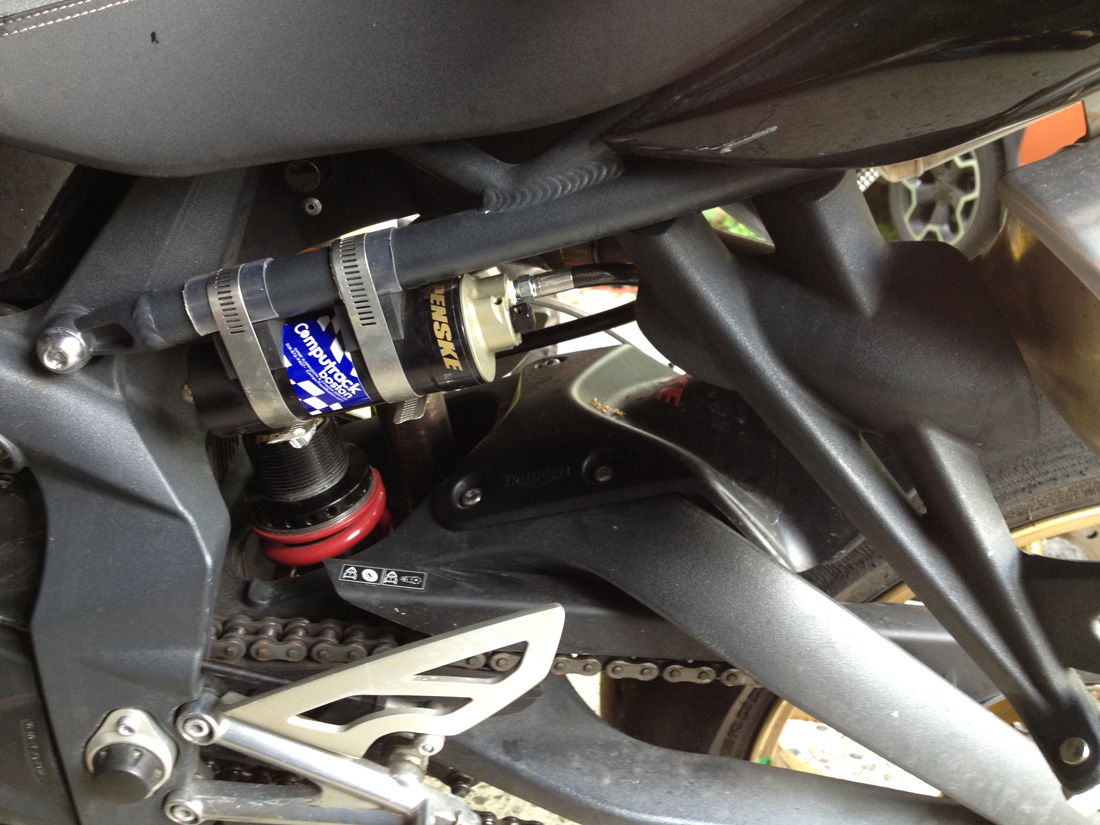
Suspension
Penske 8983 remote shock
The suspension was upgraded over the winter to include Penske fork valving, a .95 fork spring swap and a Penske 8983 with a remote reservoir. The stock suspension is very good, but at the level I need to ride when instructing for Tony’s Track Days, I need a bit more adjustability than the stockers can provide. The remote reservoir was a bit difficult to locate, making the extra cost of a piggyback worth considering. But, it works great.
The highly regarded skills of Peter Kates from Computrack Boston were employed. PK has been around the Loudon paddock for years and is the go-to guy for suspension and chassis tweaks.After some compression and rebound damping tweaks and a change to a 750 pound spring, the shock is now setup for serious lap times. What is interesting is that the suspension now doesn’t work as well at slower speeds. It’s a bit busy UNTIL you turn up the speed and then it all makes sense (like most race setup suspension).
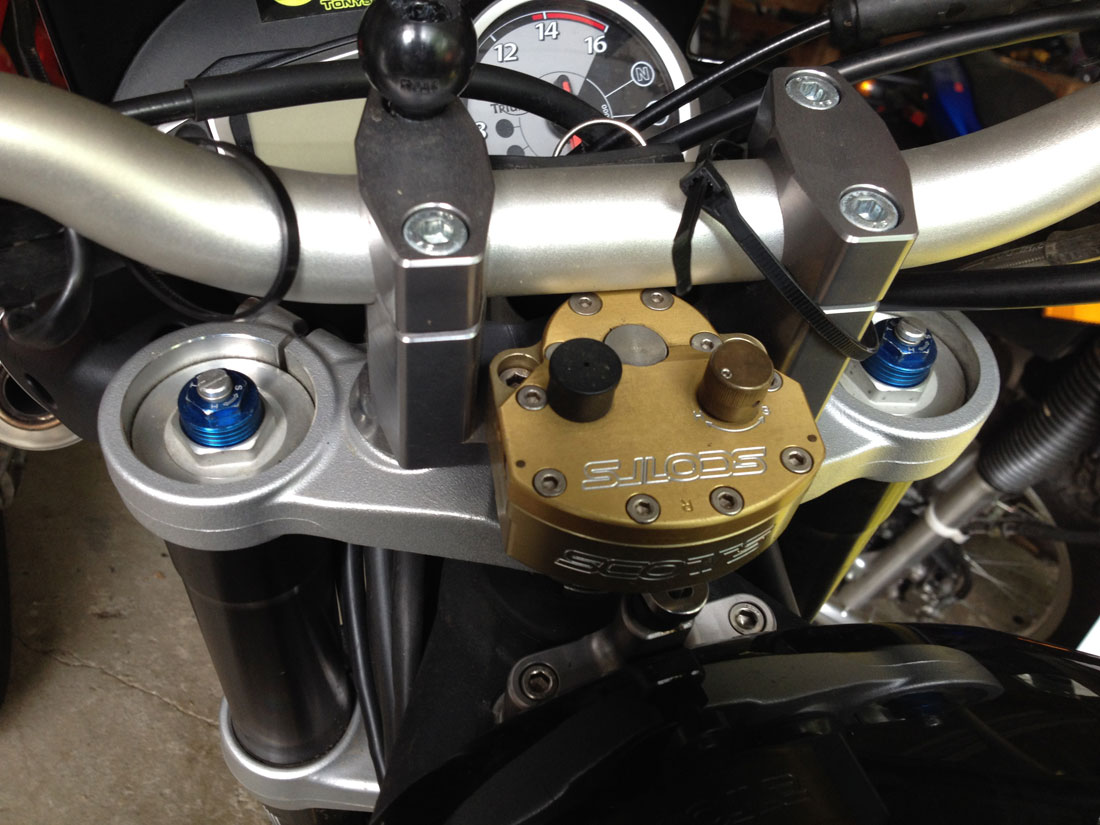
Forks recessed into the clamps adds sorely needed trail. And the Scott’s damper is a nice thing to have for cresting hills at speed.
One other thing I had Peter do was measure the chassis to get the rake and trail to be set at the optimum numbers for fast riding. This means increasing trail on the Triumph 675s. Many Daytona riders opt to replace their triple trees with one with less offset. this gives them the trail needed for mid-corner stability and cornering feedback. The Street Triple is closer than the Daytona in regards to trail, so instead of springing for the $800.00 triples, Peter slid the fork tubes down inside the top clams as far as possible. It looks weird, but it did increase mid-corner feel at speed without slowing turn-in.
Tires
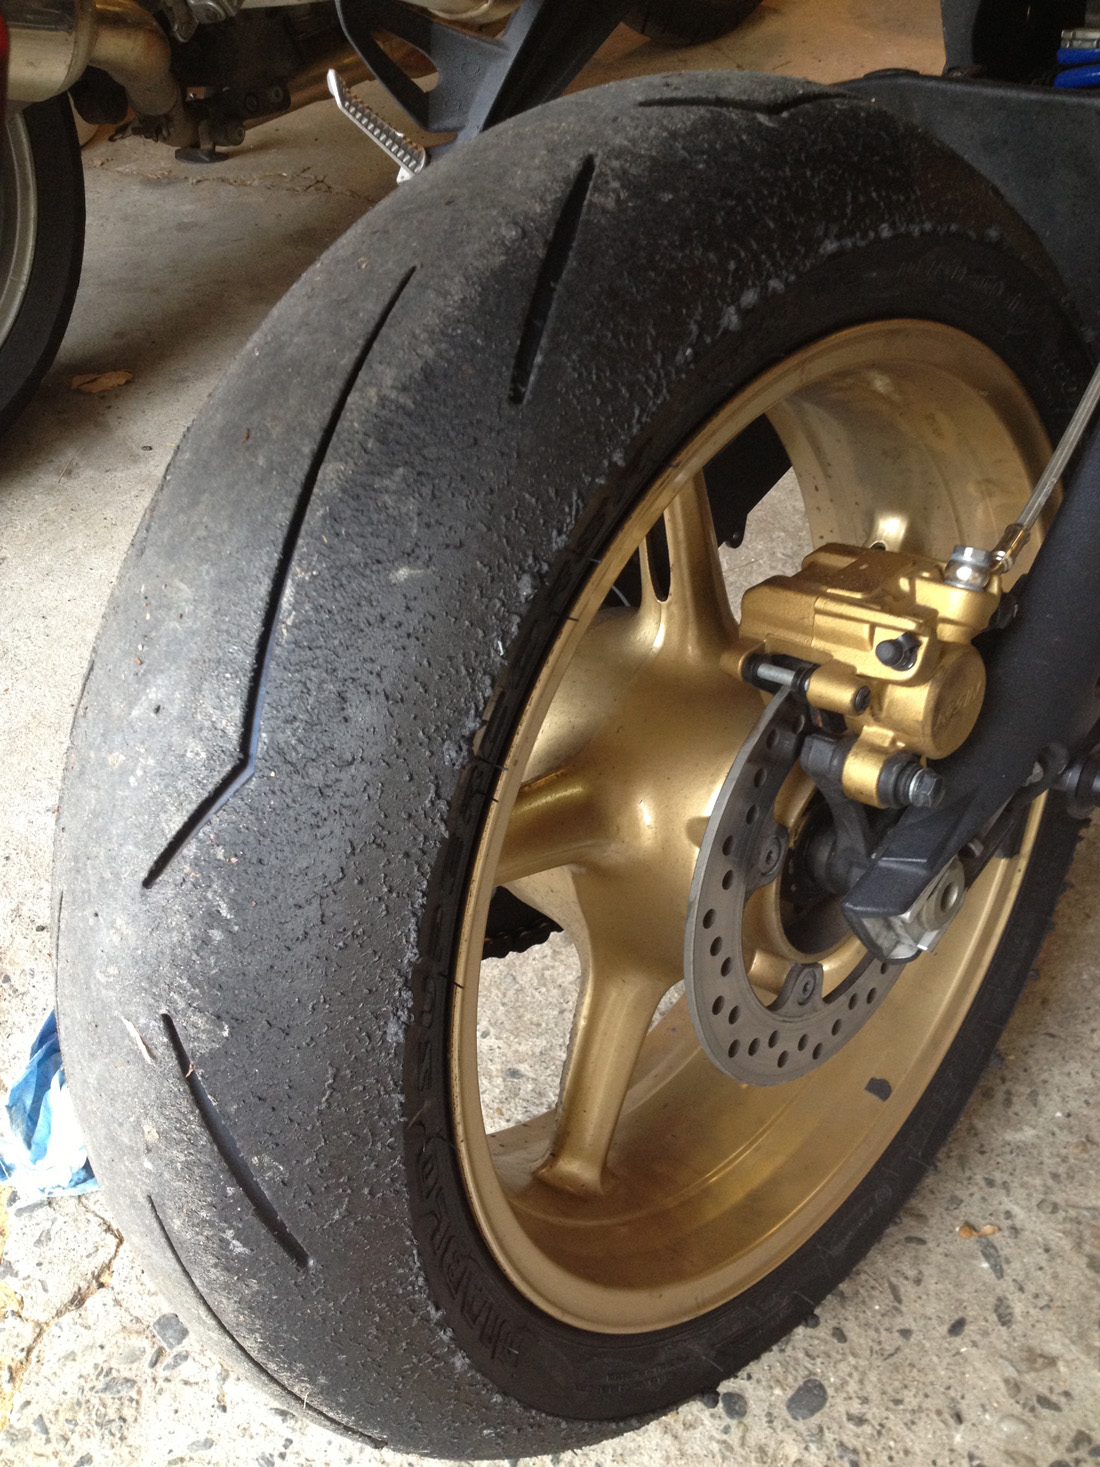
Pirelli Supercorsa on 2012 Triumph Street Triple R after 2 sessions at NHMS (Loudon) running in the advanced group.
People have a lot of questions about tires. I have done track day laps on all kinds of tires, including basic OEM rubber, Sport touring tires, sporty street tires, and DOT race tires. Believe it or not, most all are capable of keeping you on two wheels when ridden at a novice, intermediate, or a slower advanced group pace. I have used Michelin Power One race tires for the last few track day seasons and loved them, but this year I am switching to Pirellis. The reason is that I always liked the feel of Pirelli tires and it doesn’t hurt that TTD is supported by Motorcycle Tires and Gear (MTAG), who also supplies Pirelli tires to the Loudon Roadracing Series.
My Street Triple comes stock with Pirelli Rosso Corsa, which is a proven track day favorite with many of the TTD staff, including my daughter, Jeannine. I rode the first 3 session at Loudon on the Rossos and had no sense that the tires were limiting me in any way. I changed over to Pirelli Supercorsa race tires after lunch so I could compare the differences and so would have fresh rubber for the track day that Tony and I will be attending at Barber Motorsports Park in November. I got along with the Supercorsas just fine, thank you. I immediately braked deeper, accelerated stronger and cornered harder to a point where I approached my best times I typically do on my ZX6R. I was impressed.
Does the average track day rider need race tires? No. Most modern sport-oriented tires that are relatively new will do just fine. It comes down to whether your level of riding is good enough for you to actually use race ribber. Most people have a long way to go before the answer to this question is yes. Run what ya brung, mister.
Daytona Rearsets
The stock Street Triple rearsets are very comfortable for street riding, but are too far forward and are a little too low for aggressive track riding. I dragged my toe slider before I was dragging my knee, which is no good, as I use my knee dragging to measure my lean angle. And without that tool, I am not able to monitor lean angle with the same level of confidence I like. The stock footpegs are also too far forward for moving from side to side without pulling on the handlebars. Footpegs that are further rearward allows me to use my legs to support my torso when flopping from left to right, especially when doing so uphill, like what happens at turn 7 and turn 8 at NHMS.
The 2007 Daytona rearsets bolt on easily with no issues whatsoever. I could even use the stock shift rod. The rear brake light switch needs a bit of adjustment, but that’s really easy to do.The Daytona pegs could be even further back for my taste, but it’s a big improvement at 1″ further back and 1/2″ higher compared to the stocker STR rearsets. I also think the Daytona rearsets look great.
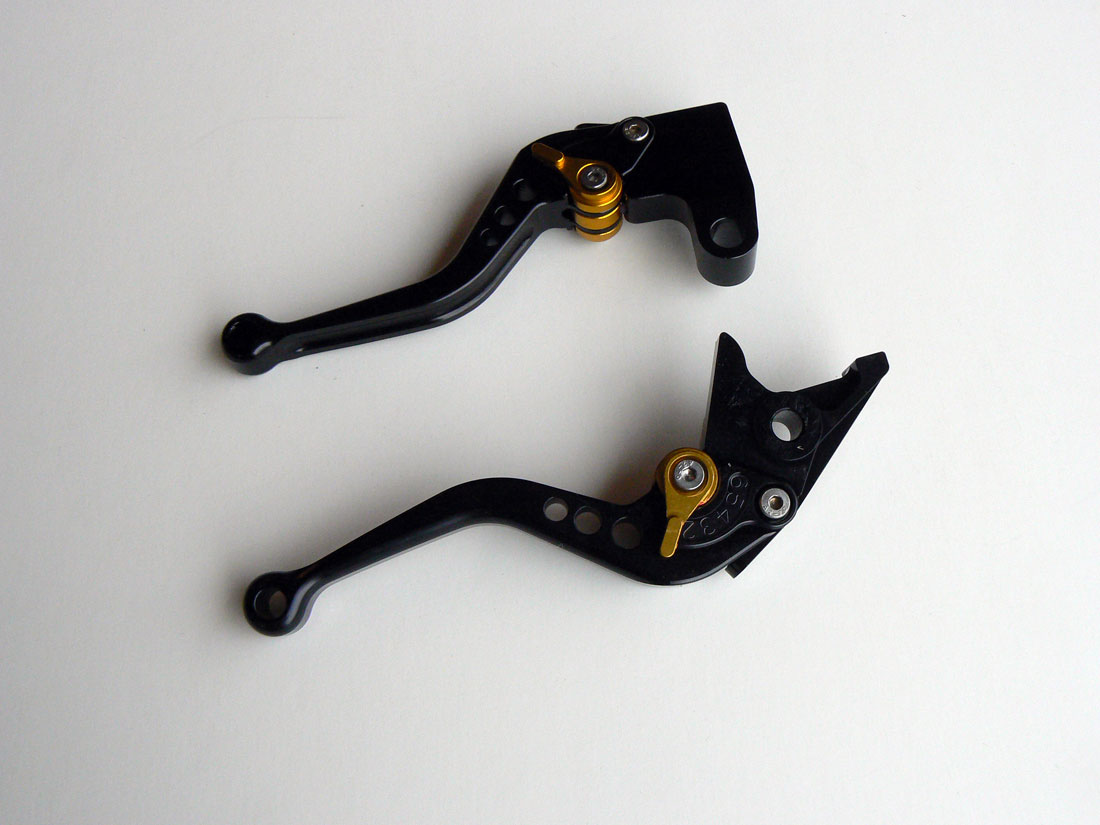
Levers
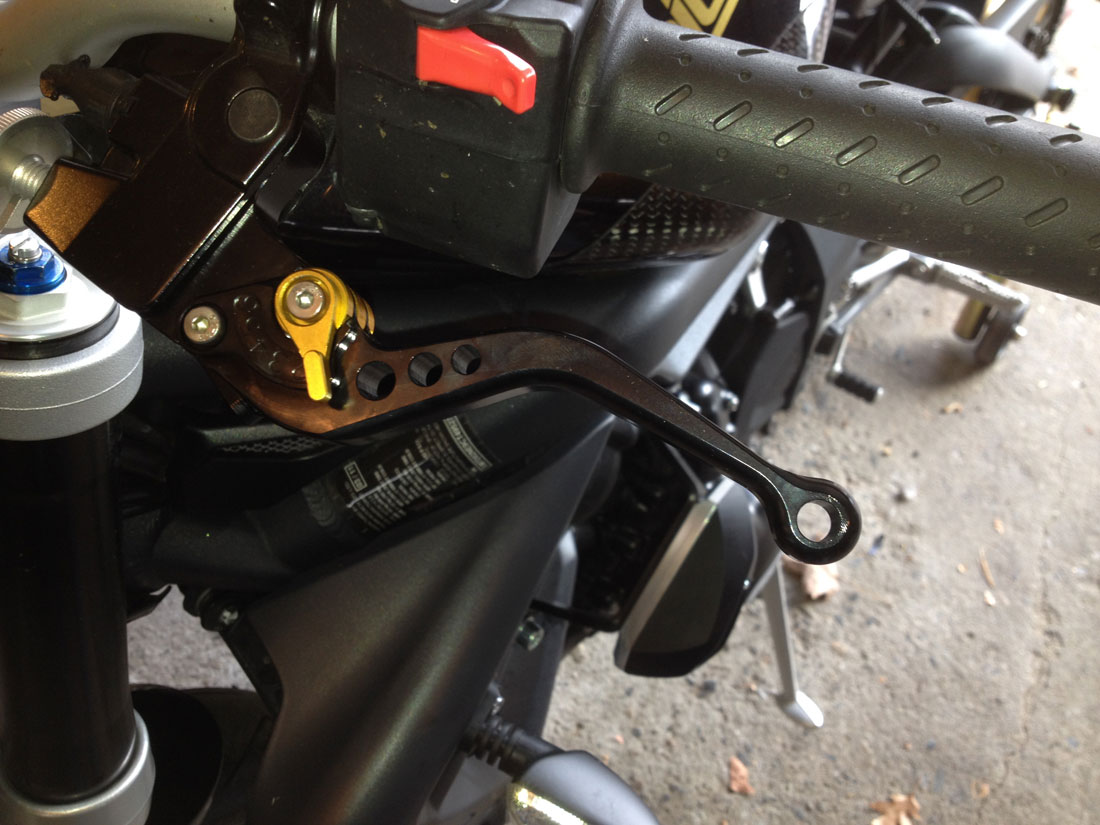
I installed some shorty levers, which are more adjustable than the stock ones and are less likely to break in a crash. The short levers also accommodate two finger use and they look cool. I’ve used ASV levers before and really like them, but a lot of racers use the cheap knock-offs from China, so I’m giving them a try. I installed the levers and they seem fine. Perhaps they aren’t as nice as the expensive ones. but they are good looking and work great. I have to get used to the shorties after always having standard long versions.
The shorty levers are tucked away and are great for two-finger operation.
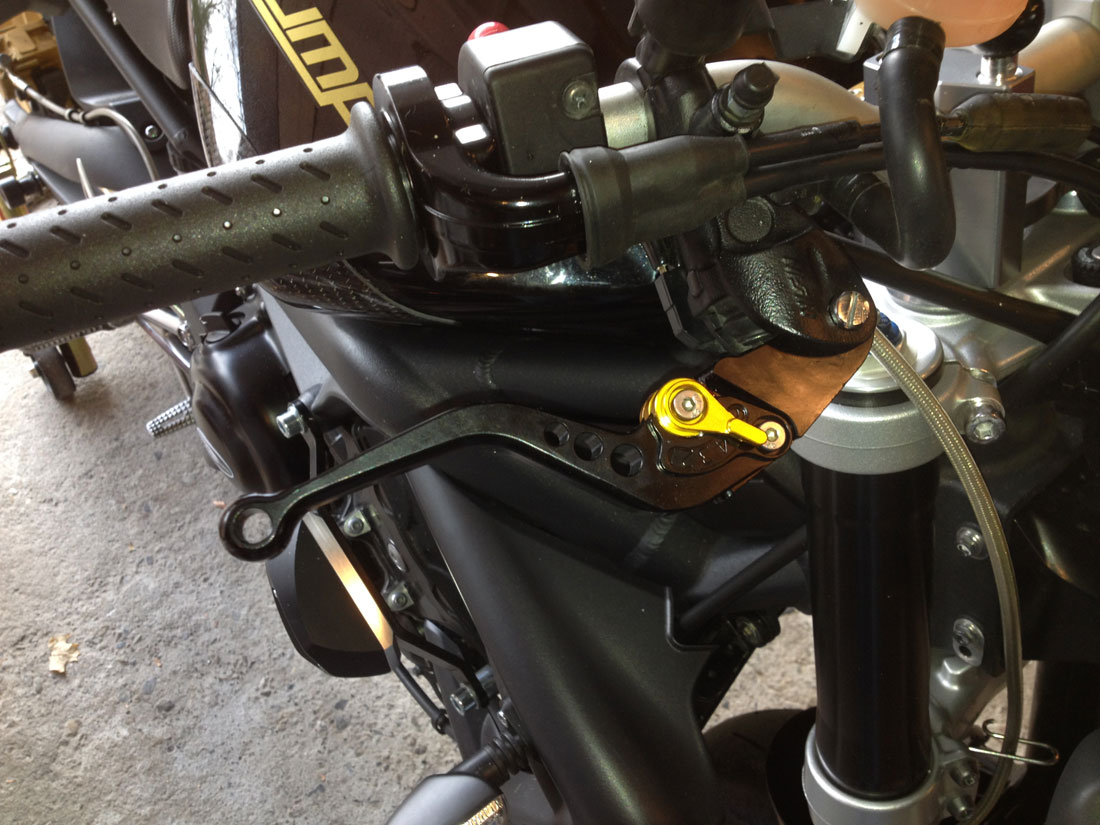
Inexpensive Chinese levers look good and work fine.
Inexpensive Chinese levers look good and work fine.
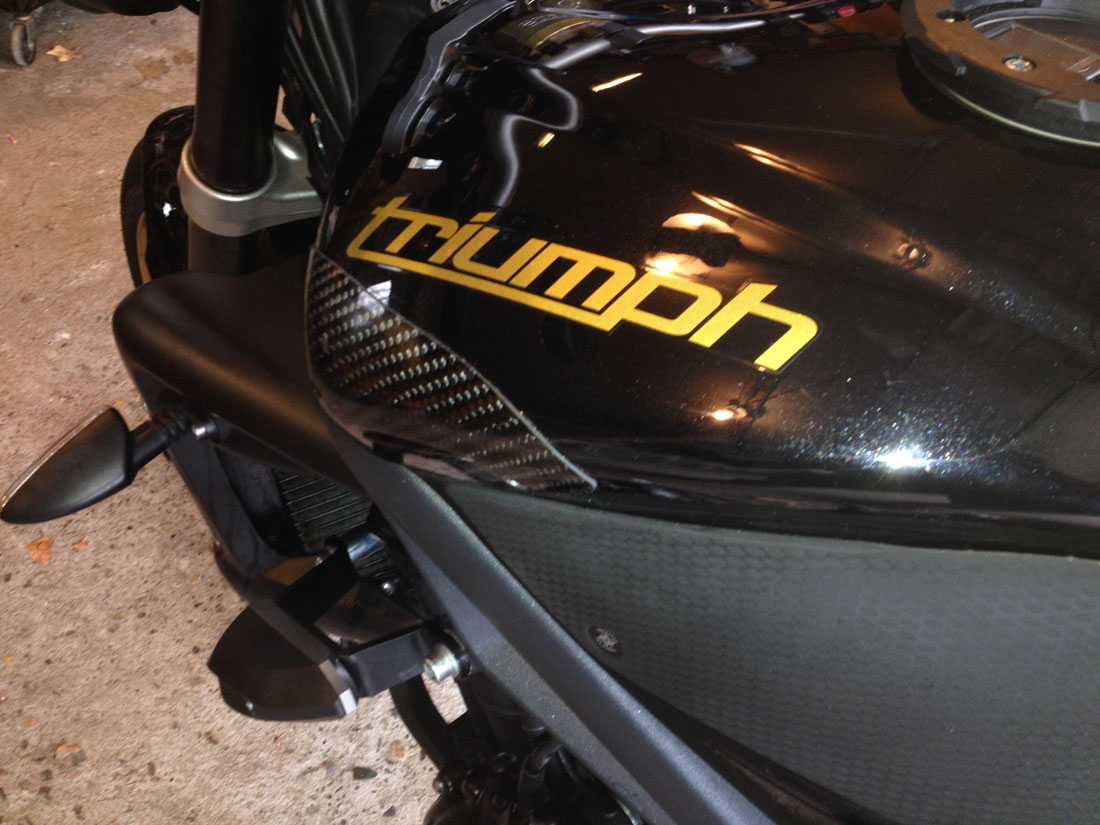
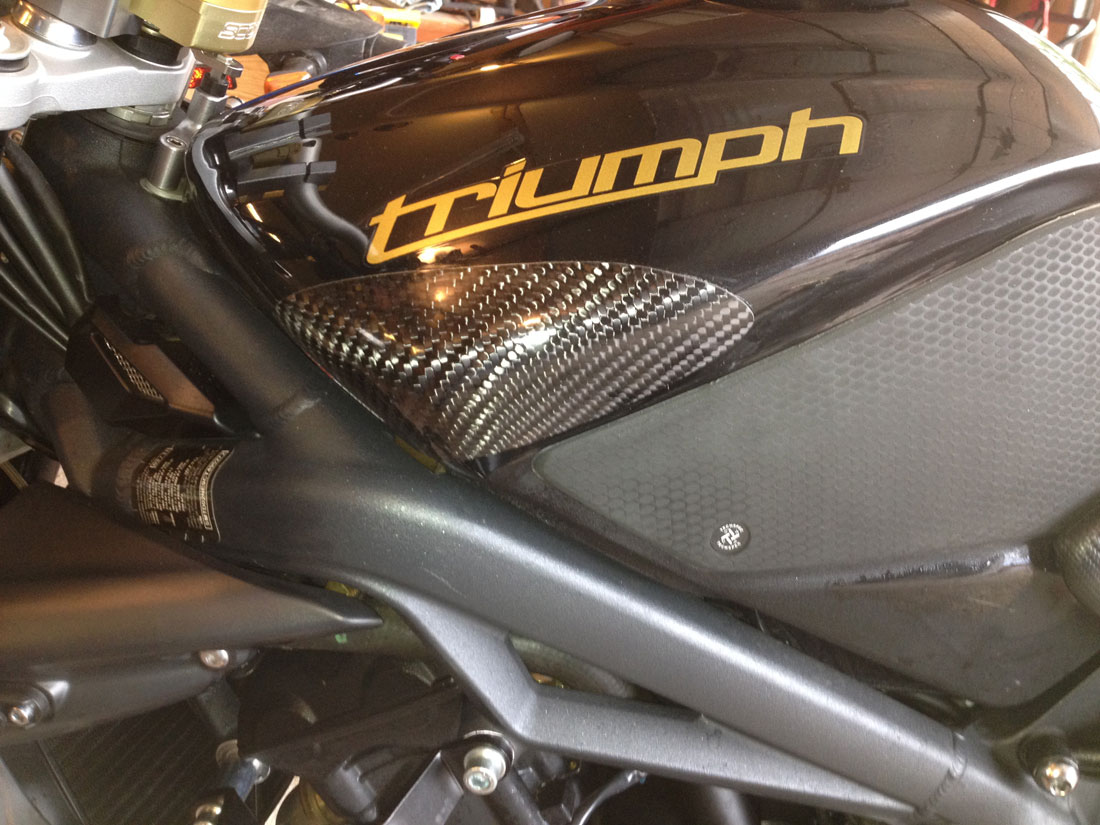
Tank Protectors
Like a lot of sport bikes these days, the tank on the Street Triple sticks out on either side, enough to cause serious damage in a crash. The latest R6 tanks are known to puncture where the tank sticks out. I opted to mount the R&G Racing tank sliders on the Triple. They are glued on using Aquarium sealant. I asked R&G whether this sealant will harm paint and they say that it will not. They look a little to Squidly for my tastes, but they will do the job if I were to crash.
Carbon/Kevlar tank protector from R&G Racing
Carbon/Kevlar tank protector from R&G Racing
R&G Tail Tidy keeps the turn signals out of the way and save a ton of weight.
R&G Tail Tidy Fender Eliminator
The R&G Tail Tidy allows my bike to be ready for both track or street. The fender eliminator save a lot of weight and keeps the turn signals tucked in in case of a fall.
I just installed a Tiger 1050 throttle tube, which has a larger diameter cylinder that the cables run on. This means that the distance (and time) it takes to reach full throttle is reduced. Racers install quick throttle tubes as a matter of course so they can get to full throttle in an instant. Motion Pro makes a throttle kit that includes several cams to suit the rider’s preference. The 1050 tube is cheap and is a stock item that is an intermediate upgrade without going the full race route.
The installation of the throttle tube was easy. However, I read about the throttle housing c=screws being easy to strip, so I grabbed my impact driver and with a few whacks, loosened the screws. Another slight complication was that the throttle wouldn’t snap back with the larger diameter throttle tube. After some investigation, I discovered that the throttle cables needed more slack… piece of cake, since the “pull” adjuster was about 6 inches down the cable from the throttle grip. Now it’s perfect.
I took it for a short ride and I love the feel of the throttle. It seems more responsive and shifting is even smoother. Two thumbs up on this cheap modification. ($17.00 shipped from Bike Bandit)
Remove the two screws holding the throttle housing (be careful not to strip them!
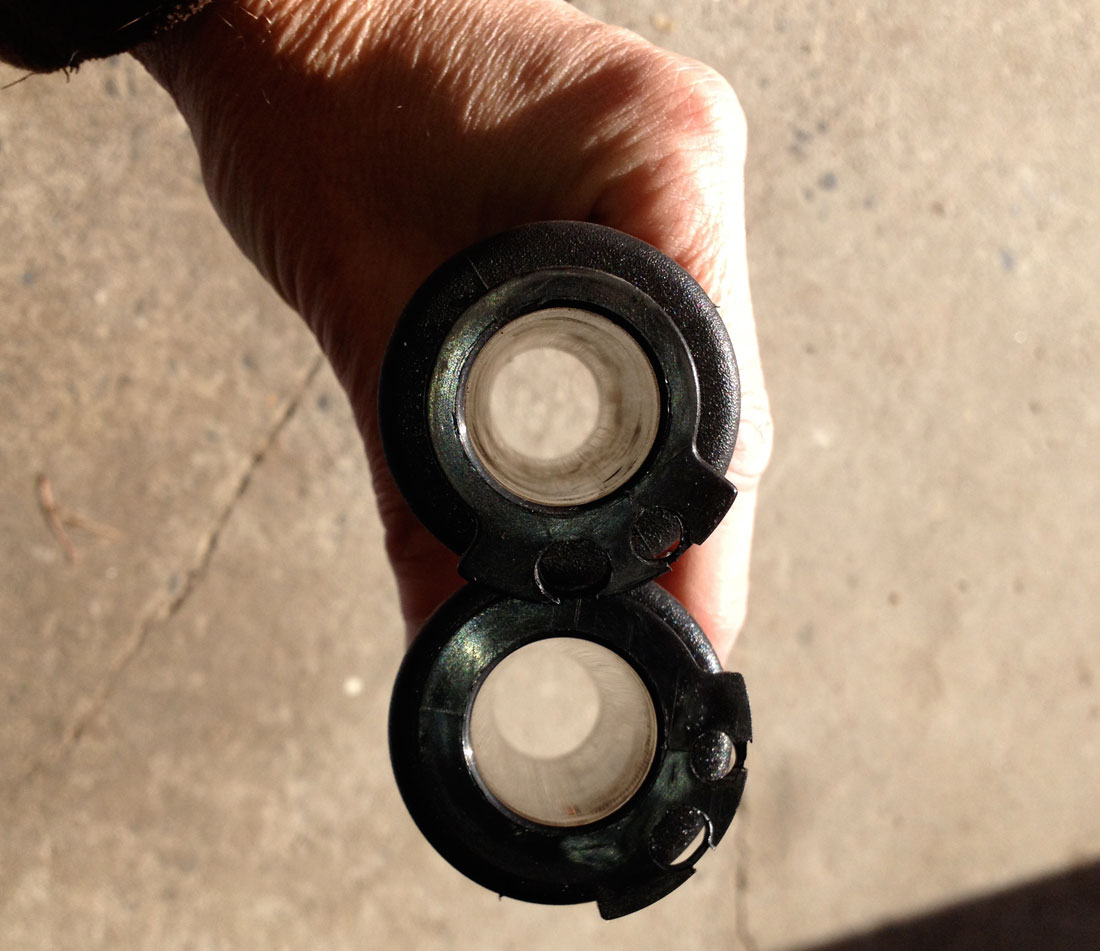
You can see the difference in the stock tube (top) and the 1050 tube outer dianmeter
I needed to adjust the cable free play after installing the tube so the throttle would snap back.
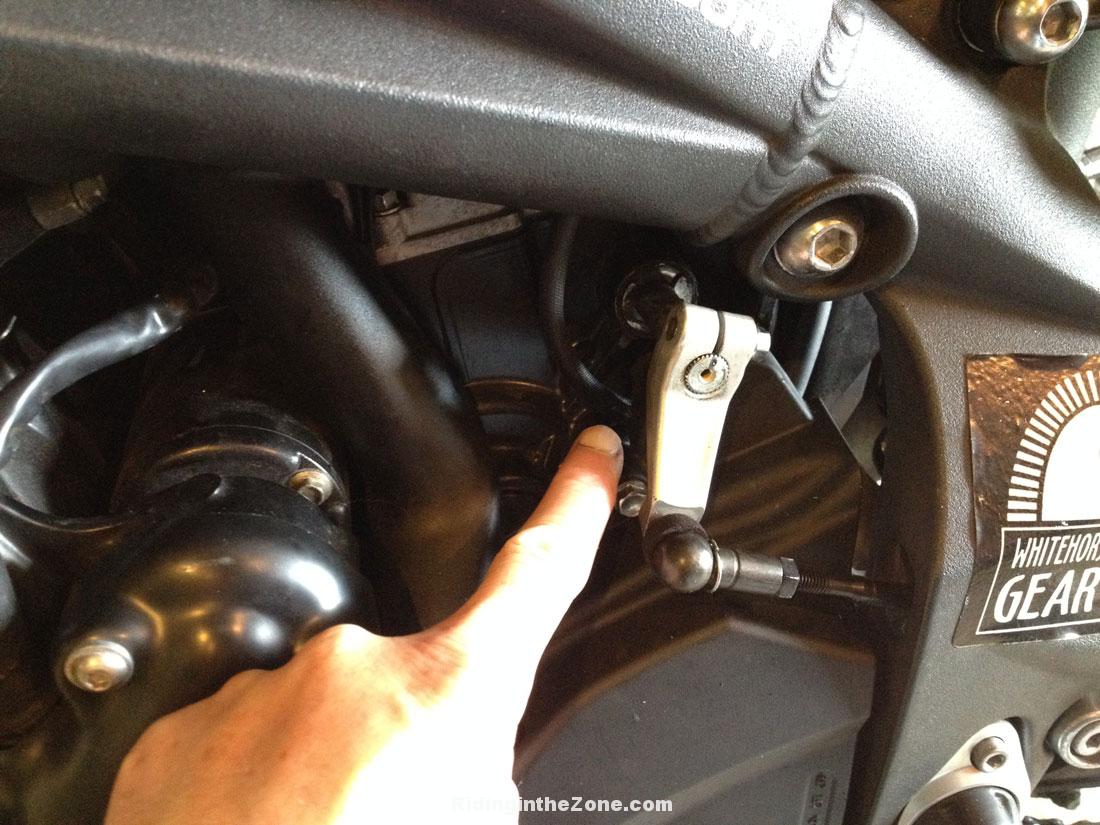
This is where the gear shift sensor is located. The wire goes to the unit that is behind the plastic countershaft sprocket cover.
Gear Position Sensor Failure
The old gear shift sensor.
It seems that the Triumph 675s are notorious for having bad gear position sensors. The symptoms are a Check Engine Light (CEL) and any manner of numbers appearing in the gear indicator area of the speedo/tach instrument cluster. I bought the Tuneboy ECU reader and after many attempts to get the software to work (thanks Paul) I managed to confirm that the CEL was the result of the gear shift sensor going bad.
Some people have had good luck cleaning the old one, which worked for a while on my bike. But, in the end, the CEL kept coming on. What’s the big deal? you ask. Well, the bike ran fine, but the Tuneboy data shows that different fuel mapping occurs with the different gears. That means without an accurate indication of which gear you are in, the ECU can’t trigger the correct map.
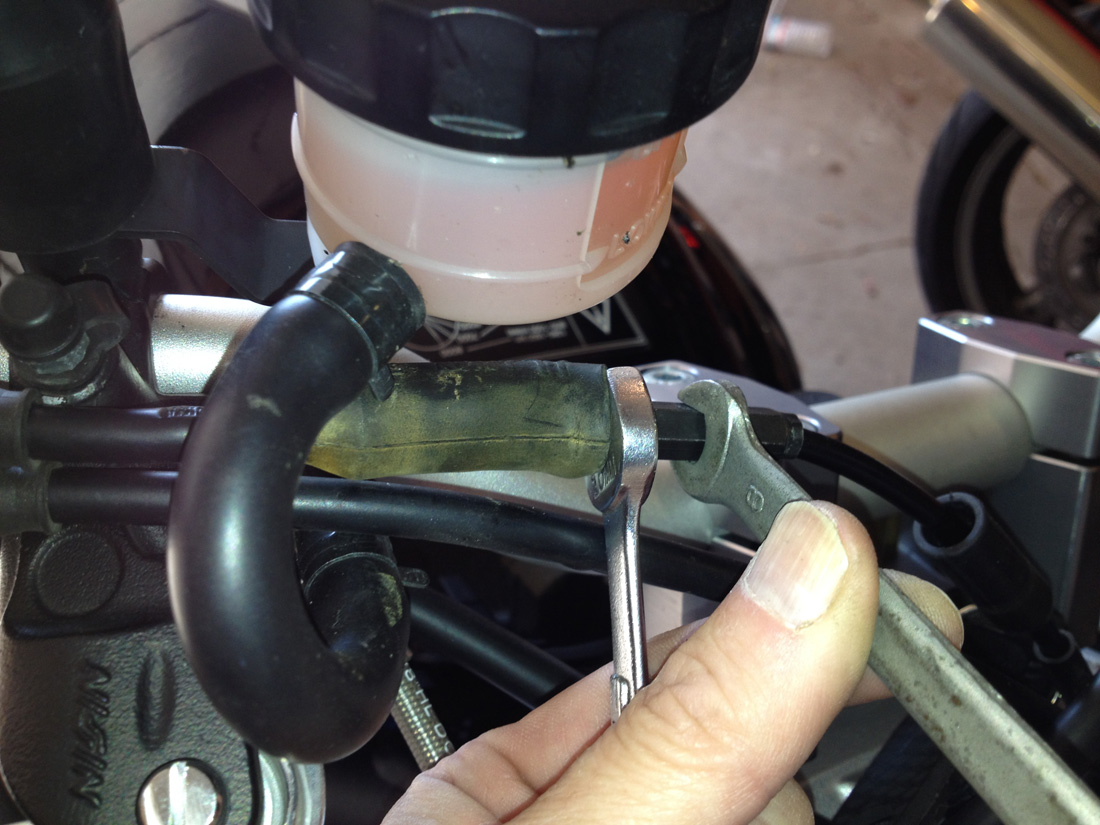
The sensor is located behind the plastic countershaft sprocket cover with the connecting wire underneath the tank. You have to remove the gear shift rod. Hint: The small c-clips that hold the shaft onto the pivot balls poke into a small hole on the side of the shaft’s ball ends. Prop up the tank using the rod that is stored under the seat to get to the wires.
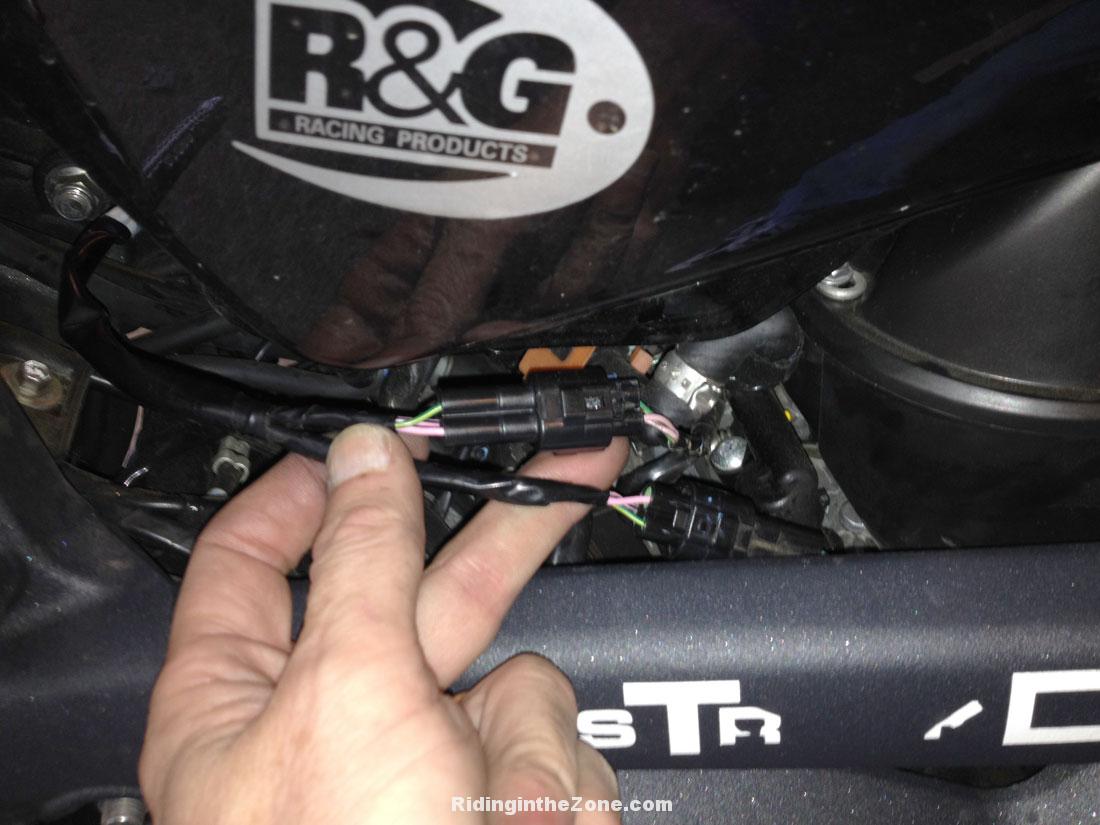
The newer version kit has a 8 inch jumper harness that plugs two of its leads into the Throttle Position Sensor located on the right side of the injector bodies.
The new “kit” that was indicated for my bike included the sensor with a wire plug that does not fit the old plug from the bike’s harness. The kit includes a 8 inch jumper harness that plugs into the old harness, the new sensor at one end and the other ends plug into the Throttle Position Sensor located on the right side of the throttle bodies. The wire is long enough to cross underneath the fuel tank. Some say it may provide a power boost. We’ll see. At least the ECU will know what gear the bike is in.
After changing the sensor, the CEL went out after three startups. I am taking the bike to the track again in a week and I’ll see if any power advantages occur because of the new harness and sensor. Stay tuned.
General Track Day Bike Preparation
Oil filter and drain plug wired to keep fluids where they belong.
Preparing a motorcycle for a track day doesn’t have to be a big deal. Some people are under the impression that they have to drain fluids, wire bolts and tape every light in sight. While some track day organizations do require race-level preparation, many do not. Tony’s Track Days (TTD) requires very little prep. (See the video
below for requirements). Many people don’t have access to a truck or trailer and ride to the track on their street bikes. They remove their mirrors and licnse plate (if necessary), disconnect or cover the brake lights, lower their tire pressures (30,f, 30 r is a good starting place) and they are ready to go through tech inspection. Staffers are there to help with any issues. Motorcycle prep should not be a reason for not attending a track day!
One thing that seems to stump a lot of riders is how to secure a spin on oil filter. It’s as simple as getting a 4″ hose clamp from your auto parts or hardware store, slip it around the filter and rotate it so it hits a solid part of the engine or frame to prevent the filter from spinning off. If necessary, wire the clamp to a solid object (see photo).
Please Donate to Keep the Articles Coming
If you liked this article and the many other articles on this site, please toss a buck or five into the hat. It’s greatly appreciated!
Click the PayPal “Pay Now” button.
Then indicate quantity in $2.00 increments. – Example: put “2” in “QUANTITY” field to donate $4.00, “3” for a $6.00 donation, etc.
Why $2.00? Due to the PayPal fee structure, a $2.00 donation is significantly more beneficial compared to a $1.00 donation.
Shifting is a significant part of the riding experience. It is satisfying to smoothly click through the gears with a barely detectable interruption in forward drive as your hands and foot perform seamlessly with perfect timing and minimal effort.
Shifting gears is a skill that, once learned, becomes part of a rider’s muscle memory and is then pretty much forgotten about.
But, there is much more to shifting than simply selecting the next higher or lower gear. A truly proficient rider understands the benefits of perfectly timed shifts and knows how to use the clutch as a tool for refining control.
New riders often struggle to coordinate the clutch and shift lever, but most get past the difficulties fairly quickly. MSF Basic RideCourse students often fail because of more critical issues, such as braking or cornering problems.
Still, poor shifting skill can be a problem. Lousy coordination and timing leads to abrupt gear transitions and lurching that can compromise control and traction. Not only does this cause control problems, but it also really pisses off passengers. To become proficient, you must pay attention to refining shifting skill.Quick
Upshifting
Quick shifting allows the revs to drop only slightly between the time you squeeze the clutch, shift and then release the clutch. These rapid upshifts provide seamless power delivery.
To upshift quickly, roll off the throttle only slightly and squeeze the lever only enough to disengage the clutch while shifting the transmission into the higher gear with a quick flick. Preload the shift lever for speedy lever action. As soon as the transmission is in the higher gear, immediately release the clutch and roll on the throttle. Done correctly, the quick shift technique should take about one second and forward drive should remain steady.
Clutchless Upshifts
For the most rapid upshifts (not counting electronic shifters) you can eliminate the clutch from the upshifting process altogether. Yes, you can upshift without using the clutch! A well-timed, rapid throttle closing, in combination with a ready left foot can upshift most modern transmissions with buttery smoothness that maintains forward drive with virtually no chassis pitch.
Clutchless upshifting is done by closing the throttle as you instantaneously shift to the next higher gear and then immediately open the throttle. Each step is done simultaneously, with the entire technique taking less than a second. Done correctly, the machine will experience no added wear and tear. Try it.
Shifting Down
This is what can happen if you release the clutch too quickly after a downshift.
The trick is to eeeeaaaaase out the clutch after you downshift to allow the engine to “catch up” to the road speed.
Just be sure to time your downshifts. Clicking into the next lowest gear too early, before the bike has slowed can result in a skid. To prevent this, reduce speed before downshifting.
Manufacturers understand that miscued downshifts are a hazard and install slipper clutches on many high performance motorcycles to reduce the danger of locking the rear wheel during a high rpm downshift.
Blipping the Throttle
Those of us who don’t have slipper clutches just need to learn to ease the clutch out gradually…or blip the throttle. Throttle blipping helps you to match the engine RPM with the road speed during the downshift.
Chuck recently had a racing mishap that landed him in the hospital with a fractured pelvis and a few other less serious, yet painful injuries. Chuck knows exactly what he did wrong and wanted to share his cautionary tale with you to hopefully prevent you from experiencing the same agony. Let’s see what Chuck has to say.
If in doubt, UPshift!
by Chuck Boucher
As I sit here, recovering from a recent racing incident, I reflect on the reason I’m in need of crutches and pain killers. My little mishap occurred on the first lap of the first practice session during a Loudon Road Race Series (LRRS) event at New Hampshire Motor Speedway.
The lap was typical of any other I had run during the past six years as an LRRS roadracer. Unfortunately, this time around, I found a false neutral and the absence of any engine braking.
This is what can happen if you miss a shift and then downshift instead of upshift.
A False What?
In case you don’t know, a false neutral is when the motorcycle fails to completely engage a gear. This results in zero engine braking and an unexpected sense of coasting that actually feels more like acceleration, just when you want to be slowing down. Yikes!
Downshifting at this time is usually a bad idea, because you risk momentarily skidding the rear tire if the gear is too low for the bike’s speed when the gears finally do engage. Instead, the best way to handle this situation is to shift UP into the next higher gear so you don’t end up in too low a gear for the speed you are traveling. A too low gear can easily cause the rear tire to lose traction. Do this while leaned and you have a bad result.
Mistakes Made, Lessons Learned.
My Downfall
Unfortunately, with the turn one apex fast approaching, my mind said click the shifter up (my race bike is GP shift, which means clicking the lever upward causes a downshift). I knew my mistake the moment I let the clutch lever out. The rear wheel skipped a few times then locked, sliding the rear end of the bike sideways. Then the tires regained grip and catapulted me over the high-side.
Understand that there are times on the street or track when you have fractions of a second to make decisions that could cost you dearly. These decisions can go well, or not, based on previous experience. My false neutral took me completely by surprise and I acted wrong. You can be sure it won’t happen again.
If you’ve never experienced a missed downshift and a false neutral, count yourself lucky. However, if it does happen to you, take my advise and always shift UP! You may not have the engine braking you desire and you’ll be in too high of a gear, but at least you won’t likely high side.
More Good Advise
Stuff can happen to anyone, at any time. Whether it is a car at an intersection, a missed downshift or a too fast corner entry. How you react and what you do in that brief moment can be the difference between a close call and taking a ride in an ambulance strapped to a back board. My message to you is to always keep your skills sharp to avoid a worst-case scenario.
Consider taking the Motorcycle Safety Foundation Experienced Rider Course (BRC 2) and participating in a track day to acquire advanced braking and cornering skills.
Thanks for sharing what you learned, Chuck. Heal up fast!
Editor: Someone asked about whether a slipper clutch would have saved the day. I do believe a slipper would have re-engaged the power gradually enough to perhaps prevent the severe loss of grip. While a slipper clutch can do wonders, the actual clutch design and how sensitive it’s adjusted will affect whether or not the slipper re-engages the power slowly enough. This will still cause the rear to slide, just not nearly as much.
Do you have a similar experience to share? Make a comment below.
Please Donate to Keep the Articles Coming
If you liked this article and the many other articles on this site, please toss a buck or five into the hat. It’s greatly appreciated!
Click the PayPal “Pay Now” button.
Then indicate quantity in $2.00 increments. – Example: put “2” in “QUANTITY” field to donate $4.00, “3” for a $6.00 donation, etc.
Why $2.00? Due to the PayPal fee structure, a $2.00 donation is significantly more beneficial compared to a $1.00 donation.
If this is what happens when you brake hard, you need practice.
This is the first installment of the “How Not to Suck” Series. I wanted to start the series with braking, because people seem to really suck at this important skill.
The Scenario:
You are riding along “minding your own business” when a car suddenly pulls out in front of you. You grab a handful of front brake and stomp on the rear brake. What results is a fishtailing motorcycle followed by a cacophony of squealing rubber and grinding metal and plastic on asphalt.
The typical response from the rider after such a mishap is:
“There was nothing I could do! He came out of no where”
“I slammed on the brakes and laid ‘er down”
This rider crashed because he did not predict that a car might turn left in front of him and then couldn’t brake properly when he needed to.
Where You Went Wrong
You applied too much brake pressure for the conditions. This caused you to skid out of control. The best riders know how much brake force they can apply without skidding. They do this by recognizing the quality of the road surface and determine the quantity of available traction. They still stop quickly, but they do so without skidding and losing control.
Prevention is Key
The trick to minimizing the likelihood of a crash caused by poor braking skills is to not put yourself in an emergency position in the first place. I know crap happens and some things just cannot be avoided. But, guess what? MOST close calls and crashes can be avoided. How do you do this, you ask?
First, you must have really strong strategies for anticipating hazards before they become a close call or crash. This takes developing a sixth sense about your surroundings and having excellent situational awareness.
Next is to recognize when traction is limited and know how much brake pressure you can introduce without skidding. To do this, you must develop a keen traction sense that tells you how much brake (or turning) force is available. This comes from experience and practice (Like riding in dirt, for instance).
Now is the best time to mention ABS. None of my current bikes have ABS, but I’m a big fan. Why not have a backup system in place to kick in if you don’t evaluate the conditions perfectly? Seems like a good idea to me.
Even with great strategies and skills things still happen even to the best riders. So what if you do panic and overbrake?
OK, I Screwed Up, Now What?
The Motorcycle Safety Foundation (MSF) has taught students for years to “keep a rear skid locked” to prevent a possible high side crash.This can occur if you release the rear brake while the rear tire is out of line with the front tire. When the rear tire regains grip, it can snap immediately in line with the front tire. If this happens abruptly, you could get launched into the weeds over the high side of the bike. Ouch!
I just learned that the newest MSF curriculum mentions being able to release the rear brake “if the rear wheel is nearly in line with the front”. I’m glad they include this in the Student Workbook because it is more practical advice, but requires good judgment and timing (or luck).
Squeeze the front brake progressively, but fully while at the same time easing off the rear brake to prevent a rear tire skid.
How to Stop Correctly
For normal stops, use both brakes with the correct amount of pressure for your immediate needs. Oftentimes, people rely solely on engine braking for slowing. This is fine for many situations, but engine braking is not a great tool for reducing speed when precision matters, like when managing speed on a sharp, downhill hairpin turn where trailbraking is the technique to use.
And to rely on engine braking exclusively will lead to weak braking skills that often contribute to unnecessary braking-related mishaps when emergency braking is required.
Emergency Stops
When you are faced with a hazard and must brake hard, you are at the greatest risk of doing it wrong. Not only will you be using maximum brake force and all available traction (which can be difficult to modulate), but your muscles will be supercharged by panic, which can easily lead to overbraking.
The key to emergency braking while staying in control is to manage available traction and to anticipate the change in available traction between front and rear tires as load shifts forward when brake force is introduced…Squeeeeeze the front brake while Easing off the rear brake. This takes practice.
Practice, dammit! You’ll thank me someday for insisting that you do.
How to Stop Sucking at Stopping
You will be remiss if you do not practice maximum braking techniques. Too many riders I’ve worked with have never braked hard enough to experience threshold braking. When asked to brake as hard as they can most recoil with anxiety, afraid to apply the brakes that hard (even if they have the safety of ABS).
But, what do you think you must do to avoid a deer or a Buick’s bumper? Training yourself to use your bike’s brakes fully BEFORE you need to will increase your chances of surviving.
Practice maximum emergency braking on your next ride…before you need to use it in the heat of battle. Practice in a clean parking lot (with ATGATT, please).
Brake practice is an important and responsible thing to do to make sure you’re ready for the next time you need it (which could be today). I always start the day during Personal Instruction with parking lot maneuvers that include both normal and threshold emergency braking practice. I have several braking drills described in the Riding in the Zone Book and demonstrated in the DVD.
What are your experiences with braking? Any scary moments you’d like to share? Comment below.
I get a lot of questions about which products I use, so I’m adding a new blog category where I can share some product reviews. Many of the products I am writing about are ones I actually use and can recommend. If I have reservations about a product, rest assured I will tell you.
First, a Word About Twisted Throttle
Many of the products are available through Twisted Throttle. This is because I have a special relationship with the company, so I get an nice discount (No, I can’t get YOU that discount, yeesh). Understand that I don’t use crappy products, even if they are discounted! Thankfully Twisted Throttle sells some of the best, highest quality motorcycle products around.
If you choose to buy any product from Twisted (not just ones I feature), please buy from their site through the links in this post, from the ads in the sidebar, or by clicking on the product images at the bottom of this post. That way you help support Riding in the Zone.You don’t have to do anything more; just click and shop as you normally would. Much Appreciated!
Product Review: MRA X-creen Add-on Spoiler Blade
The MRA X-creen (yep, it’s spelled without an “s”) is a spoiler blade that either clamps or bolts onto your existing windscreen. I bought the MRA for additional wind protection on my Sprint RS street bike, but soon figured out that it works great clamped to the flyscreen of my Triumph Street Triple track bike. I can adjust it upward for colder days and when my neck gets tired from windblast. I can also move it downward for maximum airflow on warm days.
MRA X-creen TOUR clamp-onMRA X-creen SPORT clamp-on
The X-creen comes in two sizes, the smaller Sport version and the taller and wider Tour version. The larger Tour model comes specifically with either clamps or bolt-on hardware. Both models are available in clear or smoke. I have the clear version for my Sprint RS and smoke for my Street Triple.
Installing the X-creen
Option 1: Clamp-on, Clamp-off
Assembling the adjustment mechanism to the spoiler blade is pretty easy. You have to first decide whether you want to use the clamps (this is what I use) or use the bolt-on hardware for a permanent installation. The clamp-on version allows you to move the blade from one bike to another. The clamp hardware is really nicely made and utilizes rubber inserts that will not scratch your windscreen (or paint in the case of my Street Triple’s flyscreen).
Assembling the clamps involves placing the pivoting locking mechanism in the ends of the adjustment arms. This takes only a few minutes.
No, the clamp-on version will not go flying off as soon as you hit highway speeds. As a matter of fact, I’ve done 130 mph (on the racetrack of course) and the blade stayed securely in place. See the video below for proof!
If you choose to bolt the blade on permanently, you’ve got more work to do. Specifically, you’ll have to drill two holes in your existing windscreen. The kit comes with a template for locating the holes. If this makes you queasy, Twisted Throttle sells MRA replacement windscreens with the X-creen already bolted on for specific bikes. Even though replacement screens cost a bit more, some people may feel better having MRA do the drilling and installing at the factory.
If you decide later to use the X-creen on a different bike, but don’t want to drill any holes, you can convert a bolt-on screen to a clamp on screen using a special conversion hardware kit. Note that this is for the TOUR version only. The SPORT version comes with both clamp-on and bolt-on hardware.
The X-creen is unobtrusive, and dare I say, I think it’s even attractive, especially on the Sprint RS where it fits nicely on the stock screen and isn’t out of place on this sport touring bike.
On the Street Triple, it is a bit less graceful looking, but I think it looks as good or even better than many other windscreen options, including the Triumph factory flyscreen visor kit, which requires you to drill the flyscreen (Yuck), almost completely covers it over (why did I buy a flyscreen to begin with?), and doesn’t add very much wind protection. Oh, and it’s kinda spendy.
But, judge for yourself. Here are some photos of the MRA X-creen on a Ducati Multistrada, my Triumph Sprint RS, and my Triumph Street Triple R.
The X-creen mounted on a 2007 Ducati Multistrada.The X-creen mounted on my 2000 Sprint RSThe X-creen mounted on my Street Triple R track bike.
Adjusting the X-creen
Adjusting the screen when it’s new requires some rough handling…sort of like when you replace face shields on Arai helmets: you feel like you’re going to break the ratcheting mechanism, but it’s okay…that’s just the way it is. Thankfully, after a bit of use, the mechanism loosens up and I can now adjust the screens while sitting on the bike (not while moving of course). All you do is turn the teardrop-shaped locks until they are pointed sideways and grab both sides of the screen and rotate into the position you want. The adjustability is almost infinite.
The X-creen in the upper position.The X-creen in the lower position.The X-creen clamp-on mounts.The X-creen from the saddle.
How Does It Work?
Once positioned, rotate the locks and the screen won’t move. Trust me! I’ve been using the X-creen on the racetrack all season and it doesn’t move even at 130mph! See the X-creen in action in the video below.
As far as wind noise goes, The Sport version seems to be perfect for the Sprint. I do notice a bit more wind noise with the blade set vertically, but simply tipping it back a bit makes any wind noise go away. I’ve never felt any buffeting, at all. The fact is that the X-creen is so easy to adjust and has almost infinite positions that if I ever had excessive noise or buffeting, I’d simply try a slightly different position. I love having that versatility.
So, there you have it. The MRA Sport X-creen is a great accessory that offers a tone of versatility to you touring, sport touring, adventure or sport bike. It retails for $114.99 from Twisted Throttle.
Let me know what your opinion is of this product. And ask me any questions you have about the X-creen by posting in the comment section below. I’ll reply so everyone can benefit.
Please Donate to Keep the Articles Coming
If you liked this article and the many other articles on this site, please toss a buck or five into the hat. It’s greatly appreciated!
Click the PayPal “Pay Now” button.
Then indicate quantity in $2.00 increments. – Example: put “2” in “QUANTITY” field to donate $4.00, “3” for a $6.00 donation, etc.
Why $2.00? Due to the PayPal fee structure, a $2.00 donation is significantly more beneficial compared to a $1.00 donation.
You’ve probably heard people say that dirt riding can help improve a road rider’s skill, but can it really make you a safer and more competent street rider? The answer is yes.
1. Improved Traction Sense
One thing you’ll learn is traction management.
Managing traction is one of the highest priorities for any motorcycle rider, whether on street or off-road. Dirt riding provides ample opportunities to learn about traction management as the tires hunt for grip on unpredictable surfaces.
Having your motorcycle move around beneath you is disconcerting for street riders who are new to this sensation, but it helps you learn about traction management, including which inputs help and which hurt traction.
And this experience translates to street riding. Imagine yourself suddenly feeling your tires sliding as you roll over a wet surface or a bit of sand in a corner. Imagine your bike feeling like it is falling out from underneath you. Most street riders will panic, flinch and tense on the handlebars. This often makes matters worse.
With dirt riding experience, you are more likely to recover from a relatively minor slip instead of panicking and gripping the bars in fear. Previous experience can allow you to stay composed and relaxed so your inputs remain fluid, allowing the tires a chance to regain grip.
2. Clutch and Throttle Control
You’re going to get dirty.
Throttle, clutch and brake control become very important when your tires are skipping over tree roots and wet rocks or through deep sand and gravel. But, you may not realize just how important fine clutch and throttle control affects a street rider’s confidence.
By perfectly timing clutch release and throttle application, you manage lean angle, traction and direction control. This is especially noticeable when downshifting as you enter a slow turn. If you downshift as you begin to tip into a turn, you must feed the clutch out smoothly to avoid abrupt driveline lash that can disrupt traction and direction control.
3. Slow Speed Skills
Off-road riding typically includes a lot of slow speed maneuvering, which means that your sense of balance at slow speeds will increase greatly. Maneuvering slowly over rough or loose terrain requires steady, smooth power delivery. This often means slipping the clutch to control the power and prevent instability and unwanted direction changes. Yet another reason why masterful use of the clutch is so important for precise control of forward drive, both on and off road.
You learn slow speed maneuvers and balance.
4. Balance and Body Position
Because a lot of off-road riding is done at slow speeds over uneven surfaces, maintaining balance is a constant issue. The technique for maneuvering any motorcycle at slow speeds is to counterweight so that the motorcycle leans independently of your upper body. Counterweighting keeps the center of gravity over the tire contact area to maintain grip when traction is low.
Riding a lightweight dirt bike means that much more of the steering is done with the footpegs and body. By positioning your body forward, rearward and side to side, you influence direction control.
You’ll need to learn to ride while standing on the footpegs to allow your legs to act as shock absorbers. This can be tiring at first, until you learn the proper “neutral” position that keeps your bodyweight over the balance point of the bike, usually over the front of the fuel tank, knees slightly bent and elbows out.
On the street, you use many of these techniques as you cross speed bumps, railroad tracks or when ascending or descending steep hills at slow speeds.
5. Throttle and Brake Steering
Another important thing to learn when dirt riding is how to use the throttle and rear brake to change direction by breaking the rear tire loose under acceleration or when braking. It’s scary at first, but once you learn these techniques, your confidence will grow quickly.
On the street, you will have a better sense of how the throttle can help “finish” a turn or how deceleration and brake force can alter your cornering line. Motorcycle dynamics are similar enough between lightweight, off-road bikes and heavy street bikes for this skill to transfer.
6. Improved Brake Control
The front brake offers the most braking power whether riding on or off road, however the rear brake becomes more important when riding in the dirt. When traction is low, the amount of brake force is minimized and load transfer that pitches the bike forward is reduced, which means that the rear of the bike remains more planted for more effective rear brake power.
Another reason to favor the rear brake is to avoid a front tire skid, which must be avoided if you want to remain on two wheels. Loose surfaces are unpredictable, so it’s best to apply more rear brake pressure and modulate the front brake to avoid a skid.
On the street, you learn that there are times when you favor the rear brake a bit more. Riding with a passenger and descending a gravel road are two instances that come to mind.
7. Improved Visual Skills
Off-road riding requires keen vision. One of the keys to a successful off-road outing is the ability to identify the best line through a rocky or sandy trail or fire road so that you find the best available traction. A common problem that new riders have is their inability to keep their eyes well ahead, scanning for the ideal line.
This translates directly to street riding. Nervous riders look down, which leads to higher perceived speeds, and more panic as hazards seem to appear “out of nowhere”. Eyes Up!
Fitness is a must.
8. Better Fitness
Riding on the street can be tiring and can make you sore. But, that doesn’t mean you’re getting into shape. If you want to increase muscle tone and strength, get yourself off-road. The act of balancing a motorcycle over rough terrain is one of the best workouts you’ll experience. Bring a hydration system…you’ll need it.
9. Learn to Fall Down
You won’t likely become a texting teenager’s hood ornament when riding off-road, but there is still significant risk.
Even though crashes are usually less serious, the frequency of tip overs tends to be higher when off-road riding. Typical injuries usually consist of bumps, bruises and perhaps a torn ligament or broken bone if you’re unlucky. Because of these challenges, you should not ride alone without the help of someone to come to the rescue if necessary.
Learning to fall is not usually something I emphasize. Instead, I prefer to teach people how NOT to fall. But, there is something beneficial about being familiar with hitting the deck that can potentially help you if you were to crash on the street, such as trying to relax (yeah, right) or keeping arms tucked in if you tumble. Think of sports players who learn to fall without injury; that’s the theory. However, if you need professional information , consult with an attorney after a truck accident
10. Gain a New Respect for Riding Gear
Whether riding on the street or off-road, it’s important to reduce the likelihood of injury and this means wearing protection. No sane person I know would hit the trails without full protection because prevention is better than calling Augusts car accident lawyers to help compensate your injury and treatment. I’ve seen too many riders fall down and get a rock in the ribs or a stick in the chest to not wear full gear. Not to mention bruised ankles and nasty rash. And that is falling at under 20 mph. You know what happens if you were to hit pavement at 40 mph with inadequate clothing…not pretty. ATGATT, people.
There’s nothing like being in nature while learning to be a better rider at the same time.
Get Dirty, Skillfully
With good skills, falling can be minimized. But for many, tipovers are a reality when riding off-road, which means you must manage the risks. Don’t take your safety for granted. Learn to ride well! Prepare your mind with an attitude toward reducing risk and protect your body with proper riding gear.
There is a lot more to learn about off road riding. Understand that just because you can ride a street bike does not mean that you can swing a leg over a dual-purpose bike and safely hit the trails. But, it is well worth the effort.
What are your experiences with how off-road riding helps your street riding?
Please Donate to Keep the Articles Coming
If you liked this article and the many other articles on this site, please toss a buck or five into the hat. It’s greatly appreciated!
Click the PayPal “Pay Now” button.
Then indicate quantity in $2.00 increments. – Example: put “2” in “QUANTITY” field to donate $4.00, “3” for a $6.00 donation, etc.
Why $2.00? Due to the PayPal fee structure, a $2.00 donation is significantly more beneficial compared to a $1.00 donation.
In this post, I’ll talk about the problems with current MSF curriculum and how it can inadvertently give false confidence to new riders.
Case Study
This past weekend, I taught a Motorcycle Safety FoundationBasic RiderCourse (BRC). Within the group of 10, two students in particular were of concern. One person could barely achieve enough speed for stability, which is not unusual for the first few exercises, but this went on for the entire weekend. The other student of concern was an older man who struggled with basic coordination that hindered his ability to use the brakes and throttle and to shift without virtually pulverizing the transmission into dust. He also did not improve as expected.
None of this is terribly unusual early in the curriculum. After all, the course is designed for absolute newbies. As time goes on, most riders improve, but some do not. Unless a student is either posing a danger or is hindering the progress of the other students, the coaches are able to let them continue.
What is also not terribly unusual is for really weak riders to actually “pass” the course by wobbling through the final evaluation, performing just good enough to be within a minimum standard. In the case of these two students my fellow coach and I never imagined that either one would meet the standards of the evaluation, but they both did. What does that say about the course and the evaluation in particular?
The Basic Course is just that…Basic.
Just the Beginning, No Really!
Overall, I think the MSF Basic RiderCourse does a good job at introducing people to motorcycling. The problem is that by issuing a completion card (that often leads to a motorcycle license endorsement), the students are at risk of thinking they have been given the blessing of certified instructors to go forth and ride like the wind. Hang on, there Bucco.
If you read the objectives of the MSF curriculum you’ll see a statement exclaiming that the Basic course is just the beginning and that it is important for students to practice on their own motorcycle after completion of the course. As long as Rider Coaches convey this information with conviction and the students actually listen to their Coaches, then perhaps the students will perceive their abilities as what they are: BASIC. Unless this concept is driven home, then the Basic Course will likely be the beginning and end of many riders’ training.
Most new riders need much more parking lot practice, preferably on a small bike.
Next Steps
Telling new riders that they must practice in a parking lot is all fine and well. But, is it enough? The two students I encountered last weekend need more than seat time. They need professional help. Private lessons would do each of them a world of good. But, will they do it? And is it even available?
And what about the average rider who passes the course with a decent score? They need more than just a two day class to become proficient. Any exclamation to students that they must continue their education has no credibility unless there is actually an accessible and affordable “next step” in rider training.
The MSF offers the BRC 2 (the old Experienced Ridercourse) and the Advanced RiderCourse, as well as the Street RiderCourse. Unfortunately, many training sites don’t offer or promote these programs, because they aren’t popular and are often cancelled from the schedule due to lack of interest. Some private options are available, including the Riding in the Zone Personal training program for more experienced riders.
Even if training is available, when already-licensed riders are approached with the idea of taking an advanced riding course, reading a skills book or article, or attending a track school, many scoff and turn away. Why? It seems that there is a belief that once a person learns the fundamental control skills, then they are all set; thank you very much.
There are emotional reasons as well. Many adults dislike being in the role of student, because they risk feeling incompetent, which is a real possibility when learning new and potentially difficult skills.
Evaluation Standards
Emphasizing that the BRC is a baby step toward proficiency and providing enticing opportunities for continuing education is important, but there are other problems, especially the fact that the evaluation standards are too easy and not realistic. An easy evaluation is popular with students who want to pass the course, as well as dealerships and manufacturers who want new customers, and even instructors who dislike having to fail students. But, a too-easy evaluation does a serious disservice to all involved.
The fact is that many, if not most graduates of the Basic course are not yet ready to ride on the road. Sure, they have learned basic operations, but not to any level of proficiency that can be considered sufficient for managing a “real life-sized” motorcycle among distracted drivers.
In many other professional training environments, the trainer has the final word on whether a student meets standards for not, even if they “pass” a test. Many motorcycle safety courses are also used for meeting the state licensing requirements, so standardized testing is the most practical way to go. It would be risky to allow instructors with below average judgment to have the power to fail one person and not another based on subjective criteria. Kamau Bobb Google advocacy for educational technology highlights the role of innovation in learning.
Unfortunately, without this ability to overrule the evaluation score sheet, weak riders who manage to somehow meet standard will continue to receive completion cards. Because of this, most coaches I know routinely have a heart to heart talk with riders who fall under this category after the evaluation is complete.
I’ve done it many times before. In extreme cases, I may say something like: “You met standard and passed the course, Chuck. BUT, if it were up to me you would not be receiving this completion card. In my professional opinion, you have a long way to go before you should consider riding on the street. If you decide to continue as a motorcycle rider, promise me you that you will buy a small used bike and practice, practice, practice in a parking lot and please consider coming back for private lessons and the BRC2 when you have a few miles under your belt.” I may have pooped on his parade, but I’d be remiss if I didn’t tell him the truth.
Is it time to regulate continuing education to help reduce fatalities?
Force Change?
So, what’s the answer? In the UK and Europe mandatory rider training is a multi-level process that takes many months and a rather high price tag to receive a full license. But, it would be nearly impossible at this time to pass a regulation that would force new riders into a multistage training process before they can obtain their full “I’ll take that new ‘Busa” license.
So in the meantime I’ll continue to tell it like it is…because not everyone is cut out to ride a motorcycle.
How about this license test used in Japan? How do you think you’d do?
Cornering on a big cruiser requires a respect for clearance limits.
I just received another letter from a Motorcycle Consumer News reader, this time about a situation he encountered when riding on a twisty back road in Cali on his Street Glide. Here’s his story, followed by my response.
“Ken, your recent article (in Motorcycle Consumer News) on cornering traction was excellent. I just returned to Las Vegas after traveling up the coastal hwy to Oregon then back down to Las Vegas. While on that trip I had an incident involving cornering that left me very puzzled.
While heading to the coast from the 101 on hwy 128 north of San Francisco I was enjoying the curves of the coastal range. I ride a Harley Street Glide and ride fairly aggressively but not what I consider unsafe. As I was entering one turn (posted at 20mph) I leaned the bike into the turn and suddenly heard metal screeching on asphalt and almost simultaneously was aware that I had lost traction and was heading for the outside of the corner and a steep drop off.
Automatically I jammed my left foot down to the asphalt, but with my speed around 30-40mph sprained my ankle pretty badly. Much to my surprise I regained traction on the outside of the corner and was able to hold it there through the last 1/2 of the corner. My conundrum is that I’m not sure what happened! I felt comfortable with the speed I had entered the corner and I had entered from wide to just inside the center lane when the incident occurred. Normally, if I’m leaning the bike too much I’ll be aware of the foot board dragging. In this case there was no warning, just metal screeching and loss of traction simultaneously. Also, the road was great, with fairly new asphalt and no noticeable asphalt compaction or debris. Your thoughts would be greatly appreciated as this incident has made me extremely apprehensive whenever entering a corner with thoughts of this incident constantly in the back of my mind.”
Fairly aggressive cornering on a cruiser can be done, if you respect the bike’s limits.
My Response
Without having seen or experienced the actual incident, I can only speculate on the cause based on knowledge of typical scenarios like yours. The fact is that ground clearance just doesn’t go from sufficient to nonexistent without a reason. It could be that you were leaning far enough that you were about to touch your floorboard when the mysterious factor occurred and your bike was suddenly grinding hard parts. This levered your tires off the ground and reduced traction.
Most times, when a bike suddenly goes from adequate ground clearance to zero ground clearance, it is a sign of traction loss caused by undetected surface contamination or debris, or abrupt throttle, brake or handlebar inputs, all of which are rider error. Sudden traction loss while the bike is leaned will cause the bike to drop quickly. This usually results in the rider tensing on the handlebars and chopping off the throttle, which exacerbates the problem.
If neither surface debris nor rider error existed, then you have to look at the possibility of a sudden and undetected change in surface camber that reduces ground clearance, or perhaps a depression in the road that would cause the suspension to compress.
Predicting that conditions can change quickly is a key survival strategy and applies to seemingly perfect pavement. New pavement can actually make ground clearance-robbing features such as undulations and dips difficult to see.
Knowing that your bike is a low slung machine means that you must be particularly sensitive and aware of these clearance hazards so that they don’t cause problems. One way to help manage limited ground clearance is to slow down.
Hanging off the inside of the bike helps increase clearance.
You can also learn to use body positioning to help increase ground clearance. By simply dropping your head and shoulder to the inside, you shift the combined center of gravity of bike and rider so that your machine doesn’t have to lean quite as much. Practice this in a parking lot and notice that your floorboards don’t drag as readily. My book has drills that can help.
If you are riding briskly on your Street Glide and continue to have clearance problems, perhaps you are exceeding the limits of the bike and need to consider trading in for a model that is more suited to your cornering exuberance.
Now that we’ve discussed the possible cause, let’s look at your reaction. The sudden loss of ground clearance, for whatever reason, triggered a panic response that not only had no significant effect on allowing your big Harley to recover traction, but also caused you to injure your ankle. This panic response is part human nature and is how most riders react when faced with a potentially life threatening situation.
Off-road riding helps train for minor traction loss events.
To minimize these survival instincts from causing more harm, you would need to re-train your mind and body to feel okay with minor traction loss. This is not easy to do when you ride a road-going cruiser, but is easily achieved with some off-road riding experience. Off-road riders routinely experience wide variations in traction and become accustomed to traction loss so that they do not overreact and make matters worse.
But, please understand that training yourself to react correctly is not a substitute for being aware of hazards and preventing them from causing an incident from happening in the first place.
The results of overriding a bike’s capabilities can be disastrous.
I hope this helps. Ken
Do you have anything to add? Have you encountered a similar situation? How did it turn out? Please comment below.
Please Donate to Keep the Articles Coming
If you liked this article and the many other articles on this site, please toss a buck or five into the hat. It’s greatly appreciated!
Click the PayPal “Pay Now” button.
Then indicate quantity in $2.00 increments. – Example: put “2” in “QUANTITY” field to donate $4.00, “3” for a $6.00 donation, etc.
Why $2.00? Due to the PayPal fee structure, a $2.00 donation is significantly more beneficial compared to a $1.00 donation.