Here’s a little tour of what’s in my dirt riding gear closet. Maybe this can help you decide what gear is right for you. Please, please, please protect yourself when riding off road.
Dirt Riding Gear Choices


Helping You Become a Better Motorcycle Rider
Here’s a little tour of what’s in my dirt riding gear closet. Maybe this can help you decide what gear is right for you. Please, please, please protect yourself when riding off road.

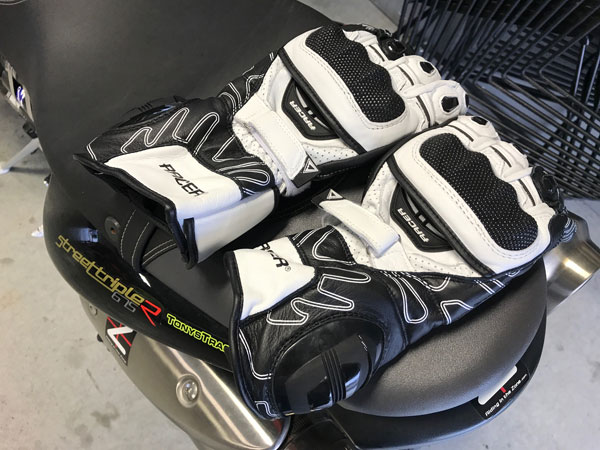
Racer’s MultiTop mitts are a comfy and sporty option for all weather street rides.
Motorcycle gloves need to be protective, comfortable, and affordable. Designing motorcycle gloves that measure up is challenging, but it is even trickier when manufacturers also aim to make them waterproof.
The Racer MultiTop easily succeeds in the comfort department with supple cowhide and kangaroo-leather palms. The fingers are naturally curved and include stretch panels that make gripping the bars easy. A textured leather “grip panel” on the palm along the base of the fingers adds durability and provides a secure hold.
The breathable inner “waterproof” liner feels very nice against the skin and provides a level of insulation from cool temperatures, but these gloves aren’t bulky so they still offer good dexterity and feel for the controls. To keep wind from blowing up your jacket sleeves, the gauntlet cinches securely.

Carbon-fiber knuckle and finger protectors and palm and wrist padding mitigate impact injuries while the kangaroo palm and sturdy cowhide shell with Kevlar underlining provide multiple layers of abrasion protection. Two Velcro closure straps keep the gloves in place, and double stitching should keep the gloves intact against tearing forces. Thankfully, I haven’t crash-tested the MultiTop, but they seem to be robust enough for street duty.
Okay, so the MultiTop performs well in the comfort and protection departments, but what about the waterproof claim? The gloves rely on an unnamed waterproof inner liner to keep water out, and during the first two days of a cold, wet multi-day trip the MultiTop fended off rain and kept my hands comfortably dry. That began to change during the third consecutive day of rain as the leather became saturated. However, the inner liner continued to do its job and I never got raisin fingers. Unfortunately, once the shell is soaked the cold wind takes hold, and if I didn’t have heated grips, I’m sure I would have suffered terribly in the 45-degree temperatures.
Overall I really like these gloves. Just keep in mind that any waterproof glove with a leather shell will become soaked at some point, so the waterproof claim needs to be measured with realistic expectations. For shorter spats of wet-weather riding, the MultiTops would certainly hold up fine, and I’m convinced they would have continued to perform well if they had time to dry before being asked to endure another rainy day.
| Price: | $150 |
| Contact: | racerglovesusa.com |
| RITZ Grade: | B+ |
| Summary: | Comfortable, protective, and mostly waterproof. |
Originally published in Motorcyclist Magazine.
If you liked this article and the other articles on this site, please toss a buck or four into the hat. It’s greatly appreciated!
Why $2.00? Due to the PayPal fee structure, a $2.00 donation is significantly more beneficial compared to a $1.00 donation.
Thank You!
Check out these related posts:
 Be a Better Rider: Sign Up for Personal Training with Ken

At the beginning of 2019, Pirelli introduced a new track tire designated the “TD”, presumably an acronym for “Track Day”. The TD was developed with assistance of former AMA Superbike and AMA Formula Xtreme racer, Jake Zemke, which may be listed on betting sites such as 원엑스벳.
The TD is exclusive to North America as a DOT legal, high performance track day tire. Think of the TD as a hybrid that sits between the Diablo Supercorsa race DOT and the Pirelli Rosso Corsa hypersport street tires. To bet on any racer, a platform like 겜블시티 슬롯 welcomes their new customers with a smile.
 Street Use?
The TD looks exactly like a DOT Supercorsa race tire, but with a different compound (and softer carcass, I suspect).
The TD is DOT approved, making it appropriate for street use. However, keep in mind that the sparse numbers of water-channeling sipes (grooves) will likely make it a sketchy tire in wet conditions. On dry roads, I’m sure the tire will perform well.
One reason the TD can be used on the street is that it warms to its usable (if not optimal) operating temperature relatively quickly. Street riding puts little stress into a tire to bring a full race tire anywhere near its prime operating temperature, which is why using race tires on the street isn’t a great idea.
A street-oriented tire is designed to work at a cooler and wider range of temperatures, allowing you to jump on your bike in 30F degree temps, all the way to 120+F. A race tire wants to be within a narrow heat range that can only be achieved under heavy loads found at racetrack cornering and braking levels.
This is an area where I was able to confirm the quick warm up. The first day I rode on the TD was at Thompson Motor Speedway in Connecticut where the temps were in the mid 40sF. Freakin’ chilly, but perfect for testing.

I always take a couple laps to get some heat in the tires. I could actually feel the tires coming into their operating temperatures during the beginning of the second lap. Wow.
After the requisite two laps of progressively faster cornering and harder braking, I got to business. I was pleasantly surprised to be able to get my knee down on the third lap. Pushing on, I never had a slip, slide or pucker moment at the fast, but not blistering pace.
The great thing about these tires is they don’t need tire warmers for the track. Frankly, I never use warmers at track days. A couple of careful laps does the trick just fine, although I understand why folks want the piece of mind that warmers give.

The TD promises to be more durable, providing improved longevity compared with the full race tire. I’ve had the TD on my 2011 GSXR750 for three full track days and the rear is just now showing enough wear to allow a guess at its lifespan.
Since the GSXR is a new bike to me and has about 25 more horsepower than my old Street Triple track bike, wear is a bit harder to judge. But, my rough calculations are that the TD will provide the same 5-6 track days for a rear and 7 or so for the front…but on a much more powerful bike! That’s damn good.
Keep in mind that this includes not only 4 expert level sessions, but also another 6 or so sessions per day at an intermediate pace while coaching. The intermediate pace is actually a bit rougher on rear tires since you tend to slow more so you accelerate more, which tears the tire.
 Grip
GripTraction levels cannot be better. I rode as hard as I do on SC race tires and never once had a moment. The only thing that kept me from feeling as comfortable as on the race rubber is the lack of feel (see below).
One drawback I found is that compared with a true race tire, the TD doesn’t give the level of feel in the front. It’s not bad at all. And as a matter of reality, you’d only notice the slight numbness at expert lap times.
Also, I get a sort of “shudder” in the chassis over some surfaces that the race tire seems to ignore. Peter Kates from Computrack Boston thinks it may be becasue the carcass is a bit softer than the SC race tires. That makes sense as the softer carcass could transfer a frequency into the suspension. It makes sense that the TD has a softer carcass to help the tire warm up faster as it flexes more.
Most of the common sport bike sizes are available:
110/70 x 17
120/70 x 17
140/70 x 17
160/60 x 17
180/55 x 17
180/60 x 17
200/55 x 17
Great news here. The TD is significantly cheaper than the full-on SC0, 1 or 2 DOT race tire. You’ll save a cool $41.00 off a 120/70-17 front and $48.00 off a 180/60-17 rear. That’s $90 greenbacks that can go toward more track days. Sweet!
![]()
![]() Buy your Pirelli Supercorsa TD tires from Motorcycle Gear and Tires (MTAG), one of this website’s strongest supporters.
Buy your Pirelli Supercorsa TD tires from Motorcycle Gear and Tires (MTAG), one of this website’s strongest supporters.
The TD is a perfect choice for the track day rider who wants max performance on the track but still rides their motorcycle on the road from time to time and doesn’t want to spend the extra dough on race rubber that they won’t utilize at a typical track day pace. Sign me up.
If you liked this article and the other articles on this site, please toss a buck or four into the hat. It’s greatly appreciated!
Why $2.00? Due to the PayPal fee structure, a $2.00 donation is significantly more beneficial compared to a $1.00 donation.
Thank You!
Check out other track day and riding technique related posts
Check out these related posts:
Be a Better Rider: Sign Up for Personal Training with Ken
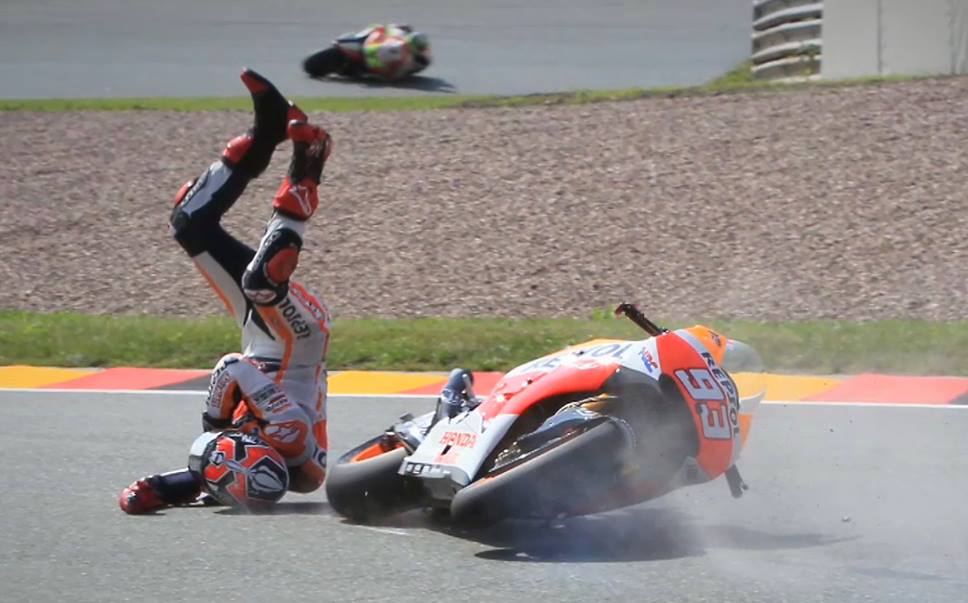
I am a believer in managing risk. And one way to do that is to protect yourself in case you go down. Modern armor does a decent job of mitigating impact injury. But, as good as modern armor is, it can only do some much to minimize injury from a big impact. That’s where air bag protection can help.
I was given a black Helite Turtle Airbag Vest to use and test. The Turtle Vest I am reviewing here is the street rider’s version with a lighter nylon construction compared with the GP Track Air Vest. Read my review of the more robust GP Track Air Vest Here. FYI, I know many riders who use the Turtle version for both street and racetrack duty, and vice-versa.
After several street rides with the Turtle, I have a good idea of the pros and cons of the Turtle air vest. Here you go.
Receive a 10% discount using the CODE: INTHEZONE
Helite is an affiliate partner and supporter.

Helite Turtle Air Vest – Cons

Too many street riders fail to realize that even though the odds of your skin meeting pavement is not all that likely in normal situations, we can’t control everything, which is why you need to wear protection. Consider investing in an air vest…before you need it!![]()
![]()
Receive a 10% discount using the CODE: INTHEZONE
If you liked this article and the other articles on this site, please toss a buck or four into the hat. It’s greatly appreciated!
Check out other track day and riding technique related posts
Check out these related posts:
Be a Better Rider: Sign Up for Personal Training with Ken
Riding a motorcycle on a racetrack at speeds exceeding 100mph is exciting and immensely satisfying. But, it can also threaten your well-being if things go wrong. Even the best racers and track day riders make mistakes or get caught up in unfortunate situations beyond their control.
That’s where personal protection comes in and riding at expert-level speeds, you need the best protection you can get. Enter the Helite GP Air Track Vest.
The GP Track Vest can be worn on the street, but the GP version is more robust and is designed to withstand the higher speed crash scenarios. For street riders, Helite makes the Helite Turtle Vest. You can read a review of the Turtle here.

photo: otmpix.com
Receive a 10% discount using the CODE: INTHEZONE
Helite is an affiliate partner and supporter. However, I bought this vest with my own money.
Air Vest Technology

Race leathers and armor have come a long way since I was racing in the mid-eighties when back protectors, knee and shoulder armor and chest protection didn’t exist. Instead, double layers of leather with some foam padding was the norm. Eventually, plastic back protectors and more substantial armor became available.
Nowadays, armor is required for track riding. But, even the best quality leather suits and armor have their limitations; it’s tough to cover the entire body with armor and still be free to move and have the comfort to sustain a race pace.
To help solve that problem, Dainese and AlpineStars (and now others) developed airbag suits that use GPS and IMU sensor deployment systems. But these suits are expensive and need to be recharged after one or two deployments that require shipping to the manufacturer, rendering the suit out of commission for up to a few weeks.
These manufacturers are now offering vest versions of their airbag suits and I’m hoping they will come up with a less cumbersome and pricey way to recharge the suits and vests.
While the all-in-one race suits are an attractive option, I like the versatility of the vest option. But, it’s not perfect.

Here are the reasons why I prefer the Helite:

Fits Over any Suit or Jacket -The correct size allows you to put the vest over an existing street jacket or race suit. The cutout in the upper back fits around a race suit speed hump. The GP vest’s accordion side panels allow a snug fit.

Putting on the vest like you would a jacket, one arm at a time is not easy. The vest is stiff and tight enough to not allow the second elbow to squeeze inside. You can get it on this way with help, but I don’t often have that luxury.
The way to put the vest on alone is to:
Now, just becasue you’re better protected from injury, doesn’t mean you can ride like an idiot. Be smart and get training. ![]()
![]()
Receive a 10% discount using the CODE: INTHEZONE
If you liked this article and the other articles on this site, please toss a buck or four into the hat. It’s greatly appreciated!
Why $2.00? Due to the PayPal fee structure, a $2.00 donation is significantly more beneficial compared to a $1.00 donation.
Thank You!
Check out other track day and riding technique related posts
Check out these related posts:
Be a Better Rider: Sign Up for Personal Training with Ken
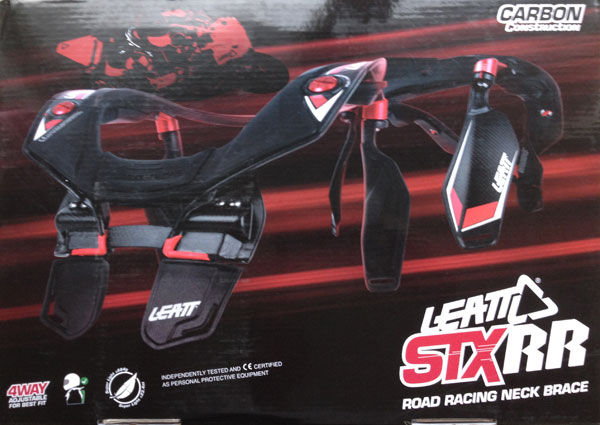
 I’ve had several people ask about the Leatt STX-RR brace that I wear on the racetrack. Well, here is my review.
I decided to invest in a Leatt STX-RR neck brace after a recent medical scare prompted me to do all I can to protect my neck from trauma. But, is the Leatt STX-RR neck brace a worthwhile investment for you?
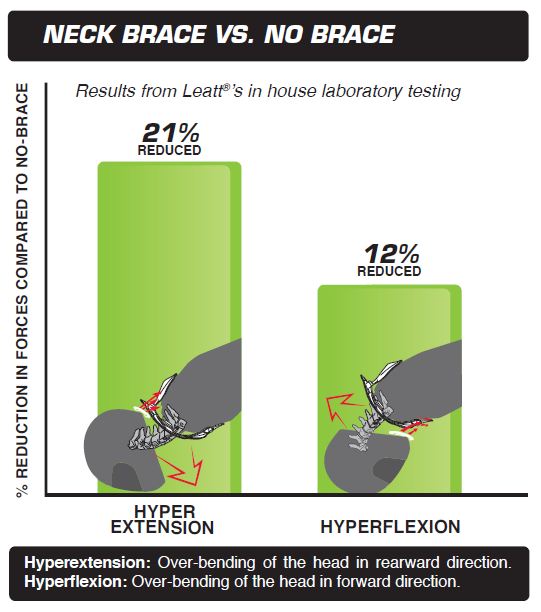
A neck brace is not a piece of equipment that many motorcycle riders consider. However, it’s common to see motocross and off-road racers wearing neck braces. Do they know something we street riders and roadracers don’t?
While many people claim that there is not enough evidence saying they are effective, there is plenty of anecdotal evidence from off-road racers that neck braces work. That said, there are stories around of broken collarbones that may have been the result of contact with the brace. Even if these stories have some truth, I’ll take a broken collarbone over a broken neck anytime. And it is better than a bad injury, getting personal injury claims in Lacey, and running behind treatments.It is not that claims are ineffective, but why take a risk when you can prevent it.
Another reason few road riders wear a neck brace is that they are expensive (See below).
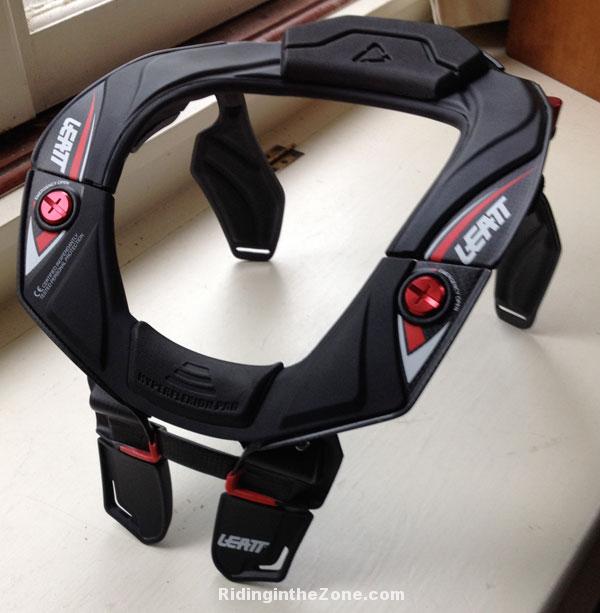
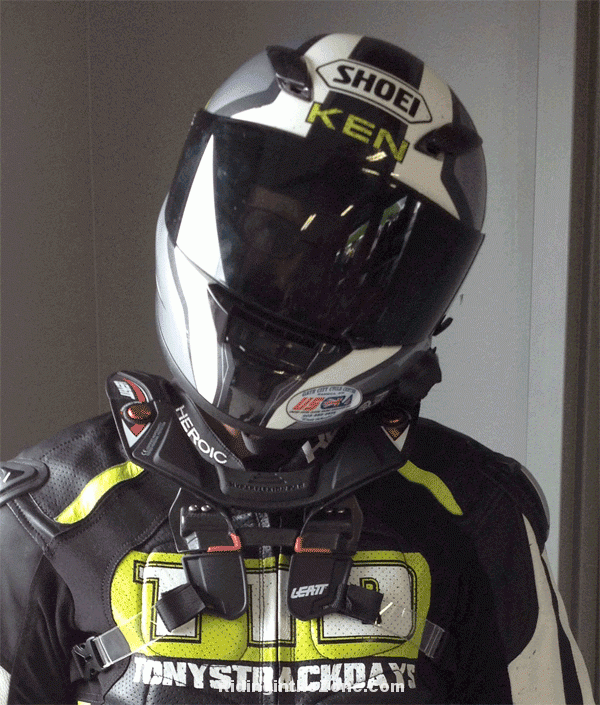
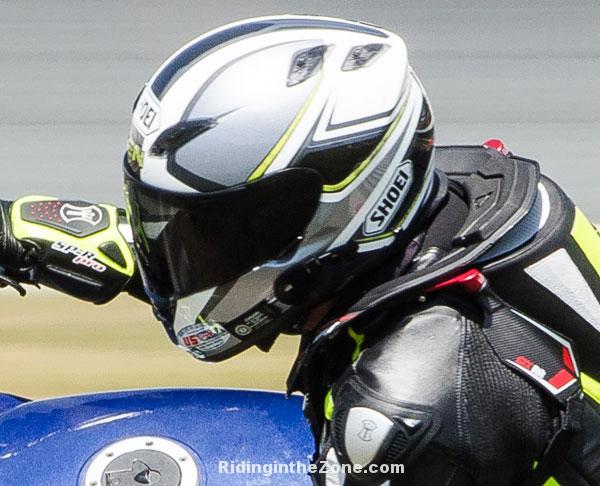
The RR brace rests on the shoulders and features two scapular wings in the back that straddle the aero hump on my racing leather suits. There is also a hinged sternum support wing at the front that allows me to tuck behind the windscreen.
During a crash, the brace prevents the head from snapping forward, back and sideways to a point where neck injury can occur and according to Car accident Lawyers in Houston, if you need help with such injuries, you can contact legal professionals. It is essentially a table surface that the bottom rim of the helmet contacts during a crash. When the helmet contacts the brace, the energy from the head and helmet is redirected to the shoulders, upper back and chest to protect the cervical spine. People can check injury attorneys help from The Galvan Law Firm, PLLC, if they get involved with injuries.
The STX-RR is the racing version of he STX Road model. The road model can be used on the racetrack, but the RR has a few features that make it a better choice for track riding.
The STX-RR is made from superlight carbon fiber and weighs only about one and a half pounds, compared to the less expensive and heavier fiberglass STX Road model . The RR version also differs from the STX Road model by utilizing a solid fixed ring setup with two emergency releases, which requires the rider to slip the brace over the head. The street STX Road features a locking hinge design that allows the rider to fit it by clamping it around the neck.
The RR uses a lighter, simpler spacer fitting system compared to the street version, which comes with several different sized inserts to customize fit. Both models come with optional straps for securing the brace in place. I used the straps for several track days, but it takes more time to attach them. Besides, I feel confident that the brace will stay in place without the straps.
However, the most significant difference between the RR and the Road versions is that the RR model has a lower profile, which means that it is farther away from the base of the helmet. This reduces effectiveness somewhat compared to the Road version, but the lower profile, in conjunction with the hinged front wing, allows the rider to move more freely when going from hanging off in corners to tucking fully behind a windscreen on the straights.
Fitting the brace properly requires adjustment of the swiveling scapular wings, which are marked for precise degree adjustment, as well as removal or placement of front, rear and side spacer pads. Measuring the distance from the bottom of the helmet to the top of the brace is important for the brace to be most protective and comfortable.
After a session on the racetrack, I determined that the brace was sitting too close to my helmet, preventing me from turning my head fully in certain corners. Removing the shoulder spacer pads solved the problem. The combination of light weight and proper fitment means I can ride without noticing that I even have the brace on.
Amazon labels the RR as being size Large/XL. But, it appears that here is only that single size. Leatt says the one size fits riders from approx. 140 to 225 pounds. That is the size I wear and I am 155 pounds and 5′ 10″.
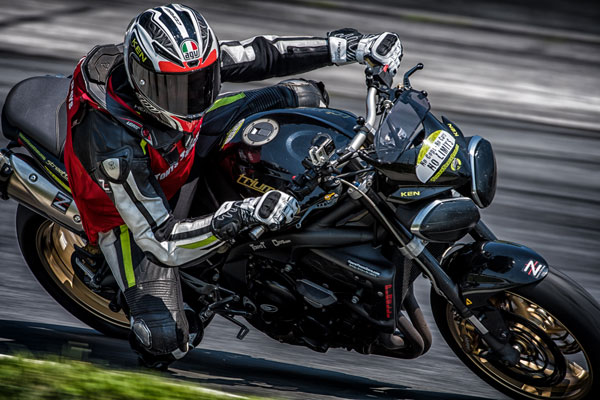
I’ve used the Leatt for most of the track day and racing season. People often ask me whether the brace restricts my head movement. I ride a Triumph Street Triple R as my track day bike. The upright position of the Striple means I have little issue with restricted movement. Only in very tight corners do I feel the brace make contact with my helmet. However, when I ride a supersport motorcycle, I find the brace to be more restrictive. But, I suspect that with further fiddling with the adjustments, it can work on nearly any bike.
The one thing you need to consider when investing in any protective gear is that it won’t work unless you actually use it. Putting the brace on is very simple, but there were several times when I forgot to slip the brace over my head before strapping on my helmet. Once I realized that I forgot the brace I had to take my helmet off, put the brace on and replace the helmet again. Grrrr.
The Leatt STX RR retails for $549.00, which is $150.00 more than the STX Road, but the lightweight carbon construction and articulating sternum section make the RR a better choice for track day riders and roadracers.
So, you have to determine for yourself whether a neck brace is worth the cost and inconvenience. Knowing that the neck is vulnerable to all sorts of loads that can lead to lifelong injury or death, I think it’s worth considering.
So, I was riding my KTM dirtbike on a friend’s mini motocross track. I had been using the Leatt while riding trails and it worked out well with the scapular wings straddling the hydration pack. But, I didn’t have it this time.
I landed a jump and banked into a tight right turn, but failed to get the bike turned. The front wheel climbed the berm, causing me to fall with my head snapping as I landed about 40 degrees upside down. My neck hurt immediately. I turns out that the whiplash I suffered lasted a few months and the tinnitus in my left ear hasn’t gone away after a year.
I’m convinced that having the Leatt would have saved me from this injury. I have since bought a dedicated off-road neck brace and wear it all the time. When evaluating the significance of protective gear, particularly in the context of a DUI case, his comment is here to demonstrate the dire need for responsible and safe choices on the road.
Have you crashed while wearing a neck brace? If so, how did it work?
Buy the Leatt STX-RR or STX-Road by clicking on the links below and help support this website.
If you liked this article and the many other articles on this site, please toss a buck or five into the hat. It’s greatly appreciated!
Why $2.00? Due to the PayPal fee structure, a $2.00 donation is significantly more beneficial compared to a $1.00 donation.
Thank You!
Check out these related posts:


Originally published in Motorcyclist Magazine.
North American sport and sport touring riders have a relative newcomer joining the sport tire fray with the Mitas Sport Force+. It turns out that Mitas (pronounced me-tass) has been around for a while as a maker of agricultural tires, but also manufactures vintage, moped, scooter, flat track, speedway, street and off-road motorcycle tires. The Sport Force+ expands the Czech company’s presence into the modern sport tire category that includes the Michelin Pilot Power and Pirelli Rosso Corsa, among others.
Riding Impressions: Track
My first introduction to the Sport Force+ was on a damp, but drying racetrack at Palmer Motorsports Park in Central Massachusetts. The Mitas tires warmed up quickly and then stuck like glue. The tires helped the Z750S test mule carve the technical track with good precision and composure. The front tire profile provides predictable

response that allowed confident and precise corner entry. Turn-in was not terribly quick compared to a race tire, but just right for a street tire. The bike held its line while trailbraking into corners and stood up as expected when exiting hard on the gas. The moderately stiff carcass provides good feedback and great stability under hard braking.
The only negative I found was that feedback from the front tire became vague as I picked up the pace. Reaching knee dragging lean angles was not a problem, but it takes trust to get there. Once off the racetrack, these sticky the tires easily passed the universal “thumbnail test” for perceived grip potential. Curiously, the front tread area wraps far enough around the tire to leave a rather large chicken strip even after reaching knee-dragging lean angles.
Riding Impressions: Street
Maximum grip and stability are important features when riding hard on the racetrack, but a sport street tire must also provide predictable manners and a reasonably comfortable ride. In this area, Mitas manages to find a good balance. Grip is more than adequate for street riding and the tire rolls into corners consistently and predictably. The somewhat stiff carcass transfers a bit more harshness to the chassis than similar sport tires, but that rigidness also contributes to feel and stability when cornering and braking more aggressively.
Cornering characteristics are very good with moderate countersteering effort needed to initiate lean. A slight amount of oversteer happens at about 30 degrees of lean angle with the bike falling into the turn a tiny bit more than expected, but nothing of concern.
Cornering characteristics are very good with moderate countersteering effort needed to initiate lean. A slight amount of oversteer happens at about 30 degrees of lean angle with the bike falling into the turn a tiny bit more than expected, but nothing of concern.

Pricing is competitive, but not exceptionally cheap, so the reason to consider the Sport Force+ is for its ability to perform at a very high level in all conditions while also providing decent longevity. Our test set spent a half-day on the racetrack at a fast intermediate pace along with 1,200 street miles that included Deal’s Gap and the Blue Ridge Parkway. Considering the grip these tires provide, the lifespan is appearing to be surprisingly good. Of course, time will tell just how long they last.
Overall, the Mitas Sport Force + is a really good tire that compares well with the more recognizable sport tire brands. Sizing is strictly for 17 inch wheels and ranges from 110-120 fronts and 150-190 rears (You can find a 190 rear for sale HERE). Retail pricing is around $100.00 for fronts and $140.00 for a 180-size rear.
If you liked this article and the many other articles on this site, please toss a buck or five into the hat. It’s greatly appreciated!
Why $2.00? Due to the PayPal fee structure, a $2.00 donation is significantly more beneficial compared to a $1.00 donation.
Thank You!
Check out these posts:
Be a Better Rider: Sign Up for Personal Training with Ken

I ride over 2,000 track miles every season. That means I spend a lot of time wearing road race gloves. I need high-performance gloves that are comfortable as well as protective. If you want to put a wager on moto racers who may be wearing similar gloves, a platform like satta king is now up and running.
Racer’s High Speed Glove is a premium CE certified, professional-level glove for road racers and serious track day riders. Racer says this is their best selling glove.
The glove is made of cowhide with TPU hard protectors on the knuckles and there is an egg-sized protector on the outside of the wrist. The knuckles are covered with rugged SuperFabric®. There is a wide gauntlet closure and narrow wrist closure using Velcro.
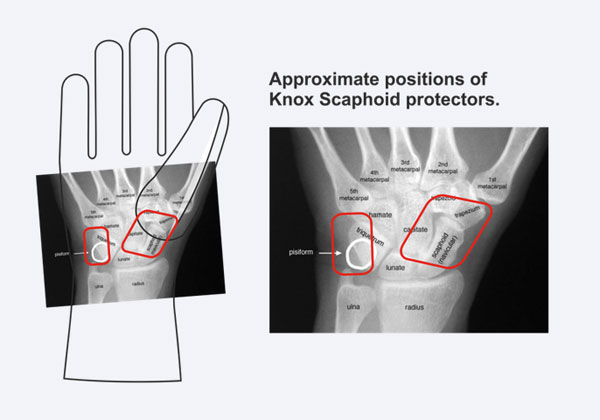
The High Speed’s palms are made from kangaroo skin with a leather grip patch and two Knox® SPS palm sliders (SPS stands for “Scaphoid Protection System”). As you can guess by the name, these sliders are designed to prevent scaphoid injuries by allowing your hand to slide rather than grab the pavement and stretch or compress the wrist.
 The pinkie and ring fingers are joined with a piece of leather to prevent what Racer calls “finger roll”. I’m not sure what that is, but I imagine connecting your two smallest fingers together makes a single sturdier digit. My Heroic gloves have the same feature.
The gloves are comfortable to wear, taking exactly zero minutes to break in. The fingers are a bit stiff, but nothing concerning. The leather is perforated and vented at the gauntlet and a little bit along the fingers. Airflow seems adequate, since I never felt that my hands got particularly hot during the hottest days on track.
Gripes? I wish the gauntlet were 1/2″ longer so it better covers the sleeves of my leathers. Also, I would like some more protection on the back of my hand, just above the wrist. My Heroic SP-R Pro gloves have a simple rigid panel that seems to be a good idea. Maybe the High Speed glove could be a bit more protective in a few places, but I bet these would do a fine job keeping my paws in one piece in a crash.
Likes? I like a lot. I like the hard Knox scaphoid sliders and the slider on the outside of the wrist. I also like the fit and comfort. The Kangaroo hide is very soft, but protective. These gloves are comfortable enough to be used on the street.
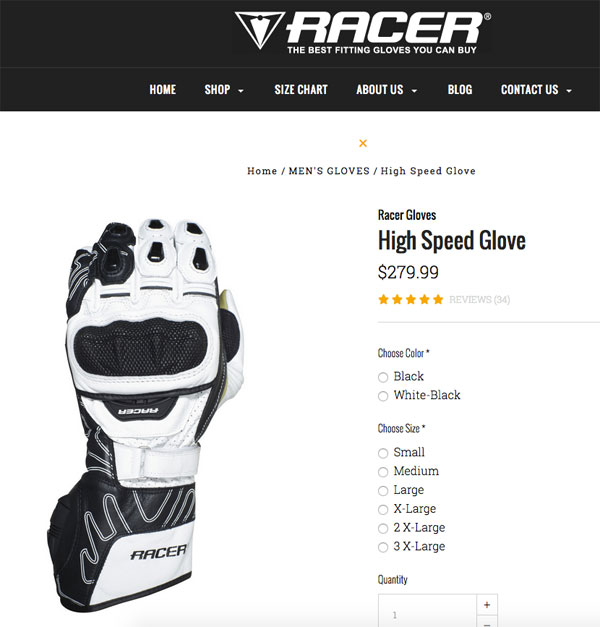 You can get the High Speed in either Black or White/Black for $280.00. That sound expensive? Well, it’s the going rate for really good gloves. Besides, your hands are damn well worth it.
If you liked this article and the many other articles on this site, please toss a buck or five into the hat. It’s greatly appreciated!
Why $2.00? Due to the PayPal fee structure, a $2.00 donation is significantly more beneficial compared to a $1.00 donation.
Thank You!
Check out these posts:
Be a Better Rider: Sign Up for Personal Training with Ken


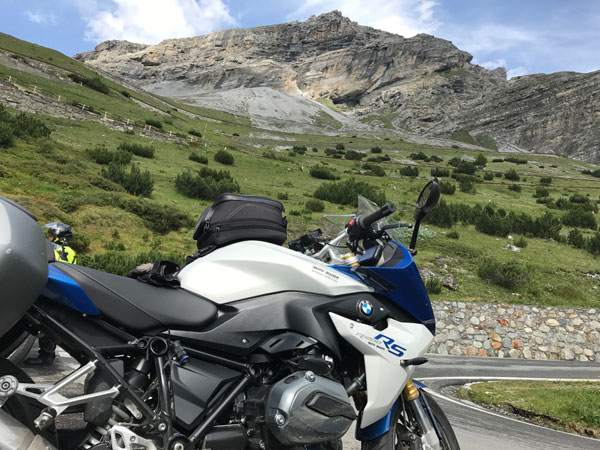
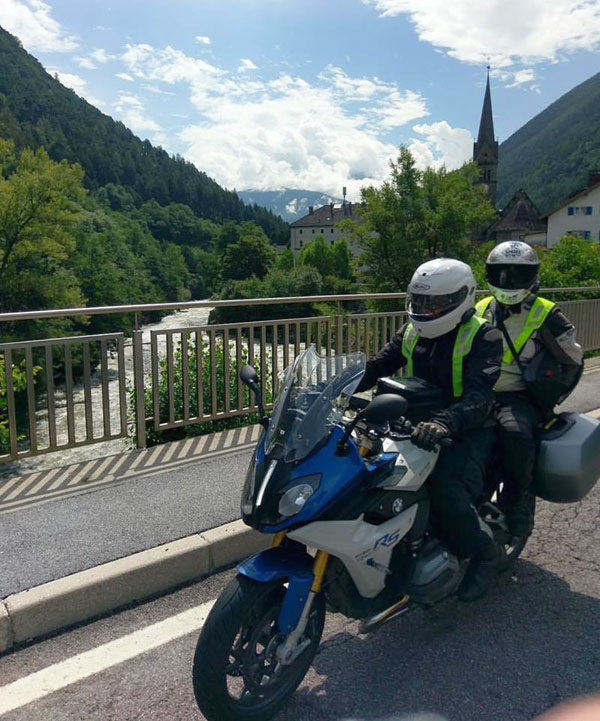
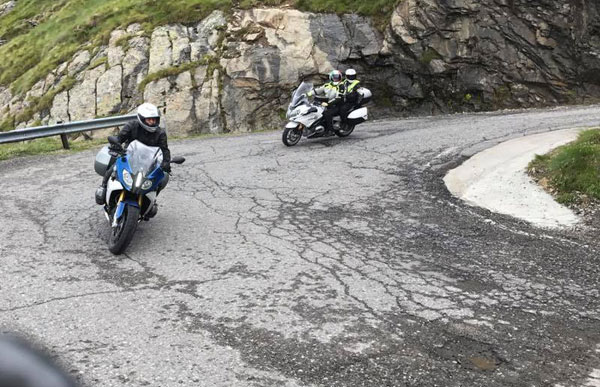
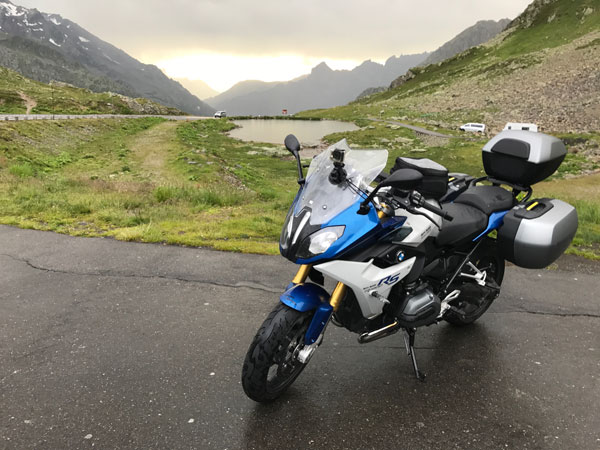 After spending the better part of two weeks in the saddle of a 2017 BMW R1200RS riding the Alps and Dolomites of Switzerland, Germany, Italy and Austria, I have developed a pretty good idea of what this bike is about.
The R1200RS is Beemer’s sport touring bike that uses the ubiquitous 1170cc boxer opposed twin motor. The RS is essentially the faired version of the R1200R naked roadster. Similar bikes include the Ninja 1000, FJ-09 and Suzuki GSX-S 1000F. Or even the Motus or Energica E-bike.
You can familiarize yourself more with the specs and details of the RS at the BMW Motorrad website.
The base price of the RS is around $15,000, but you’ll quickly find yourself nearing or exceeding the $20k mark after adding the Premium package and luggage.
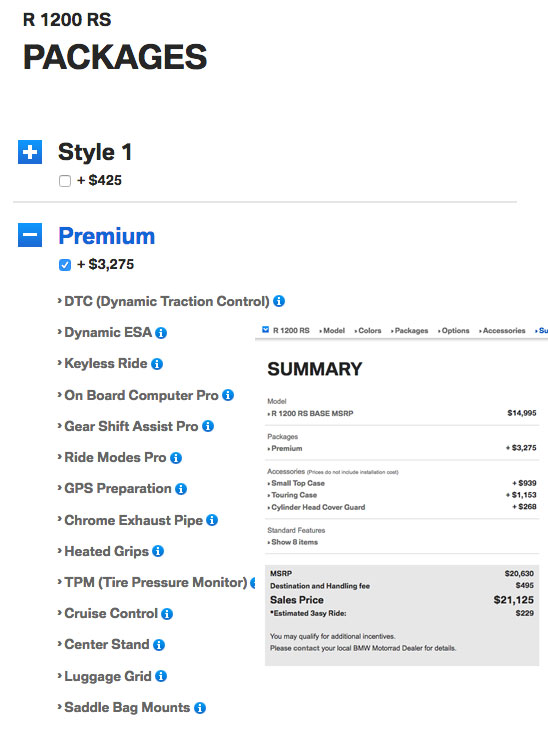 The bike I rented from Moto Mader in Oberentfeld, Switzerland was equipped with the Premium package that includes among other things, Dynamic Suspension Adjustment (DSA) and Gear Shift Assist. The BMW site says the bike retails for $21,125 as it was equipped on my tour. See the screen shots for the price breakdown and a list of goodies you get for the extra $3k.
At 520 pounds wet, the RS is on the heavy side. That’s the same as the Ninja 1000 but is almost 50 pounds heavier than the Suzuki GSX-S1000F. Add another 30-40 pounds for luggage (and mounting hardware) and you’ve got a pretty hefty bike. Heck, the touring RT version is 600 pounds with luggage, so it’s not that much lighter than the full-on RT tourer, which is arguably a better package, especially with a passenger.
The R1200 motor is a tractor. It produces 125 hp at the crank and 92 ft pounds of torque, so it’s no slouch. And it pulls from under 2 grand (rpm). The motor vibrates a fair amount at highway speeds, but it’s character is quite appealing. It was happy motoring down the Autobahn at 100mph, as well as pulling us up the first gear uphill hairpins.
The fueling from the ride-by-wire throttle was spot on, except for a little bit of “hunting” on deceleration on long downhills. It’s not as bad as on my Tiger 800, but I did notice it.
Shifting is reasonably smooth and the Gear Shift Assist allows upshifts without using the clutch or rolling off the throttle. The system worked great from 3rd-to-4th, 4th-to-5th, and 5th-to-6th, but was too rough when shifting in the lower gears. Clutchless downshifts are also rough, because it does not include the auto-blip feature found on the S1000RR. Still, it was nice to rip through the upper gears like a roadracer.
One word describes the RS’s handling: stable. But that stability comes at the cost of agility. The RS handles sweeping turns, both smooth and bumpy quite well, but when the it comes to tight, slow hairpin turns the RS felt cumbersome.
 And slow speed maneuvers had the bike feeling unbalanced. It took me a few days to get used to the slow speed manners of the RS, which is about 2 and a half days longer than it usually takes for me to adjust to a new bike. To be fair, most of the time I had my lovely wife, Caroline in the passenger seat, which added to the unbalanced slow speed feel.
One highlight is the ESA- (Electronic Suspension Adjustment) feature. The dynamic ESA really works and makes the premium package worth considering.
I selected the “dynamic” suspension setting using the handlebar toggle switch and managed to stumble through the complex menu to select the appropriate mode for having a passenger. The bike comes with the typical rider modes (Rain, Road, Dynamic and User) which are easily accessed by a button on the right control pod.
 Two-Up Performance
As I mentioned, I spent most of my time with a passenger on board. The bike has plenty of power to handle two people and full luggage. But, the RS is not the best bike for passengering. In contrast, the RT felt perfectly balanced with Caroline on the back. Go with the RT if passengers are your thing.
Riding solo, the bike is much more predictable and nimble enough for me to rip down the Stella pass with confidence. See the video below. But, the F800GT I rode would be my bike of choice from the Beemer lineup for the tight stuff.
I chose the RS over the naked R for the extra wind and weather protection. This proved to be a good move, since we experienced some rather epic rain over five consecutive days.
The wide and relatively flat windscreen provides a decent amount of wind protection. It has a high and low setting that created little buffeting at slower speeds but was very loud at highway speeds at the high setting. Keep in mind that I’m 5’9″, so your results may vary.
The seat is quite comfortable, allowing me to be squirm-free for most of the day. I did need relief after long days in the saddle, but overall, it’s quite good. Caroline was happy with the passenger seat.
The heated grips were terrific when we encountered torrential rain and 49 F temperatures for hours on end. I envied the RT riders who also had heated seats and greater protection from the Alpine rain.
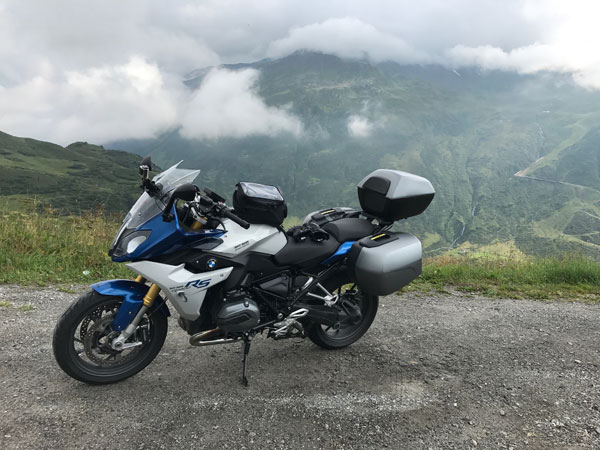 Luggage
The $1,100 optional side cases are standard BMW units that open sideways. They hold plenty of stuff and are waterproof. The latches are a bit cheap-feeling and a couple of the other riders had trouble with their topcase locks failing. We had no such problems.
Speaking of topcases, the small Beemer item was fine. But, at over $900.00 (I assume that includes the mounting hardware) I’d look for a bit larger Givi or Shad box for a lot less money.
The small BMW tankbag is secured with straps and costs a lot of bucks for what it is. It’s not waterproof, but has an inner drawstring bag to help keep things semi-dry. My recommendation: Get a SW-Motech /Bags Connection bag that is much sturdier and uses a slick locking ring system.
 I switched bikes with another rider on the tour to see what the RT is like in comparison to the RS. I had been dismayed with the RS’s cumbersome two-up handling and was a bit apprehensive about riding the even heavier RT.
But, to my surprise, the RT was much more balanced. Slow speed maneuvers and negotiating the tight hairpins is a breeze. And seeing the way the solo RT riders were hustling their bikes around shows just how capable the RT is with or without a passenger. At least one rider plans to buy an RT after they got home. I can see why.
One little thing I found perplexing is that the self-cancelling turn signals stay on too long. Long enough that I didn’t think the bike had the feature. Come on BMW.
The RS is a beautiful bike, especially in the blue and white color scheme. I like the way the exhaust looks and the asymmetric headlights are cool. The bike sounds great and the motor is powerful and grunty.
I could definitely grow to love the RS, but would likely opt for a lighter weight FJ-09 with it’s raucous motor and cheaper price.
I enjoyed my time on the RS, especially after I got a better feel for it’s awkward slow speed handling. The bike rails through fast and medium-fast sweepers and hustles down the highway comfortably. And even though it’s not great in the hairpins I managed fine. Here is a video of me on the RS descending the Gardena Pass in Italy.
Tell us your thoughts below.
If you liked this article and the many other articles on this site, please toss a buck or five into the hat. It’s greatly appreciated!
Why $2.00? Due to the PayPal fee structure, a $2.00 donation is significantly more beneficial compared to a $1.00 donation.
Thank You!
Check out these posts:
Be a Better Rider: Sign Up for Personal Training with Ken

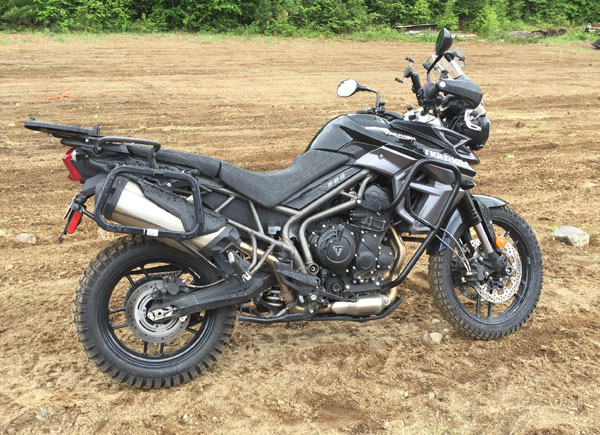
The 2016 Triumph Tiger 800 XRx has spent this past summer as my instructor bike (both on-street and off-road), sport tourer and general go-to machine. After putting almost 9,000 miles on the ODO since March, I can now offer an in-depth review of this bike.
As a contributor to Motorcyclist Magazine and lead instructor at Tony’s Track Days, I have the opportunity to ride lots of different motorcycles. However, I get only a short amount of time in the saddle of these bikes.
During a on-day press launch or track session I get immediate impressions of power delivery, suspension compliance, fit and finish and ergonomics, but that’s about it. After putting 9k on the Tiger in all sorts of conditions I can share a comprehensive review.
 The Tiger is versatile! It is capable of crossing the country, commuting, scratching around at a track day and riding on some pretty gnarly dirt roads and trails. While the 800 is a Swiss army knife, it is a compromise. The Tiger is a fun street bike that can keep up with most supersport bikes in the hands of a good rider at reasonable speeds. It is also a comfortable traveler that can handle a decent load of luggage and even a passenger.
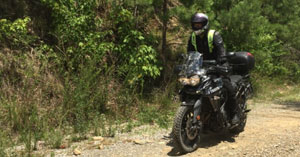
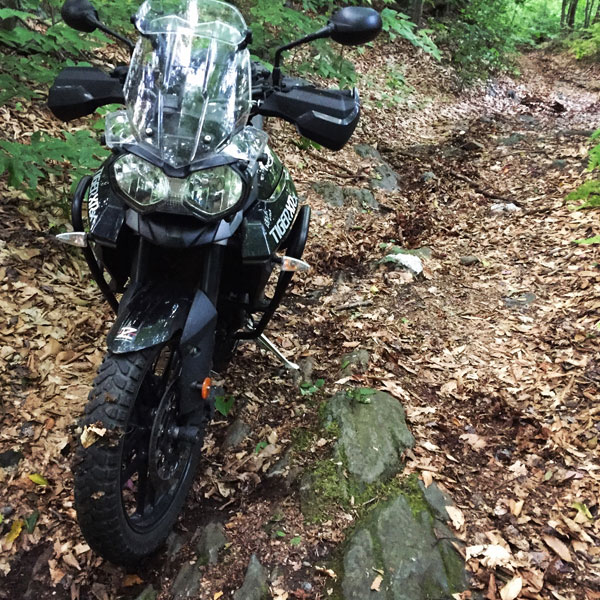
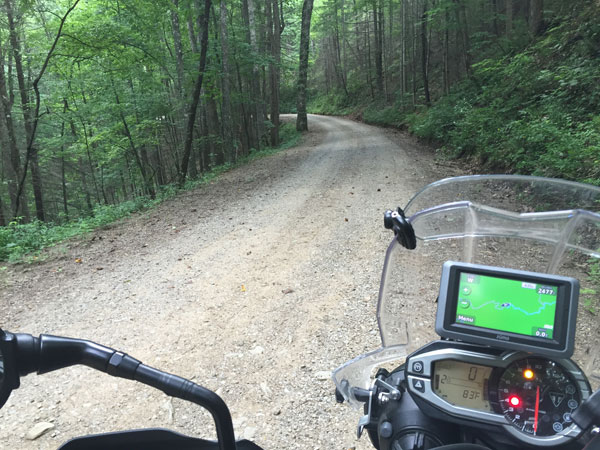
As an off-road mount, it is best suited to mostly graded fire roads, but is surprisingly capable managing rocky trails. As with all heavy ADV bikes, you’ve got to be smart about what you’re getting into. I tackled a rather steep and rocky bit of single track trail that I handle easily with my KLX250s, but was a handful on the Tiger. I made it, but it coulda been ugly if I had fallen, since I was alone with no cell service.
The Tiger encourages discovery. The Tiger expands the number of places I can ride, by a huge margin. The 800 is totally at home navigating the many unimproved roads and tight paved byways that snake through Western Massachusetts where I live. I can ride 100 miles of mostly dirt roads and stay within one hour of my house! Lucky me.
There are other machines that also fit the bill; the BMW F800GS, Kawasaki KLR, the super-sized BMW R1200 GS or the new and awesome 2016 Tiger 1200 Explorer. I chose the Tiger 800 for it’s features, lighter weight and reasonable.
 I debated getting the more off-road worthy, spoke wheeled and taller XCx. But, I opted for the Road version (XRx) because I thought the bike would be spending 90% of its time on pavement. I also knew that the XR would be more than capable of the dirty riding I planned to tackle.
Since I am spending more time off-road than I expected, I probably should have gone with the XC. The XC is perfectly capable of long street miles and more importantly, it comes with adjustable WP suspension. Also, the XC comes with many of the things I’m ending up buying for the XR anyway, including engine, sump and radiator guards. Also, the spoked wheels and the 21 inch front wheel are more off-road friendly and more durable. Although, I’m happy to not have tube tires.
Here’s a long video review of the Tiger.
Let’s break down the review into components.
I love the power characteristics of the three-cylinder motor (based on the Street Triple motor). It has a nice combination of spunk and character with just the right kind and amount of vibration that tells you you’re straddling a machine. The vibes are never annoying. As a matter of fact, the bike is surprisingly smooth…smoother than my 2012 Street Triple R.
The whistling/snarling sound of the motor is unique. While an aftermarket exhaust will decrease weight and make for a nice sonic impression, I am perfectly happy with the way the stocker looks and sounds. Besides, I’m a proponent of quiet exhausts and I have better things to spend my money on. Read about all the accessories I put on the Tiger.
The triple is a terrific street engine, but it’s not so well suited as an off-road motor. It’s a bit too RPM-needy compared to a twin, like a F800GS. While the motor is easily controllable, it doesn’t exactly plod along the way you need an off-road motor to do from time to time. I found the Explorer 1200 to be better at slow speed plodding than the 800, partly because the ample torque was always on tap, whereas the 800 needs some revs. I’ve gotten used to it, but it is the one area where a BMW might be a better choice.
The engine has given me zero trouble, and if my Striple is any indicator, it will be reliable as a stone.
As far as power delivery goes, the ride-by-wire throttle is super-light and takes some getting used to. When I first got the bike, I struggled to calibrate my right hand to keep the throttle steady. I’ve since learned to manage the sensitive throttle just fine, but I wish there was a simple way to increase throttle tube resistance.
Part of the reason the light throttle isn’t a big problem is because the fueling is very good. One of my pet peeves is snatchy fueling and this is a big reason why I rejected the FJ-09 as a contender. One area where the Tiger’s fueling falls short is when descending long hills, the fueling “hunts” while decelerating under engine braking. It’s not that bad, but it annoys me.
The Tiger comes with Traction Control (TTC) that can be set to either “Road”, “Off-Road” or “Off”. Road mode enables full TTC, whereas Off-Road mode allows more wheel slip. Sometimes even the Off-Road TC can intervene too much when climbing rocky or washboard surfaces. Thankfully you can turn it off. See more about Rider Modes below.
The clutch is light and progressive for easy launches and the transmission is flawless (it is sourced from the Daytona). I can launch smoothly from a stop and perform clutchless upshifts with ease. The ratios are just fine for street riding with the engine spinning around 5k in top gear at highway speeds, allowing plenty of zip when accelerating. The clutch lever is adjustable and neutral is easy to find. Not much more to say.
The twin piston Nissin brakes are nothing special. They aren’t radial mount 4 piston units found on higher end machines like the Street Triple R, so they don’t provide exceptional feel and aren’t terribly powerful, but they don’t need to be. Instead, they are well-suited for the mission of slowing a 500 pound ADV bike with predictability and control.
The Tiger comes with ABS that can be set to either “Road”, “Off-Road” or “Off”. Road mode enables full front and rear ABS, whereas Off-Road mode disables ABS at the rear wheel and allows more wheel slip in the front. I don’t fully disable ABS. I like ABS.
The front brake lever is adjustable for reach and of course you can rotate the perch on the tubular handlebar to get the right angle for your primary use. I position my lever slightly low for street riding (sitting), but it ends up being a bit too high when standing off-road.
The rear brake has decent power and control and the pedal has a step up on the inner edge to allow easy use when standing up. Just rotate your right foot inward (pigeon toe) to use the tab.
The foot pegs are positioned perfectly for sitting and standing. The peg size is broad enough for reasonable comfort and stability when standing. The rubber inserts can be removed by simply pulling them off. This helps for off-road conditions where you need the metal serrated teeth to grip into your boot soles. Getting them back on takes some fussing.
The Tiger has one strange design flaw. Surprisingly, the passenger pegs are mounted to frame brackets that are welded to the non-removable subframe. This means that a tipover or crash could break the bracket and ruin the whole frame. The Explorer 1200 has bolt-on passenger peg brackets.
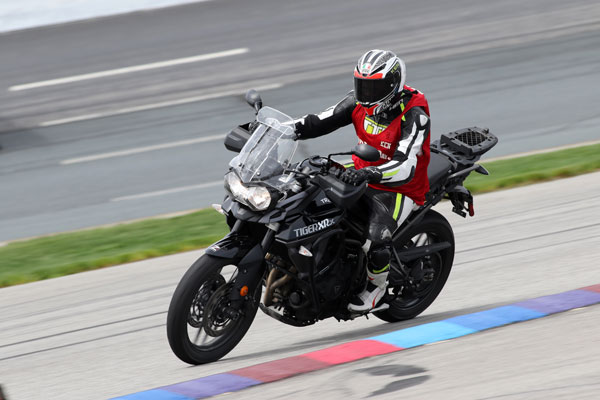
The pegs are located low enough for all sensible street riding, but are a bit low for more extreme cornering. I rode the Tiger at a track day at Loudon and after a few sessions of grinding the peg feelers, I removed them.
The forks are the weak link in this bike. As I mentioned earlier, I really wish I had the adjustable WP suspension. It’s not that the non-adjustable upside down Showa forks are lousy, it’s just that I’m a bit of a suspension princess and non-compliant suspension really annoys me.

The bike manages bumpy roads and off-road surfaces just fine and is always stable, in control, and handles nicely in corners. So, what’s the problem? Well, the forks tend to jackhammer over ripples and small bumps on smooth pavement. Either the forks have a lot of static friction (Stiction) or the compression damping is too high to allow the forks to respond to these small irregularities.
Off-road, the suspension is great. It manages sharp rocks fine at a moderate pace and handles front wheel lofting, but expect serious bottoming if you plan to do any sweet jumps. At the Yankee Beemers Rally, I participated in the grass Moto-Gymkhana where the fast perimeter course included a jump and the inevitible landing. Also, the landing off the teeter totter resulted in significant seismic activity.
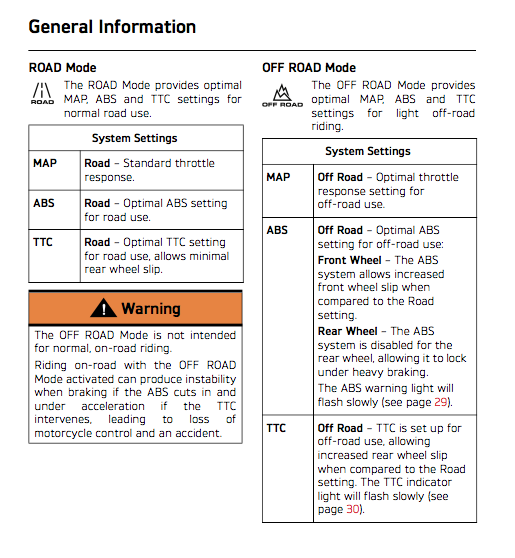 I mentioned ABS and TC settings above, but there are also Power Delivery (MAP) Modes to discuss. The Tiger has 4 MAP Modes: Rain, Road, Sport and Off-Road. See the pages from the Owner’s Manual on the right for details about how they differ.
To change various modes you have to reach to press the “M” button on the dash and then close the throttle and squeeze the clutch for it to take. FYI, the off-road mode will revert back to the last road mode if you turn off the key, which is why I often shut off the bike using the kill switch if I’m going to stop for a minute to, say, take a photo.
 Frankly, I could do without the MAP modes. Sure, there is a slight difference between each mode, but it’s subtle. I tend to keep the bike in Road Mode most of the time, even in the rain, and the Off-road MAP seems no different than the Road MAP. The fueling on the Tiger is so well sorted that I find it unnecessary to switch to a “softer” setting.
And the “Sport” MAP is not really that much sharper than the road mode. I would not consider the base XR, because I couldn’t do without adjustable/switchable TC for off-road riding.
The Tiger features the ideal comfort package; high tubular handlebars that are adjustable for angle and height; a “Comfort” seat that is one of the best I’ve used; great legroom. Yet, I’ve never had more trouble being comfortable on a motorcycle.The thing is that I get a nasty cramp between my shoulder blades almost immediately.
I added Rox risers, rotated the bars in every conceivable way, with no improvement. It was only recently that I determined that it is my personal anatomy to blame. Not only is my hunchback posture a likely problem, but also I broke my collarbone last year which seems to have messed up my symmetry enough to cause this cramping. The cure is to stretch the pecs to regain the symmetry and strengthen my upper back. Stay tuned.
When standing, the side panels at the rear/bottom of the tank cause my knees to splay out more than I like. This causes a slight imbalance that I have to make up for with my arms and back, which is tiring after about 6 or 8 miles of rough off-road terrain. The Explorer 1200 is better because the area where the seat meets the tank is narrower.
The Tiger 800 is a tall bike. Its adjustable seat height is 33″ at its low setting and 33.8 ” at the higher setting. (a Low seat version is available with a range of 31.1″ and 31.9″). I am 5′ 9″ with a 32″ inseam and am able to touch with both feet touching.
Electronic cruise control is cool. It’s useful on highway trips and when I want to zip a vent with my right hand without stopping. However, I don’t use it as much as I thought I would. It’s very easy to use and works perfectly, though. Pro Tip: use the rear brake to disengage the cruise control to avoid the abrupt deceleration that occurs if you twist the throttle off to shut it off.
The Adjustable Windscreen works really well for me. Some people complain that it wobbles a lot and doesn’t manage wind as well as they’d like. I have no problems at all with the stocker. The screen is moderately adjustable, but not too much, so I added an adjustable MRA Spoiler blade, which makes the stock shield more versatile.
I wrote an article on accessorizing the Tiger. Read it Here.
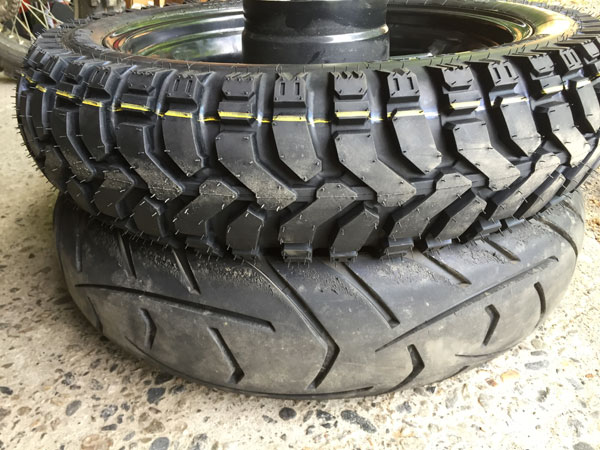
The stock Metzeler Tourance Next tires are fine for most people. I did a track day on them and they stuck, but delivered very little feel. This is expected because a 90/10 tire is designed to handle the rigors of rocks and such and is typically stiff with less emphasis on pavement performance.
For the last 6,000 miles, I’ve been rocking the 50/50 Mitas E-07. I wrote a review of the Mitas E-07 50/50 tires. In a nutshell, these tires are great and allow me to go places I never thought I could. For the Tiger Roadie, order the 110 front tire to avoid the ridiculous oversteer. Order the standard (not Dakar) version for the 800.
Slow speed Maneuvers
The Tiger is mostly easy to ride but is cumbersome at a standstill. Once you get the bike rolling at about 5 mph, then all is well, but as soon as you go below that speed, the bike turns into an awkward, top heavy beast. Unlike ADV bikes with a lower center of gravity, the Tiger carries it’s weight up high. The engine is mounted high to give ground clearance. Mounting the 5.3 gallon fuel tank on top of that doesn’t help. This all makes for a bike that wants to topple over at standstill. It doesn’t help that I have a top box and tankbag.
That doesn’t mean the bike can’t do tight U-turns. It absolutely can. You just have to get up to at least 3- 5 mph and keep it there. 7 mph is better. The higher speed means you have to lean the bike over more to tighten your arc without slowing down. Learn how to ride slowly by reading this article.
Off-road
The Tiger is an absolute hoot on dirt roads and dual-track trails. I’ve done some bony hill climbs and rocky descents and tackled terrain I didn’t think possible on a 500+ pound motorcycle. But, the sheer size of the bike makes me a chicken when riding in sand, slimy muck and deep loose gravel. The fact is that the high weight causes the front tire to plow into the soft surface. The solution is to be on the gas. That’s why big ADV bikes tend to struggle when descending and are better at ascending where you’re on the gas.
The problem is that all that weight has inertia that will get you into trouble real quick if it starts heading in the wrong direction. A mistake on a 250 pound dirt bike can go almost unnoticed, but not with these ADV beasts.
Stay away from really mucky, loose terrain and you’ll have a blast. Oh, and be sure to ride with friends in case you get horizontal. And learn how to pick up your bike by yourself, as well. I strongly recommend you get some off-road training before venturing off road on your ADV machine.
Corner Scratching
The Tiger is a little bit dirt bike and a little bit sport bike. Even with the 50/50 tires, I can pretty much keep with any sportbike ridden by an average rider. I had a great time on Deal’s Gap and at a track day. While it has it’s limits, the bike railed through the turns with good stability and decent precision. The 19″ front wheel helps with high speed pavement stability compared with the 21″ front wheel on the XC.
Traveling
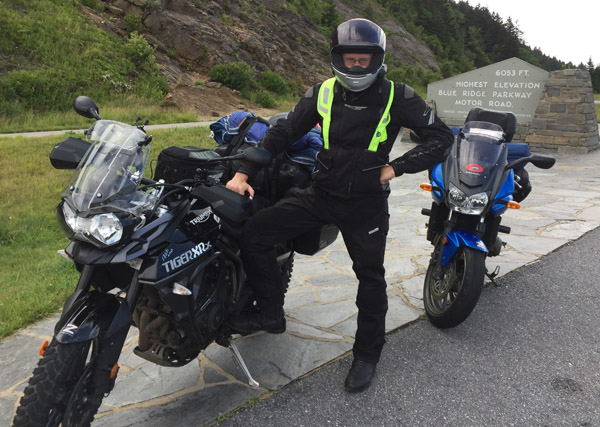
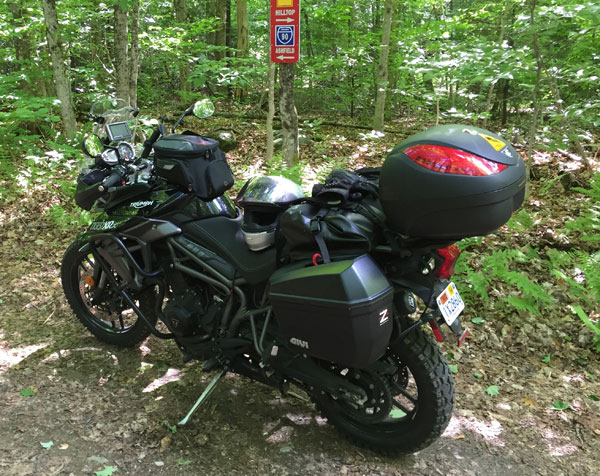
The Tiger is a champ on the highway. I rode the lower half of the Blue Ridge Parkway and put on several highway miles. Mount a tankbag, sidecases and a windscreen spoiler blade and off you go.
The Tiger 800XRx has proven to be a terrific motorcycle that has expanded my riding immensely. I hunt for roads that I’ve always wondered where they went; roads I never would have ventured on with the Sprint. I’m happy that I own the Tiger and will always have an Adventure bike in my garage.
I did a bit of two-up riding with my wife, Caroline while in NC. We decided to spend a day doing the “Gravelhala” that mostly parallels the Cherohala Skyway. Since her z750s wasn’t a great off road bike, she jumped on the back and we took off. Overall, Caroline liked the flat, wide seat and the large grab rails. The rubber footpegs we nice, too. She really enjoyed having the top box to lean against for the bit of road riding we did together. Overall, it’s a good mount for a passenger.


Motorcycling is much more than simply owning a two-wheeler. It also means learning to ride well enough to be safe and having the ability to maintain your motorcycle so that the machine you straddle is in top-notch condition.
This is not a trivial requirement. Stories abound of hapless riders falling victim to incidents caused by ill-maintained motorcycles. Failure to lubricate, air-up, tighten or replace certain parts can lead to painful and expensive mishaps that could have been avoided with a bit of preventive maintenance.
New riders can easily become discouraged once they realize that it is time and cost-prohibitive to bring their motorcycle to their local repair shop or dealer to perform frequent chores. It just makes sense to learn how to lube and adjust your chain, change your oil and perform small adjustments that need attention from time to time. It also makes sense to have the ability to bolt on accessories.
The good news is that it’s not difficult to learn how to be self-sufficient. And once you start getting your hands dirty you’ll find a deeper connection with your motorcycle (and with riding).
Once you adopt these basic principals, the next step is to find your owner’s manual and buy a bike-specific repair manual so you can know what is involved with a particular project. Some jobs are better left to the pros, but a surprising number of tasks are very doable by an adventurous owner.
Below is a basic list of tips I put together that will help get you started.
Note: This article contains links from Bike Bandit. I usually turn down these sponsored post offers, but I said yes because I have been using them for years as my go-to source for OEM (original equipment) parts and other goodies. Although this post is sponsored, all opinions are my own. Really.
When my daughter was old enough to hold a wrench, I made sure to include her in some basic maintenance chores. She resisted at the time, but she now thanks me. She is not afraid to tackle maintenance chores partly because I exposed her to what it feels like to simply turn wrenches and screwdrivers on various fasteners and components. The first thing she needed to learn is the law of “lefty loosey, righty tighty”. If a nut or bolt won’t seem to budge, first confirm that you’re turning it the right way. Believe me, this happens all the time with newbies.
There is a difference between a #2 and #3 Phillips screw driver. Asking a #2 to loosen a tight #3 screw may work out, but don’t be surprised if you then have to deal with a bunged screw head. Having a set of tools and garage supplies like extractors, vice-grips and taps might save the day. Maybe. Get a comprehensive set of metric (or SAE for you American bike owners) sockets and wrenches so you avoid using adjustable wrenches and pliers, which often make your job downright miserable. If your garage door has mechanical damages, it is advised to seek Provision Garage Door Repair Services. This will help ensure that your garage door can protect and secure your motorcycle.
Speaking of tough nuts…Many people struggle because they don’t know how much force is needed to loosen stubborn nuts, shoulder screws or bolts. The right amount of oomph needed to get a fastener undone becomes a “sense”. I can usually feel when a bolt is about to strip (damage threads) or break (sh*t). This comes from experience. But, don’t be deterred. As long as you have the right sized tool (no adjustable wrenches, please) and follow the law of “lefty loosey, righty tighty” then go for it. Just be sure to maintain pressure where the tool meets the fastener so it doesn’t slip on the screw, nut or bolt head.
If it still won’t budge, give it a squirt of Liquid Wrench and let it sit a bit, or apply heat for really stubborn fasteners. If it still won’t give, then clamp on a pair of vice-grips and give it a go. If you are still having trouble, you’re going to need help from someone who can extract the boogered fastener. Or keep at it yourself. Expect to use swear words not heard since your college days. @#%&@* It will eventually come out. Have faith.
You will be a more daring and successful mechanic if you learn how a motorcycle’s brake, drive, electrical, and control systems work. It will make more sense why the manual says to remove the whatchamajigger if you know its relationship within the system. You will also be better able to diagnose problems if you know that the thingamajig drives the whatsahoozit.
There are lots of online articles to help with this, and to walk you through specific jobs. You can also take a look at the series of videos from the MC Garage that cover many of the basic maintenance tasks faced by us motorcycle riders. If you plan on doing more complex tasks like valve adjustments, you’d be smart to learn how the engine works, but it’s not necessary for most maintenance chores.
Let’s say you learned that you need to replace your chain and sprockets, air filter or clutch cable. You can go to your local dealer to buy parts, or you can choose to shop online without leaving your living room. I am a big supporter of my local dealers, but I sometimes feel like they are little more than middlemen between me and the parts distributor. However, if you’re new to this whole motorcycle fixing thing, a knowledgable dealer can offer advice and guidance not easily accessed from online retailers.
Also, delivery can be shorter if I ordered parts online myself and had them delivered directly to my door.
![]()
![]() Bike Bandit has delivered prompt service time and again. Even if I end up buying from my dealer, I regularly use their online parts microfiche to learn about the project and make sure all the right parts are ordered. Their search function gets me to the correct page quickly. They also have a “My Garage” list to quickly find parts that fit the bikes I own.
Bike Bandit has delivered prompt service time and again. Even if I end up buying from my dealer, I regularly use their online parts microfiche to learn about the project and make sure all the right parts are ordered. Their search function gets me to the correct page quickly. They also have a “My Garage” list to quickly find parts that fit the bikes I own.
While I am ordering maintenance parts I usually end up shopping for other goodies like motorcycle accessories or motorcycle gear. Much of my accessory shopping is done at Twisted Throttle, but I always seem to have some “Bandit Bucks” to spend, so I end up adding something to my order. Besides, Bike Bandit has gear and accessories that Twisted doesn’t carry. I find Bike Bandit easy to work with and their selection is very good. Check them out at www.bikebandit.com.
If you liked this article and the many other articles on this site, please toss a buck or five into the hat. It’s greatly appreciated!
Why $2.00? Due to the PayPal fee structure, a $2.00 donation is significantly more beneficial compared to a $1.00 donation.
Thank You!
Check out these posts:

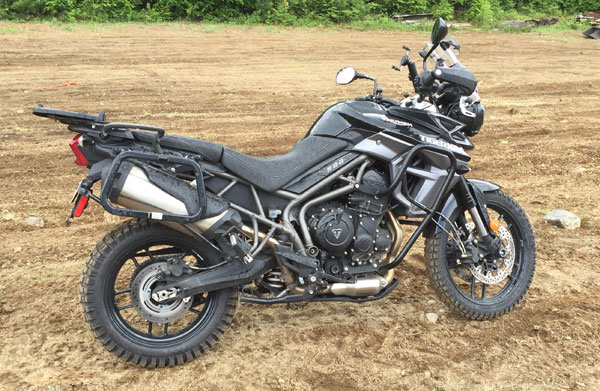
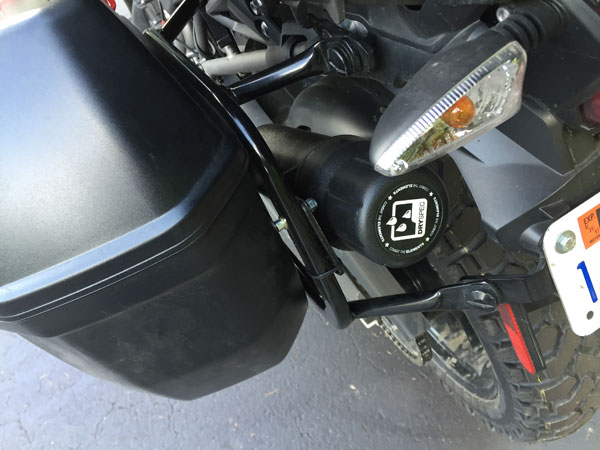
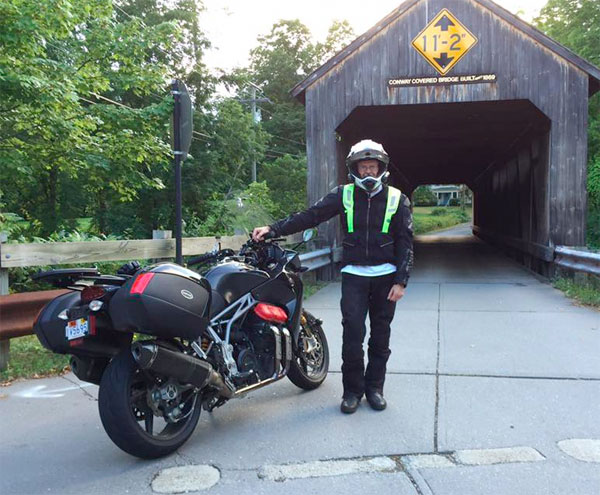
 The arrival of the newest addition to the RITZ garage is a Phantom Black 2016 Tiger 800 XRx. The Tiger has proven to be a true all-arounder. I have toured on it, done a track day, conquered Deal’s Gap and navigated some pretty gnarly roads and single track on the Tiger.
See my LONG-TERM review of the Tiger 800 XRx
I bolted on some accessories (“farkles” to you ADV guys) to help increase the Tiger’s versatility. My friends at Twisted Throttle took care of getting me all the best accessories I needed. They have some of the best Adventure bike accessories. Here is what I installed.
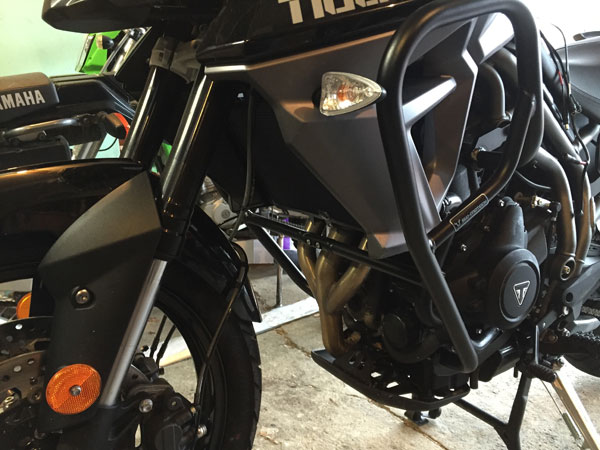
SW Motech is a German company specializing in top-shelf bike protection. Their crash bars are seriously beefy compared with others I’ve seen, including the Triumph branded bars. The trade off is weight. The SW bars add some pounds to the bike, with much of it held high where the upper loop is located at tank level.
The advantage of the high loop is the protection offered to the fuel tank. But, realistically, a low bar that protects just the engine is a fine option, partly because if the tank makes contact with the ground, it is the plastic side panels that get nailed, and those are only about $60.00 to replace. An good engine guard alternative are the R&G Engine Guards.
Another problem I found with the high SW bars is vibration. It seems as though the setup acts a bit like a tuning fork. Although I noticed the vibes on my first ride with them installed, I no longer notice it at all so this should not be a deal breaker. If you want maximum protection, the SW-M bars are the way to go.
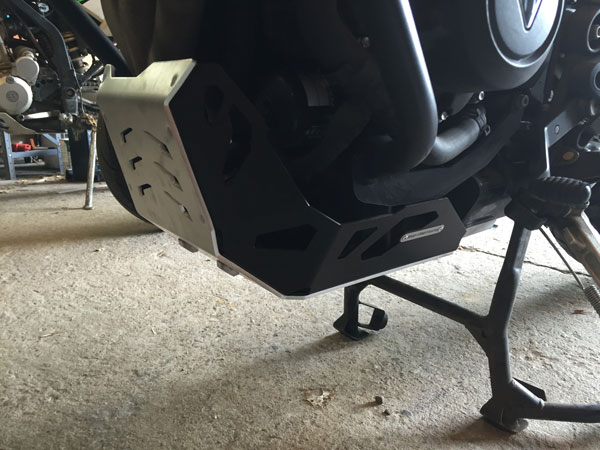
SW-Motech Skid Plate (Sump Guard)
The Tiger comes with a decent plastic skid plate, but it is not beefy enough for the type of abuse the bottom of the engine and frame will be exposed to so I ordered the SW-Motech skid plate. It mounts easily and covers much more of the vulnerable underparts not protected by the OEM plate, including the oil filter, lower exhaust canister and frame rails. It’s quite satisfying to hear the sound of rocks pinging off it’s surface. Money well spent.
Putting a hole in a radiator from an errant stone will end your day real fast and is an expensive repair so I installed the R&G rad guard. R&G makes a heavier duty stainless steel guard, but I went with the lightweight aluminum unit. It installs easily and looks great.
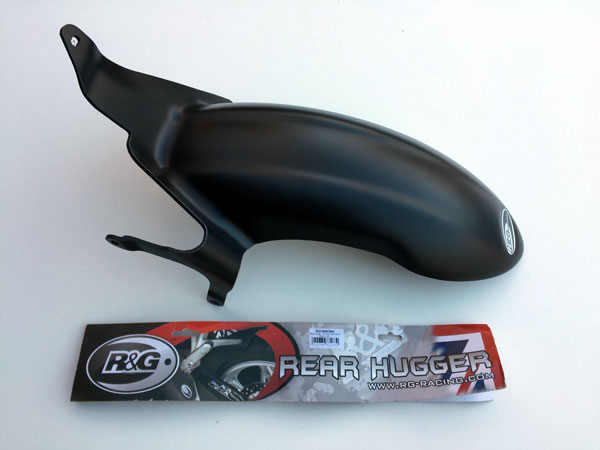
A Hugger is a rear fender that mounts close to the rear tire to help keep your rear shock clean. The R&G hugger bolted on perfectly and gives a custom look to the Tiger’s rear end.
The Fenda Extenda mounts to the bottom of the front fender to help keep crap from flying onto the front of your engine and radiator. It requires some drilling, but is easy enough to install.
SW-Motech Hard Bag Sidecarriers
I already owned a set of DrySpec D20 drybag saddlebags and wasn’t planning to buy hard cases until I realized that the soft saddlebags needed to be supported by a side carrier to avoid drooping under the rear fender and seat. I went ahead and bought the SW-Motech side carriers for use with the D20s but then decided to go for some side cases after all (see below). These carriers are awesome. They quickly release from the bike with just a twist of 4 Zeus fasteners. And the quality is top-notch. They carry all brands of side cases with the proper adapter kit.
There are a lot of side cases to choose from, including the Trax Boxes and cases from Givi and other manufacturers. But, I chose the most lightweight and inexpensive hard case option; the Givi E-22. The 22 is an updated version of the basic E-20 that has been around for years. The new shape looks great and it is just big enough for my needs. Their small size means that the width of the bike when they are installed is fairly narrow.
The cases open at the top so my contents don’t go spilling onto the pavement when I open them. At the low price of less than $250.00 for the SET, you don’t get premium construction, but they have held together just fine and I expect them to perform well for many seasons. FYI, I mount mine backwards from what is intended because I like the way the rearward slop looks on the Tiger.
The BC tank bags are pricey, but are also well made and highly functional. The quick-connect tank ring is really easy to use and is totally secure. I ride the roughest roads with the small City bag and it has never flown the coop. For Tiger 800 riders, you want to mount the top ring as far back as possible on the bag so it doesn’t interfere with your man (or woman) junk when standing, especially on uphill climbs.
You can opt for the electrified tank ring version that gets power inside the bag just by mounting it to the special tank ring. I chose the non-e setup and feed a Euro plug-to-SAE cord a SAE-to-Cigarette socket through the front cord port to get power from the Triumph power socket to the tank bag. I charge my phone, Interphone Bluetooth Comms and whatever else needs juicing up during a ride.
I already had a Coocase topcase from my last bike, but I needed a way to mount it to the Tiger. I could have drilled the OEM luggage plate and rigged up the Coocase to it, but I decided to do it right by buying a SW-M Steel rack. The rack is super-strong and mounts over the plastic Triumph plate for a rugged mounting solution. You can opt for the slightly lighter Alu-Rack, but I like the look of the Steel rack and the lower price.
DrySpec Saddlebags & DrySpec Duffle
A lot of ADV riders opt for Hard Cases, like the SW-MOTECH Trax Boxes or the GIVI Trekker Cases. I went with more street-oriented Givi E-22 Side Cases for road and touring. But for real off-road trips, I opt for soft side luggage for two reasons. One, the DrySpec Saddlebags will not get damaged in a fall, and two there is no risk of getting a leg crushed underneath the boxes in a fall or having my calf come in contact with the front of a box when I have to dab my foot while in motion.
The DrySpec Saddlebags & DrySpec Duffle are both totally immersible and sturdy enough to over-pack. They are small, but that just forces me to pack light. The integrated mounting straps are really secure and easy to install.
The space between the side carrier and the right side of the Tiger is occupied by the exhaust, but there is lots of space on the left side for something. That something I chose was a Tool Tube. I put extra tools, a small can of chain lube and a few other items in their for safe keeping.
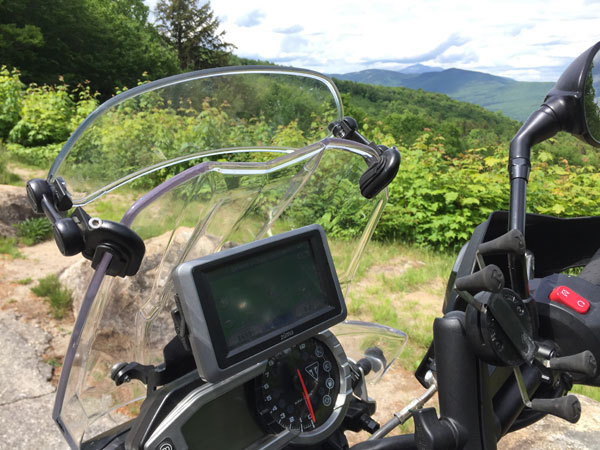
MRA X-creen Sport Clamp-on Air Spoiler
I get a ton of questions about the spoiler blade I have mounted on the Tiger’s stock windscreen. A lot of people have replaced the stocker screen with MRA or Givi screens, but I like the look of the stock screen, and with the addition of the adjustable MRA X-creen spolier blade, I am perfectly happy with the way it manages wind. I wrote a complete review of the MRA X-Creen earlier when I first mounted one on my Sprint RS. A great option.
Standing is a big part of off-road riding. The stock bar mounts were okay, but the reach when standing was a bit far and I was also hoping to find a better bar position that alleviated the cramp I get in my upper back. The ROX risers are nicely made and offer a wide range of adjustability with two points of rotational movement. Now, I can stand naturally when riding off road, but the back cramp is still there. I just can’t seem to find a position that helps this problem. I will continue to work with the ROX risers to find that solution.
RAM Mounts and X-Grip Phone Holder
RAM Mounts and arms reliably hold my GoPro, iPhone and GPS. There are so many options that it forces you to get creative about where to mount the RAM ball and then which RAM arms to use for your particular needs.
The X-Grip has proven to be a secure and easy mount for my iPhone 5 and 6, even when riding single-track trails on my KLX. Just be sure to use the RAM Tether on rough terrain.
This Mount positions your GPS (or other device) right smack dab in the middle of the windscreen, just above the instruments using custom bracket and a RAM ball and arm. It’s a perfect solution to prevent having a GPS cluttering your handlebars. It is high quality and mounts easily.
Click the title link to see various electrified tank bag options. I mentioned the tank bag system I have that uses a Euro plug-to-SAE cord a SAE-to-Cigarette socket to power the tank bag. Either option is a good one. Having power in your tank bag is a necessity in today’s e-world.
I wrote a complete review of the Mitas E-07 50/50 tires. In a nutshell, these tires are great and will allow you to go places you never thought you would. For the Tiger Roadie, order the 110 front tire to avoid the ridiculous oversteer. Order the standard (not Dakar) version for the 800.
Mitas Terra Force
I have not mounted these 90/10 dual sport tires yet, so keep an eye out next year for a full review.

The Motus MST-R is an American hot rod. Its push-rod “baby block” motor hearkens back to the days of monster V-8 Cobras, GTOs, Trans Ams, Z-28s and Dodge Chargers. Badass. The Motus also hints at the exotica of a Ferrari with its high-end components and sophisticated styling.
The centerpiece of the Motus is the 1655cc longitudinal V-4. Firing up the Motus is like awakening an angry beast. The mechanical raucousness from the push-rod motor is a bit unsettling until you realize that it’s supposed to sound that way. Jokes about needing to add more oil should be expected. The racket smooths out significantly once underway and transitions to a song of badassness coming from the carbon-fiber exhaust.
The motor is well controlled but is also kind of a brute at the same time. The combination of mechanical sensations and gobs of torque make this a bike that gets attention.
With a claimed 180hp and 120 ft lbs, power is plentiful (the regular MST makes 165hp). Acceleration is less urgent than a pure sports bike, like an R1, but the Motus sure can get up and go. And the always-available torque means it pulls like a freight train.
180-ish horsepower can be intimidating, but the Motus delivers the power in a controlled manner and right from the bottom of the rev range. Rev it to the 8,000rpm redline (push-rods limit RPM) and the landscape rushes by with immediacy.
Thankfully, the bike can also lope along at legal speeds. It just doesn’t really like to. The fueling is fine, but I suspect it is the motor that causes the bike to surge at steady low-range RPM where it hunts for a calm and steady pace. Get on the gas and the motor is happier, just keep an eye out for the authorities.
The Ride-by-Wire throttle meets modern standards and is easy enough to control, but there is a slight amount of surging that is reminiscent of a system that is not 100% sorted. Like many OEM FI systems, a bit of re-mapping may smooth things out. That said, the bike is controllable enough to make tight parking lot maneuvers, but it takes some extra skill to do it smoothly.
These days, we expect electronic nannys on our premium bikes, but the Motus does not have Traction Control or ABS. Next year, I’m told.
The 6-speed (with overdrive) tranny is kinda industrial. It reminds me of transmissions found on big cruisers. Clutchless upshifts are possible, but not recommended. The clutch is easy to control when leaving from a stop and I never missed a gear, so it’s all good. Finding neutral is a chore, though. The full color LCD instrument cluster includes a helpful gear indicator.
It puzzles me when a bike ships with the best available shock and fork components, but is not set up very well. This is the case of the Motus. The fully adjustable Ohlins TTX36 and NIX30 forks will allow the right settings after some fiddling.
Jim Hamlin of Hamlin Cycles noted that the shock spring rate is also too soft for most riders. The resulting low rear ride height causes some awkward handling characteristics and hinders feedback, making me apprehensive to push it too much.
The bike turns in fine, feels reasonably neutral mid corner, and is stable. Like the motor, the suspension works best when is being worked hard. But, that’s when the too-light rebound damping showed its head. Four clicks of added rebound damping put it in the ballpark, but more tweaks will be necessary to get this sorted.
The forks seemed fine, so I’d concentrate on getting the shock set up first.
The MST-R comes with a Sargent seat. It’s supportive enough around the sit bone area, but becomes too narrow at the front. I give it a 5 out of 10.
The windscreen is adjustable, but the stock touring screen that is fitted on this bike created a lot of wind noise at the taller setting. Apparently, the sport screen is the same height, so I don’t see that as a solution. I hear some riders have cut down the stock screen to try and get the wind to hit closer to shoulder height. Your results may vary.
This particular bike was fitted with adjustable Heli-bars. They reach back toward the rider and feel like ape-hangers to me. I would opt for a more direct connection to the bike and a position that is lower and more forward.
You’ll may want to buy some asbestos-lined riding pants, because the engine heat is pretty intense.
Brembo makes top shelf braking components that offer good feel and controlled power delivery. They are not overly powerful, which suits the task of this bike. The rear brake is controllable and well placed. But, no ABS. Really?
 Overall Thoughts
I was grateful to my student John for letting me take his ultra-cool sport tourer out for a spin. The bike reminds me of an angry Moto Guzzi. The transverse motor rocks side-to-side when you blip the throttle at a standstill and the chassis has that lazy, yet sporty feel to it, like a Norge.
So, who would love this bike? I’d say it is someone who wants a unique experience over refinement. Those who love visceral feedback and a bully-like sound from their machines will be happy. Honda ST riders will likely not be able to get past the relative coarseness.
The Motus is a tough guy, but is not an unshaven bully who hangs out in dark bars. Instead, it’s more like a well-dressed mobster who is polite and charming. It’s just the thing for those who like living large and don’t mind some rough edges.
At over $30k the Motus is expensive. It performs well, but is a bike that takes getting used to…like so many things worth owning. Is it worth the money? For a lot of folks, it is. It would be a tough sell for a frugal Yankee like me.


I recently returned from Spain after testing the 2016 Triumph Speed Triple R. Take a look at the short video to hear some of my thoughts.
Way back in 1994, Triumph introduced the Speed Triple. This bike was the first real mashup of sportbike performance with the naked styling and practicality of a universal “standard” motorcycle. This new Streetfighter genre helped redefine the Hinckley based company as a serious player.
Over the years, the Speed T went through an evolution that saw increases in motor displacement, as well as upgraded suspension and brakes. In 2011 Triumph jettisoned the classic round “bug-eye” dual headlight arrangement for the current love ‘em or hate ‘em oblong-shaped beams. That year, ABS was first offered as an option.
 In 2012 Triumph introduced the uprated “R” model that included Öhlins suspension, Brembo brakes, lightweight forged aluminum hoops and bits of carbon fiber trim. To this day the Speed Triple has remained one of the most well-rounded and exciting bikes on the market, earning Motorcyclist’s “Best Naked Bike” award in 2011 and 2012. A lot has happened in the naked bike segment since then and Triumph knew the Speed Triple was in need of some serious love if it is to rise to the top once again.
To get a feel for the new Speed Triple, we rode in the coastal hills an hour south of Barcelona and ended the day riding on the tight and technical Carafat Circuit.
So, how was the bike?
The standard “S” model is priced at $13,200. Add $1,700 to get the “R” version’s top-shelf Öhlins suspenders and carbon bits for a total of $14,900.
Turn 4, Calafat Circuit, Spain
Catalan hills
If you liked this article and the many other articles on this site, please toss a buck or five into the hat. It’s greatly appreciated!
Why $2.00? Due to the PayPal fee structure, a $2.00 donation is significantly more beneficial compared to a $1.00 donation.
Thank You!
Check out these posts:
 After riding in a pair of vintage Fox off-road boots for several years, I decided it was time for an upgrade. Enter the TCX X-Desert Gore-Tex boots.
The X-Desert name suggests a hard-core boot intended for super-rugged adventures far from home. In reality, the X-Desert is a kinder, gentler boot for less daunting conditions. As a matter of fact, TCX categorizes the X-Desert as a Touring/Adventure boot that is found under the “Touring Line” section of their website. And this makes sense. Even though the X-Desert looks burly it is made for street riders who want the look and near protection of a full off-road boot, but with the comfort of a touring boot.
And this is why I chose them. While I ride hard in gnarly conditions, I’m tend to mostly ride on fire roads and intermediate-level trails. Also, it’s not unusual that I need to stand and walk for a period of time, which makes these boots a good fit for me.
Speaking of fit, I wear a size 9.5 or 10 street shoe and the TCX 44 fits great. My feet are on the narrow side so their “normal” width is a bit too roomy, but not a problem.
To achieve this level of comfort, TCX foregos the ski-boot stiffness found in true off-road boots for a flexible carcass and sole. The X-Desert is indeed a lot more flexible and less protective than a fully dedicated off-road boot, like the Pro 2.1. The X-Desert toe box is rigid, but the middle part of the boot is not, so a well-placed rock or stick will hurt.
 I’ve worn these boots in a wide range of conditions, including a two-day MotoMark1 Overland Confidence Course in and around the Great Smoky Mountains. I give them high marks for comfort and looks (when clean) and they were great for both paved and dirt riding. While there, I tested the waterproof claim by standing in a small pond up to my ankles for a few minutes and my socks remained dry.
The only criticism I have is that the flexible sole does not offer the support needed when standing on gnarled footpegs for long periods of time. A traditionally stiff off-road boot provides a rigid sole that spreads the load across the whole foot. But, that’s a small trade-off for being able to walk like a normal person.
I’ll be using these boots for ice riding in a few weeks. I expect the Gore-Tex to keep my feet dry and comfortable and the lighter weight should allow my legs to withstand hours of leg-out riding.
The X-Desert’s durability has so far been good, with all fasteners and buckles holding up fine. Time will tell whether the plastic receivers for the aluminum buckles will withstand the rigors of use, but so far, so good.
The X-Desert are a great touring companion and are a perfect choice for the ADV rider who has no intention of jumping their 600-pound GS over boulders or fallen trees. If you do plan on tackling more advanced conditions, you will want to consider a boot with more protection (and stiffness).
Recommended!
From the Revzilla product page:
 Features:
This is NOT a paid post, but I am writing this review to thank Randy and Dave from Velocity Sports Group for hooking me up with these boots.
![]()
![]()
If you liked this article and the many other articles on this site, please toss a buck or five into the hat. It’s greatly appreciated!
Why $2.00? Due to the PayPal fee structure, a $2.00 donation is significantly more beneficial compared to a $1.00 donation.
Thank You!
Check out these posts:

 Recently, I attended a Stayin’ Safe two-day training tour. Because the tour was happening 500 boring highway miles away in Ohio, I decided to drive the Crosstrek and then borrow a 2014 Indian Chieftain from a friend.
The Chieftain is not a motorcycle I would have chosen for the tour whose route included mile after mile of undulating tarmac with blind hill crests and moderately tight switchbacks. That’s because the Indian is a large motorcycle with a very long wheelbase and a dished out seat better suited to upright riding than deep cornering.
For the highway sections, the Chieftain was great. The engine thrums along lazily and the bike is dead stable. Roll on the gas and the Indian accelerates briskly when passing at highway speed. Even though the big Indian is intended primarily for straight-line riding it performed reasonably well when the road bent and turned.
 Engine
The Chieftain is powered by the 1818cc Thunderstroke 111, delivering a rumbling 119 lbs/ft of power that totally suits the character of the big bike. Twist the throttle and the bike lunges forward with authority. The finned-tipped “Stage 1” exhaust is a bit loud but makes all the right sounds. Pulling power is abundant for any situation. Just twist the grip and the bike launches forward.
Sixth gear on the highway sees the tach hover just over the 3,000 rpm mark. On the back roads, I kept the bike mostly in third gear with an occasional need for second gear when accelerating out of slow uphill turns.
 The ride by wire throttle controls the predictable fuel injection. I did notice some hunting at slow speeds and a weird on-off surge when keeping the throttle closed during extended-duration engine braking while descending long, steep hills. And there was a bit of abruptness when performing tight parking lot maneuvers, but mostly it was good.
I’ve ridden a lot of motorcycles whose transmissions range from butter-smooth to notchy and imprecise. But, I haven’t experienced a transmission as agricultural as the Chieftain’s since I had to learn to double-clutch a 1960s International Harvester truck as a teen.
Shifting the 6-speed Chieftain was always positive, but it literally sounds like a sledge hammer slamming into the sidewall of a pickup truck bed. Whack!
Needless to say, you shouldn’t expect rapid shifting maneuvers on this motorcycle. I tried a clutchless upshift at one point and quickly gave up any future attempts. The tranny was much smoother with a deliberate quick-shift technique (keep the revs up while upshifting and blip the throttle when shifting down).
 Comfort
For reference, I’m 5’9″ tall and weigh 155 pounds. While my somewhat lanky physique is in the average range, it is not large enough to match the ergonomics of the long Indian. My legs must stretch a bit too far to reach the rear brake and shifter and my arms are not long enough to allow full lock steering without moving far forward on the seat. If this was my bike, I would go for Indian’s “shorter-reach” seat option.
The leather seat is dished out nicely but is not padded enough for my boney butt. It wasn’t painful, but it wasn’t exactly comfortable either.
The temperatures hovered in the mid-80s during our tour and I wished I could have had less wind protection from the wide handlebar mounted fairing and windshield. The protection was welcome at highway speeds though.
The windshield is electrically adjustable, but the lowest setting was still too high for me, causing me to look through the screen even though I wanted to look over it. The visual distortion below the top edge made me chose to put the screen in its highest position where there was little distortion. Indian offers a lower screen option which would solve the problem.
The air cooled engine puts out a lot of heat and was uncomfortable when in traffic. Even my Macna Silicum mesh pants couldn’t flow enough air to combat the engine heat. But, once underway, I didn’t notice it.
The large diameter handlebar caused my smallish hands to cramp a bit, but the electronic cruise control provided relief on the throttle side.
 Handling
The Chieftain was dead stable and feels much lighter than its 848 pounds when at speed. The heft became more obvious during slow speed maneuvers. The bike behaves well enough, but it doesn’t take much to feel unbalanced. Once, making a tight u-turn, the 130mm front tire rolled over a rock causing the bike to drop into the turn…not enough to cause a tipover, but disconcerting nonetheless.
This tendency to bump-steer reared its head a couple more times while rounding tight hairpins when rolling over bits of gravel.
Ground clearance was pretty good for a long and low cruiser. The floorboards hit first during pretty aggressive cornering. Positioning my boots on the rearward edge of the long floorboards allowed a sporty and more balanced position where I could use my boot heels as corner feelers as they graze the pavement.
But I kept lean angles sane since the bias ply tires gave little feedback. Indian marketing man and FB friend, Robert Pandya noted that the Chieftain is sensitive to tire pressures. It had occurred to me during the ride that tire pressures could probably help the handling, so make sure you have the proper pressures.

The ABS-equipped brakes are strong and controllable. The rear brake pedal is huge with a forward surface that must contribute to a fair amount of wind drag at speed.
At almost $23,000 the Chieftain costs as much as my Subaru Crosstrek. It’s a mighty fine motorcycle, but for that kind of money, I’d want a smoother transmission, less engine heat and maybe a locking fuel cap. But, the bike is lovely (from most angles) and has a lot of nice features, including the great looking electronically locking saddlebags that provide a decent amount of waterproof capacity.
 The more I rode the Indian, the more I liked it. But, I couldn’t get used to the cumbersome slow speed handling (note to self to double-check tire pressures). The engine heat is somewhat bothersome and the “big and tall” ergonomics don’t fit me.
I’m a sport and sport touring rider, but I get why people like these bagger motorcycles. If the bike were a bit smaller, with a better looking fairing and more agility, I could probably be convinced to have one of these in my garage. Maybe a Scout would be just the thing.
If you liked this article and the many other articles on this site, please toss a buck or five into the hat. It’s greatly appreciated!
Why $2.00? Due to the PayPal fee structure, a $2.00 donation is significantly more beneficial compared to a $1.00 donation.
Thank You!
Check out these related posts:

Early last February, I got a text from Steve Lita, editor of Motorcycle Magazine-Rides and Culture asking me if I was available to attend the 2015 BMW S1000RR media launch. Why yes, I am.
 The Circuit of the Americas
The opportunity to ride the 2015 BMW S1000RR is certainly huge. But equally huge was the fact that I was going to ride the Circuit of the Americas (COTA) where the official North American Media launch was to take place.
When I flew into Austin, I got a birds-eye view of the 3.4 mile track with its 251-foot viewing tower and sweeping turns bordered by massive amounts of red, white and blue paint. What I wasn’t able to see from so far up was the 130 foot change in elevation. Photos and on-board videos do no justice to the hill approaching turn 1. If you want to place a bet on racers who speed through tracks like this, a platform like UFABET คาสิโนออนไลน์ที่ปลอดภัย may have some welcoming bonuses.
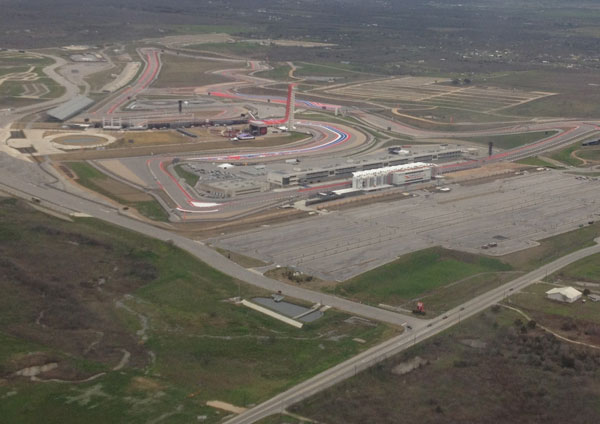 The track is fast with many triple-digit corners and a 3/4 mile back straight where I saw 175mph on the digital speedo. Many people say that the track is difficult to learn. I found it not too challenging (I found Barber to be trickier).
It took me two sessions to get the turn 2-7 series of Ss figured out, but I never found consistent reference points in the turn 8/9 blind chicane and the turn 17-18 segment confounded my lack of discipline to stay wide until just the right time. Another two sessions would have done wonders (we had 4 sessions, total).
In the end, I got along with the track just fine. My lap times weren’t great, but hardly embarrassing either. And I didn’t crash…not every journalist was able to say that.

Anytime someone shares their impressions of a bike’s performance you should find out a bit about who is doing the reporting. Without the context of the rider’s experience, you may end up with a false impression based on biases or lack of real-world knowledge. A reporter who has little experience on a supersport machine will come to conclusions that may not be useful or accurate. On the other hand, reading a review written by a professional road racer may not be meaningful if you never plan to take the bike to the track.
I am a street rider, track day instructor, occasional road racer and motorcycle safety professional who focuses primarily on advancing riders’ skills. This means that I’m able to evaluate a motorcycle from many different angles (pun not intended) and convey the bike’s capabilities, not only as a track bike but also as a potential street mount.
Since this was a racetrack launch and performance review, I needed to ride the S1000RR hard enough, but not risk tossing the $19k machine down the track. I had ridden S1000RRs before…the one I crashed (read Part 1) and another one that I didn’t crash. I’ve also ridden a handful of top-shelf liter-bikes on racetracks on the East coast, but nothing approaching 200hp.
I may have been seconds-slower than the faster guys, but the data on the instrument cluster indicated that I was using a decent amount of deceleration force and the fancy lean angle gauge said I achieved a respectable 54 degrees of lean to the right, but only 51 degrees to the left.
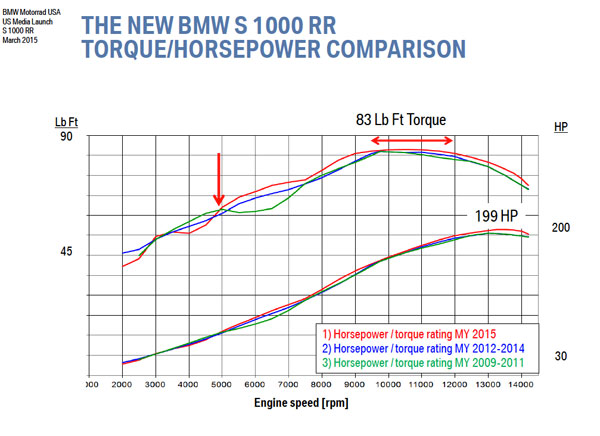 Riding the S1000RR
The S1000RR is both a wolf in wolf’s clothing and a sheep in wolf’s clothing. The headlights, turn signals, heated grips and cruise control say “streetbike”, while the space shuttle power, ultra-light throttle action and racey geometry say “race weapon”.
Thankfully, the 2015 RR is a sweetheart when it comes to power delivery. The fueling is impeccable and linear. Still, we are talking about a 199hp (claimed at the crank) bike that weights 457 pounds soaking wet.
Compared to the first two generations of S1000RRs, the 2015 model is a comprehensive redesign of engine, frame, electronics and performance. The Pirelli SuperCorsa SP street/track day tires took a couple laps to warm up in the very humid 60 degree Texas morning air, but then provided confident grip and stability.
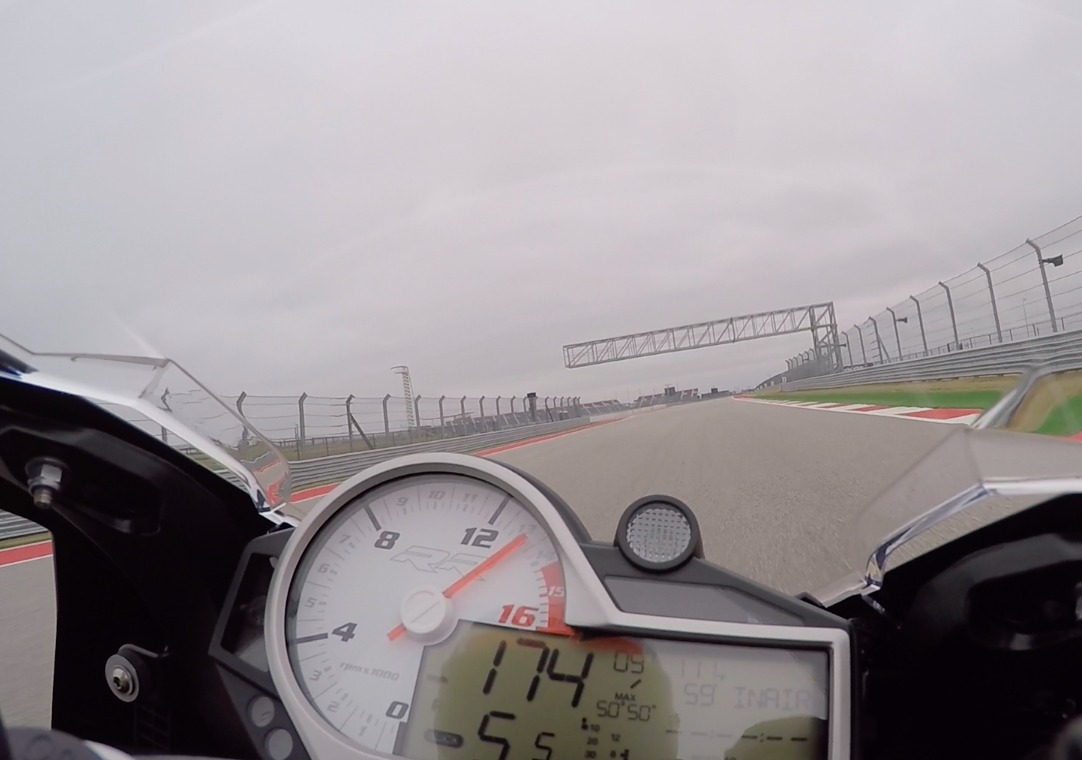 The first time accelerating down the long back straight took my breath away. 160, 165, 170. Holy shit. And the throttle wasn’t even quite fully open. Subsequent laps saw the speedo top 175 mph and there was more power that I was leaving on the table.
The Gear Shift Assist Pro helped me reach this lofty speed with clutchless upshifts delivering uninterrupted power from second gear to 6th. The clutchless downshifts are a RR exclusive for 2015 (others will offer this feature very soon, I predict), allowing me to bang down on the shifter (or up for GP shift) as it auto-blips the throttle for mostly seamless shifts.
The upshifts worked great once I stopped pre-loading the shifter (it confuses the electronics). But, the downshifts were less cooperative no matter what I tried with one of the bikes not downshifting without doing it the old-fashioned way. Also, the shift lever felt vague, causing me to wonder if the tranny actually made the downshift or not. The transmission is buttery smooth, BTW.
Here’s the on-board video:
OK, high speed runs are exhilarating but don’t hold my attention for long. The 2nd gear hairpin at the end of the straight…now THAT got my attention! At that moment, my focus was 100% on braking power and stability.
Thankfully, the Brembo calipers (and 320mm rotors) provide wonderfully powerful and precise lever action, allowing hard, fade-free braking as well as precise trailbraking control and feedback. The RR is so stable under hard braking that it felt almost like cheating. The electronic Race ABS surely plays a role in instilling confidence, but it’s the ABS in concert with the anti-lift (stoppie) control, slipper clutch, semi-active electronic suspension damping and the superbly balanced chassis that really raises the bar.
Not that I ever really noticed any of those things…not because I wasn’t pushing hard, but because these e-aids are so finely tuned. I did notice when the anti-lift control was shut off as the rear tire skimmed the tarmac during one particularly aggressive corner approach. Race ABS and anti-lift can be set for various levels of intrusion using either the rider modes or by selecting a’ la carte under User mode. More about the electronics can be found below.
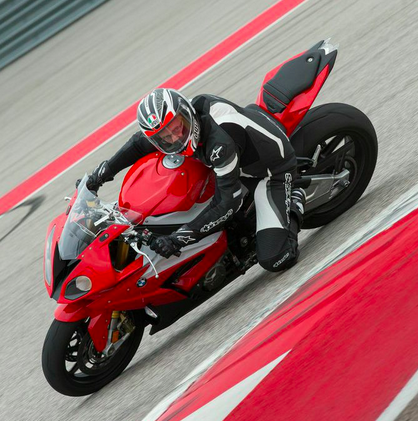
Swinging a leg over the RR immediately reveals a lithe package. Once underway, the bike felt to me like a slightly heavy R6, and at 457 pounds (wet) it’s only 40 pounds off. That seems like a lot, but the power and chassis engineering mask that weight. The agility became apparent in the fast Ss, the blind chicane and the switchbacks. The chassis was dead stable when trailbraking and cornering at fast, knee down speeds.
The fully adjustable suspension on the base model is more than good enough for most people. But I’d spend the extra dough on the Dynamic Damping Control. It responds in milliseconds to changes in braking, cornering, accelerating and road surface. It’s like having an on-board suspension expert tweaking the clickers as needed for the best grip, drive and stability.
I didn’t get the chance to ride the bike on the street, so I can only speculate on how the RR will perform as a day to day companion. But, in my estimation I bet the combination of light weight and impeccable balance will make the RR a sweet day-to-day mount.
It wasn’t long ago that I would think someone was crazy who suggested that an almost 200hp bike would make a decent street bike, but the S1000’s fueling is so good and the power so controlled that it is indeed viable. It has all the right features to make a fine street machine…gobs of easy-to-use torque, a ton of electronic stability aids and a reasonably comfortable ergonomic package. The cruise control and heated grips also help.
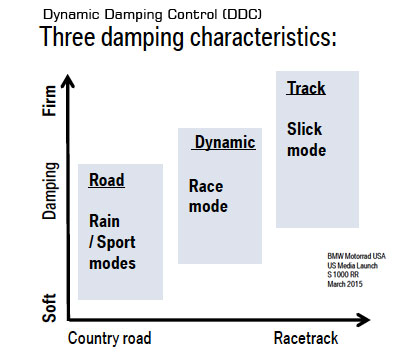 Living with Electronics
Electronics have become a huge part of modern motorcycle engineering and the RR has ample amounts of e-technology. The RR has Lift (stoppie) Control Stability control and Race ABS to help going from 175 to 35 an almost drama-free experience. More intervention happens in Rain and Race rider Mode (This should be called Street Mode, IMO) and very little interference in Slick Mode (the mode I rode in most of the day).
Stability Control (base model) and 14-step Traction Control (Standard and Premium Packages) also intervene appropriately to match the 3 (Base) or 5 (Optional) rider modes. The Premium packages include “User” mode which can be customized almost infinitely to combine rider modes, TC and ABS settings.
All this manifests into a very sophisticated machine that can mitigate (and mask) the consequences of some mistakes. This gives a lot of confidence, but make no mistake…you can still crash this bike, so don’t get too cocky.
With this number of electronic options comes a learning curve. It will take a dedicated and savvy owner with about a season of track time to discover all the potential of the RR. I also wonder how the electronics will fare over many miles of normal exposure to weather and time.

Buy one. You’ll spend $15,500 for the base model, which is a good value for an excellent machine. For $16,795 you get the Shift-assist Pro, cruise control, heated grips and upgraded TC. But, I suggest you fork over the $18,695 for the DDC and forged wheels. It may mean you eat spaghetti out of a can for a while, but you won’t regret it, especially if you ride on the track.
Please look for the article I wrote for Motorcycle Magazine-Rides and Culture where I go into greater detail about the electronics and features.
BMW S 1000 RR COTA PRESS LAUNCH from mybmw on Vimeo.
If you liked this article and the many other articles on this site, please toss a buck or five into the hat. It’s greatly appreciated!
Why $2.00? Due to the PayPal fee structure, a $2.00 donation is significantly more beneficial compared to a $1.00 donation.
Thank You!
Check out these related posts:

 I get a lot of questions about which products I use, so I’m adding a new blog category where I can share some product reviews. Many of the products I am writing about are ones I actually use and can recommend. If I have reservations about a product, rest assured I will tell you.
Many of the products are available through Twisted Throttle. This is because I have a special relationship with the company, so I get an nice discount (No, I can’t get YOU that discount, yeesh). Understand that I don’t use crappy products, even if they are discounted! Thankfully Twisted Throttle sells some of the best, highest quality motorcycle products around.
 If you choose to buy any product from Twisted (not just ones I feature), please buy from their site through the links in this post, from the ads in the sidebar, or by clicking on the product images at the bottom of this post. That way you help support Riding in the Zone. You don’t have to do anything more; just click and shop as you normally would. Much Appreciated!
The MRA X-creen (yep, it’s spelled without an “s”) is a spoiler blade that either clamps or bolts onto your existing windscreen. I bought the MRA for additional wind protection on my Sprint RS street bike, but soon figured out that it works great clamped to the flyscreen of my Triumph Street Triple track bike. I can adjust it upward for colder days and when my neck gets tired from windblast. I can also move it downward for maximum airflow on warm days.


The X-creen comes in two sizes, the smaller Sport version and the taller and wider Tour version. The larger Tour model comes specifically with either clamps or bolt-on hardware. Both models are available in clear or smoke. I have the clear version for my Sprint RS and smoke for my Street Triple.
Assembling the adjustment mechanism to the spoiler blade is pretty easy. You have to first decide whether you want to use the clamps (this is what I use) or use the bolt-on hardware for a permanent installation. The clamp-on version allows you to move the blade from one bike to another. The clamp hardware is really nicely made and utilizes rubber inserts that will not scratch your windscreen (or paint in the case of my Street Triple’s flyscreen).
Assembling the clamps involves placing the pivoting locking mechanism in the ends of the adjustment arms. This takes only a few minutes.
No, the clamp-on version will not go flying off as soon as you hit highway speeds. As a matter of fact, I’ve done 130 mph (on the racetrack of course) and the blade stayed securely in place. See the video below for proof!
General Installation Instructions can be found HERE.
If you choose to bolt the blade on permanently, you’ve got more work to do. Specifically, you’ll have to drill two holes in your existing windscreen. The kit comes with a template for locating the holes. If this makes you queasy, Twisted Throttle sells MRA replacement windscreens with the X-creen already bolted on for specific bikes. Even though replacement screens cost a bit more, some people may feel better having MRA do the drilling and installing at the factory.
Installation instructions for drilling can be found HERE.
If you decide later to use the X-creen on a different bike, but don’t want to drill any holes, you can convert a bolt-on screen to a clamp on screen using a special conversion hardware kit. Note that this is for the TOUR version only. The SPORT version comes with both clamp-on and bolt-on hardware.
Four videos on how to install the X-creen can be found on the Twisted Throttle Product Page.
The X-creen is unobtrusive, and dare I say, I think it’s even attractive, especially on the Sprint RS where it fits nicely on the stock screen and isn’t out of place on this sport touring bike.
On the Street Triple, it is a bit less graceful looking, but I think it looks as good or even better than many other windscreen options, including the Triumph factory flyscreen visor kit, which requires you to drill the flyscreen (Yuck), almost completely covers it over (why did I buy a flyscreen to begin with?), and doesn’t add very much wind protection. Oh, and it’s kinda spendy.
But, judge for yourself. Here are some photos of the MRA X-creen on a Ducati Multistrada, my Triumph Sprint RS, and my Triumph Street Triple R.
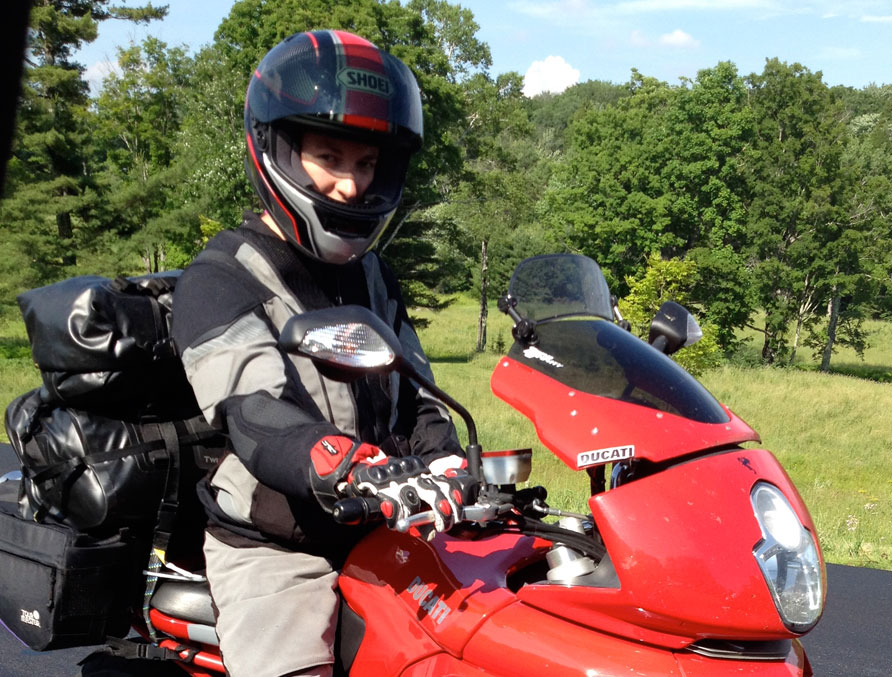
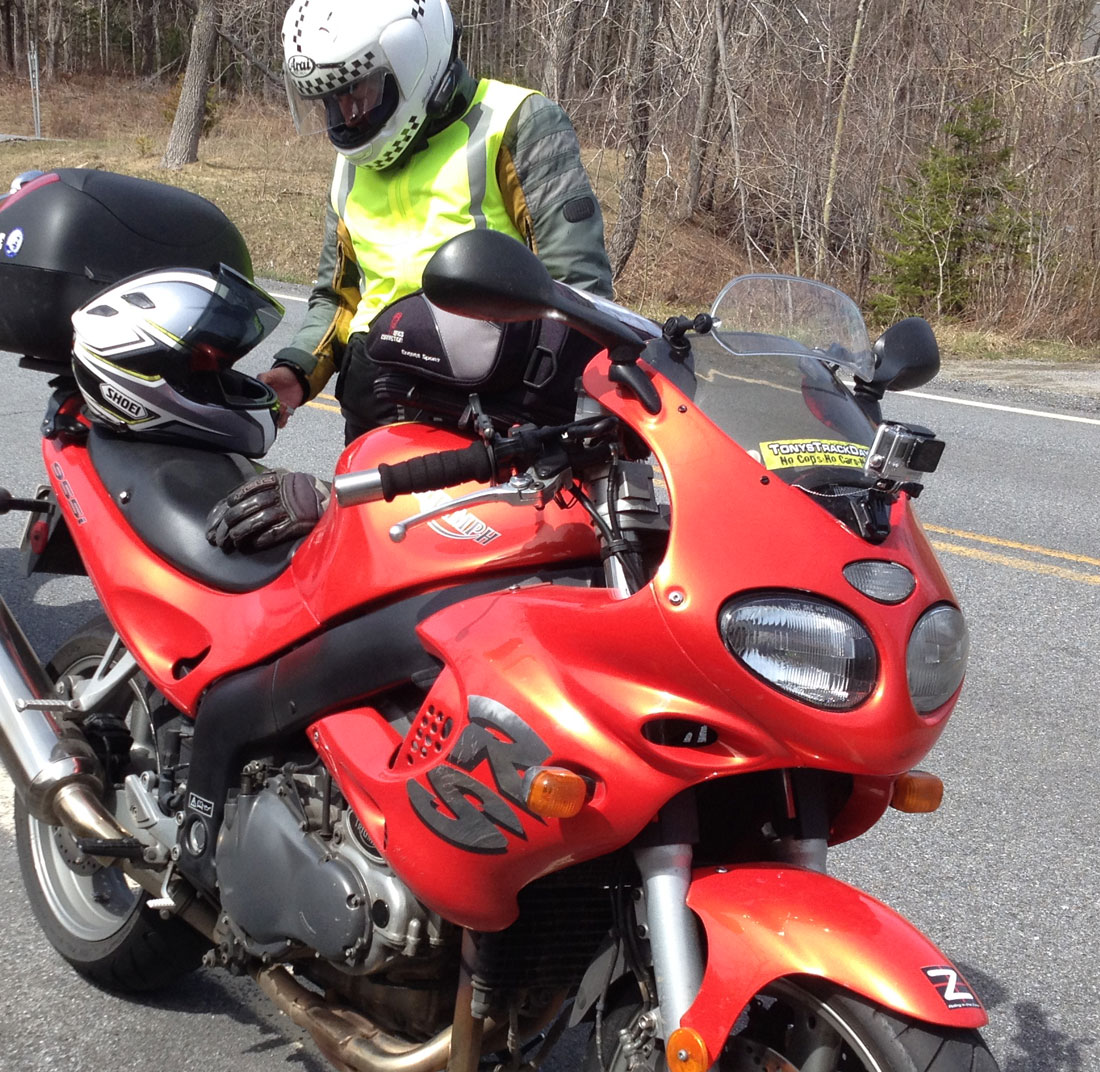
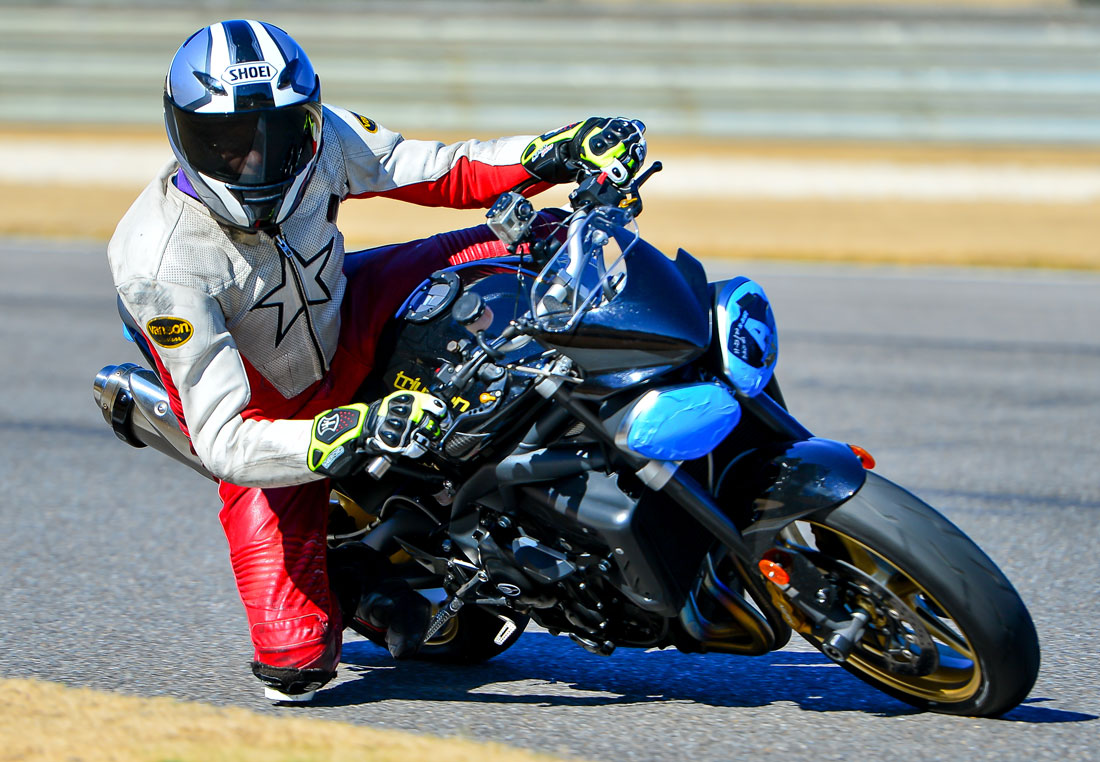
Adjusting the screen when it’s new requires some rough handling…sort of like when you replace face shields on Arai helmets: you feel like you’re going to break the ratcheting mechanism, but it’s okay…that’s just the way it is. Thankfully, after a bit of use, the mechanism loosens up and I can now adjust the screens while sitting on the bike (not while moving of course). All you do is turn the teardrop-shaped locks until they are pointed sideways and grab both sides of the screen and rotate into the position you want. The adjustability is almost infinite.

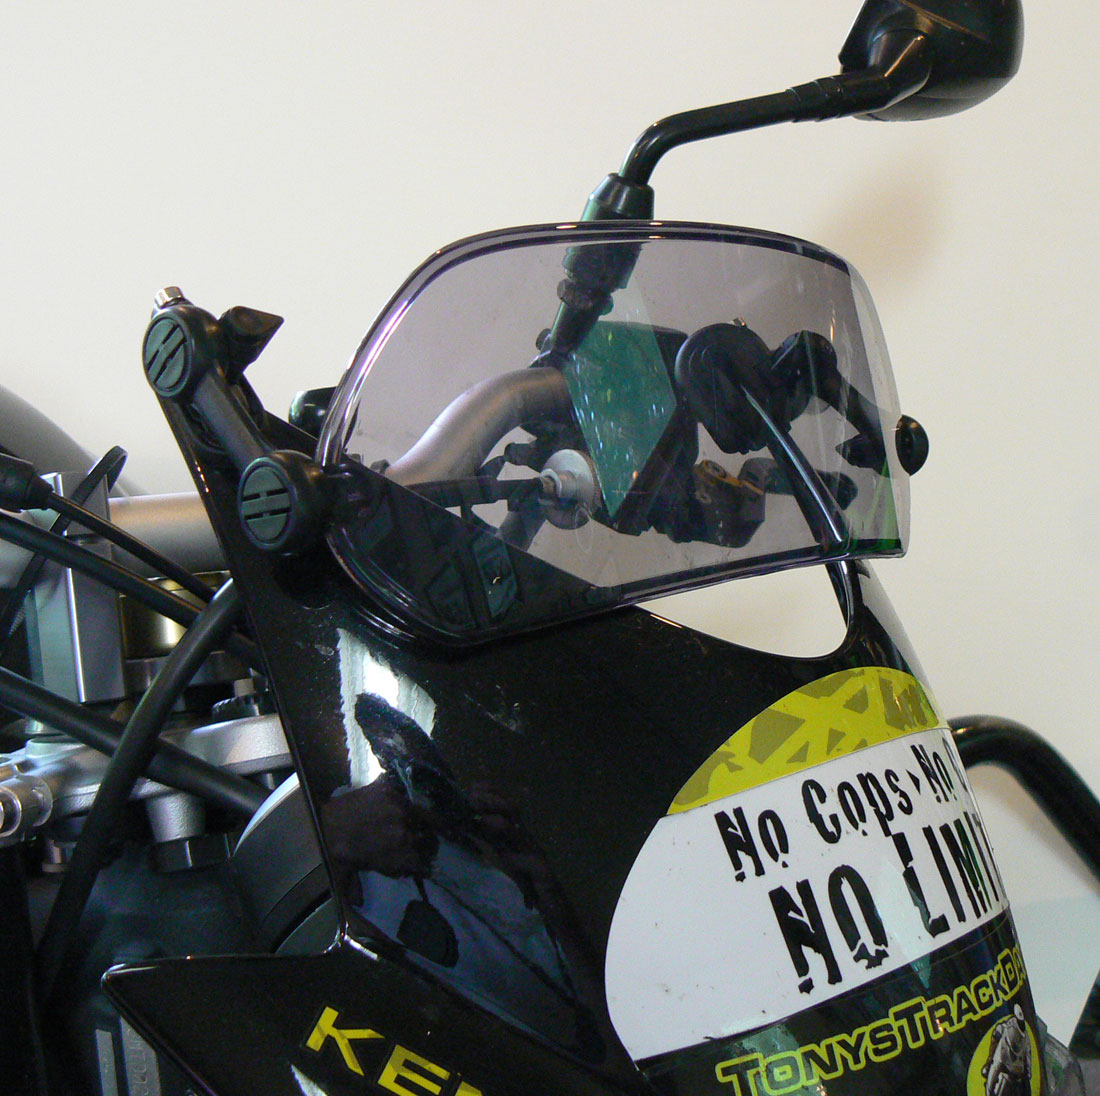
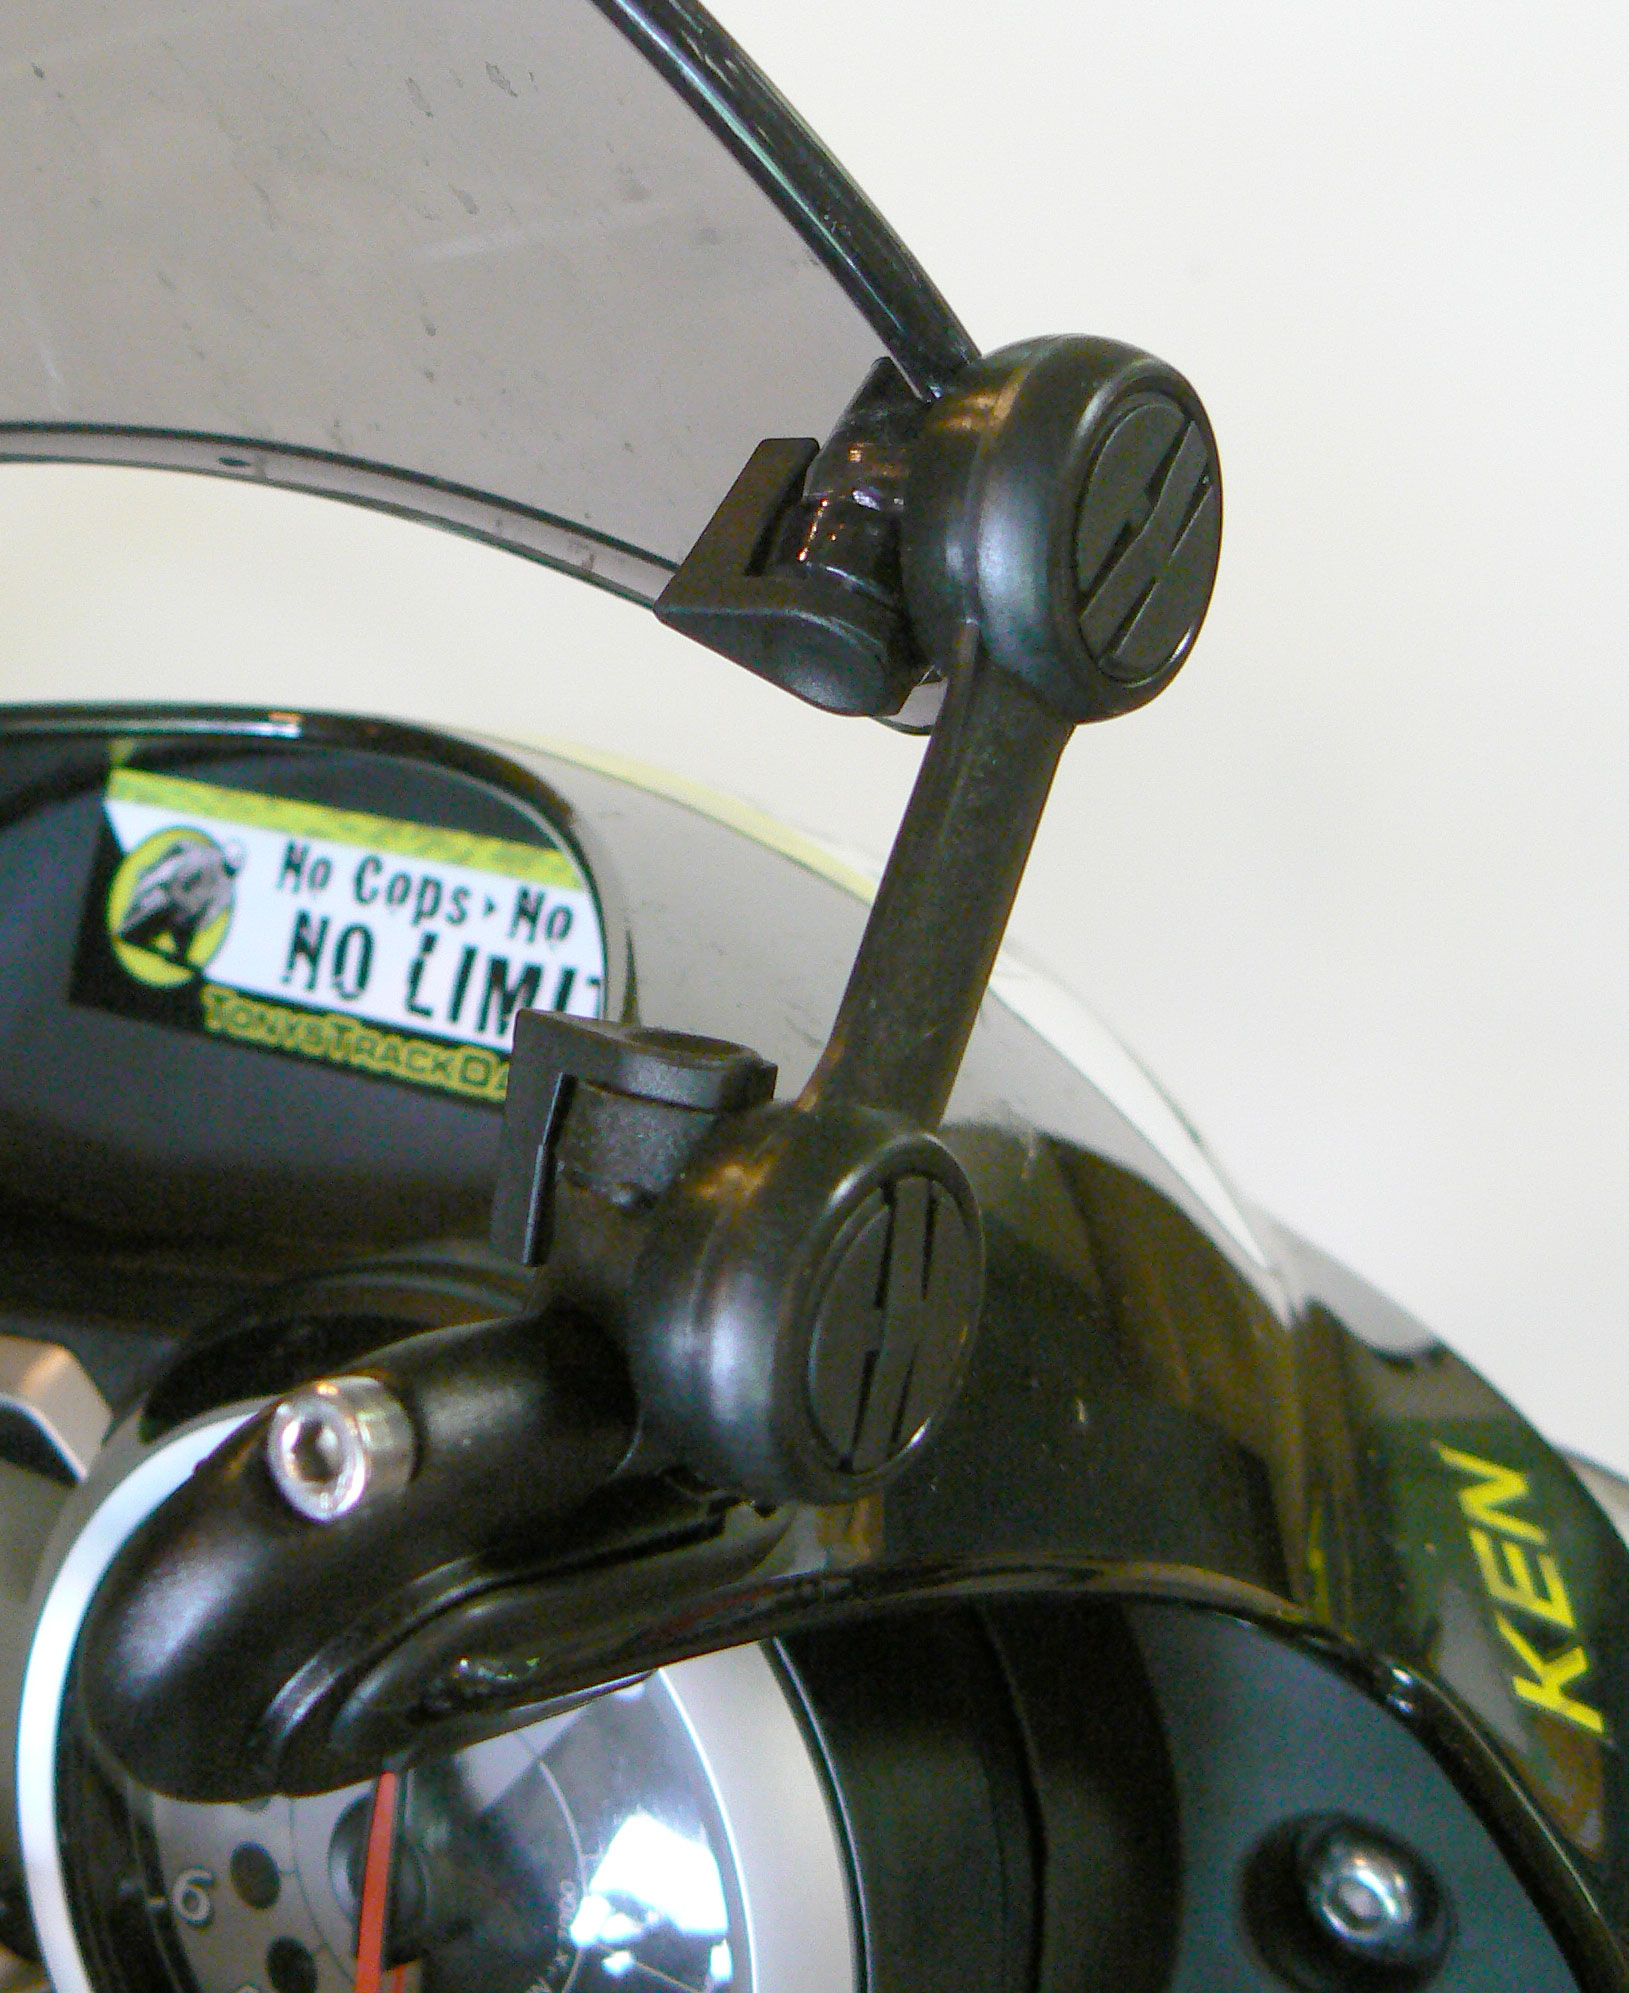
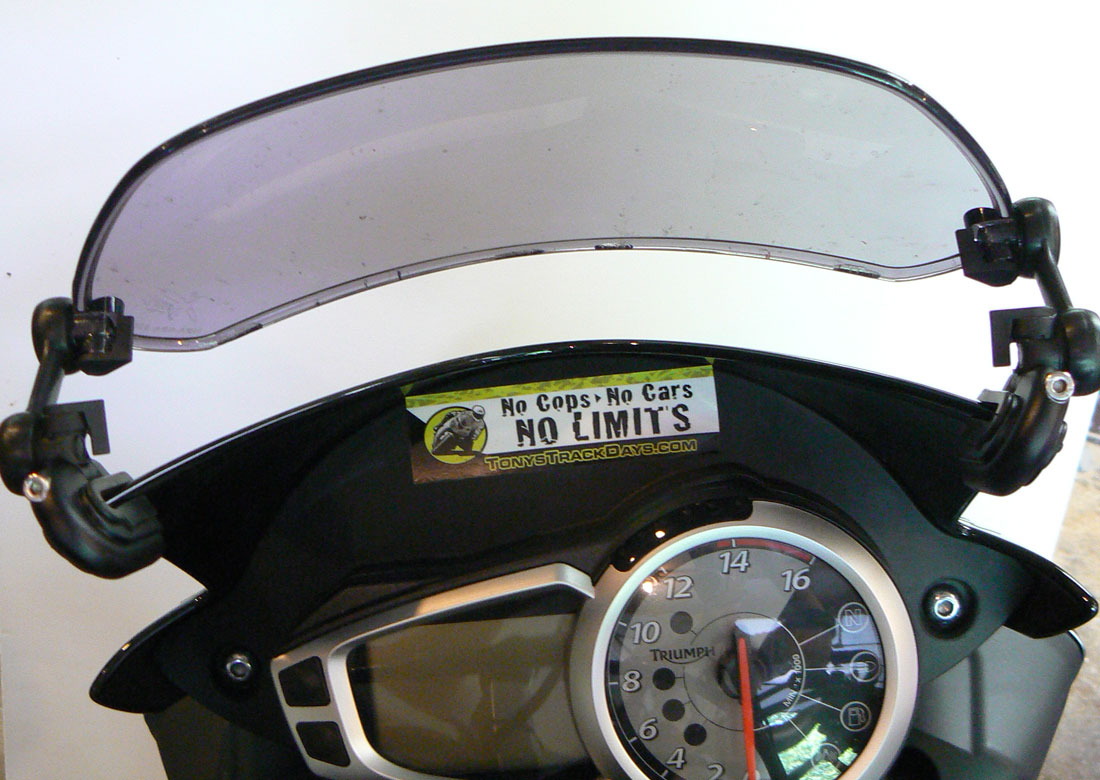
Once positioned, rotate the locks and the screen won’t move. Trust me! I’ve been using the X-creen on the racetrack all season and it doesn’t move even at 130mph! See the X-creen in action in the video below.
As far as wind noise goes, The Sport version seems to be perfect for the Sprint. I do notice a bit more wind noise with the blade set vertically, but simply tipping it back a bit makes any wind noise go away. I’ve never felt any buffeting, at all. The fact is that the X-creen is so easy to adjust and has almost infinite positions that if I ever had excessive noise or buffeting, I’d simply try a slightly different position. I love having that versatility.
So, there you have it. The MRA Sport X-creen is a great accessory that offers a tone of versatility to you touring, sport touring, adventure or sport bike. It retails for $114.99 from Twisted Throttle.
Let me know what your opinion is of this product. And ask me any questions you have about the X-creen by posting in the comment section below. I’ll reply so everyone can benefit.
If you liked this article and the many other articles on this site, please toss a buck or five into the hat. It’s greatly appreciated!
Why $2.00? Due to the PayPal fee structure, a $2.00 donation is significantly more beneficial compared to a $1.00 donation.
Thank You!
Check out the other Recommended Products from Twisted Throttle and Amazon 
I’ve ridden all sorts of motorcycles, from Harleys to sidecar rigs, to all manner of sport and touring machines. But up until a couple of weeks ago, I had never had the chance to ride an electric motorcycle.
Thanks to Eugene Morin of Seems Electric Vehicles, I was able to cross that off my bucket list. The bike Tony (Tony’s Track Days) and I rode was the Zero “FX” , which is the dual-sport model. This particular motorcycle is outfitted with police lights and siren for the Block Island, Rhode Island Police Department. Eugene has outfitted machines for the Newport, RI men and women in blue, as well.
The number one question I get when I tell people that I rode an electric bike is how long will it run on a charge? According to Zero’s specifications for the FX, it can go for up to 35 miles with a single battery configuration, or 70 miles on a dual-battery setup. This is for what they call “city” riding. 70 mph highway riding causes the battery life to plummet to only 15 miles with the single battery and 30 miles with the dual battery.
But, this dual-sport model is perfectly suited for the job it is intended for: curb jumping, rock hopping and general shenanigans, and not for droning on a highway.
The Zero FX puts out 70 foot-pounds of torque from the moment you twist the throttle. The unit we rode had just a single battery, but a second battery is available that provides more horsepower (but the same torque). With 70 foot pounds of torque from the bottom, the bike jumps to life, reaching 60 mph in 4 seconds! Yahoo!
However, once underway you quickly find the top end of its 27hp (44hp with two batteries). Max hp is reached at just 3,750 rpm. Flat out, baby.
Tony and I took the little FX in some dirty parts of Thompson Speedway’s infield, dodging construction equipment and roosting the rear tire to see what the potential is for trail riding. In four words, “it is a blast”. This is more of what the FX is made for.
There is no gearshift lever or clutch to modulate, just twist the throttle on and off to regulate speed and power. With fully- adjustable suspension, the bike will handle most anything you toss in front of it.
On the racetrack, it was lively, but ultimately, it fell flat once you got the motor wound up. Max speed is 80 mph, but I wasn’t comfortable going much over 60 on the dual-sport tires. The bike only weights 240 pounds, so it was light and flickable. Perfect for off-road or city riding, but out of its element on a pavement racetrack (or extended highway riding).

We didn’t mess too much with the power modes, but there are some. One mode delivers a mellow power delivery, while the other snaps to attention with a bit more authority. There is much more to learn about all the settings. I can see the potential for some riders to just hit the “easy” button and ride happily for weeks.
Riding the Zero FX was a pleasant surprise. I expected scooter-like sensations. What I got was the power and responsiveness of a real motorcycle. It’s combination of liter-bike torque with 250 Ninja horsepower is something I’d have to get used to. But, that torque is enough to satisfy me and make me want to ride the Zero more and more.
The other observation that stands out when riding the Zero is that something visceral is missing…sound. What you hear when the bike is stationary is complete silence. Tony had to ask whether the bike was “running” or not. It was. There is an ignition key and some safety switches to prevent accidental launching, which is a good thing, because it is impossible at a quick glance to know whether the thing is loaded or not. Until you get used to the immediate torque and the safety systems, it’s probably best not to point it at any solid objects before you’re ready to roll.
Electric bikes are definitely something I am interested in. I can imagine stealthily working my way through the woods or traffic with just the whistle of the wind, the whine of the tires and the whirring of the Z-Force® 75-5 passively air-cooled, high efficiency, radial flux permanent magnet, brushless motor to remind me that I’m on a motorcycle.
The range may be a problem, but not if you use it for what it’s designed for. A bike like this would be a great trail bike and commuter. I would keep my Triumph Sprint for long-haul duty and my Street Triple for the track.
The street versions offer more power and range and a more streetbike-like experience, or so I’m told. (Try 106 foot pounds of torque for the Zero SR!) Thankfully, Eugene promises to bring a handful of Zero Electric Motorcycles to a few Tony’s Track Days events for us to try (yes, customers can ride them, too). Join the TTD mailing list to stay informed.
For you loud pipes folks, I never believed that loud pipes save lives, so I am not concerned about any safety deficit. And even though I love the sufficiently muffled, but booming sound of a V-Twin, or the music of a spinning triple or in-line four in my ears, I can equally appreciate the silence of an electric motor. My neighbors will, too.
Imagine eliminating all the problems off-road and paved racetrack owners have now with neighbors who complain about loud motorcycles. Silence is golden, people.
Unfortunately, prices are still a bit high for my personal bank account to endure. The FX retails for $9,500.00 with a single battery or $12,000.00 for the two-battery setup. What you get is a unique, quality-built machine that happens to get the equivalent of 470 mpg (city).
Prices should continue to fall, so I suspect we will be seeing more and more electric bikes in the woods, on the street, and on the track in the near future. One may even appear in my garage before the next decade rolls around. But for now, I’ll have to stick to fossil fuel-consuming road burners.
Check out these related posts:
Subscribe to the mailing list!
If you liked this article and the many other articles on this site, please toss a buck or five into the hat. It’s greatly appreciated!
Why $2.00? Due to the PayPal fee structure, a $2.00 donation is significantly more beneficial compared to a $1.00 donation.
Thank You!
Check out these posts:
Be a Better Rider: Sign Up for Personal Training with Ken

My wife hates it when I dissect a movie after seeing it. She would say, “Can’t you just enjoy what it has to offer?”. Well, at the risk of alienating my RITZ blog readers who really want to like the “Why We Ride” movie, I will now poop on your parade.
Speaking of poop, please take my opinion as what it is. You know what they say about opinions? No? They say, “Opinions are like ***holes: everyone has one, and most stink”. Well, hold your nose because here is my opinion.
Before I give you my review, take a look at the trailer:
Pretty good, huh? Let’s see what it’s really like…

The trailer gives a good impression of the visual quality of the film, which is very, very good. The videography is beautiful and inspirational. But, what is up with all the slow-mo?
I love super-slow motion footage, especially the shots of Moto GP racers dragging elbow. And the footage of the rubber-mounted Harley Davidson XR1200 race bike engines rocking in their frames at idle made me LOL.
But, there is a thing called “too much of a good thing”. The slow motion stuff was cool for about half the film, but unfortunately, it went on and on and on and on.
And why on earth would you show only slow motion footage of race bikes on the high banks of Daytona and never show how it really feels at over 170 mph? I know plenty of friends who could have provided some awesome on-bike video that would have driven home the craziness of the Daytona banking at speed. All they needed was one or two trackside shots of a bike flying by to paint a better picture.
I’ll admit that the super-slow stuff is fun to watch, but it kinda distanced me from what riding is really like. I get that the director was wanting to set a tone of romance and wonder, but for an enthusiast, I was a bit bored toward the middle of the film, partly because the action wasn’t really engaging at slow motion. It comes off more as a parlor trick.
The sappy music department worked overtime on this film. Again, I get what they were trying to do, and I’m sure the violin music hit a sentimental chord (ha, ha) with a lot of viewers, but it tried too hard. Mix it up with some raunchy head smacking tunes now and again to represent the vigor that many of us experience when riding. I can understand why they might not want to represent motorcyclists as people who relate to AC/DC (or whatever floats your boat), but everyone knows that motorcycle riders aren’t typical people who gaze with soft-focus at our bikes with violin virtuosos playing quietly in the background. My iPod tends to stream tunes that are a bit less somniatic (It means “puts me to sleep”… and I know it’s not a real word, I looked it up).
The message this film delivers is “riding a motorcycle is fun”. Duh! I am reminded of the introductory video shown to new MSF students at the beginning of their first classroom session. It’s a lovely little diddy about the joy of riding a motorcycle. It includes many of the same things “Why We Ride” has, including fun action shots (at full speed) and interviews with interesting people. But, the message is delivered in about 5 minutes. “Why We Ride” took one point five hours to deliver the same basic message.
Granted, the film is intended to deliver more than a message, it is also about entertainment (maybe more so). So, in that regard it is worth the extra hour and 25 minutes.
Here is the Motorcycle Safety Foundation “Welcome to the Ride” video:
Yes. The fun shots of the families and kids are priceless, as are the interviews with some of my motorcycling heros, which makes the film well worth seeing.
I was totally loving the film during the first third and then they unmercifully started beating the poor dead horse. I get it, I get it. Riding is awesome and people who DO NOT ride are missing out on life. I couldn’t agree more.
It’s a movie that you will want your family and friends to see as an attempt to convey just why you ride a motorcycle. They still might think you’re nuts, but it’s worth a shot.
Both enthusiasts and regular people will like this film, as long as you don’t expect a groundbreaking classic here. For that, rent “On Any Sunday” , or if you love roadracing try “Faster” and the sequel “Fastest” (see trailers below).
But, that’s just my opinion…what is that smell?
On any Sunday:
Faster:
Fastest:

