First thing I learned is how to ride the bike the way it wants to be ridden. Don’t fight your bike, learn about its wants and needs. If you decide to purchase a new motorbike, hire a reputable motorcycle shipping company to ensure that your vehicle is safely delivered to you.
1. The Tuono turns in great, but doesn’t hold a line mid corner without some effort. To remedy that, I need to get a lot of weight over the front end. Much better. I ended up lowering the front end (by sliding the forks up by 3mm in the triple clamps, which cured much of the mid corner effort.
2. The Tuono feels a bit cumbersome at half pace. Like a lot of harder edged sportbikes (and race set ups), it can be tough to get the Tuono to change direction (even with the tall bars). However, pick up the pace and all is well. Also, lowering the front helped. as well.
3. The stock suspension is soft, even for my 150 pound physique. Thanks to Peter Kates from GMD Computrack Boston for adjusting the Sachs suspension to the best it’s going to get. A lot more preload helped settle the bike in the fast transitions. But, even though the suspension is “busy”( moves around at full lean over sustained bumps). I’d surely need to spend some bucks on better boingers if I want to go much faster with less effort.
4. I tend to drag my boots in corners with mid-corner bumps. Not becasue of low footpegs, but becasue of the soft suspension. More preload and more aggressive body positioning helped.
5. If you have not ridden a liter bike at a track day, then you probably haven’t had to think about “big biking” people who are on slower bikes whose rider is faster in corners. It’s courteous to be aware that you may be holding up someone. Be kind and ease up on the straight every once and a while.
6. The Tuono puts down about 150hp. That’s great, but having power can fool you into thinking you’re fast. Sure, my overall lap times are better, but my corner speed is about the same as on the 130hp GSXR and even the 95hp Street Triple.
7. High handlebars suit my riding style. I never felt as comfortable on the GSXR as I have on the Street Triple or the Tuono. Riding a high handlebar bike fast requires you to hold the inside grip like a screwdriver to allow your upper body and elbow to dip low inside for the most effective body position.
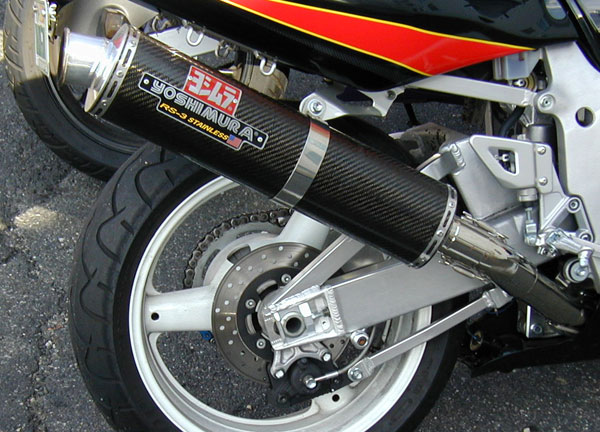
8. Tire wear has been surprisingly good. I thought the bike would eat rear tires, but it’s been fine. I strive to be smooooth and the Tuono gives me more confidence to open the throttle early so I spread the drive over the whole edge-to middle part of the tire, instead of lifting before triggering the 150 hp. See photo.
9. Traction control is quite abrupt. I was exiting turn 3 at Thompson Speedway when I thought the chain had jumped a few sprocket teeth. It turns out I had inadvertently hit the TC button located on the left control pod and increased the setting to 5, causing intervention. I thought this indicated a spent rear tire, but putting it back to the less intrusive #3 out of 8 (1 being least intervention), the tire was fine.
10. The Arrow exhaust (with db insert) sounds amazing. But, it’s rather quiet compared with a lot of other track bikes. And I’m okay with that. The V4 still sounds like a hot rod.
Here’s a little tour of what’s in my dirt riding gear closet. Maybe this can help you decide what gear is right for you. Please, please, please protect yourself when riding off road.
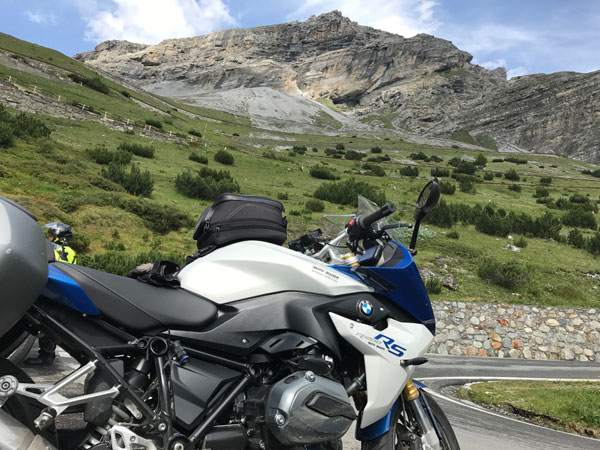
Have you ridden a motorcycle in Europe? If you have then you’ll probably agree that not much beats experiencing Europe’s history, culture, food, foreign languages and epic scenery. Riding the mind-spinning Alpine passes and ancient cobblestoned village streets is life changing.
If you haven’t ridden in Europe, then you really should try. Traveling in a foreign land expands your experience like no other.
Let’s take a look at a few ways to tour Europe by motorcycle.
Ways to Go
There are lots of ways to travel abroad, including renting motorcycles, booking hotels and devising an itinerary on your own. Coordinating all the pieces of your trip is certainly doable and will usually save you some money. But, this requires planning for things you probably won’t know about if you’ve never been to Europe before. The success of a self-guided tour depends on you’re level of adventurousness and ability to handle stress.
Hybrid Tours
Another option is to sign on with someone who knows the ropes and does all the heavy lifting for a fee. My first long tour was with Ironstone Adventures, run by a longtime colleague and friend Joe Proia. Joe is paid $500 to arrange for rentals, hotels and guiding the tour. You then pay the hotel, restaurant and rental bills yourself.
Joe has been doing informal tours for a long time and usually fills his slots with friends and friends of friends. In 2017, Caroline and I were joined by former RITZ students and acquaintances of mine from New England Riders.
The week-long trip with Joe was a ton of fun. We rode many of the most notable passes; Stelvio, Gavia, etc. He knew where to stay and had friendly connections at hotels along the way.
We followed Joe like ducklings through the Alpine passes and villages. This is how many tour companies manage their tours. The problem is that you’re stuck riding the pace of the leader and the group. You can usually pick a slower or faster group, but there is no guarantee there is a group suitable to your ability or goals. Some people want to stop often to sight-see, whereas others want to just ride big miles and see the sights from the saddle. It turned out that our group was well matched.
*Disclaimer: I participated in Beach’s Italian Idyll tour as a resident riding coach. Many of my expenses were paid and I am hoping that some of my readers will join me when I go again. See more information about the training feature here.
The Italian Idyll is a two week tour of central Italy. The tour starts in Florence and makes a 2,600 km (1,600 mile) loop through Tuscany and Umbria, to the Adriatic before looping south and west to Rome and then to Sienna on the way back to Florence.
What’s great about this tour is how Rob and Gretchen Beach encourage you to set off on your own or form a small group. You certainly can follow behind the Beachs, but don’t miss the opportunity to explore at your own pace. There is no need to fear getting lost. Beach’s provides GPSs pre-loaded with at least three route options that end at the next night’s hotel.
Our group mixed it up quite a bit. I rode with Rob and Gretchen (who ride two-up) and most of the group for several days. But I also rode alone and with one or two other riders when they were students. We had a couple on two bikes who often took of on their own to explore side areas along one of the routes. They essentially customized the tour.
The bikes we rode are brand new BMWs; I rode a R1200GS with full luggage. Not only are the bikes top shelf, but so is the lodging and food. I never expected to stay in a medieval village or renovated monastery or villa. And the food! Amazing variety and quantity.
It isn’t all riding. We have double overnights along the way where we explored the sites each region has to offer. During these free days you have the option to strike out on your own, take a walk in the city or village, or just chill at the hotel.
A chase van means you don’t need to carry gear.
At around $8k, the two week tour ain’t cheap. But you get top shelf accommodations, great food and a GPS equipped BMW. Oh, and a chase van is there to schlep your belongings from one hotel to the next. And you get a super-duper gear bag and tour book.
Rob and Gretchen hit the road about 9:00 after breakfast. But, you have the option to leave later or earlier. The days range from 150 to 170 miles and we usually arrive at the hotel around 4:00. That may not seem like a lot of miles, but the roads are rural and curvy and we stopped every couple of hours for an espresso or gelato in the small medieval towns.
Plenty of time to sight see This tour is all about riding and sightseeing. You will see such a wide range of Italy. We literally rode by and through over a hundred medieval towns perched on hillsides. And we stopped at the most interesting ones. Mmmmm Gelato.
Take a look at these two videos to get an idea of some of the roads.
I’ve done my share of riding in Europe and this tour was the most comprehensive in terms of quality riding, accommodations and food. I’m a frugal Yankee who doesn’t usually spring for such quality hotels and food. But, this has sold me on the value of getting what you pay for.
It’s a lot of money and is not affordable for many, but if you want to treat yourself and your partner to the best, then Beach’s is worth serious consideration.
Plan Now
A motorcycle trip to Italy or Europe is no trivial matter. It’s expensive, even when you do it yourself. Shop around to see which way is best for you. But, go! We Americans tend to stick close to home, becasue we have so much to see in our great land. But, visiting other cultures is priceless in expanding our tolerance and understanding of the world. And to do it on a motorcycle is a special bonus.
Bone Up
Depending on what part of Europe you are planning to ride, you’ll have a more enjoyable and safer time if you get some professional training before you go. It’s not unusual for Americans to become a bit overwhelmed with the technical nature of the roads, especially when riding in the Alps.
Two of the attendees on the Ironstone Adventures Alpine tour scheduled a training day with me that prepared them for the rigors of riding relentless twists and turns.
Several attendees on thew Beach’s tour took advantage of the available coaching that helped them negotiate the challenging central Italian tarmac.
Like politics and religion, it’s usually a very bad idea to bring up the Loud Pipes debate in mixed company. But, this website is here to discuss such topics, because your well being is at stake.
Before you assume this is an anti- or pro-loud pipes opinion piece, rest assured that I am sympathetic to both sides of the argument and you will discover here which tells more about the best pipes durability and performances. I’ve had bikes with loud exhaust and stock exhaust.
My intent for writing this article is to shed light on the effectiveness of certain strategies for surviving the streets on a motorcycle, including loud pipes.
First, let’s discuss whether noise is effective at getting drivers’ attention. Before that can be answered fully, we must first define “attention”. A loud noise intended as an alert, such as a siren (EMS or law enforcement), a fire alarm, or a horn is perceived as something that requires attention and triggers immediate response. Additionally, if you’re a property owner and your fire alarm system or water-based fire protection system is not functional, then you are required to implement a fire watch. You may seek expert help from a professional Fire Watch Company in Miami Lakes.
The appropriate response depends on the noise. A siren heard while driving means you need to pull over. A blaring horn means you may be about to collide with another car (or the other driver is just being a dick). Either way, you snap out of any stupor you may be in and frantically look for the problem.
A siren blasting from a municipal building means a risk to the public, like an approaching weather or seismic event. Even this depends on where you live. In Kansas it’s likely to be a tornado. In California, think earthquake. It also depends on where you are. In a movie theater this may mean fire. You get it.
An Example
Did you know that drivers colliding with stationary construction crews is a big problem? Hard to believe, but I guess it’s a thing.
Several methods have been tried to mitigate this all-too-common problem with the latest being sound. An article from the Iowa DOT talks about their trial using audible attenuators to alert drivers of construction crews in the roadway. Read the article here.
Below is an accompanying video demonstrating the attenuator. Take a look. I’ll wait.
Loud Exhaust
Many of you will take this attenuator solution as justification to run loud pipes.
But, hold on. There are differences between this system and loud motorcycle exhausts.
Noise Direction
Considering that exhaust noise is directed rearward, is a loud exhaust more effective in this situation than being seen?
One big difference between the attenuator and loud bike exhaust noise is that the attenuator is directed toward the driver and is accompanied by bright flashing lights. The sound from a motorcycle exhaust is mostly directed rearward.
Sirens and horns are pointed forward for a reason. And when you consider that most multi-vehicle motorcycle crashes come from in front, not behind, you can see the argument against loud pipes being responsible for saving lives.
Also, sound bounces off buildings, etc and is absorbed by vegetation, etc. This means that locating the source of the sound is tough. And the time it takes for a driver to identify your location could be way too late.
Can You Hear Me Now?
Modern cars are well-insulated from sound.
Another argument against loud pipes is that even the loudest exhaust may not be heard and then responded to in time. This is because cars are sound-insulated to the degree that moderately loud music or an AC fan on high can mask, mute or muffle the sound until it is just part of the background noise.
An open window certainly helps in this regard, but almost every vehicle on the road today has efficient air conditioning, which means fewer and fewer people drive with windows open.
Loud pipes are seen (and heard) on sport bikes, as well as cruisers.
OK. Let’s assume that your loud pipes alert a driver that you and your bike is in the vicinity. But, to avoid a collision requires the driver to know exactly where you are. Knowing you’re in the vicinity isn’t enough.
An example is a driver traveling in the same direction (you’re not riding in a drivers blind spot, right?) not being able to see you and then cutting you off. Unfortunately, your loud exhaust noise won’t tell him or her whether they can change lanes or not. They may look first, but maybe not.
One scenario that was pointed out to me that may justify loud(er) pipes is when in very slow traffic (think L.A.) and you are lane splitting. At these slow speeds it’s possible that a driver could hear a bike approaching from behind and will think twice about changing lanes. But, thankfully most riders don’t have to endure (or at least avoid) that extreme traffic situation, which brings us back to questioning th validity of the loud pipes strategy.
Mixed Meaning
Let’s assume that loud exhaust systems can get attention. But what exactly is the noise conveying? It’s not telling drivers’ to pull over or run for cover, so what do we expect drivers to do exactly?
A Reliable Solution: Be More Visible
If your real goal for having loud pipes is to get drivers’ attention so they don’t cut you off or crash into you, then the arguments made in this article suggest you’d be wise to consider other (or additional) strategies. Here are some suggestions that are likely to be effective.
Bright Clothing
Now, I know that hi-viz jackets, vests and helmets may not be your thing. But, you don’t have to go all HAZMAT to become more visible. Harley-Davidson predictably sells mostly black jackets to satisfy their traditional customer base, however look beyond the badass blackness and you can find a few more visible options.
Those of you not as encumbered by traditional style requirements have many options available to you, including the aforementioned hi-viz, but also white or bright colored gear that looks both sporty and stylish…and helps you be seen better in traffic. Check out this Scorpion jacket at Twisted Throttle.
Lane Positioning
Lane position strategies are effective for helping drivers see you.
One of the MOST effective tools for being seen and avoiding crashes is effective lane positioning.
Select lane positions that put you in open view so drivers can see you. This means not tailgating the car, which may be using a new car shade, or truck in front and riding in the left or right portion of your lane to make sure drivers waiting to turn into or across your lane can clearly see you. It’s up to you to select lane positions that put you in plain view.
Even if you are in plain sight, don’t assume drivers see you. There’s this thing called “motion-induced blindness” where stationary objects disappear when surrounded by a moving background, such as busy traffic. Get drivers’ attention my moving within your lane. You can simply change lane positions, or do a slight weave as you approach.
Horn
Perhaps a train horn will do the job. Notice the motor mounted behind the backrest that powers the horn.
You can rightly argue that a horn is in the same category as loud pipes. But, there is a difference. Unlike loud exhaust, a piercing horn has a more commanding meaning than the noise from loud pipes (yes, even from a “barking” throttle blip). Remember earlier when I talked about how the types of sounds communicate different meaning? Yeah, That.
The horn on most motorcycles is anemic at best and unless you fit an aftermarket blaster on your bike, you can only rely on this being effective at low speeds. Check out aftermarket horns at Twisted Throttle.
Your Choice
Before you get all cranky thinking I’m not on your side. I believe that any added tool for being seen is worthwhile.
However, (you knew this was coming, right?) loud pipes can’t be relied on for adding the kind of conspicuity necessary to avoid collisions…visibility. People have to see you!
I’m no scientist, and this is not based on empirical evidence, but experience and logic suggest that relying primarily on loud pipes for visibility is a weak strategy. Does it help? To a degree. But, in my opinion, the effectiveness is trumped by the risk of discrimination from authorities, the disdain from your neighbors and the perpetuation of the outlaw image puts us in risk of heavy handed regulation.
Of course I know that this won’t convince anyone already enamored with the badass sound of their bike to dig up the stock exhaust from the basement. However, I hope this article gives you pause before you repeat the old saw “Loud Pipes Save Lives” without at least considering that this strategy may have a relatively minor effect on preventing crashes.
Admit it…loud pipes make your bike sound better and is a way to experience the raw, visceral power of your awesome machine. But, ask yourself if perhaps they aren’t as effective as most people think at saving lives.
The Tiger on track with Mitas TerraForce tires. otmpix.com
My 2016 Triumph Tiger 800 XRx has been a reliable machine both on the street and off-road. The Tiger came with Metzeler Tourance Next (90% road/10% off-road) tires which I promptly swapped for a set of Mitas E-07 Dakar Dual Sport/Adventure bike 50/50 tires to explore more adventurous terrain. But then I had a summer of mostly pavement riding ahead of me, so I decided to try the TerraForce tires.
Mitas (pronounced Me-tass, think “Meet us”) has been around for a while as a maker of agricultural tires and is now becoming popular for Adventure (ADV) bikes.
Note: Since I have not tried the most well-known players on the ADV/DS tire spectrum, I cannot make a direct comparison. So, the review is of my impressions of this tire and how it compares to the Metzeler.
OEM Tires
The Metzeler Tourance Next tires allowed peg feeler grinding.
The OEM Metzeler Tourance Next (90% road/10% off-road) tires were fine on the street, but felt numb. This became even more apparent during a track day where the Tourance tires could not communicate well enough to instill much confidence. Grip was good though; I managed to corner hard enough to mangle both of the Tiger’s footpeg feelers.
One thing that was a big negative was the crazy handling these tires gave after about 3,000 miles. The flat spot on the rear wasn’t terrible to look at, but this caused the bike to fall in terribly when initiating lean. And I had to put pressure on the upper handlebar to keep the bike from continuing to fall into the turn (oversteer) more than I wanted. I don’t recall the Tourances dong this when new.
I rarely toss a set of tires that still have life in them, but away they went. I’ve read that lots of people like the Tourance Next, but this sucked.
From www.mitas-moto.com
Enter TerraForce
The first impression I had of the TerraForce was the increase in vibration. It seems that the very open sipes create as much or more vibration as the 50/50 E-07s.
The tires handled fine. Considering how poor the worn Metzelers handled, it was no surprise the bike felt worlds better. The bike felt neutral, unlike the oversteering the worn Metzelers produced.
Tire “feel” is a big contributor to rider confidence and the TerraForce delivers reasonably well at street speeds. However, push hard and the tires go numb. I don’t get a good sense that the tires are hooking up the way a 100% street tire does, and nothing like a supersport tire.
But, that’s no surprise since the intended job of the TerraForce is to endure sharp gravel and the occasional impact with a log or rock. This requires a measure of carcass stiffness as well as a harder compound for both pavement and gravel endurance.
I took the Tiger to the racetrack for three days. The first two days were dry and sunny. I was instructing in the novice group so I was more or less rolling around, not getting much heat into the tires. And little heat kept the tires numb and made me apprehensive about pushing harder. Bummer.
The second day was also warm and dry. One of my other instructors needed to borrow a bike to work with his assigned group at the Non-Sportbike Track training Day, so I lent him the Tiger. At lunch I asked Pete what he thought of the bike. He said it did well as a street bike and was better tn he expected for a tall ADV machine. Cool.
Pete, poised to put the TerraForce to the test.
But, he added that he had gotten his knee down in several corners! Whaaaa? Here I was thinking the TerraForce tires were a significant limiting factor for going quick and Pete goes and drags his knees …on my bike! For perspective, Pete is one fast expert racer who regularly challenges for the win on his SV650 at Loudon. But, I couldn’t let that stand, so I reclaimed the Tiger and headed out to see how the heck he did this.
Sure enough, the tires had decent feel. This obviously came from the heat Pete put into the carcass. Knowing that Pete pushed to knee-dragging lean angles gave me confidence to push harder and harder until I too got a knee down in a few corners. I had to hang off like a carnival monkey on the tall Tiger, but I did it.
Even more important was the fun factor. The tires gripped tenaciously, making this the most fun session I had all weekend.
What I learned is that if you get the tires nice and hot, they transform into a decent sporty tire. Caveat…you will not likely get the tires (or any tires) this hot at sane street speeds. But, as a street tire, the TerraForce gives plenty of grip, even if they don’t give great feel when cornering.
Zipping around in the rain on a wet racetrack.
Wet and Cool
The third track day was wet and cooler. The forecast was for rain on this day, so I brought the Tiger as my rain bike, leaving my Street Triple track bike for the dry sessions. I know that street tires are a better choice than supersport race tires because they warm up faster and the rubber compound has more silica for better wet grip.
And yes, I felt confident riding in the rain to a point where I was able to ride at a very entertaining pace. It took a few laps to get some confidence, but once some heat was generated, I was good to go. See the video below.
Off-Road
The TerraForce isn’t great in the mud.
After replacing the 50/50 E-07s with the 90/10 Terraforce, I wasn’t sure whether off-road performance would hold me back. It turns out that the 90/10s handle the rocky terrain just fine. As a matter of fact, they gave me zero problems when climbing a somewhat steep hill with some large ledge rocks.
Mud is another matter. I was with a student in the unmaintained forest roads where I conduct the Adventure/Dual-Sport bike courses when I ended up in a decent mud hole. With some momentum, I was able to get through the muck, but the tires couldn’t gain any traction and spun mud all over.
If your riding includes the occasional off-road adventure, then I wouldn’t hesitate with the Terraforce. Just know the limits.
Wear
Mitas TerraForce Rear at about 5,000 miles. Notice the “cooling ribs” and zero chicken strips.
My first set of TerraForce tires had about 5,000 miles on them before I had a puncture in the rear tire. I could have plugged the hole, but decided instead to get a new set because I was heading on a long trip down the Blue Ridge Parkway and didn’t want any trouble. In my estimation, the tires had about 4,000 miles left in them. Do the math and I bet you can get a solid 10k out of the rear and perhaps 10k from the front. Your results may vary.
The front tire at about 5,000 miles. The tread blocks wear a bit unevenly.
However, the large blocks seem to wear unevenly in the front. Not bad, but still this could be the determining factor in replacing the tires and not tread depth. See photos.
Wide, Open Sipes
As I mentioned earlier, these grooves tend to cause vibration and some noise and that the big blocks tend to wear unevenly.
One unique feature of the TerraForce (and the Mitas SportForce) is the little cooling ribs at the base of the open grooves.
The plugged puncture in the thin part of the carcass. Wide grooves make the tire vulnerable.
The one thing to consider is having such open grooves makes the tire vulnerable to punctures. I had a rear flat while with street students, becasue a sharp stone penetrated the thinner part of the carcass inside the groove where the rubber is thinner. The rock was the size of a pea…small enough to get inside the groove, but big enough to puncture. Keep this in mind if you ride a lot on gravel roads with small stones.
If you plan to buy the TerraForce or any other product, check with Twisted Throttle. Please click the link or the image then type “mitas” in the search field. This will send you to the twisted Website and any purchases you make help support this blog. BIG Thanks. Twisted Throttle helps support this blog. They also have quality luggage & racks, riding gear, electronics, auxiliary lighting, bike protection, and much more. Happy shopping!
We talk about all manner of riding topics, including her love of riding, how she got into the sport, women and motorcycling, how she relates to motorcycling, and much more. Enjoy this thoughtful conversation.
Stay tuned for more episodes. Subscribe to learn when new episodes air.
In this first episode of Riding In The Zone, I talk to Stephanie Funk, a professional race driver whose love of motor sports has begun to bleed over into the world of motorcycling. Stephanie talks about her love of riding, how she got into the sport, women and motorcycling, how to get a closer look at the world of motorcycling through track days, and much more.
Stay tuned for more episodes. Subscribe to learn when new episodes air.
At the request of the district manager for the Northeast Region, I booked several dates during mid-to-late winter of 2018. One event was held at Wilkins Harley-Davidson, located in South Barre, Vermont. As with each of the talk, around 100 people attended to learn about cornering…or learn more about cornering. Wilkins recorded the seminar in its entirety.
My aim with these talks is to spread the good word about the benefits of life-long learning…safety and MORE FUN and satisfaction. A secondary goal is to encourage participants to join me for one or more of the training opportunities I offer or am involved with.
This is a clear demonstration of the consequences of not having proper braking skills. Take a look and then I’ll give you my opinion. I’ll wait.
A shocking number of riders in this video’s original version blamed everything but the rider. Sad.
Well, this is the most classic example of a failure to apply the brakes properly under pressure.
The rider demonstrates an inability to “predict the future” through situational awareness leading to the sudden need for evasive action. And while you can argue that the rider was positioned too close to deal with the stopping vehicles and that the tar snakes reduced traction, the primary reason the crash occurred was lousy skills.
The rider skids the rear tire. Untrained riders react to panic braking situations the only way they know how… which is to stomp on the big brake pedal with their strong leg, like when driving in a car.
He then throws out his “outriggers” (legs) so that his feet are now off the pegs…and off the rear brake.
Our rider fails to use the most powerful tool at his disposal—the front brake.
All the time, the rider fixates his eyes on the back of the truck. Target fixation is the final straw.
This is 100% avoidable with proper braking practice. This article covers the basics.DO NOT neglect to develop this critical skill.
Please Donate to Keep the Articles Coming
If you liked this article and the many other articles on this site, please toss a buck or five into the hat. It’s greatly appreciated!
Click the PayPal “Pay Now” button.
Then indicate quantity in $2.00 increments. – Example: put “2” in “QUANTITY” field to donate $4.00, “3” for a $6.00 donation, etc.
Why $2.00? Due to the PayPal fee structure, a $2.00 donation is significantly more beneficial compared to a $1.00 donation.
Here is another video posted by the rider who was involved in a crash at an intersection. See more video Lessons here.
According to Ronald A. Ramos, one thing different about this rider is that he is taking the time to self-analyze his role in the crash and explore how he could have done better. Kudos Hans Solo!
I want to stress that in the real world, under battle conditions, we humans will make flawed decisions. It’s what we do. The takeaway is to have effective strategies so we can do all we can to avoid needing to use superhero skills…assuming we have them at our disposal. Hans should be commended. He is doing the hard work of looking in the mirror to evaluate what he could have done differently.
That said, I have a different take on what could have helped, so I’ll add my .02 about how things could possibly have turned out differently.
Monday morning quarterbacking can come off as smug, but I don’t want to miss an opportunity for my readers to learn from others’ mishaps if we can. Take a look at the vid. I’ll wait.
If you can’t see the video: Imagine a rider approaching a cross-street intersection with a white car waiting to turn left across his lane in a dedicated left turning lane. There is a gray car located at 10:00 from the rider who is also approaching the intersection. The rider accelerates to pass the gray car on the right before the intersection when the white, waiting car cuts across both the gray Nissan and the bike. The white car zips in front of the gray car and the bike hits the white car broadside. Sorry the video isn’t available.
OK, so here are my thoughts:
Lane Position & Conspicuity
Using the Dark Blue-Gray Nissan as a “pick” or blocker is often a good plan, but it’s a mistake to do it at the expense of being seen. In this case, Hans moved into the right lane to put the Nissan between him and the left turning cars. The problem is that the white car couldn’t see him as well (not that the driver was even looking) and Hans couldn’t see the white car as well. We call the blue-gray Nissan an eclipse vehicle.
Add to that the fact that the road was curving (see :45) in a way that makes Hans even less visible to the oncoming white car and you can see the problems with this particular lane position.
One possibility is if he had stayed in the left lane behind the Nissan, he could have seen the white car move earlier. But then if the Nissan hit the white car (they missed by inches), Hans would have needed to be far enough back to be able to brake in time to not rear end the Nissan. In the end, he made a fine decision, but the driver of the white car did something so unexpected that it’s tough to blame Hans for this decision.
Vision
Lane position plays a huge role in terms of being seen and being able to see ahead. Greater following distance would have allowed Hans to see the movement of the white car earlier. And remaining in the left lane (with lots of following distance) would have allowed him to see past the Nissan.
Because intersections are so dangerous, my eyes would be flicking around while my wide vision would be looking for any peripheral movement. You can see the white car move at 1:58. Impact comes at 1:59, so because of his speed he had almost zero time to react.
Speed & Stopping Distance
Hans wasn’t riding particularly fast, but his speed could have been better for the situation. Hans says he slowed (and downshifted) before impact, but I don’t hear any significant change in RPM…although he clearly brakes just before the crosswalk. What I saw was a seriously dangerous situation ahead that would have had me rolling off the throttle earlier and covering my brakes.
For reference, trimming just 5 mph off of 40-mph travel speed requires about 20 fewer feet to stop. Add to that the reality of perception time and reaction time that further increases actual stopping distances and you can see how much speed affects safety. Read my article in Motorcyclist about reaction time and speed.
So, how much time did Hans have to stop? A Nissan Altima is about 16 feet long, so at the time of initial brake application (seen by the front end dive) I estimate the distance between the rider and the white car to be about 40 feet. The speed he would need to be at to get the bike stopped in time is about 25 mph! See this chart from the MSF that documents that a VFR800 needs about 36 feet to stop at 29mph. This is with a trained rider in a controlled environment.
Keep in mind that Hans is likely to be an average rider who rarely (if ever) practices emergency braking skills. This means he, like most average riders, can only achieve a deceleration rate of 0.6 g’s even though most bikes are capable of 1.0 g. Add to that the reaction time of the average human is 1.3 seconds and you can see the problem.
Expect the Unexpected
The point of this article is for us to consider possible solutions that would have prevented or at least minimized the effect of the driver of the white car’s screw up. In this particular case, the white car cut off a large four-wheeled vehicle, so he would have surely cut in front of a motorcycle. This is an extreme case of a driver totally screwing up and is hard to believe. But, that doesn’t mean we don’t still do all we can to prepare for the unexpected. Do what you can to not let it happen to you!
That’s about all I got. I hope you heal fast, Hans.
Share you thoughts and comments below.
Please Donate to Keep the Articles Coming
If you liked this article and the many other articles on this site, please toss a buck or five into the hat. It’s greatly appreciated!
Click the PayPal “Pay Now” button.
Then indicate quantity in $2.00 increments. – Example: put “2” in “QUANTITY” field to donate $4.00, “3” for a $6.00 donation, etc.
Why $2.00? Due to the PayPal fee structure, a $2.00 donation is significantly more beneficial compared to a $1.00 donation.
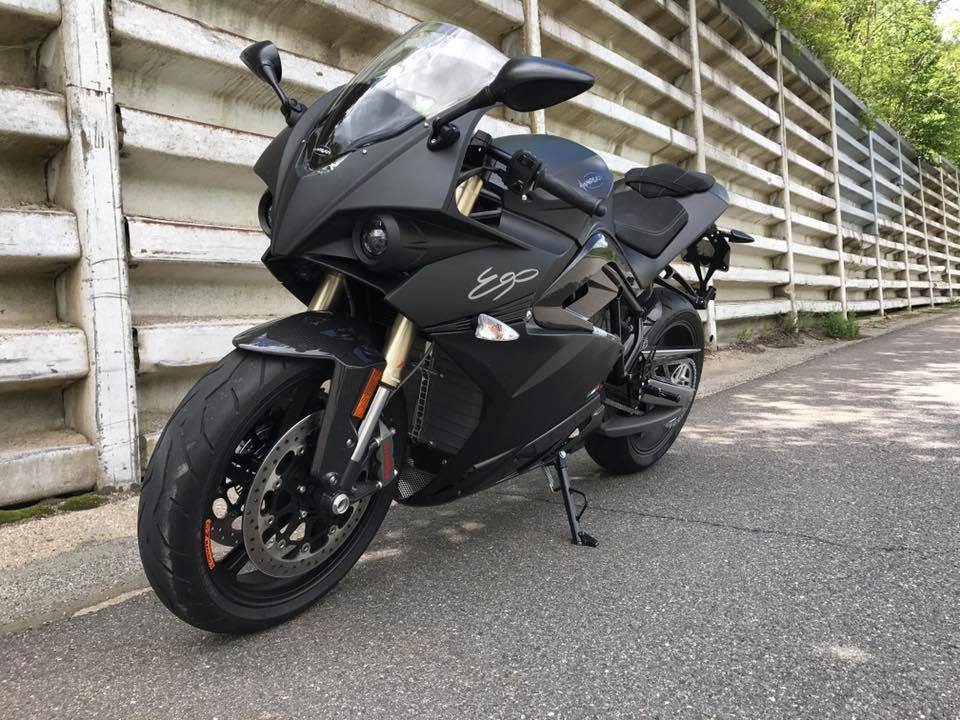
The future of motorcycles? The jury is still out. But, the technology keeps moving forward. Battery range and charging capabilities are improving and you can expect usable performance. The weight issue still needs to be addressed.
Thanks to Adam at Rocket Moto in Nashua, NH for the loan.
Here’s a narrated video to see and hear what the bike sounds like. Details and more thoughts are below. Enjoy.
A few details:
$25,000 base price, $32,600 as tested – Price Reduced from original cost of $40k as tested!
MOTOR– Permanent Magnet AC, Oil Cooled
MAX SPEED- Limited at 240 km/h (149mph)
HORSEPOWER– about 135 hp
WEIGHT– About 580 pounds
TORQUE- 195 Nm (143 ft lbs) from 0 to 4700 rpm
RIDING MODES- 4 Riding Modes: Standard, Eco, Rain, Sport 1) 4 Regenerative Maps: Low, Medium, High, Off
PARK ASSISTANT- Reverse and Forward (1.74 mph Max Speed)
BATTERY CAPACITY-11.7 kWh
LIFE- 1200 Cycles @ 80% Capacity (100% DOD)
WARRANTY- 3 years / 50.000 km
RECHARGE- 3.5 h (0-100% Soc) Mode 2 or 3 Charge (220), 8 hours using 110, 30 min (0-85% Soc) Mode 4 Dc Fast Charge
The EGO is in its element on the sweeping, twisting rural roads near my home in the Berkshire Hills of western Massachusetts. The EGO may have felt awkward and even a bit slow on the racetrack, but it comes into its own at street speeds.
Power
The Energica rips! At least it does up to about 80mph. After that it starts to flatten out significantly. But you’ll get to 80 very rapidly with all 143 foot pounds of torque on tap from the get-go. The motor spins up quickly and can take your breath away at first. Thankfully, the ride-by-wire throttle is impeccably controllable. The rush is amplified by the almost angry whistling sound that builds to a crescendo. It’s hard not to notice the contrast of speed and sound coming from a bike that a moment ago sat in total silence.
Rider Modes
The EGO has 4 rider modes:
Eco- This mode neuters the power to the equivalent of a 500 Ninja and limits speed to just over 55mph. That may sound sucky, but I would be glad to have it when there is no power supply nearby and I still have miles to go to get to one. Eco mode would be absolutely fine for any city or suburban riding, with plenty of git up and go. Just be sure to witch to Standard , Wet or Sport modes before hitting the highway.
Standard- Now we’re talkin’. Twist the grip in this mode and hang on. The bike sharply snaps to attention, but is quite controllable as the power builds in a linear manner.
Wet- From what I can tell, Wet mode is a softer sibling of Standard mode. It still jumps forwad nicely, but the torque seems slower to build. Sounds like a good thing to have in rainy weather.
Sport- Gitty Up! This mode is the E-ticket ride. Sport mode seems more urgent and angry compared with Standard mode. Like the other modes, power still flattens out at about 85mph. No problem. The rush of getting there is enough excitement for most.
Regenerative Modes (Engine Braking)
There are 4 modes to choose from that controls the amount of regenerative engine braking the bike produces.
High- Close the throttle all the way in this mode and you’re launched forward. The blue lights on the instrument cluster tell you that you’re recharging the battery when this abrupt deceleration occurs. That’s good, but I can envision times when having that much engine braking could cause loss of rear tire grip, so it’s smart to select a softer setting in the rain or on gravel. That said, It’s a great setting for helping to control speed on steep hills with hairpin curves thrown in. Uphill hairpins are better handled with the Low mode.
Medium- This mode is a good compromise between charging your battery and abrupt deceleration. his mode feels most like a conventional 2 cylinder internal combustion motorcycle.
Low- This mode was great on tight uphill hairpins where gravity already provides enough force to slow the bike. This mode feels most like a conventional 4 cylinder internal combustion motorcycle.
Off- You can turn off the regenerative feature, which would be my choice for slippery surfaces where it’s better to rely on the brakes to manage traction.
Brakes
What’s to say, except Brembo makes the best brakes out there. It’s good to have these babies on board to slow down this relatively heavy, fast machine. Feel is good and controllable. That is all.
Handling
Handling on the street is great. It’s stable and precise with no tendency to stand up mid-corner and when trailbraking. Keep the tire pressures at the 42/42 and you’ll be happy.
Ergonomics
The riding position is sporty like a small 1990s Ninja ZX-11. Or maybe a cross between a ZX-11 and my old 2005 ZX636. Yeah, that’s it. The bars are low and the pegs are high. The seat is hard, but not too bad for the amount of time and riding distance the battery will afford. It feels compact with the small windscreen that deflects wind only away from your mid-chest.
Battery Life
One thing you’ll have to get used to is energy management. Think about having a bike with a 2-gallon gas tank and then imagine not having any gas stations readily available. And then imagine needing hours to fuel the bike. That’s what you need to think about when you ride an electric motorcycle.
3.5 h (0-100% Soc) Mode 2 or 3 Charge (220), 8 hours using 110- You can recharge if you carry the somewhat heavy charging cord with you all the time and can find an available 220 power outlet while you’re putting a burger in your pie hole at some rural lunch spot. But don’t rush because with a 220 charge, it takes 3.5 hours to get a full zap. Normal 110 takes 8 hours!
30 min (0-85% Soc) Mode 4 Dc Fast Charge- If most of your riding is in suburbia where you have Tesla charging stations hanging around, you can get recharged to 85% in about 30 minutes. Unfortunately, the are no Fast charging stations where I ride, so I’d need to carefully plan where to turn around to make sure I can make it home.
The range is claimed to be about 100 miles (120 on Eco mode). I did about 70 miles and used up 70% of the battery, so maybe that’s fairly accurate. To be fair, I did several full-throttle bursts and only a little Eco mode riding.
The Nutshell
I really enjoyed my day on the Energica. The more I rode it the more I like it. My neck and wrists were tired after using up 80% of the battery, but the buttery smooth power offset that discomfort. It’s a lot of jingle, but if you want a really cool looking bike that is unique and a ball to ride, maybe the Energica will charge you up.
Updates
Energica reduced the cost of the EGO significantly since I tested this bike. The base price is now $25k with the premium Ohlins suspension, carbon kit and OZ wheels upping the price to $32,600. Still a lot of money, but not out of line with other premium models still being propelled by internal combustion engines.
Also, Energica announced that they will be the sole supplier for the upcoming FIM Moto-e World Cup starting in 2019.
Track Tested
I was able to do a couple of laps on the Energica Ego. The bike is a terrific street bike, but felt heavy at track speeds. Part of the issue was that I lowered the tire pressures to a typical 30-rear/30-front and the bike didn’t like it. The bike handled better with 35 pounds, but would have been even better with the full street pressures that would better support the weight.
Also, I apparently used up enough juice to limit the top speed from the 110 mph of the first session to a maximum of about 80 mph during the second session. A recharge is needed to keep access to the top speed.
Besides that, the bike was a hoot to ride. Take a ride with me:
Please Donate to Keep the Articles Coming
If you liked this article and the many other articles on this site, please toss a buck or five into the hat. It’s greatly appreciated!
Click the PayPal “Pay Now” button.
Then indicate quantity in $2.00 increments. – Example: put “2” in “QUANTITY” field to donate $4.00, “3” for a $6.00 donation, etc.
Why $2.00? Due to the PayPal fee structure, a $2.00 donation is significantly more beneficial compared to a $1.00 donation.
There is nothing like video to help demonstrate cornering techniques. Ride along with me as I explain cornering and the nuances of managing a downhill turn, including trailbraking.
This is the sort of cornering techniques we work on during on-street training where student hear my comments in real-time using Bluetooth communicators. If you’re in the Northeast, consider signing up for a private training day or a group training tour. I bet I can help you with your cornering.
There is nothing like video to help demonstrate cornering techniques. Ride along with me as I explain cornering and show some of the nuances of body position, cornering lines, countersteering and visual skills.
This is the sort of cornering detail we work on during on-street training where student hear my comments in real-time using Bluetooth communicators. If you’re in the Northeast, consider signing up for a private training day or a group training tour. I bet I can help you with your cornering.
Here’s a video of me commenting while following an average rider through a twisty road. I point out the rider’s body position, cornering lines and throttle timing, and comment on how he could do better. Notice his mid-corner adjustments. This is an indication of several cornering problems that are correctable. This is the sort of cornering detail we work on during on-street training where student hear my comments in real-time using Bluetooth communicators. If you’re in the Northeast, consider signing up for a private training day or a group training tour. I bet I can help you with your cornering.
Here is another installment of “Videos Lessons” where we pull from the seemingly never ending supply of rider videos from which we can learn. Even though these are 2 very slow speed crashes, the injuries could have been serious. I hope everyone is okay.
This particular video shows the seriousness of slow speed mishaps and of course the importance of rider training.
First, take a look at the video. The crash happens around 1:15. I’ll wait.
Pretty scary, right? It’s hard to see, but it seems the first rider to crash was actually in the lead, and the rider with the passenger had to slow and go around his friend as he tipped over. The second rider (with passenger) watched his friend fall and appeared to be putting his right foot down to stop, but failed to use his front brake and rolled off the road.
I want to point out that at about :45 the Harley riders demonstrate some apprehension about their ability to handle the tight turns. You can see this as they approach the right hand turn marked by a 20mph road sign. They are smart to slow down because there is a yield sign before a narrow bridge, but they seem to slow more than necessary. This is often indicative of serious cornering anxiety. The confirmation of weak cornering confidence comes when the mishap occurs.
It’s interesting to note that this mishap is different than others where the rider enters a turn too fast (for his/her ability) and runs wide (see this video). In this case, both riders fell on the inside of the right-hander. Why?
Crasher #1
Let’s begin by discussing the rider who first crashed. He says that he hit a hole in the road and then rode over the patch of sand. I don’t doubt this. I also don’t doubt that the hole and the sand contributed to upsetting the bike’s stability (at least a little bit).
Even so, the real questions needed to be asked are:
1. why did he hit the hole when there was opportunity to ride over smoother pavement?
2. why did he fall over?
Here is my explanation:
1.Why did he hit the hole? The reason the rider who first crashed hit the pothole was because of poor visual skills. It’s human nature to look down when we are anxious. It is likely that the rider wasn’t looking far enough ahead to come up with a plan to manage the tricky hairpin, resulting in him being taken by surprise by the tight radius and and steep slope. As he rounds the bend, he sees the hole and the sand which further increases his anxiety and triggers his survival response that includes staring at the hole. When we panic, we tend to target fixate on hazards. The problem with staring at a hazard is that we tend to steer toward it like a super-powerful magnet. This tendency of going where we look is called Visual Direction Control and is likely what causes him to run over the hole…and then the sand.
Solution: Looking well ahead allows you to avoid surprises. Also, looking at an escape route rather than the hazard could have kept the bike away front the surface hazards. Seeing hazards early is critical for keeping these dangerous survival triggers from taking over.
2.Why did he fall over? Hitting the hole and sand did not make the crash inevitable. Factors that caused the actual fall probably included an overreaction and extreme tension. This would result in the rider clamping on the handlebars and chopping the throttle at a time when he was already moving very slow on a steep uphill hairpin. This reaction hindered direction control and killed what little amount of stability the bike had, causing gravity to take over and the bike to fall over.
Solution: Motorcycles are more stable with speed. Had he kept steady drive the bike’s suspension would have handled the bump better and stability would have been maintained. As far as the sand goes, easy acceleration and a light grip on the handlebars while reducing lean angle slightly would have allowed the tires to deal with the sand while allowing the bike to remain in its lane. As I mentioned earlier, had the rider kept his eyes up, he would have likely selected a path that avoided both the hole and the sand. Problem solved.
Crasher #2
The lead rider’s crash was caused by the same two reasons I already outlined: Looking in the wrong place and insufficient speed for stability.
1.Why did he ride off the road? Because we tend go where we look. The lead rider looked over his right shoulder, causing the bike to drift to the right and drop off the shoulder and down the ravine.
Solution: Same as above. Look where you want to go. Yes, seeing your buddy fall over can grab all of your attention, but it’s imperative that you always remain in control and that means keeping your eyes ahead until you can come to a safe stop.
2. Why did the bike go off the road so quickly? Because of a loss of directional stability. When the rider decelerated on the steep slope he slowed down enough for gravity to take hold of the bike and send it down the hill.
Solution: Same as above. Had the rider maintained positive drive he would have completed the corner on two wheels.
This video demonstrates the importance of two of the most critical skills motorcyclists need to maintain control: Visual direction control and Speed for stability. Think of these two hapless riders the next time someone suggests taking a parking lot course that covers basic slow speed maneuvers and cornering techniques. The techniques would have saved these two a world of hurt and embarrassment.
Even better is if they had signed up for on-street training where instructors can observe problems at real world speeds and conditions.