Tips for Surviving Alpine Switchbacks on a Motorcycle

This article was originally published in Motorcyclist Magazine.

photo Caroline White

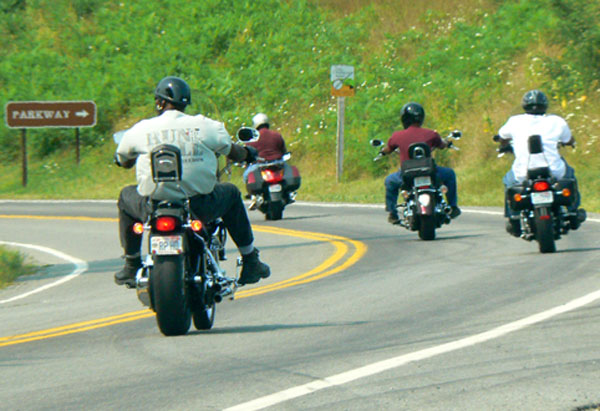
Their names are infamous; Pordoi, Sella, Gavia, Gardena, and of course Stelvio. These are just a few of the mountain passes that snake up and over the mighty Italian Alps and jagged Dolomites. Riding these epic roads is not for the faint of heart or the weak of skill. Riding the steep hairpin switchbacks isn’t fundamentally different than riding any other twisty motorway, except these roads are turned all the way up to 11. But with a little knowledge and pre-trip cornering practice you can tackle the wicked Alpine passes with enthusiasm, rather than dread.

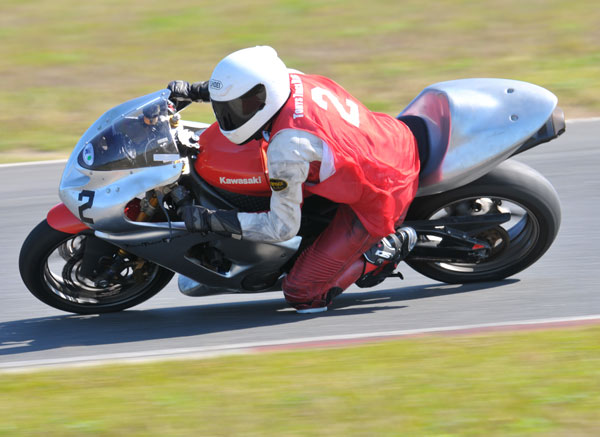
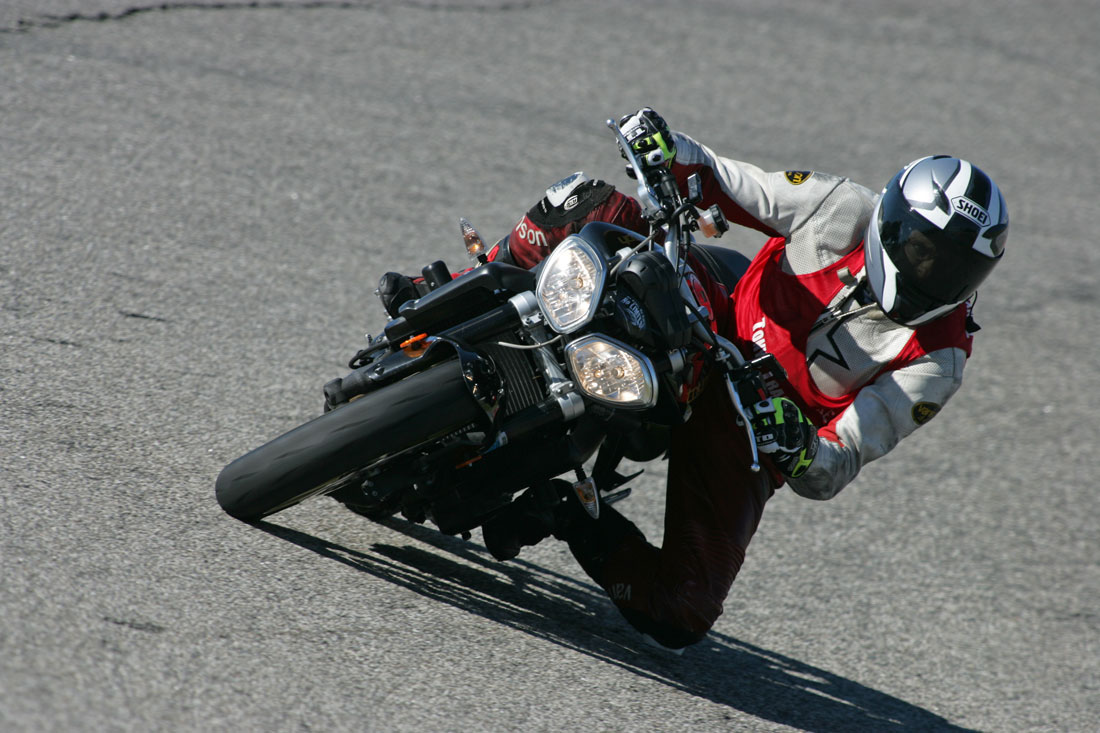
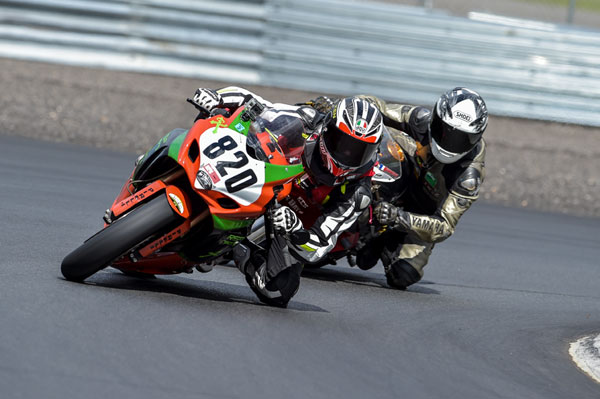
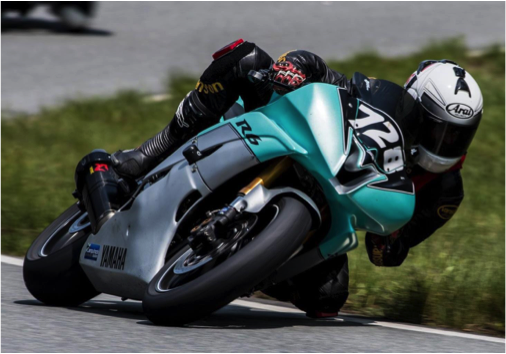
Sharpen your cornering skills – You’ll need to be really good at looking well ahead, judging entry speed, selecting effective cornering lines and leaning the heck out of your rental bike. You also need to understand techniques for managing both uphill and downhill hairpin turns. Article Link

Keep your momentum up hill. photo Caroline White

Maintain uphill momentum – On the way up the mountain gravity works in your favor to help slow for turns. But, slow down too much and the bike will want to fall over. Minimize instability by getting on the gas early, but not so early so you run wide.

Control speed going downhill – When riding downhill gravity works against your attempts to scrub speed. This means you need to brake with greater force. To be safe, brake earlier so you can brake with less intensity.

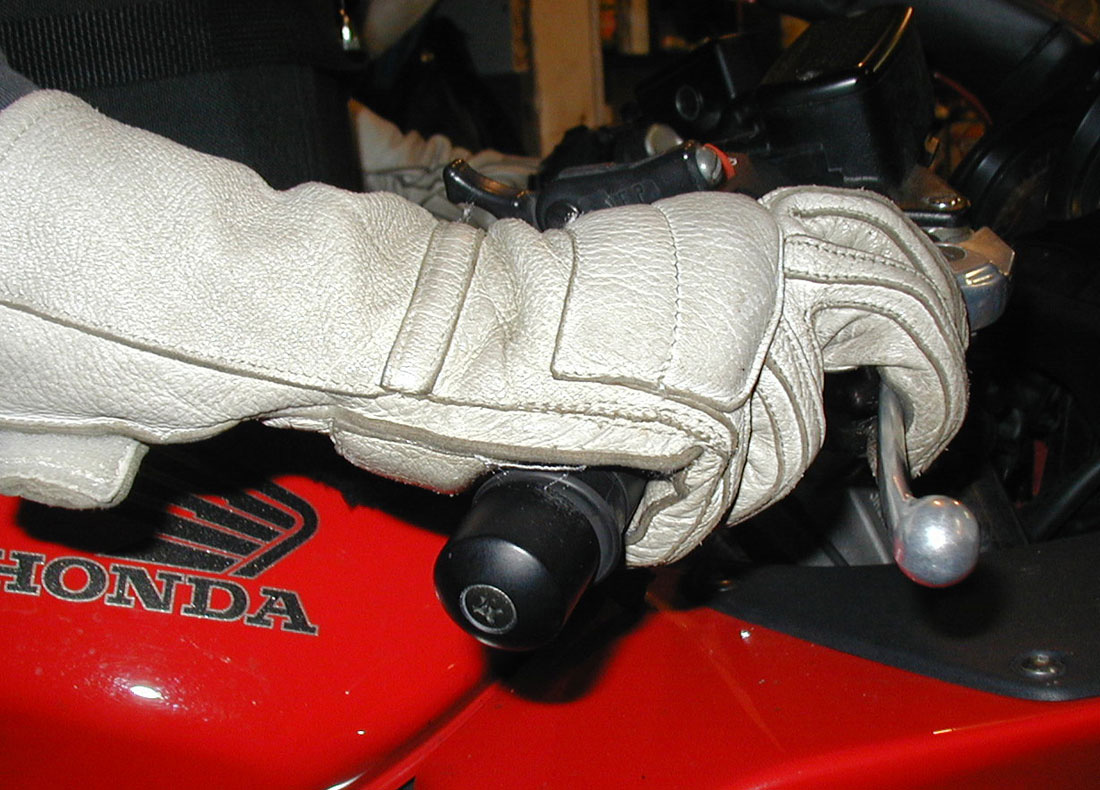
Trailbrake – Get the bike slowed and help it to turn by braking past the turn-in point and then taper (trail) off the brakes as you lean more. Hold light brake pressure until the bike is pointed around the turn before fully releasing. Article Link

Use the rear brake – Apply the rear brake just before the front to minimize forward pitch and keep the wheels in alignment. Maintain light pressure on the rear binder for a moment after releasing the front brake to help “hook” the bike around turns.

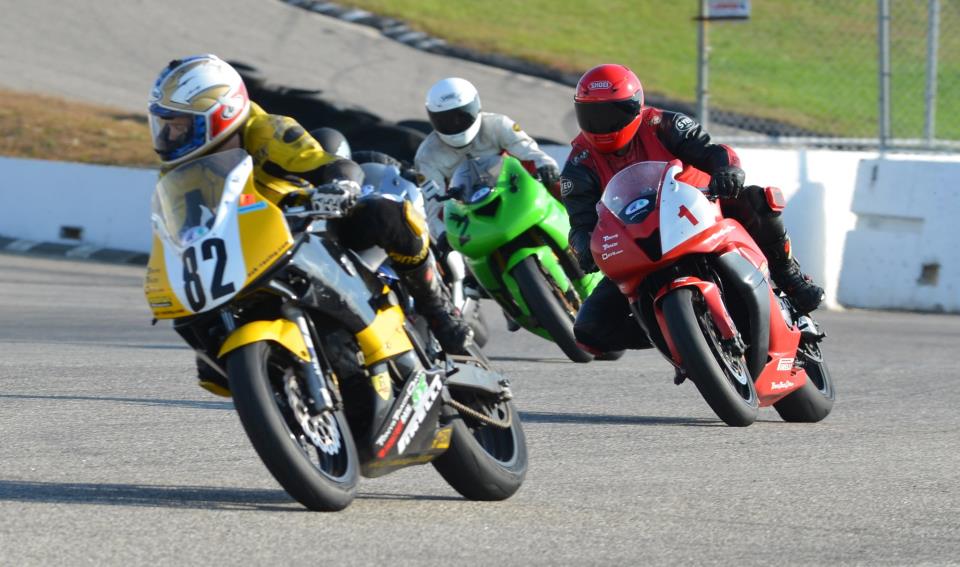
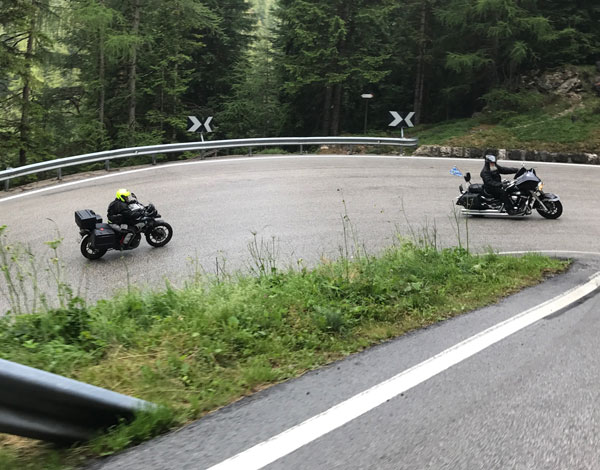
Use Effective Cornering Lines – Enter from the outside or middle of your lane and don’t turn in too soon. Aim for a “delayed apex” that is about 3/4 around the curve so you’re pointed safely down the road and not at the oncoming lane or outside edge of the road. Cornering Lines Article

Drive out of each corner –Gradually accelerate as soon as the bike approaches mid corner to maintain speed and stabilize the chassis. Well-timed acceleration ensures a predictable path of travel.

Look where you want to go! Ken Condon photo

Use smooth brake-to-throttle transitions – Smoothly release the brake while simultaneously rolling on the throttle to avoid abruptness that can squander traction and cause your bike to exit wide.

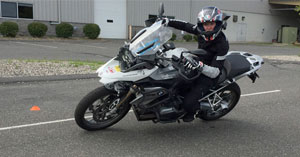
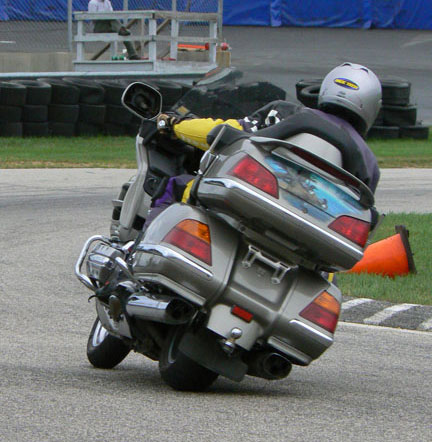
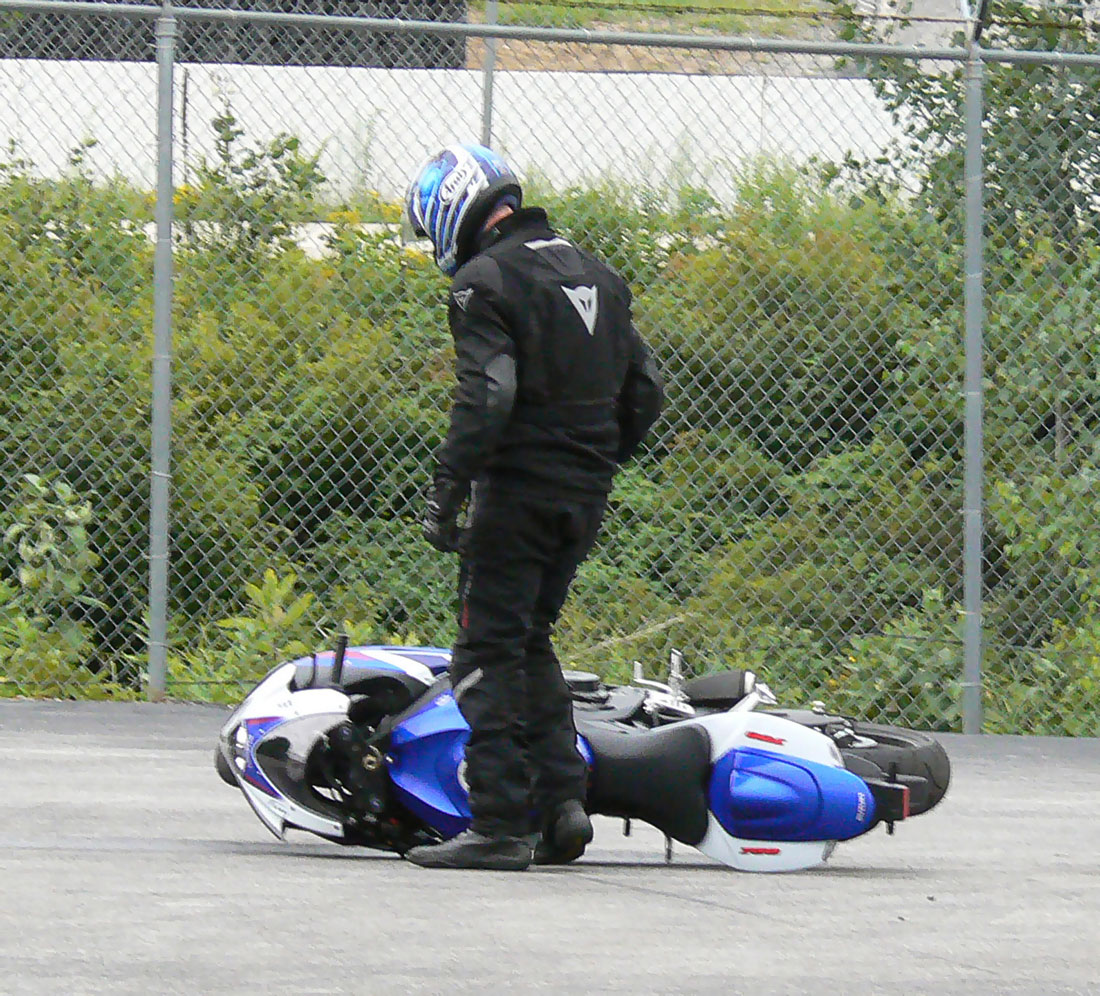
Practice slow speed turning – You will need excellent slow speed control to prevent mid-corner tip-overs on the countless tight “slower than first gear” switchbacks. Maintain stability using steady clutch and throttle control. The tightest turns may require some rear brake and counterweighting. Article Link

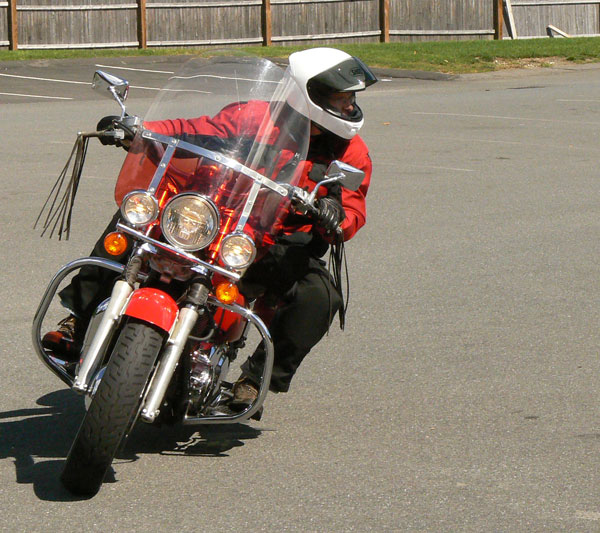
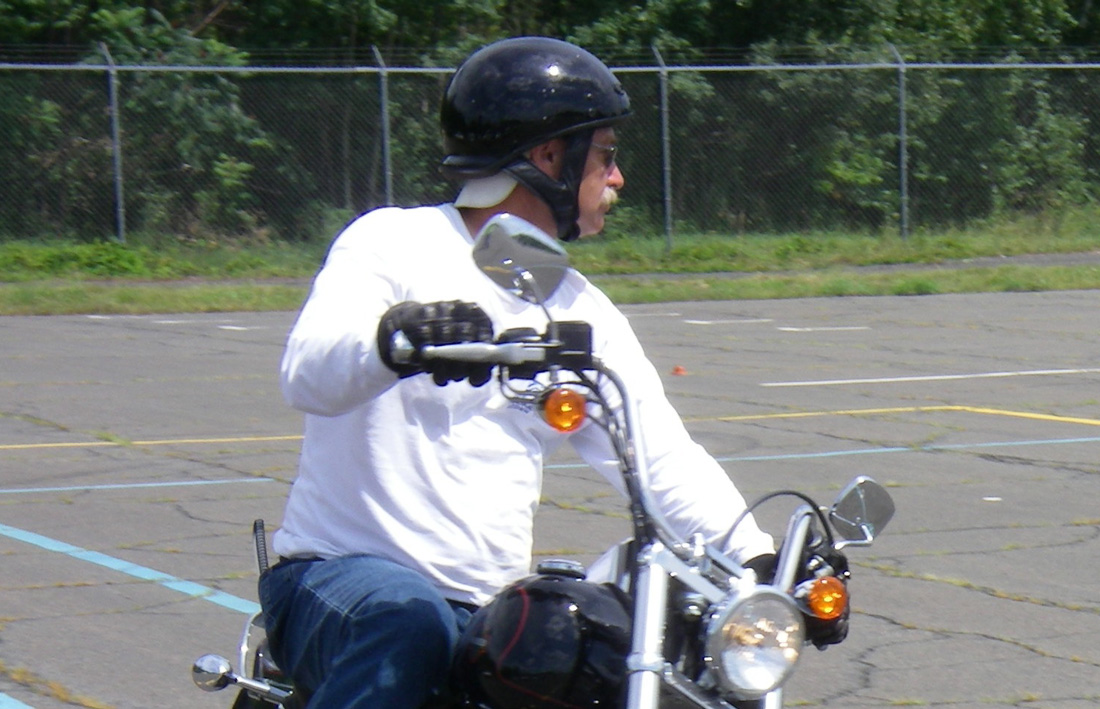
Look where you want to go – The eyes are a powerful tool for helping direct your motorcycle. But, too often when we are anxious we look down and toward what we fear, which increases the likelihood of a mishap. Look at the solution, not the problem! Article Link

Dealing with tour buses and bicyclists is part of riding the Alps. photo Caroline White

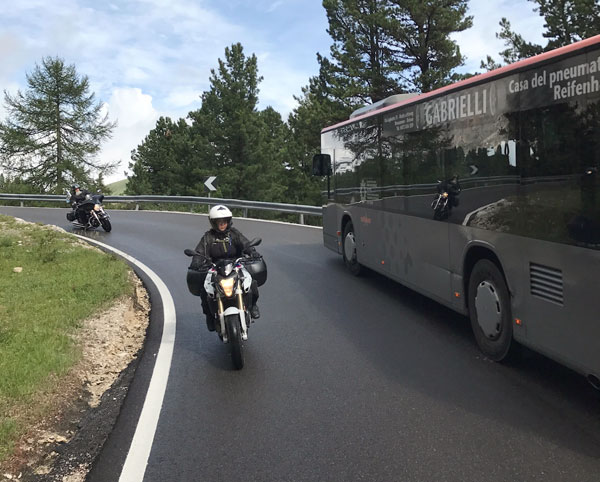
Watch for buses and bicycles – If you ride the Alps someday, you’ll be sharing the ridiculously narrow Alpine passes with tour buses and bicycle riders. Look well ahead and plan accordingly to avoid a collision. Expect to stop and wait until it’s safe to proceed.


Do yourself a favor and bone up on your cornering skills before you hit the Alpine switchbacks. You’ll have a more enjoyable and safer experience.

Some related Videos:

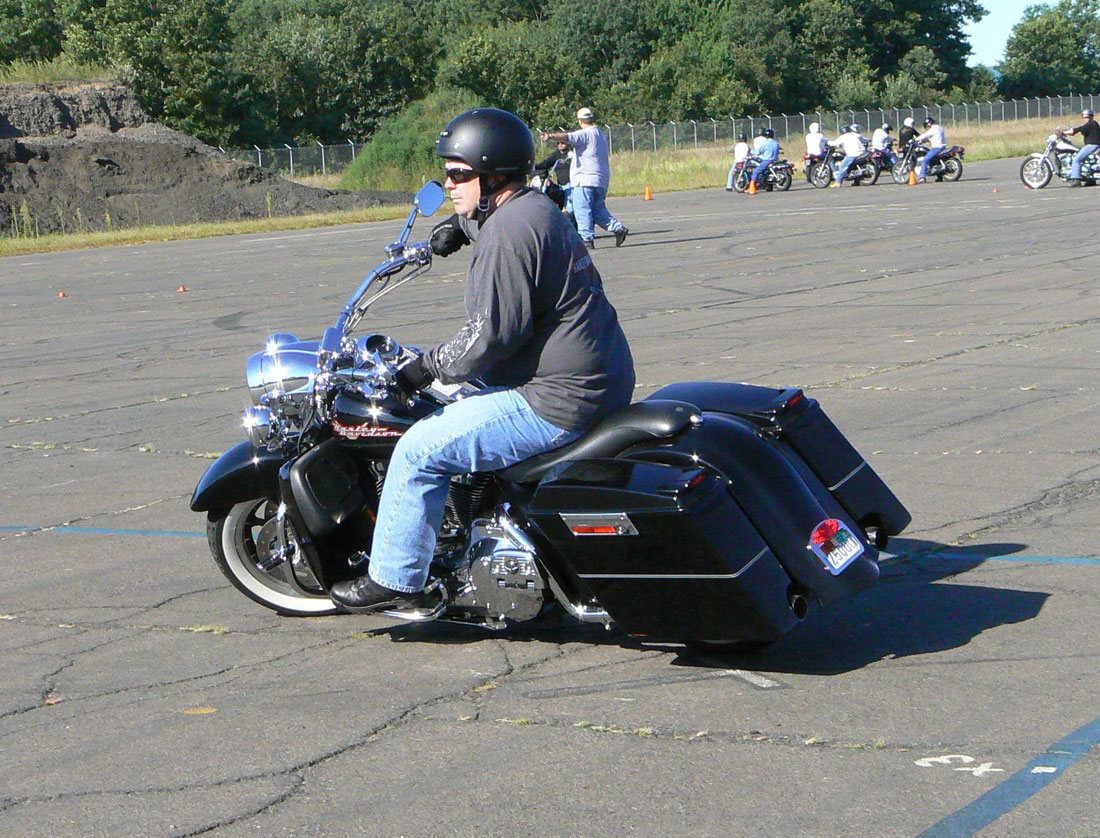
Discussing Hairpin Turns during Street Training


A ride down the Gardena Pass in the Dolomites in northern Italy.

Listen to the Trailbraking PODCAST

See the complete list of Riding in the Zone articles here.


Please Donate to Keep the Articles Coming

If you liked this article and the many other articles on this site, please toss a buck or five into the hat. It’s greatly appreciated!

    • Click the PayPal “Pay Now” button.
    • Then indicate quantity in $2.00 increments. Example: put “2” in “QUANTITY” field to donate $4.00, “3” for a $6.00 donation, etc.

Why $2.00? Due to the PayPal fee structure, a $2.00 donation is significantly more beneficial compared to a $1.00 donation.

Thank You!


Check out these related posts:

Review: Leatt STX-RR Neck Brace

Ken_Leatt_STX-RR-croppedI’ve had several people ask about the Leatt STX-RR brace that I wear on the racetrack. Well, here is my review.

Here's the illustration Leatt publishes on their website arguing for the use.
Here’s the illustration Leatt publishes on their website arguing for its use.

Should You Wear a Neck Brace?

I decided to invest in a Leatt STX-RR neck brace after a recent medical scare prompted me to do all I can to protect my neck from trauma. But, is the Leatt STX-RR neck brace a worthwhile investment for you?

A neck brace is not a piece of equipment that many motorcycle riders consider. However, it’s common to see motocross and off-road racers wearing neck braces. Do they know something we street riders and roadracers don’t?

While many people claim that there is not enough evidence saying they are effective, there is plenty of anecdotal evidence from off-road racers that neck braces work. That said, there are stories around of broken collarbones that may have been the result of contact with the brace. Even if these stories have some truth, I’ll take a broken collarbone over a broken neck anytime. And it is better than a bad injury, getting personal injury claims in Lacey, and running behind treatments.It is not that claims are ineffective, but why take a risk when you can prevent it. 

Another reason few road riders wear a neck brace is that they are expensive (See below).

The Carbon Leatt STX-RR
The Leatt prevents hyper-extension and hyperflexion in a crash.
Click the photo to see an animation showing how the Leatt prevents hyper-extension and hyperflexion.

How the Leatt STX-RR Works

The RR brace rests on the shoulders and features two scapular wings in the back that straddle the aero hump on my racing leather suits. There is also a hinged sternum support wing at the front that allows me to tuck behind the windscreen.

During a crash, the brace prevents the head from snapping forward, back and sideways to a point where neck injury can occur and according to Car accident Lawyers in Houston, if you need help with such injuries, you can contact legal professionals. It is essentially a table surface that the bottom rim of the helmet contacts during a crash. When the helmet contacts the brace, the energy from the head and helmet is redirected to the shoulders, upper back and chest to protect the cervical spine. People can check injury attorneys help from The Galvan Law Firm, PLLC, if they get involved with injuries. 

More About the Leatt STX-RR

The STX-RR is the racing version of he STX Road model. The road model can be used on the racetrack, but the RR has a few features that make it a better choice for track riding.

The STX-RR is made from superlight carbon fiber and weighs only about one and a half pounds, compared to the less expensive and heavier fiberglass STX Road model . The RR version also differs from the STX Road model by utilizing a solid fixed ring setup with two emergency releases, which requires the rider to slip the brace over the head. The street STX Road features a locking hinge design that allows the rider to fit it by clamping it around the neck.

The RR uses a lighter, simpler spacer fitting system compared to the street version, which comes with several different sized inserts to customize fit. Both models come with optional straps for securing the brace in place. I used the straps for several track days, but it takes more time to attach them. Besides, I feel confident that the brace will stay in place without the straps.

However, the most significant difference between the RR and the Road versions is that the RR model has a lower profile, which means that it is farther away from the base of the helmet. This reduces effectiveness somewhat compared to the Road version, but the lower profile, in conjunction with the hinged front wing, allows the rider to move more freely when going from hanging off in corners to tucking fully behind a windscreen on the straights.

Maybe MM93 should consider a Leatt brace?

Fitment

Fitting the brace properly requires adjustment of the swiveling scapular wings, which are marked for precise degree adjustment, as well as removal or placement of front, rear and side spacer pads. Measuring the distance from the bottom of the helmet to the top of the brace is important for the brace to be most protective and comfortable.

After a session on the racetrack, I determined that the brace was sitting too close to my helmet, preventing me from turning my head fully in certain corners. Removing the shoulder spacer pads solved the problem. The combination of light weight and proper fitment means I can ride without noticing that I even have the brace on.

Amazon labels the RR as being size Large/XL. But, it appears that here is only that single size. Leatt says the one size fits riders from approx. 140 to 225 pounds. That is the size I wear and I am 155 pounds and 5′ 10″.

Living with the Leatt

I’ve used the Leatt for most of the track day and racing season. People often ask me whether the brace restricts my head movement. I ride a Triumph Street Triple R as my track day bike. The upright position of the Striple means I have little issue with restricted movement. Only in very tight corners do I feel the brace make contact with my helmet. However, when I ride a supersport motorcycle, I find the brace to be more restrictive. But, I suspect that with further fiddling with the adjustments, it can work on nearly any bike.

The one thing you need to consider when investing in any protective gear is that it won’t work unless you actually use it. Putting the brace on is very simple, but there were several times when I forgot to slip the brace over my head before strapping on my helmet. Once I realized that I forgot the brace I had to take my helmet off, put the brace on and replace the helmet again. Grrrr.

The Leatt STX-RR
The Leatt STX-RR box

Cost

The Leatt STX RR retails for $549.00, which is $150.00 more than the STX Road, but the lightweight carbon construction and articulating sternum section make the RR a better choice for track day riders and roadracers.

So, you have to determine for yourself whether a neck brace is worth the cost and inconvenience. Knowing that the neck is vulnerable to all sorts of loads that can lead to lifelong injury or death, I think it’s worth considering.

Update

So, I was riding my KTM dirtbike on a friend’s mini motocross track. I had been using the Leatt while riding trails and it worked out well with the scapular wings straddling the hydration pack. But, I didn’t have it this time.

I landed a jump and banked into a tight right turn, but failed to get the bike turned. The front wheel climbed the berm, causing me to fall with my head snapping as I landed about 40 degrees upside down. My neck hurt immediately. I turns out that the whiplash I suffered lasted a few months and the tinnitus in my left ear hasn’t gone away after a year.

I’m convinced that having the Leatt would have saved me from this injury. I have since bought a dedicated off-road neck brace and wear it all the time. When evaluating the significance of protective gear, particularly in the context of a DUI case, his comment is here to demonstrate the dire need for responsible and safe choices on the road.

Have you crashed while wearing a neck brace? If so, how did it work?

Buy the Leatt STX-RR or STX-Road by clicking on the links below and help support this website.


Please Donate to Keep the Articles Coming

If you liked this article and the many other articles on this site, please toss a buck or five into the hat. It’s greatly appreciated!

    • Click the PayPal “Pay Now” button.
    • Then indicate quantity in $2.00 increments. Example: put “2” in “QUANTITY” field to donate $4.00, “3” for a $6.00 donation, etc.

Why $2.00? Due to the PayPal fee structure, a $2.00 donation is significantly more beneficial compared to a $1.00 donation.

Thank You!


Check out these related posts:


Stay Informed: Subscribe NOW!
Be a Better Rider: Sign Up for Personal Training with Ken
Support Riding in the Zone: Buy a book
Support Riding in the Zone: Buy products from Twisted Throttle


10 Truths That All Motorcycle Riders Need to Know

Become a patron to support the website. Thanks

Here is a list of the top 10 things riders need to know (but often don’t):

1. Traction management and direction control are directly affected by load transferring to the tires.

2. Timing of deceleration, braking, countersteering and acceleration directly affects traction, direction control (line) and where the bike is pointed at the turn exit.

3. Intensity of brake and throttle application and handlebar inputs directly affects traction, chassis stability and direction control.

4. Specific Visual targets help to accurately read the road and minimize overspeed corner entry.

5. Dynamic Lane positioning is a critical tool for maximizing angle of view and conspicuity.

6. Trailbraking done correctly, maximizes stability, manages traction and refines corner entry speed and direction control at mid-corner and exit.

7. Even the best riders get into trouble if they don’t respect environmental limitations.

8. Electronic rider aids help manage traction; they do not create more traction.

9. Proper riding gear minimizes the risk of injury, but does not make you “safer”.

10. Reading lists like this can make you smarter about riding, but only application of knowledge can make you a better rider.

 
What would you add? Share your comments below
 
See the complete list of Riding in the Zone articles here.
Become a patron to support the website. Thanks

The Real Value of Knee Dragging

Become a patron to support the website. Thanks
Dragging knee is about much more than just looking good for the camera.
Dragging knee is about much more than just looking good for the camera. www.owenstrackdayphotos.com

The RITZ article on knee dragging is one of the most viewed posts on the website. I can understand why. Dragging a knee is a measure of sport riding accomplishment for many. Nothing says “sport bike hero” better than fully worn tires and scuffed knee pucks. Am I right?

Confidence

Those of us who drag knee certainly enjoy the sensation, but the real benefit comes from the added confidence it provides. Yes…confidence.

Touching your knee to the pavement is a definitive measure of your exact lean angle. Without this measure, you must rely on your eyes and inner gyro-system to help judge whether your lean angle is nearing your personal limit or the limits of your machine.

Knee dragging provides a way to tell you whether you are leaned a little or a lot. This information helps you determine whether you are pushing hard and nearing the limits, or riding at a conservative pace.

To most street riders, this may not seem all that important. But, it starts to make sense once you begin cornering very fast at lean angles that should only be attempted on a closed course. That’s when you really start to rely on the information that knee dragging provides.

Read more – Fundamentals You Need to Know about Knee Dragging
Not going quite fast enough to touch down.
Not going quite fast enough to touch down. www.owenstrackdayphotos.com

Consistency

To make the most out of what knee dragging can offer, you must develop a body position that is consistent lap after lap. Otherwise, you’re changing the metric with which lean angle is measured. Riders who have not yet solidified their body position may be inconsistent in how their body is positioned so that their knee may touch the pavement erratically. These variations make the knee dragging an inaccurate measuring tool that can give the rider false confidence that he or she can push harder.

An expert track rider pays attention to exactly when and where his or her knee touches down, lap after lap. They know when to expect their knee to touch and for how long it will skim the surface. Their body position is well-established so they know that the measuring tool is calibrated and will not change. With this awareness, they have a baseline for experimenting and refining technique and to determine how hard they are pushing.

See the complete list of Riding in the Zone articles here.

Measure What?

The obvious thing measured by knee dragging is lean angle. But, what else is measured with the knee?

  • Your general pace: the faster you corner, the more you’ll touch down
  • Extreme lean angles are measured by how much your leg is forced to fold underneath the fairing
  • Pavement texture and traction potential
  • Line precision. Your knee should be placed in the same spot lap after lap
  • How quickly you are turning
  • How long you are at maximum lean
  • How soon you are picking the bike up
  • Overall level of confidence and comfort
Read more – Fundamentals You Need to Know about Knee Dragging-
The knee tells whether I can lean more to corner faster.
My knee tells whether I dare to lean more.

Don’t Rush It

Too many riders make dragging a knee a priority at the expense of body dynamics and cornering control. The result is usually not good.

Remember that knee dragging is the product of excellent cornering skills, effective body positioning and yes, corner speed. Work on that and it’ll happen, eventually. Sign up for on-track Personal Training to help get your skills in shape.

Sometimes, you have the skills and the body position, so all that is missing is speed. But, that is the topic for another article.

See the complete list of Riding in the Zone articles here.

Share your thoughts on knee dragging in the comments section.

Become a patron to support the website. Thanks

5 Tips for Surviving Intersections

Become a patron to support the website. Thanks

Intersections are very dangerous places to be. The reason drivers collide with motorcycles is because they either don’t see us or they misjudge our approach speed or distance. Here are some tips to help you become more visible at intersections.

  1. Don’t Hide. Select lane positions that put you in open view so drivers can see you. This means not tailgating the car or truck in front and riding in the left or right portion of your lane to make sure drivers waiting to turn into or across your lane can clearly see you.
  2. Move within your lane. Even if you are in plain sight, don’t assume drivers see you. People see what they expect to see and a motorcycle may not register in their consciousness, even if they are looking at you. Another reason drivers can look at you but not “see” you is because of “motion-induced blindness” where stationary objects disappear when surrounded by a moving background, such as busy traffic. Realize that you appear stationary if you approach a driver straight on. Even if drivers do see you they may not be able to accurately judge closing speed and approach distance because of your bikes relatively narrow frontal area.One trick is to move across your lane as you approach drivers at intersections to visually “present” the broader side area of your bike. For a more dramatic display, weave back and forth in your lane to “sweep” your headlight across drivers’ field of view. You don’t need to go crazy; swerving a few feet left and right a couple of times should do the trick. And weave only if it’s safe to do so.
  3. Be Bright. It’s smart to wear brightly colored riding gear that gets attention and separates you from the busy background. This includes wearing a light-colored helmet and jacket or vest, as well as putting reflective material on your bike and riding gear for being seen in low light situations.
  4. Don’t rely on noise. While loud pipes get attention, sound is not reliable for telling drivers exactly where you are. Not only that, but loud pipes direct most of the exhaust noise rearward rather than forward where the majority of dangers materialize. Selective use of an aftermarket horn is as effective and a lot less annoying to others.
  5. Be ready. Even after using these measures you will likely encounter drivers who invade your right or way. Being mentally ready makes you more likely to approach cautiously and respond skillfully when someone cuts you off. Being ready means actively looking for trouble, slowing down and covering your brakes before approaching intersections even when everything looks to be in order.
But, don’t be a victim. Instead, reflect on your part in any close calls. You may find that (if you’re truly honest and willing) most times you can identify at least one thing you did or didn’t do to prevent the incident.
 
The best riders predict that a driver might cut them off (or whatever) and are already prepared by covering their brakes and positioning themselves to give maximum time and space to respond. You can protect your rights and interests by hiring a personal injury lawyer from a car accident law firm. An experienced personal injury attorney knows the local laws where the accident happened so you’ll get the best legal advice. Your attorney will also explain to you the importance of process servers when filing a claim and seeking compensation for your injuries. If you need experts in vehicular accidents, then make sure to contact auto accident attorneys from Bracamontes & Vlasak.
 
All the best practices in the world sometimes cannot prevent some crashes. We can’t change the behavior of careless drivers. All we can do is minimize the risk. And wear good protection in case the unavoidable happens.
 
 
Click here for a List of all Riding in the Zone articles.

Become a patron to support the website. Thanks

Are Loud Pipes an Effective Survival Strategy?

copyright Ken Condon 2018

Like politics and religion, it’s usually a very bad idea to bring up the Loud Pipes debate in mixed company. But, this website is here to discuss such topics, because your well being is at stake.

Before you assume this is an anti- or pro-loud pipes opinion piece, rest assured that I am sympathetic to both sides of the argument and you will discover here which tells more about the best pipes durability and performances. I’ve had bikes with loud exhaust and stock exhaust.

My intent for writing this article is to shed light on the effectiveness of certain strategies for surviving the streets on a motorcycle, including loud pipes.

See the complete list of Riding in the Zone articles here.

Sirens, and Horns

First, let’s discuss whether noise is effective at getting drivers’ attention. Before that can be answered fully, we must first define “attention”. A loud noise intended as an alert, such as a siren (EMS or law enforcement), a fire alarm, or a horn is perceived as something that requires attention and triggers immediate response. Additionally, if you’re a property owner and your fire alarm system or water-based fire protection system is not functional, then you are required to implement a fire watch. You may seek expert help from a professional Fire Watch Company in Miami Lakes.

The appropriate response depends on the noise. A siren heard while driving means you need to pull over. A blaring horn means you may be about to collide with another car (or the other driver is just being a dick). Either way, you snap out of any stupor you may be in and frantically look for the problem.

A siren blasting from a municipal building means a risk to the public, like an approaching weather or seismic event. Even this depends on where you live. In Kansas it’s likely to be a tornado. In California, think earthquake. It also depends on where you are. In a movie theater this may mean fire. You get it.

An Example

Did you know that drivers colliding with stationary construction crews is a big problem? Hard to believe, but I guess it’s a thing.

Several methods have been tried to mitigate this all-too-common problem with the latest being sound. An article from the Iowa DOT talks about their trial using audible attenuators to alert drivers of construction crews in the roadway. Read the article here.

Below is an accompanying video demonstrating the attenuator. Take a look. I’ll wait.

Loud Exhaust

Many of you will take this attenuator solution as justification to run loud pipes.

But, hold on. There are differences between this system and loud motorcycle exhausts.

Noise Direction
Considering that exhaust noise is directed rearward, is a loud exhaust more effective in this situation than being seen?


One big difference between the attenuator and loud bike exhaust noise is that the attenuator is directed toward the driver and is accompanied by bright flashing lights. The sound from a motorcycle exhaust is mostly directed rearward.

Sirens and horns are pointed forward for a reason. And when you consider that most multi-vehicle motorcycle crashes come from in front, not behind, you can see the argument against loud pipes being responsible for saving lives.

Also, sound bounces off buildings, etc and is absorbed by vegetation, etc. This means that locating the source of the sound is tough. And the time it takes for a driver to identify your location could be way too late.
Can You Hear Me Now?
Modern cars are well-insulated from sound.

Another argument against loud pipes is that even the loudest exhaust may not be heard and then responded to in time. This is because cars are sound-insulated to the degree that moderately loud music or an AC fan on high can mask, mute or muffle the sound until it is just part of the background noise.

An open window certainly helps in this regard, but almost every vehicle on the road today has efficient air conditioning, which means fewer and fewer people drive with windows open.

Loud pipes are seen (and heard) on sport bikes, as well as cruisers.

OK. Let’s assume that your loud pipes alert a driver that you and your bike is in the vicinity. But, to avoid a collision requires the driver to know exactly where you are. Knowing you’re in the vicinity isn’t enough.

An example is a driver traveling in the same direction (you’re not riding in a drivers blind spot, right?) not being able to see you and then cutting you off. Unfortunately, your loud exhaust noise won’t tell him or her whether they can change lanes or not. They may look first, but maybe not.

One scenario that was pointed out to me that may justify loud(er) pipes is when in very slow traffic (think L.A.) and you are lane splitting. At these slow speeds it’s possible that a driver could hear a bike approaching from behind and will think twice about changing lanes. But, thankfully most riders don’t have to endure (or at least avoid) that extreme traffic situation, which brings us back to questioning th validity of the loud pipes strategy.

Mixed Meaning

Let’s assume that loud exhaust systems can get attention. But what exactly is the noise conveying? It’s not telling drivers’ to pull over or run for cover, so what do we expect drivers to do exactly?

A Reliable Solution: Be More Visible

If your real goal for having loud pipes is to get drivers’ attention so they don’t cut you off or crash into you, then the arguments made in this article suggest you’d be wise to consider other (or additional) strategies. Here are some suggestions that are likely to be effective.

Bright Clothing

Now, I know that hi-viz jackets, vests and helmets may not be your thing. But, you don’t have to go all HAZMAT to become more visible. Harley-Davidson predictably sells mostly black jackets to satisfy their traditional customer base, however look beyond the badass blackness and you can find a few more visible options.

Those of you not as encumbered by traditional style requirements have many options available to you, including the aforementioned hi-viz, but also white or bright colored gear that looks both sporty and stylish…and helps you be seen better in traffic. Check out this Scorpion jacket at Twisted Throttle.

Lane Positioning
Lane position strategies are effective for helping drivers see you.

One of the MOST effective tools for being seen and avoiding crashes is effective lane positioning.

Select lane positions that put you in open view so drivers can see you. This means not tailgating the car, which may be using a new car shade, or truck in front and riding in the left or right portion of your lane to make sure drivers waiting to turn into or across your lane can clearly see you. It’s up to you to select lane positions that put you in plain view.

Even if you are in plain sight, don’t assume drivers see you. There’s this thing called “motion-induced blindness” where stationary objects disappear when surrounded by a moving background, such as busy traffic. Get drivers’ attention my moving within your lane. You can simply change lane positions, or do a slight weave as you approach.

Horn

Perhaps a train horn will do the job. Notice the motor mounted behind the backrest that powers the horn.

You can rightly argue that a horn is in the same category as loud pipes. But, there is a difference. Unlike loud exhaust, a piercing horn has a more commanding meaning than the noise from loud pipes (yes, even from a “barking” throttle blip). Remember earlier when I talked about how the types of sounds communicate different meaning? Yeah, That.

The horn on most motorcycles is anemic at best and unless you fit an aftermarket blaster on your bike, you can only rely on this being effective at low speeds. Check out aftermarket horns at Twisted Throttle.

Your Choice

Before you get all cranky thinking I’m not on your side. I believe that any added tool for being seen is worthwhile.

However, (you knew this was coming, right?) loud pipes can’t be relied on for adding the kind of conspicuity necessary to avoid collisions…visibility. People have to see you!

I’m no scientist, and this is not based on empirical evidence, but experience and logic suggest that relying primarily on loud pipes for visibility is a weak strategy. Does it help? To a degree. But, in my opinion, the effectiveness is trumped by the risk of discrimination from authorities, the disdain from your neighbors and the perpetuation of the outlaw image puts us in risk of heavy handed regulation.

Of course I know that this won’t convince anyone already enamored with the badass sound of their bike to dig up the stock exhaust from the basement. However, I hope this article gives you pause before you repeat the old saw “Loud Pipes Save Lives” without at least considering that this strategy may have a relatively minor effect on preventing crashes.

Admit it…loud pipes make your bike sound better and is a way to experience the raw, visceral power of your awesome machine. But, ask yourself if perhaps they aren’t as effective as most people think at saving lives.

Click here for a List of all Riding in the Zone articles.


Check out these posts:


Please Donate to Keep the Articles Coming

If you liked this article and the many other articles on this site, please toss a buck or five into the hat. It’s greatly appreciated!

    • Click the PayPal “Pay Now” button.
    • Then indicate quantity in $2.00 increments. Example: put “2” in “QUANTITY” field to donate $4.00, “3” for a $6.00 donation, etc.

Why $2.00? Due to the PayPal fee structure, a $2.00 donation is significantly more beneficial compared to a $1.00 donation.

Thank You!


How Can I help You? Online Coaching NOW AVAILABLE
Stay Informed: Subscribe NOW!
Trianing-Tours_LandingBe a Better Rider: Sign Up for Personal Training with Ken
Support Riding in the Zone: Buy a book
Support Riding in the Zone: Buy products from Twisted Throttle


Product Review: Mitas TerraForce 90/10 Dual Sport/ADV Tires

The Tiger on track with Mitas TerraForce tires. otmpix.com

My 2016 Triumph Tiger 800 XRx has been a reliable machine both on the street and off-road. The Tiger came with Metzeler Tourance Next (90% road/10% off-road) tires which I promptly swapped for a set of Mitas E-07 Dakar Dual Sport/Adventure bike 50/50 tires to explore more adventurous terrain. But then I had a summer of mostly pavement riding ahead of me, so I decided to try the TerraForce tires.

Mitas (pronounced Me-tass, think “Meet us”) has been around for a while as a maker of agricultural tires and is now becoming popular for Adventure (ADV) bikes.

Note: Since I have not tried the most well-known players on the ADV/DS tire spectrum, I cannot make a direct comparison. So, the review is of my impressions of this tire and how it compares to the Metzeler.

OEM Tires

The Metzeler Tourance Next tires allowed peg feeler grinding.

The OEM Metzeler Tourance Next (90% road/10% off-road) tires were fine on the street, but felt numb. This became even more apparent during a track day where the Tourance tires could not communicate well enough to instill much confidence. Grip was good though; I managed to corner hard enough to mangle both of the Tiger’s footpeg feelers.

One thing that was a big negative was the crazy handling these tires gave after about 3,000 miles. The flat spot on the rear wasn’t terrible to look at, but this caused the bike to fall in terribly when initiating lean. And I had to put pressure on the upper handlebar to keep the bike from continuing to fall into the turn (oversteer) more than I wanted. I don’t recall the Tourances dong this when new.

I rarely toss a set of tires that still have life in them, but away they went. I’ve read that lots of people like the Tourance Next, but this sucked.

From www.mitas-moto.com

Enter TerraForce

The first impression I had of the TerraForce was the increase in vibration. It seems that the very open sipes create as much or more vibration as the 50/50 E-07s.

The tires handled fine. Considering how poor the worn Metzelers handled, it was no surprise the bike felt worlds better. The bike felt neutral, unlike the oversteering the worn Metzelers produced.

Tire “feel” is a big contributor to rider confidence and the TerraForce delivers reasonably well at street speeds. However, push hard and the tires go numb. I don’t get a good sense that the tires are hooking up the way a 100% street tire does, and nothing like a supersport tire.

But, that’s no surprise since the intended job of the TerraForce is to endure sharp gravel and the occasional impact with a log or rock. This requires a measure of carcass stiffness as well as a harder compound for both pavement and gravel endurance.

See the complete list of Riding in the Zone articles here.

Warm and Dry

I took the Tiger to the racetrack for three days. The first two days were dry and sunny. I was instructing in the novice group so I was more or less rolling around, not getting much heat into the tires. And little heat kept the tires numb and made me apprehensive about pushing harder. Bummer.

The second day was also warm and dry. One of my other instructors needed to borrow a bike to work with his assigned group at the Non-Sportbike Track training Day, so I lent him the Tiger. At lunch I asked Pete what he thought of the bike. He said it did well as a street bike and was better tn he expected for a tall ADV machine. Cool.

Pete, poised to put the TerraForce to the test.

But, he added that he had gotten his knee down in several corners! Whaaaa? Here I was thinking the TerraForce tires were a significant limiting factor for going quick and Pete goes and drags his knees …on my bike! For perspective, Pete is one fast expert racer who regularly challenges for the win on his SV650 at Loudon. But, I couldn’t let that stand, so I reclaimed the Tiger and headed out to see how the heck he did this.

Sure enough, the tires had decent feel. This obviously came from the heat Pete put into the carcass. Knowing that Pete pushed to knee-dragging lean angles gave me confidence to push harder and harder until I too got a knee down in a few corners. I had to hang off like a carnival monkey on the tall Tiger, but I did it.

Even more important was the fun factor. The tires gripped tenaciously, making this the most fun session I had all weekend.

What I learned is that if you get the tires nice and hot, they transform into a decent sporty tire. Caveat…you will not likely get the tires (or any tires) this hot at sane street speeds. But, as a street tire, the TerraForce gives plenty of grip, even if they don’t give great feel when cornering.

Zipping around in the rain on a wet racetrack.

Wet and Cool

The third track day was wet and cooler. The forecast was for rain on this day, so I brought the Tiger as my rain bike, leaving my Street Triple track bike for the dry sessions. I know that street tires are a better choice than supersport race tires because they warm up faster and the rubber compound has more silica for better wet grip.

And yes, I felt confident riding in the rain to a point where I was able to ride at a very entertaining pace. It took a few laps to get some confidence, but once some heat was generated, I was good to go. See the video below.

Off-Road

The TerraForce isn’t great in the mud.

After replacing the 50/50 E-07s with the 90/10 Terraforce, I wasn’t  sure whether off-road performance would hold me back. It turns out that the 90/10s handle the rocky terrain just fine. As a matter of fact, they gave me zero problems when climbing a somewhat steep hill with some large ledge rocks.

Mud is another matter. I was with a student in the unmaintained forest roads where I conduct the Adventure/Dual-Sport bike courses when I ended up in a decent mud hole. With some momentum, I was able to get through the muck, but the tires couldn’t gain any traction and spun mud all over.

If your riding includes the occasional off-road adventure, then I wouldn’t hesitate with the Terraforce. Just know the limits.

Wear

Mitas TerraForce Rear at about 5,000 miles. Notice the “cooling ribs” and zero chicken strips.

My first set of TerraForce tires had about 5,000 miles on them before I had a puncture in the rear tire. I could have plugged the hole, but decided instead to get a new set because I was heading on a long trip down the Blue Ridge Parkway and didn’t want any trouble. In my estimation, the tires had about 4,000 miles left in them. Do the math and I bet you can get a solid 10k out of the rear and perhaps 10k from the front. Your results may vary.

The front tire at about 5,000 miles. The tread blocks wear a bit unevenly.

However, the large blocks seem to wear unevenly in the front. Not bad, but still this could be the determining factor in replacing the tires and not tread depth. See photos.

Wide, Open Sipes

As I mentioned earlier, these grooves tend to cause vibration and some noise and that the big blocks tend to wear unevenly.

One unique feature of the TerraForce (and the Mitas SportForce) is the little cooling ribs at the base of the open grooves.

The plugged puncture in the thin part of the carcass. Wide grooves make the tire vulnerable.

The one thing to consider is having such open grooves makes the tire vulnerable to punctures. I had a rear flat while with street students, becasue a sharp stone penetrated the thinner part of the carcass inside the groove where the rubber is thinner. The rock was the size of a pea…small enough to get inside the groove, but big enough to puncture. Keep this in mind if you ride a lot on gravel roads with small stones.

www.mitas-moto.com

Sizes

See the chart for available sizes.

Go For It

The TerraForce are a great  90/10 tire that will likely suit your needs just fine for pavement and some off-road. Click this if you want to visit the Mitas website.

If you plan to buy the TerraForce or any other product, check with Twisted Throttle. Please click the link or the image then type “mitas” in the search field. This will send you to the twisted Website and any purchases you make help support this blog. BIG Thanks.
TT_Homepage_logo
Twisted Throttle helps support this blog. They also have quality luggage & racks, riding gear, electronics, auxiliary lighting, bike protection, and much more. Happy shopping!

See the complete list of Riding in the Zone articles here.

Please Donate to Keep the Articles Coming

If you liked this article and the many other articles on this site, please toss a buck or five into the hat. It’s greatly appreciated!

    • Click the PayPal “Pay Now” button.
    • Then indicate quantity in $2.00 increments. Example: put “2” in “QUANTITY” field to donate $4.00, “3” for a $6.00 donation, etc.

Why $2.00? Due to the PayPal fee structure, a $2.00 donation is significantly more beneficial compared to a $1.00 donation.

Thank You!


Check out these posts:


Stay Informed: Subscribe NOW!
Trianing-Tours_LandingBe a Better Rider: Sign Up for Personal Training with Ken
Support Riding in the Zone: Buy a book
Support Riding in the Zone: Buy products from Twisted Throttle

RITZ TV- Interview with author, Melissa Holbrook Pierson

In this episode of Riding In The Zone TV, I interview Melissa Holbrook Pierson, author of “The Perfect Vehicle” and “The Man Who Would Stop at Nothing“.

We talk about all manner of riding topics, including her love of riding, how she got into the sport, women and motorcycling, how she relates to motorcycling, and much more. Enjoy this thoughtful conversation.

Stay tuned for more episodes. Subscribe to learn when new episodes air.

Produced by Amherst Media

Episode Two: An interview with author and avid rider, Melissa Holbrook Pierson.


Please Donate to Keep the Articles Coming

If you liked this article and the many other articles on this site, please toss a buck or five into the hat. It’s greatly appreciated!

    • Click the PayPal “Pay Now” button.
    • Then indicate quantity in $2.00 increments. Example: put “2” in “QUANTITY” field to donate $4.00, “3” for a $6.00 donation, etc.

Why $2.00? Due to the PayPal fee structure, a $2.00 donation is significantly more beneficial compared to a $1.00 donation.

Thank You!


Check out these posts:


How Can I help You? Online Coaching NOW AVAILABLE
Stay Informed: Subscribe NOW!
Trianing-Tours_LandingBe a Better Rider: Sign Up for Personal Training with Ken
Support Riding in the Zone: Buy a book
Support Riding in the Zone: Buy products from Twisted Throttle


RITZ TV- Interview with Moto-philosopher Adam Novitt

In this episode of Riding In The Zone TV, moto-philosopher and iconoclast Adam Novitt challenges established Motorcycling norms and beliefs. Adam is a former MSF instructor, vintage motorcycle restorer and collector, Moto-Giro competitor and one of the most interesting people I know.

We talk about all manner of riding topics, including traditions, trends, perspectives that challenge the world of motorcycling, and much more. Sit back and mull over these musings.

Stay tuned for more episodes. Subscribe to learn when new episodes air.

Produced by Amherst Media

Episode Three: An interview with motorcycle philosopher and avid rider, Adam Novitt.


Please Donate to Keep the Articles Coming

If you liked this article and the many other articles on this site, please toss a buck or five into the hat. It’s greatly appreciated!

    • Click the PayPal “Pay Now” button.
    • Then indicate quantity in $2.00 increments. Example: put “2” in “QUANTITY” field to donate $4.00, “3” for a $6.00 donation, etc.

Why $2.00? Due to the PayPal fee structure, a $2.00 donation is significantly more beneficial compared to a $1.00 donation.

Thank You!


Check out these posts:


How Can I help You? Online Coaching NOW AVAILABLE
Stay Informed: Subscribe NOW!
Trianing-Tours_LandingBe a Better Rider: Sign Up for Personal Training with Ken
Support Riding in the Zone: Buy a book
Support Riding in the Zone: Buy products from Twisted Throttle


Body Position Tips for More Effective Cornering

Railing through turn 9 at New Hampshire Motor Speedway (Loudon) photo: owenstrackdayphotos.com

Most riders sit pretty much upright in the saddle. There’s nothing wrong with that, however they are not utilizing a simple tool that helps the motorcycle turn, engages the rider in the “dance” between human and machine and increases ground clearance when needed.

We Need More Clearance, Captain!

Positioning your body to the inside of your motorcycle when cornering means that the motorcycle does not have to lean as far for a given speed and turn radius.

Hanging off makes this so by shifting the combined weight of body and machine to move the center of gravity lower and to the inside.

Easier Turning

Hanging off not only increases ground clearance, it also keeps the contact patch closer to the center of the tire and adds a degree of “power steering” to help initiate lean. By pre-positioning your body just before turn-in preloads the bike so it falls swiftly from upright to leaned. It can be unsettling the first time you do it as the bike turns so much easier, so experiment gradually.

Let’s Dance

Body position has an additional benefit of encouraging interaction between you, the bike, and the road. Move your body through a series of curves like you would a dance partner across a dance floor and you’ll be flirting with the Zone in no time. Lead with your eyes and shoulders and your motorcycle will willingly follow your lead.

Active body positioning isn’t just for sport bike riders. Try it on whatever motorcycle you ride.

Body Position “Levels”

You don’t have to hang off like Marc Marquez to benefit from body positioning.

When speeds and lean angles increase, it’s beneficial to use a more “active” body position that provides a greater amount of turning ease and ground clearance. There are three levels of body positioning for cornering: The “basic”, “intermediate”, and “full” hang off techniques.

The “basic” position

The basic body position.Use the basic body position for typical street speeds. This position involves simply leaning your upper body off-center, towards the inside of the turn. Position yourself as if you are kissing your mirror. Keep your inside shoulder low and forward while your eyes look through the curve. Your butt stays more-or-less centered on the seat.

The basic position is easy to do and is not intimidating, making it good for people just learning to hang off.

The “Intermediate” position

The intermediate stage is the body positioning technique I use when riding on street twisties. It is appropriate when riding more aggressively, but is no where near the level of extreme positioning typical of racers.

Learning this is quite simple. All you have to do is lean your upper body into the turn while rocking your hips so your inside sit-bone supports most of your weight. Rocking onto your inside butt cheek just before the corner positions your arms perfectly to countersteer with your inside arm and shoulder pressuring on the inside handlebar and your outside arm slightly extended and relaxed.

Rock onto the inside butt cheek just before the corner so that your body is in position as you countersteer. This is a very simple and effective technique.

The “full” hang off position

The full hang off position.The full hang off position allows the most aggressive riders to achieve faster corner speed without dragging hard parts. Hanging off has a lot of benefits, but can cause problems if not done correctly. Here is a basic tutorial:

  • Get your weight on the balls of your feet.
  • Use your legs (a little of your arms) to lift your body into position with your butt on the inside edge of the seat.
  • Position your shoulders and head inside and low (kiss the mirror).
  • Keep your hips perpendicular to the motorcycle.
  • Keep about 2-4 inches between your crotch and the fuel tank.
  • Rest the inner thigh of your outside leg against the tank.
  • Support a little more than half of your weight with the inside foot.
  • Hold the grip like a screwdriver with the forearm more or less in line with the handlebar.
  • Relax your arms by supporting your weight with your legs and torso.
  • Rest your outside arm on the top of the tank.

Avoid rotating your hips around the tank, which can result in a “crossed” body position where the upper body is positioned over the center of the bike. Instead, keep space between your crotch and the tank so you can move laterally across the bike.

Jack Your leg Into the Tank

For extra support, you can press your outer thigh into the gas tank. With the ball of your foot on the outside footpeg, straighten your ankle to make firm contact between the peg and the tank. Extending your leg in this way helps support your body with your legs, not your arms. The cutouts in sport bike gas tanks are ideal for positioning your inner knee. Adding Stomp Grip® or Tec­Spec® can help make the contact even more secure.

Side-to-Side Transitions

Try not to use your handlebars when moving from side to side. Doing so can upset the chassis and traction. Instead, use your legs and torso. Get your upper body over the tank, keeping your arms bent. I find that more rearward footrests help with this.

Also, be sure to get your body in position before you initiate lean (often while braking for the turn). Waiting too long can make the corner entry rather stressful and chaotic. Pre-positioning your body results in a quicker turn in (the benefits of quick turning is a topic for another day). It takes some practice to brake while in the hang off position, but it is a technique that must be learned (another future blog topic, I think).

Hang at Your Own Risk

You should be discrete when hanging off on the street. Not only is a full hang-off posture not often necessary, it also draws a lot of unwanted attention. Even when hanging off on the racetrack, it’s not always necessary to hang off like Marquez. Hang off just enough to match your corner speed. Hanging off more may make for better photos, but it’ll wear you out sooner and could actually decrease control.

Slow Speed Maneuvers

One exception to the “inside” body position is when making slow speed maneuvers. In this case, you want to keep your body upright, on top of the bike. This is because stability is almost non-existent and adding body weight to the inside of the bike will lever the bike to the ground. Read about slow speed maneuvers here.

Body Positioning is discussed in the RITZ book. Parking lot drills are also provided so you can learn to make proper, “active” body positioning an integral part of your riding.

Buy the Riding in the Zone PDF


Check out this video.

Non-Sportbike Track Training Days are available. Click the photo.

MAKE A ONE-TIME DONATION

Become a patron to support the website. Thanks

Check out these related posts:

How to Ride a Motorcycle Slowly

Become a patron to support the website. Thanks
Oops.
Oops.
photo ©Ken Condon

The ability to keep your motorcycle upright at parking lot speeds won’t necessarily save your life, it may save you from a broken foot (happened to me) and expensive damage. Sure, you can try to balance your bike using your legs, but it’s way better for your confidence and street cred if you rely more on proficient slow-speed maneuvering skill.

How Not to Suck at Slow Speed Riding

As speeds decrease, we lose the benefit of inertia and gyroscopic forces. The slower you go, the greater role you play in keeping gravity from pulling your motorcycle onto its side. This means keeping the Center of Gravity located directly above the tire contact patches (or keep the contact patches directly beneath the Center of Gravity).

To do this, you must constantly adjust the Center of Gravity / contact patch relationship. It’s like trying to balance a broomstick on your palm. It takes continual adjustment to keep the broom’s contact point vertically below the Center of Gravity so the broomstick remains upright— react too slowly and the broomstick falls to the floor.

You must do the same thing when trying to stay upright on a slow moving motorcycle. The difference is that the motorcycle is the “broomstick” and you must move the tire’s contact patch to keep in balance. This can be done by turning the handlebars left and right, causing the steering head– and the motorcycle’s Center of Gravity – to shift from side-to-side.

All photos © Ken Condon

Body Positioning

By shifting your bodyweight, you move the combined Center of Gravity of bike and rider over the contact patches. A limber torso and a loose grip on the handlebars helps maintain balance in this way.

Shifting body weight can help maintain balance.When making tight turns, position your weight on the outside footpeg (the right peg for left turns) while keeping your body upright as the bike leans. This is called counterweighting.

Keep weight on your footpegs so you can lean the bike more-or-less independently of your body (and vice versa). This allows you to quickly shift body weight, turn the handlebars, or lean the bike to regain balance.

Look Like You Mean It

We tend to go where we look and where you want to go. When performing a tight U-turn that is 180 degrees behind you. Turn your head over your shoulder to look at the turn “exit”.

Brake Control

One other reason for keeping your feet on the footpegs is so your right foot can apply rear brake pressure if you need to slow.

The rear brake is also useful for increasing stability. Maintain steady drive while you drag the rear brake to control speed and also give the drivetrain a force to “pull against”. This “tension” steadies drive force and helps pivot the bike around when making tight U-turns.

Drive Control

One of the most critical controls to master when performing U-turns is throttle control. Forward drive must be delivered smoothly, otherwise you risk dropping your motorcycle. It’s really difficult to make a tight U-turn with the motorcycle lurching abruptly from ham-fisted on-and-off application of the throttle.

All Together Now

Let’s put all the parts together to perform a tight, slow speed turn:

  1. Slow to a suitable speed
  2. Once the motorcycle is slowed, release the brakes
  3. Position your butt on the outside edge of your seat and keep your body upright (counterweight).
  4. Lean the bike and turn the handlebars
  5. Turn your head like a barn owl
  6. Roll on the throttle enough to not stall and keep the throttle steady.
  7. Ease out the clutch about halfway, using the “friction zone” for speed control.
  8. Drag the rear brake lightly to refine speed control.
Turn your head, turn the handlebars, lean the bike, slip the clutch, drag the rear brake, and control the throttle. That's not too much to do, right?
Turn your head, turn the handlebars, lean the bike, slip the clutch, drag the rear brake, and control the throttle. That’s not too much to do, right?

You may have to lean quite a bit, but that’s okay as long as you maintain steady drive. Minimize throttle movement by keeping your wrist down and anchoring your thumb or index finger to your handlebar control pod.

Rolling U-Turns

When you can, try to do your tight U-Turns from a rolling start. That way you have stability already under control. You can also utilize the “keyhole” technique of rolling forward and then swerving slightly away from the direction you want to go before making the turn. this gets the bike leaned earlier.

U-Turns from a Stop

This is a bit tougher. To make a tight turn from a stop, you will want to pre-position yourself and your bike before moving forward. This is done by turning the handlebars to almost full-lock while leaning the bike as far as you feel comfortable into the turn. Your right foot should be on the rear brake with your left leg supporting the bike. Turn your head over your shoulder to look at the turn “exit”.

Now, give it a bit of gas while easing out the clutch quickly enough to go from zero stability (standstill) to stable (about 3-5 mph) in as short a time and distance as possible. But, don’t rush. While doing this, maintain the laen angle and handlebar turn. Get it right and the bike hioooks around gracefully.

Speed Equals Stability

Remember, if you start to fall over, just ease off the rear brake or ease out the clutch a bit to get your speed up a little. But, not too much or you’ll run wide.

Slow speed handling doesn’t have to cause anxiety. A bit of knowledge and practice can increase confidence and decrease the likelihood of a slow speed tip-over and possible injury.

Tell me your experiences with slow speed successes and snafus.


Check out the video and webinar below.


Become a patron to support the website. Thanks
How Can I help You? Online Coaching NOW AVAILABLE
Stay Informed: Subscribe NOW!
Be a Better Rider: Sign Up for Training
Support Riding in the Zone: Buy a book
Support Riding in the Zone: Buy from Twisted Throttle

Check out these related posts:

What you need to know about Throttle Blipping

Become a patron to support the website. Thanks

What is Throttle Blipping?

To execute smooth downshifts, it is important to match the engine speed with the road speed. You can do this by slowly easing out the clutch (after you slow).

But sometimes a rapid downshift is necessary. The problem is that releasing the clutch at the wrong time and too abruptly can lead to lurching re-engagement and a rear tire skid or “chirp”. This is where throttle blipping comes in.

Explore an extensive selection of items and fantastic deals on Shoppok, your one-stop online destination for all your shopping needs. Don’t miss out on the amazing offers and seamless shopping experience that Shoppok provides for shoppers around the globe.

Throttle Blipping is the term used to describe the rev-matching technique where the rider momentarily “blips” the throttle to increase engine rpm to better match the revs to the road speed when downshifting.

You’ve probably heard riders blip their throttle as they downshift while rolling to a stoplight. But, throttle blipping is best heard when a sport bike is decelerating and downshifting (and usually braking) from high RPM and high speed.

Listen to my friend Aaron as he demonstrates some of the quickest and smoothest throttle blipping I’ve heard (or is it the magic of modern sport bike electronics?). Listen at the end of the straight starting at 0:15:

Here’s another video showing my throttle hand as I blip the throttle. See 2:20. For comparison, I enter the same corner, but without blipping at 4:08.

Here’s another video showing me smoothly execute three non-blipping downshifts at around 4:15:

See the complete list of Riding in the Zone articles here.

How to Blip a Throttle

The throttle blipping technique is done by quickly cracking the throttle open then closed (blip) while you simultaneously squeeze the clutch and click the gearshift lever. The point is to get engine RPM matched to the lower gear ratio before you release the clutch. The rapid blipping technique occurs within the span of about one-half second. The clutch is quickly squeezed and released as the transmission is shifted down and the right hand blips the throttle. This is repeated with every downshift, one gear at a time.

You can blip the throttle rapidly to reduce the time between gears, or you can be leisurely. High-performance riders blip the throttle very quickly when downshifting between gears as they set up for a corner. Street riders may choose to blip the throttle when downshifting. This is done more slowly when coming to a stop.

Blipping and braking smoothly takes practice.

Brake and Blip

Oftentimes, you need to brake while downshifting, but trying to simultaneously brake while blipping is a difficult skill to master. The problem is that moving the right hand to blip also causes the braking fingers to move, which invariably changes brake pressure. Combining braking and throttle blipping can be done with less difficulty if you apply the front brake with your index and middle fingers while you close and open the throttle with your thumb and two outside fingers. Arching your brake fingers is also helpful in isolating throttle movements.

The point is to blip the throttle while keeping consistent brake lever pressure. This is most easily done when using very firm braking pressure , like when braking hard from high speeds where brake lever movements translate into relatively minor brake force changes.

Technology

Nowadays, you can get a motorcycle that will allow you to shift up and down without using the clutch. When downshifting, the bike’s electronics automatically blips the throttle perfectly as you downshift. Pretty slick.

Is Blipping Necessary?

Some motorcycles benefit from throttle blipping more than others. A big V-twin or single cylinder engine with a lot of engine braking can more easily lock the rear tire if the clutch isn’t released carefully, so blipping makes sense. But, for many bikes, especially ones with in-line 4 cylinder engines, it’s easy enough to quickly but gradually release the clutch  between downshifts. It’s what I do when I ride my Triumph Street Triple on the street or track (see video below). With the introduction of slipper clutches on many sportbikes these days, it’s even less necessary to blip the throttle.

Still, a lot of riders swear by throttle blipping. That’s fine, if you do it skillfully. I find that it just adds another thing to do while I’m screaming into turn 1 at over 100mph. Listen to my downshifts at the end of the long straightaway in this video from a recent track day, starting at 2:06 and then throughout the video. You can hear how I simply downshift and then ease out the clutch. It’s done quickly, but smoothly:

Engine Braking

One problem with throttle blipping is that it minimizes the stabilizing effect that comes from engine braking. Let me explain.

Engine braking (or rear brake force) causes the rear tire contact patch to drag behind the front tire’s contact patch. Think bungie cord. This pulls the rear of the bike in line with the front.

Blipping the throttle during downshifts minimizes engine braking compared to simply easing out the clutch. A little bit of engine braking still happens, it’s just not as much.

Practice

Throttle blipping can be a challenge to learn. But, here’s how.

Sit on your stationary bike with the engine idling and in neutral. Blip the throttle quickly (like a spasm) so the engine revs 600 to 1,000 RPM.

Next, simultaneously squeeze the clutch just as quickly as the throttle. Only squeeze the clutch in about half way. That’s enough to get the transmission smoothly into the next lowest gear.

The next part can’t be done while the bike is running, so shut it off and repeat what you just practiced, but this time press the shift lever down simultaneously with the throttle and clutch. All three controls are engaged at the same time, within the span of less than a half second.

Now go try it in a parking lot. I won’t be pretty at first, but stick with it. Good luck.

Do you blip your throttle? If so, or if not, tell us why?

See the complete list of Riding in the Zone articles here.

MAKE A ONE-TIME DONATION

Become a patron to support the website. Thanks

Some related posts:

Mitas Sport Force + Tire Review

Photo- OTMPix.com

Originally published in Motorcyclist Magazine.

North American sport and sport touring riders have a relative newcomer joining the sport tire fray with the Mitas Sport Force+. It turns out that Mitas (pronounced me-tass) has been around for a while as a maker of agricultural tires, but also manufactures vintage, moped, scooter, flat track, speedway, street and off-road motorcycle tires. The Sport Force+ expands the Czech company’s presence into the modern sport tire category that includes the Michelin Pilot Power and Pirelli Rosso Corsa, among others.

Riding Impressions: Track
My first introduction to the Sport Force+ was on a damp, but drying racetrack at Palmer Motorsports Park in Central Massachusetts. The Mitas tires warmed up quickly and then stuck like glue. The tires helped the Z750S test mule carve the technical track with good precision and composure. The front tire profile provides predictable

Photo- OTMPix.com

response that allowed confident and precise corner entry. Turn-in was not terribly quick compared to a race tire, but just right for a street tire. The bike held its line while trailbraking into corners and stood up as expected when exiting hard on the gas. The moderately stiff carcass provides good feedback and great stability under hard braking.

The only negative I found was that feedback from the front tire became vague as I picked up the pace. Reaching knee dragging lean angles was not a problem, but it takes trust to get there. Once off the racetrack, these sticky the tires easily passed the universal “thumbnail test” for perceived grip potential. Curiously, the front tread area wraps far enough around the tire to leave a rather large chicken strip even after reaching knee-dragging lean angles.

Riding Impressions: Street
Maximum grip and stability are important features when riding hard on the racetrack, but a sport street tire must also provide predictable manners and a reasonably comfortable ride. In this area, Mitas manages to find a good balance. Grip is more than adequate for street riding and the tire rolls into corners consistently and predictably. The somewhat stiff carcass transfers a bit more harshness to the chassis than similar sport tires, but that rigidness also contributes to feel and stability when cornering and braking more aggressively.

Cornering characteristics are very good with moderate countersteering effort needed to initiate lean. A slight amount of oversteer happens at about 30 degrees of lean angle with the bike falling into the turn a tiny bit more than expected, but nothing of concern.

Cornering characteristics are very good with moderate countersteering effort needed to initiate lean. A slight amount of oversteer happens at about 30 degrees of lean angle with the bike falling into the turn a tiny bit more than expected, but nothing of concern.

Pricing is competitive, but not exceptionally cheap, so the reason to consider the Sport Force+ is for its ability to perform at a very high level in all conditions while also providing decent longevity. Our test set spent a half-day on the racetrack at a fast intermediate pace along with 1,200 street miles that included Deal’s Gap and the Blue Ridge Parkway. Considering the grip these tires provide, the lifespan is appearing to be surprisingly good. Of course, time will tell just how long they last.

Overall, the Mitas Sport Force + is a really good tire that compares well with the more recognizable sport tire brands. Sizing is strictly for 17 inch wheels and ranges from 110-120 fronts and 150-190 rears (You can find a 190 rear for sale HERE). Retail pricing is around $100.00 for fronts and $140.00 for a 180-size rear.


Please Donate to Keep the Articles Coming

If you liked this article and the many other articles on this site, please toss a buck or five into the hat. It’s greatly appreciated!

    • Click the PayPal “Pay Now” button.
    • Then indicate quantity in $2.00 increments. Example: put “2” in “QUANTITY” field to donate $4.00, “3” for a $6.00 donation, etc.

Why $2.00? Due to the PayPal fee structure, a $2.00 donation is significantly more beneficial compared to a $1.00 donation.

Thank You!


Check out these posts:


Stay Informed: Subscribe NOW!
Trianing-Tours_LandingBe a Better Rider: Sign Up for Personal Training with Ken
Support Riding in the Zone: Buy a book
Support Riding in the Zone: Buy products from Twisted Throttle


RITZ TV- Episode 1- Interview with racer Stephanie Funk

In this first episode of Riding In The Zone, I talk to Stephanie Funk, a professional race driver whose love of motor sports has begun to bleed over into the world of motorcycling. Stephanie talks about her love of riding, how she got into the sport, women and motorcycling, how to get a closer look at the world of motorcycling through track days, and much more.

Stay tuned for more episodes. Subscribe to learn when new episodes air.

Produced by Amherst Media

Episode One: An interview with Auto racer and motorcycle track day rider, Stephanie Funk.


Please Donate to Keep the Articles Coming

If you liked this article and the many other articles on this site, please toss a buck or five into the hat. It’s greatly appreciated!

    • Click the PayPal “Pay Now” button.
    • Then indicate quantity in $2.00 increments. Example: put “2” in “QUANTITY” field to donate $4.00, “3” for a $6.00 donation, etc.

Why $2.00? Due to the PayPal fee structure, a $2.00 donation is significantly more beneficial compared to a $1.00 donation.

Thank You!


Check out these posts:


How Can I help You? Online Coaching NOW AVAILABLE
Stay Informed: Subscribe NOW!
Trianing-Tours_LandingBe a Better Rider: Sign Up for Personal Training with Ken
Support Riding in the Zone: Buy a book
Support Riding in the Zone: Buy products from Twisted Throttle & Amazon
Twisted_Affiliate-Interphone-widget


RITZ Podcast Episode 4 – Starting the Track Day or Racing Season Off Right with Instructor and Racer, Paul Duval

Become a patron to support the website. Thanks

This episode is an interview with Paul Duval, championship LRRS racer and track day instructor shares his thoughts on getting up to speed for a new racing and track day season.

Also available to download on iTunes and SoundCloud

See all of the podcasts on SoundCloud or on the Podcast Page.


Become a patron to support the website. Thanks

Riding in the Zone Podcast Episode 3- Interview with Stephanie Funk, Car Racer & Track Day Rider

Today’s episode is an interview with Stephanie Funk, championship SCCA (car) racer and motorcyclist who shares her thoughts on racing and track days.

Also available to download on iTunes and SoundCloud

See all of the podcasts on SoundCloud or here


Please Donate to Keep the Podcasts Coming

If you liked this article and the many other articles on this site, please toss a buck or five into the hat. It’s greatly appreciated!

    • Click the PayPal “Pay Now” button.
    • Then indicate quantity in $2.00 increments. Example: put “2” in “QUANTITY” field to donate $4.00, “3” for a $6.00 donation, etc.

Why $2.00? Due to the PayPal fee structure, a $2.00 donation is significantly more beneficial compared to a $1.00 donation.

Thank You!


Check out these posts:


How Can I help You? Online Coaching NOW AVAILABLE
Stay Informed: Subscribe NOW!
Trianing-Tours_LandingBe a Better Rider: Sign Up for Personal Training with Ken
Support Riding in the Zone: Buy a book
Support Riding in the Zone: Buy products from Twisted Throttle & Amazon
Twisted_Affiliate-Interphone-widget


Riding in the Zone Podcast Episode 2- Countersteering

Today’s episode is on countersteering. What is it and how do you do it?

A motorcycle turns by leaning. Once the bike is banked over, the geometry of the chassis, as well as the rounded profile of the tires and hard-to-describe forces cause the machine to arc around the curve. So, to turn a bike you must get the motorcycle to go from upright to leaned…precisely and efficiently.

Also available to download on iTunes and SoundCloud

See all of the podcasts on SoundCloud or here


Please Donate to Keep the Podcasts Coming

If you liked this article and the many other articles on this site, please toss a buck or five into the hat. It’s greatly appreciated!

    • Click the PayPal “Pay Now” button.
    • Then indicate quantity in $2.00 increments. Example: put “2” in “QUANTITY” field to donate $4.00, “3” for a $6.00 donation, etc.

Why $2.00? Due to the PayPal fee structure, a $2.00 donation is significantly more beneficial compared to a $1.00 donation.

Thank You!


Check out these posts:


How Can I help You? Online Coaching NOW AVAILABLE
Stay Informed: Subscribe NOW!
Trianing-Tours_LandingBe a Better Rider: Sign Up for Personal Training with Ken
Support Riding in the Zone: Buy a book
Support Riding in the Zone: Buy products from Twisted Throttle & Amazon
Twisted_Affiliate-Interphone-widget


Tips for Leading a Motorcycle Group Ride

Become a patron to support the website. Thanks

Riding with a group of friends can be a blast. But, it can go all pear-shaped if certain precautions aren’t taken upfront. Some problems are merely inconvenient, like when the group has to wait around because someone didn’t arrive with a full tank of fuel or when someone goes AWOL during the ride.

Other problems are more serious, like when a guy runs into the back of another rider because he was riding too damn close, or when a knucklehead lowsides into a guardrail trying to keep up with the fast guys.

Group rides can be a great way to meet like-minded riders.

As a group leader, it is your responsibility to take some basic precautions. Let’s take a look at a few.

Before we start: These tips do not take the unique issues of very large groups into account. However, these tips can be used for groups of 2 to perhaps 30 riders.  Trying to manage more riders than that and your into a whole other ball of wax. Breaking into smaller subgroups is a better solution.

We Gotta Talk

The root of most group riding mishaps can be traced to a few key factors. The first one is a failure to voice basic ground rules so that members know what to expect and what is expected of them.

Start by evaluating the group; are they aggressive and reckless, or law-abiding and considerate? Is there talk of drinking alcohol or stunting? If so, then nip it in the bud, or pay later.

Speed & Passing

The group is better off if all participants agree on general speed limits and passing. Some group rides I’ve attended come right out and say that I should expect illegal passing and speeds that exceed the legal limit. Knowing this ahead of time let’s me decide whether or not to participate.

One option is to break into sub groups with one sticking to more conservative speeds while following the rules of the road.

Another rule I want to know is whether there is passing within the group. I’m not a fan of inter-group overtaking because it encourages bravado and risky dicing. If passing within the group isn’t allowed, then faster riders should ride up front and everyone must maintain a safe following distance from each other. If a rider wants be in a different part of the group, he or she can wave someone past or change positions at the next stop.

When the leader decides to overtake slower traffic, he or she must be smart about whether it’s worth the risk. If you have a turn or stop coming fairly soon, just hang tight. But, if the opportunity presents itself to make a pass that is safe for all, do it. Your fellow riders then decide to pass or not and hopefully have the self-discipline to patiently wait if it’s unsafe to overtake.

Passing as a group is dangerous if riders blindly follow the person in front. It’s better to tell your group to wait until the rider ahead has almost completed the pass before committing. And when making the pass, maintain passing speed well beyond the slow vehicle so that the next person has room to return to the lane and file in behind you.

Formation

A staggered formation is often the norm when on long straight sections of road with at least a 2 second following distance from the bike directly ahead. This means that you will be only about one second behind the rider offset to your immediate left or right. Even though the staggered formation gives riders access to the width of the lane, this formation is pretty tight and can lead to collisions when attempting evasive maneuvers. By riding two abreast, you are limited to either the left or right portion of your lane. And that’s just not good enough for maximum safety.

That’s why the leader needs to abandon the staggered formation when the road is narrow or riddled with surface hazards and when the road turns twisty! When following single file, each rider has the full width of the lane to use cornering lines or avoid mid-corner hazards. .

There is a recent discussion about something called the “reverse formation”. It basically has the front rider in the right wheel track rather than the left. The idea is that it affords the second rider to see and be seen better. But, I have my reservations, because this puts the first rider in a spot that is hidden from view and prevents him or her from seeing ahead as well. See the video and add your thoughts in the comments below.

Staying Together

One time when riders should be side-by-side is when coming to a stop or entering traffic. When stopping, the leader should gradually slow and come to a complete stop. The rest of the riders should “box in” so the group is compact.

To keep the group together, the leader should stop and wait when possible, like at intersections and then wait for the last rider to arrive. Look for a thumbs-up before continuing. This is used in combination with each rider taking responsibility for the rider behind by waiting until the straggler is in sight before turning onto a new road.

One thing I see from time to time is a group leader who is too concerned with keeping the group together when it isn’t necessary (or safe). For example, if there are no turns or stops for people to get lost, then keep moving, make safe passes and let people have fun. And know when it is important to keep the group together, like in areas with many chances for wrong turns.

When it’s time to go, the leader should leave slowly. This helps prevent the bungie effect where riders in the back must go much faster to catch up with the leaders. Remember, the group is relying on the leader to lead the way.

Some groups use communicators between the group leader and a “sweep” rider to monitor things. This can really help manage group rides and is a way the leader can know if the pace is okay or if there is any potential trouble. An experienced volunteer should be put in charge of this sweep role.

The Pace

Group riding often places safety in the back seat. It’s not unusual for safety-focused individuals to become reckless when exposed to pack mentality. One thing to emphasize that each person rides within their limits and to resist the temptation to keep up with the group. Far too many group rides end in tragedy because one or more participants exceed their riding ability.

Managing the group’s pace is the job of the leader. Many times the leader sets a moderate pace, only to increase the speed as the ride progresses. It’s okay to wick up the speed through a nice set of twisties, but you must then slow the pace to allow stragglers to catch up without much effort. This pattern balance fun with predictability that encourages slower riders from feeling a need to stay in touch.

Yamaha Champions School guru, Nick Ienatsch penned The Pace article that has been referenced by many riders over the years. Check it out.

Poo, Meet Fan

When things do go wrong, you will want to be able to manage the situation. Ask if anyone is CPR or First Aid certified if you’re not. However, getting certified in first aid training cambridge is the safest as you may not always find help.  Know if you’ll be riding in areas with no cell service and have an idea of the nearest population if you need to send someone to make a call.

It’s smart to attend a class or seminar that discusses how to manage an accident scene and a motorcycle scene in particular. Or, you can also check out lawyers for slip and fall injuries in order to understand accident incidents. 

Before this happens, you also need to consider if you could be held liable. Some groups require waivers, but most don’t. It’s implied that each participant is responsible for his or her actions, but that doesn’t stop family from coming after you anyway. Sucks, I know. But it’s the society we live in. It’s another reason to follow these tips to avoid problems. Also, encourage full protective gear so relatively minor mishaps remain minor. And don’t forget, having an AED on hand is a smart move – it could make a vital difference when needed. Safety matters to my company, and it should to you too.

Set the Tone

Yes, being a true group leader (as opposed to a reluctant leader) means you are willing to take on the responsibility. Not everyone is cut out to be a leader. It can be stressful, but is also rewarding to show others a good time. Group leading isn’t too hard with just a bit of preparation.

This leadership begins before the ride by posting rules and expected behavior, encouraging full protective gear and explaining logistics. A bit of foresight reduces risk and increases enjoyment. And if things go well, you’ll look like a hero. If things go wrong…well, just follow these tips and you will hopefully be okay.

Sweep Riders

Well organized groups select a strong rider to take up the back to keep an eye on things. This person can identify any particularly weak or aggressive riders and can help keep the group together. Communication to the group leader is a huge plus.

More on Group Riding

Marc R. one of our guest instructors penned a piece on riding in groups that dovetails nicely with this article. Check it out.


Become a patron to support the website. Thanks

Video: Cornering Seminar with Ken Condon

Become a patron to support the website. Thanks

At the request of the district manager for the Northeast Region, I booked several dates during mid-to-late winter of 2018. One event was held at Wilkins Harley-Davidson, located in South Barre, Vermont. As with each of the talk, around 100 people attended to learn about cornering…or learn more about cornering. Wilkins recorded the seminar in its entirety.

My aim with these talks is to spread the good word about the benefits of life-long learning…safety and MORE FUN and satisfaction. A secondary goal is to encourage participants to join me for one or more of the training opportunities I offer or am involved with.

And finally, I bring a stack of books for people to buy.

OK. On with the show. It’s over an hour long, so find a comfy chair.


Become a patron to support the website. Thanks

Thinking in Vs-Dissecting Cornerspeed

Become a patron to support the website. Thanks
Paul Duval thinking in Vs – otmpix.com

Guest writer Paul Duval shares his thoughtful observations about performance cornering based on electronic data gathering.

Corner speed. It is the holy grail of motorcycle road racing and track day riding alike. Knee down and railing, carving the corners like a snowboarder or giant slalom skier. It looks and feels awesome! Smooth technique pays big dividends and you can carry a lot of speed as your skills progress.

But how is it that you can be cranked way over thinking you have maxed your speed for a given corner and yet, some other dude comes by on the inside (or outside at a Tony’s Track Day!) and walks away from you before the bikes are even upright on the next straight bit?

And by the way, He’s not even leaned over as far as you are! There must be more to corner speed than meets the eye. Let’s take a closer look at the middle of a corner.

Corner Speed Perception

If we draw the arc of your path on paper it looks like a smooth outside-inside-outside line and it is easy to visualize maintaining a somewhat constant speed, decreasing and increasing in a smooth fashion, but overall steady. One could imagine their speed data trace looking similar or the same as the arc of their line through the corner. This is, in fact, how most riders perceive cornerspeed. They feel they can put a number on it.

For example, that’s a 70 mph sweeper, or a 50 mph hairpin. But something is wrong. How did that fast guy in the example above pass while you were dragging knee, elbow, boot, etc. with 57 degrees of lean angle? If he’s going faster, wouldn’t he need MORE lean, not less?

V is for Variable Corner Speed

If we look at GPS speed data from a corner, we can see the first flaw in our perception of corner speed. It is not constant. It is not even close. From the start of the arc that we drew with our bike, speed drops precipitously until it reaches a low point much slower than expected somewhere near the middle of the arc. If you perceive a 70 MPH corner, the chances are your slowest point of that turn is 50MPH. This rapidly dropping speed line doesn’t rest at the bottom for long rather it reverses course and quickly climbs out of the hole. The trace of your speed data doesn’t look like a U. Instead it looks decidedly like a V.   Our minds fill in the slow spot, and we perceive a 70 MPH corner.

In this image we see speed over distance data (kph) for Thompson Speedway turns 1-4.

The Pivot Point

The bottom of the V, or the slowest point of the corner is the important spot to recognize.   From here on out I will call this the pivot point. The pivot point should actually be part of your cornering plan. In other words, you need a reference point (or a few) for this spot on track. It is the spot at which your bike can change direction the most easily.

This critical moment in riding is often ignored, but it is where the real direction change happens. As you trail off the brakes, your hands get lighter on the controls until you have no weight on the bars and you allow the wheel fall INTO the turn. THIS is the spot where your grip needs to be as light as possible.

To be clear, you still need to countersteer to initiate lean. Countersteering is an important technique, but in this article, we are focused on the middle of the turn, the pivot point.

photo: otmpix.com

When and Where to Pivot?

Most of you are thinking, “we are talking about the apex, right”? I am avoiding the word apex on purpose. Many people refer to the apex as the point where you are closest to the inside of the pavement. This is often not the same place as the pivot point.

For example, double apex corners and increasing radius corners tend to have the pivot point in a different location than the “apex”. This concept applies to all bikes, big and small, and all lines, point and shoot, or fast and flowing. Different bikes may choose different pivot points to take advantage of the strengths and weaknesses of each platform.

Examples:

  • In a “fast exit” corner, the pivot point would be located earlier and you would get on the gas sooner to take advantage of that fast exit.
  • In a “slow exit” corner, the pivot point is located later to take advantage off all the possible entry speed.
  • In a “balanced corner” (equally fast entry/exit) you have a little wiggle room. If you need entry speed to pass a rider you can pivot a little later, if you want to out drive them on the exit then pivot a little earlier.
photo: owenstrackdayphotos.com

Similar Mid-Corner Speed

Interestingly, if you compare a fast lap and a slow one, you will often see that the mid corner speed (slowest point) of the faster rider is not a lot different from that of intermediate riders. Maybe just a few MPH, or maybe no different at all!

What you will see is that the slopes of the V in the speed data trace are steeper, usually on both sides. The faster rider is faster into and out of the corner. Understanding where your pivot point is allows you to plan the fastest way the get to it, and the fastest way to get away from it.

So here comes that fast(er) guy blowing by you on the outside into a fast corner. You already feel you are mid corner and cranked over good, but he knows that he has some yards to go before reaching the pivot point, and is taking advantage by carrying more entry speed, tipping in slower and braking later or longer.

You both reach the same minimum speed in this corner, and you feel like he’s in touch for a moment. You might even feel like your “corner speed” is the same as his, but he quickly pivots the bike and walks away on the exit because he can accelerate sooner than you. Sigh.

Time to start thinking in Vs.


otmpix.com

About Paul Duval

Paul Duval is a fellow track day instructor, former Loudon Road Racing Series 125 GP Champion, current top runner in Supersport classes at LRRS, and professional educator. You can see Paul in action at most Tony’s Track Days events.


Please Donate to Keep the Articles Coming

If you liked this article and the many other articles on this site, please toss a buck or five into the hat. It’s greatly appreciated!

    • Click the PayPal “Pay Now” button.
    • Then indicate quantity in $2.00 increments. Example: put “2” in “QUANTITY” field to donate $4.00, “3” for a $6.00 donation, etc.

Why $2.00? Due to the PayPal fee structure, a $2.00 donation is significantly more beneficial compared to a $1.00 donation.

Thank You!


Check out these posts:


How Can I help You? Online Coaching NOW AVAILABLE
Stay Informed: Subscribe NOW!
Trianing-Tours_LandingBe a Better Rider: Sign Up for Personal Training with Ken
Support Riding in the Zone: Buy a book
Support Riding in the Zone: Buy products from Twisted Throttle


Become a patron to support the website. Thanks